
VSCode × Python でアルゴリズムを動かそう! 選択法アルゴリズムのアニメーションを作成

本記事では、無料開発環境VScode とPythonで、選択法のアニメーションを作る方法について解説します。
開発環境や用意するものの詳細は、交換法アルゴリズムのアニメーション作成記事を確認してください。
選択法アルゴリズムのステップ
未整列部分の最小値を探す
配列の左端から順に、最小の要素を見つける。
最小値を現在の位置と交換
見つけた最小値を未整列部分の先頭(現在のインデックス)と入れ替える。
次の要素に移動
未整列部分の先頭を一つ右にずらし、同じ操作を繰り返す。
最後の要素まで繰り返す
配列の最後まで到達したらソート完了。
特徴
安定性: 不安定(同じ値の順番が変わる可能性がある)。
計算量: 平均・最悪ともに O(n2)O(n^2)。
メモリ: 追加のメモリをほとんど使わない(in-placeソート)。
用途: 配列が小さいときや、データの交換回数を最小限にしたい場合に適している。
選択法アルゴリズムのアニメーションを作るPythonコード
import numpy as np
import matplotlib.pyplot as plt
import imageio
import os

def selection_sort_animation(arr, save_path="selection_sort.gif"):
    frames = []
    fig, ax = plt.subplots()
    n = len(arr)

    for i in range(n):
        min_idx = i
        for j in range(i + 1, n):
            if arr[j] < arr[min_idx]:
                min_idx = j
        arr[i], arr[min_idx] = arr[min_idx], arr[i]

        # プロットの更新
        ax.clear()
        ax.bar(range(len(arr)), arr, color=["red" if x == i or x == min_idx else "blue" for x in range(n)])
        ax.set_title("Selection Sort Animation")
        ax.set_xlabel("Index")
        ax.set_ylabel("Value")
        plt.pause(0.3)  # 動きを遅くするために時間を増やす

        # 一時ファイルとして保存
        frame_path = f"frame_{i}.png"
        plt.savefig(frame_path)
        frames.append(imageio.imread(frame_path))
        os.remove(frame_path)  # 一時ファイル削除

    # GIF保存
    imageio.mimsave(save_path, frames, duration=1.0)  # GIFの各フレームの表示時間を長くする
    print(f"GIF saved as {save_path}")

if __name__ == "__main__":
    data = np.random.randint(1, 100, 10)  # 10個のランダムな数値
    selection_sort_animation(data)
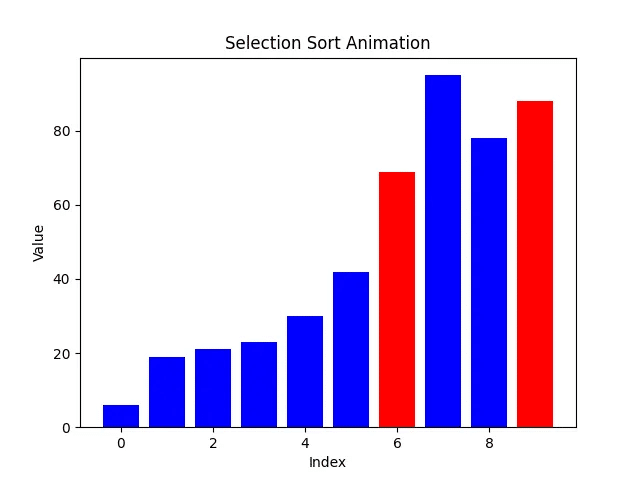
動画は、配列データの移動が確認できます
選択法アルゴリズムのアニメーション動画(.GIF)