
[Shopify]商品ページに前後の商品へ遷移するボタンを設置できるセクション(Dawn)95/100

こんにちは。Shopify専門エンジニアのまりん(@crowd37cord)です。
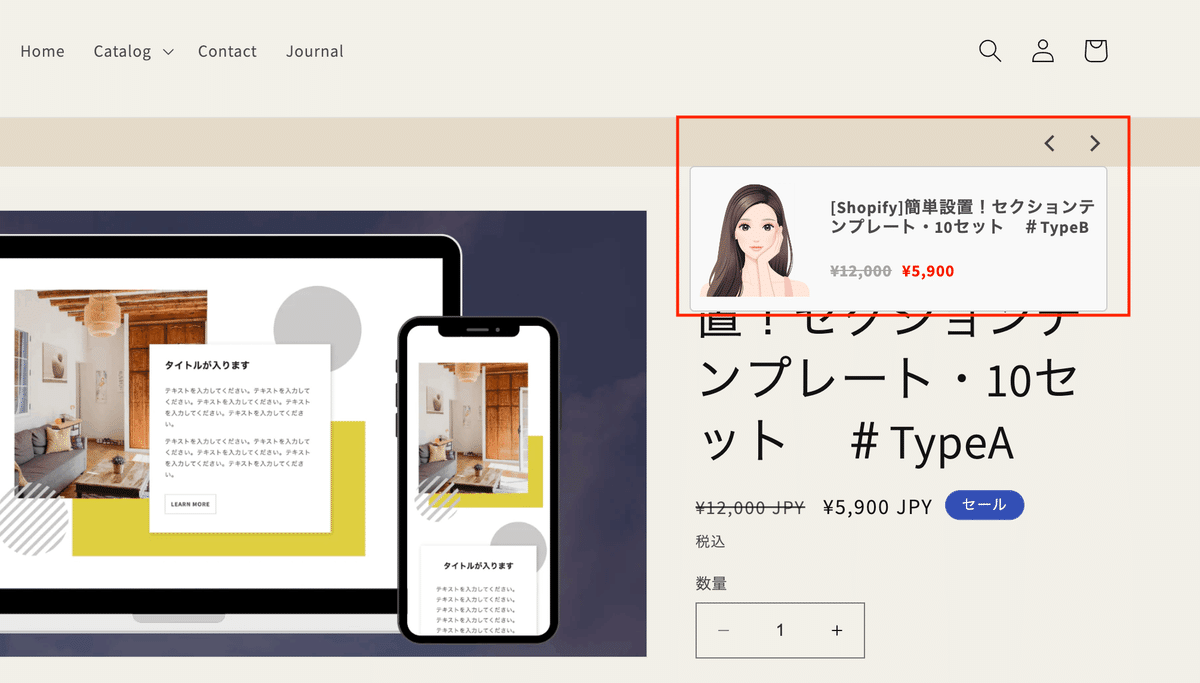
商品詳細ページに「次の商品・前の商品」ボタンを追加し、矢印ボタンをホバーすると前後の商品の画像・タイトル・価格がひょろっと出てくるようにしてみました♪
コレクションAllの商品が表示されます。
対象テーマ:Dawn
✔️今回のゴール
====
パソコン
====
====
スマホ
====

🔸CMSの特徴
「商品前後ページ遷移」をクリック

・セクションの背景カラー
・上下の余白で幅を調整
✔️設置手順
Step1 新規セクション作成
1)管理画面>テーマ>コード編集>セクション>新規作成
ファイル名は何でもOK
→私はsec-product-prevnextにしてみました
🔸sec-product-prevnextセクションファイルのコード
{{ 'sec-product-prevnext.css' | asset_url | stylesheet_tag }}
{%- style -%}
.section-{{ section.id }}-padding {
padding-top: {{ section.settings.padding_top | times: 0.75 | round: 0 }}px;
padding-bottom: {{ section.settings.padding_bottom | times: 0.75 | round: 0 }}px;
}
@media screen and (min-width: 750px) {
.section-{{ section.id }}-padding {
padding-top: {{ section.settings.padding_top }}px;
padding-bottom: {{ section.settings.padding_bottom }}px;
}
}
{%- endstyle -%}
{%- liquid
assign previous_product = collection.previous_product
assign next_product = collection.next_product
if previous_product or next_product
else
assign collectionList = product.collections[0].handle
assign previous_product = nil
assign next_product = nil
assign last = collections[collectionList].products_count
for p in collections[collectionList].products
if p.handle == product.handle
assign prev = forloop.index | minus: 2
assign next = forloop.index
if prev >= 0
assign previous_product = collections[collectionList].products[prev]
endif
if last >= next
assign next_product = collections[collectionList].products[next]
endif
break
endif
endfor
endif
-%}
<div class="product__prevnext section-{{ section.id }}-padding" style="background-color:{{ section.settings.color_bg }};">
<div class="page-width">
<ul class="prevnext-wrap">
{%- if previous_product -%}
<li>
<a class="prev-icon" href="{{ previous_product.url }}">
<span class="gg-chevron-left"></span>
</a>
<div class="prev-product hover-product">
<div class="hover-product-wrap">
<div class="hover-product-img">
<img
srcset="{{ previous_product.featured_media | image_url }} {{ previous_product.featured_media.width }}w"
src="{{ previous_product.featured_media | image_url: 'master' }}"
alt="{{ previous_product.featured_media.alt | escape }}"
loading="lazy">
</div>
<div class="hover-product-txt">
<p>{{ previous_product.title }}</p>
<p>
{% if previous_product.compare_at_price %}
<span class="__compare_at_price">
<s>{{ previous_product.compare_at_price | money }}</s>
</span>
{% endif %}
<span class="__price">{{ previous_product.price | money }}</p>
</span>
</div>
</div>
</div>
</li>
{%- endif -%}
{%- if next_product -%}
<li>
<a class="next-icon" href="{{ next_product.url }}">
<span class="gg-chevron-right"></span>
</a>
<div class="next-product hover-product">
<div class="hover-product-wrap">
<div class="hover-product-img">
<img
srcset="{{ next_product.featured_media | image_url }} {{ next_product.featured_media.width }}w"
src="{{ next_product.featured_media | image_url: 'master' }}"
alt="{{ next_product.featured_media.alt | escape }}"
loading="lazy">
</div>
<div class="hover-product-txt">
<p>{{ next_product.title }}</p>
<p>
{% if next_product.compare_at_price %}
<span class="__compare_at_price">
<s>{{ next_product.compare_at_price | money }}</s>
</span>
{% endif %}
<span class="__price">{{ next_product.price | money }}</p>
</span>
</div>
</div>
</div>
</li>
{%- endif -%}
</ul>
</div>
</div>
{% schema %}
{
"name": "商品前後ページ遷移",
"tag": "section",
"class": "malin",
"disabled_on": {
"groups": ["header", "footer"]
},
"settings": [
{
"type": "color",
"id": "color_bg",
"label": "背景カラー",
"default": "#dedede"
},
{
"type": "header",
"content": "t:sections.all.padding.section_padding_heading"
}, {
"type": "range",
"id": "padding_top",
"min": 0,
"max": 100,
"step": 1,
"unit": "px",
"label": "t:sections.all.padding.padding_top",
"default": 10
}, {
"type": "range",
"id": "padding_bottom",
"min": 0,
"max": 100,
"step": 1,
"unit": "px",
"label": "t:sections.all.padding.padding_bottom",
"default": 0
}
],
"presets": [
{
"name": "商品前後ページ遷移"
}
]
}
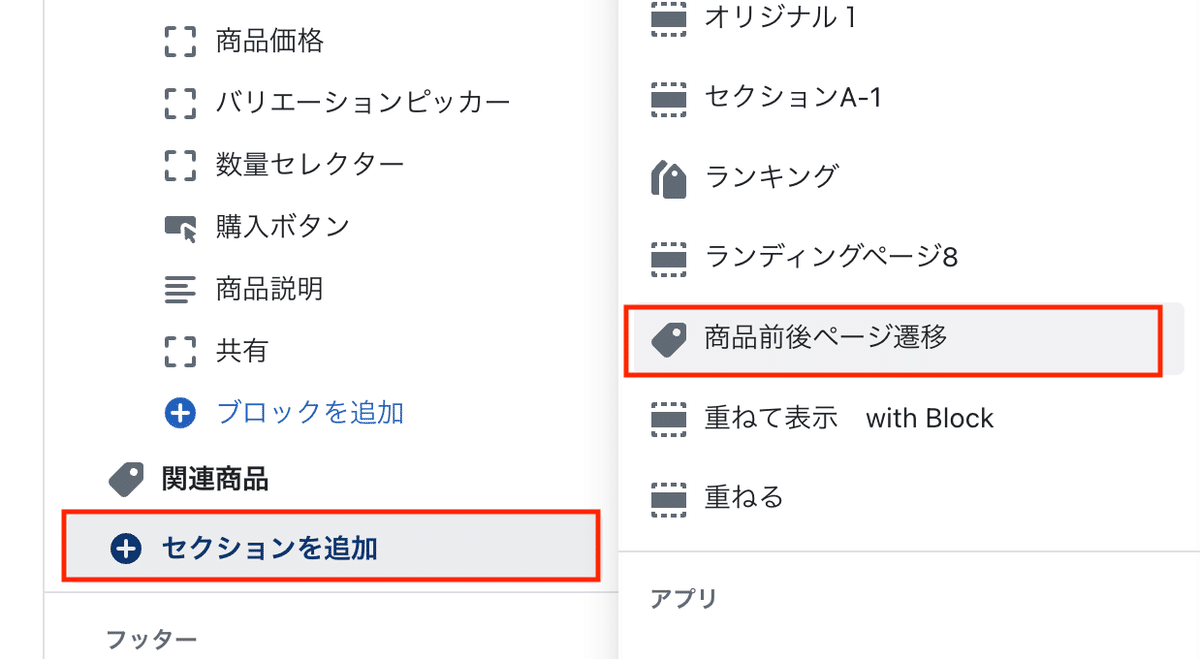
{% endschema %}Step2 CMSでセクションを追加
1)管理画面>カスタマイズ>商品ページ選択


2)セクション追加「商品前後ページ遷移」選択
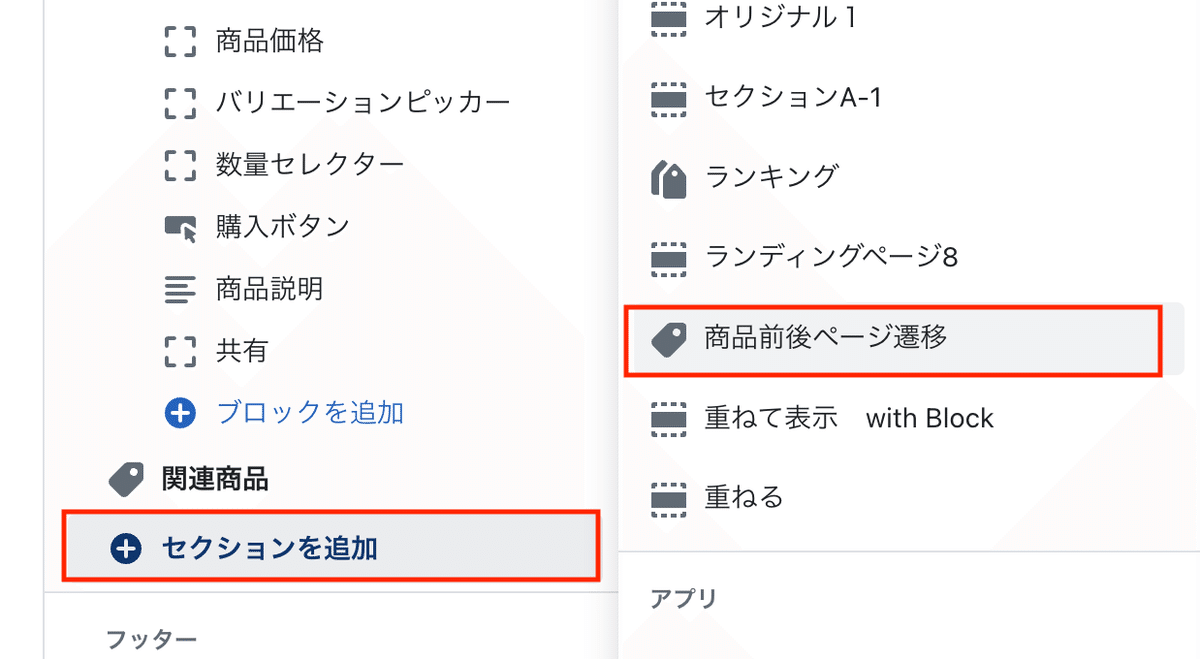
3)最後に位置を調整
レイアウトは各自調整してください♪
✔️レイアウトのサンプルコード
もし下記のレイアウトでよければCSSコードこちらに残しておきます。
====
パソコン
====
====
スマホ
====
【ご注意】
※返金&サポート&コメント返信はしておりません。
※最新のDawnテーマ対象です。
※コードのみのご紹介で解説などはしておりません。
※2023.6時点のコードです。メンテナンスは今後する予定はありません。
※環境やバージョンによりレイアウト崩れることもありますので適当にCSSで調整していただければと思います。
ここから先は
3,057字
/
1画像
この記事のみ
¥
1,200
期間限定!Amazon Payで支払うと抽選で
Amazonギフトカード5,000円分が当たる
Amazonギフトカード5,000円分が当たる
この記事が気に入ったらチップで応援してみませんか?