
[Shopify Flow]注文が入るとSlackに注文情報を送信するフローを作ってみました! #Slack連携基本編

こんにちは。Shopify専門エンジニアのまりん(@crowd37cord)です。
Shopify FlowとSlackを連携する方法をご紹介。まずは簡単にできるところから始めてみようかと思いますので、注文が入ったらその詳細を表示してみるというところを目標に進めてみようと思います。
【全体の流れ】
❶Slackでチャンネル作る
❷Slack API画面でWebhook連携(無料で誰でも作れるので簡単)
❸Shopify Flowの設定
たった3ステップでできるし、SlackのWebhook設定は開発スキルなしでもポチポチボタンを押していくだけなので誰でも簡単にできるのでぜひ試してみてね。
フローのテンプレートファイルを一番下にアップしておいたのでダウンロードしてインストールして使えます。
👉今日のゴール
フローを使ってSlackに注文が入ると下記のようにメッセージが入るようする。

Slackには
商品名- バリアント x 個数
小計
送料
税金
合計金額
が送信されるようにしてみました。
👉設定手順
🐝Step1 Slackで新規チャンネルを作成
❶新規チャンネル追加

❷チャンネル名入力。お好みで作成

orderというチャンネル名で作成してみました。

🐝Step2 Slackで新規アプリ作成
❶下記のSlack APIのページへ
❷「Your apps」をクリック

❸スクラッチを選択

❹アプリ名を入力。お好みでOK。ワークスペースを選択し「アプリ作成」ボタンをクリック

❺左メニューのIncoming Webhooksを開いてアクティベートOff→ONへ

Add New Webhook to Workspaceボタンをクリック

❻先ほどスラックで作成したチャンネルを選択

私はOrderというチャンネルを作成したのでそのチャンネルを選択し「許可」ボタンをクリック。
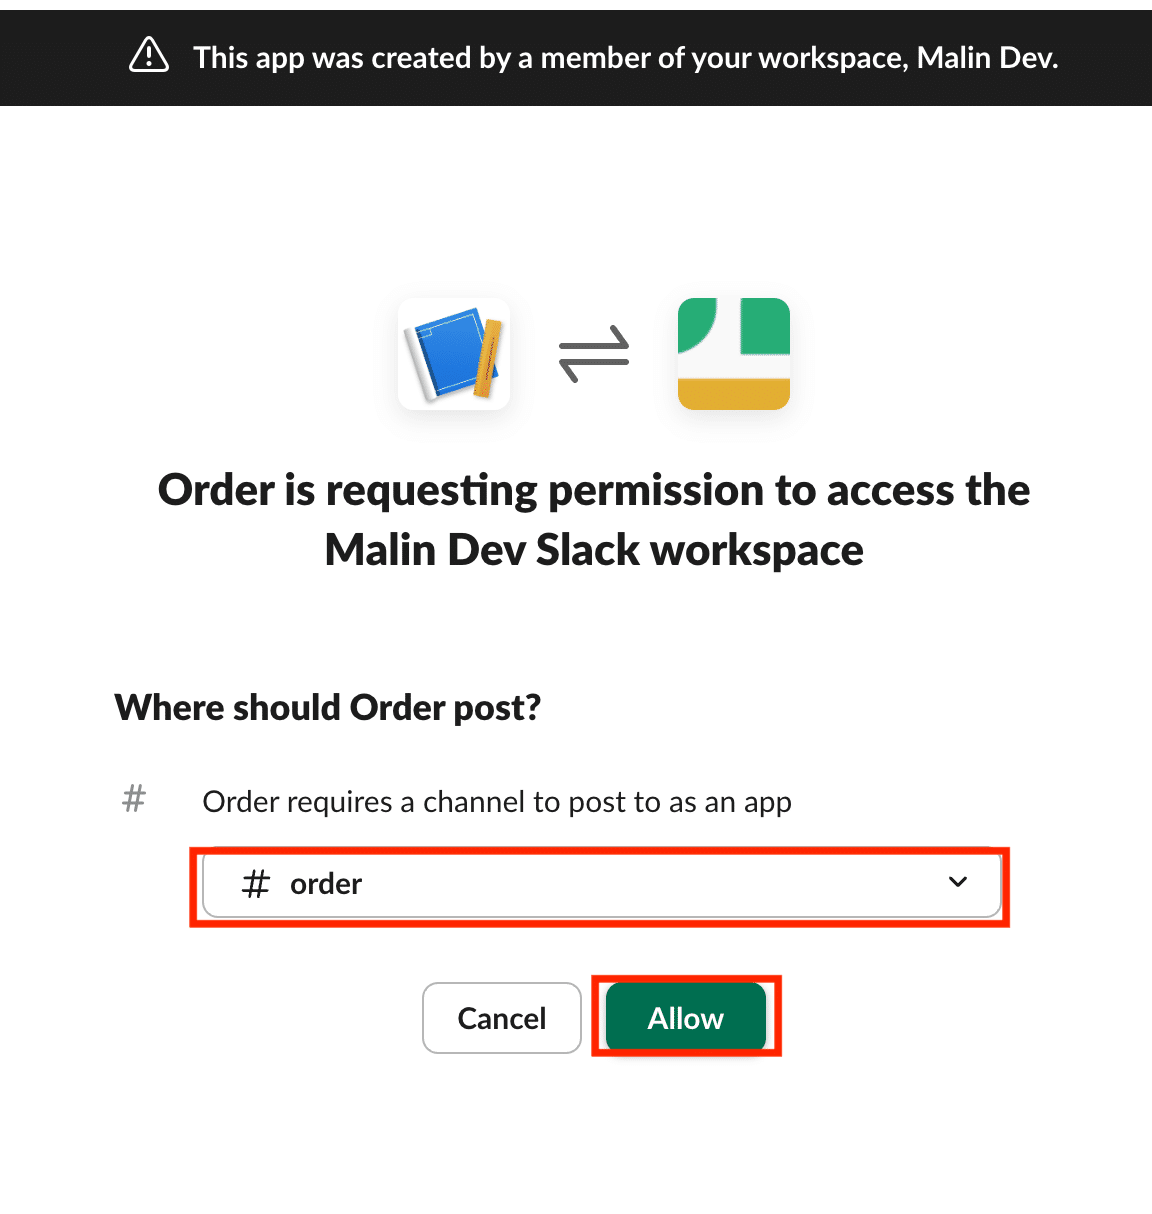
❼URLが発行されるのでこれを控えておく

🐝Step3 Shopify Flowを設定
❶Shopify管理画面のFlowからフロー新規作成ボタンをクリック

❷トリガーをOrder createdで作成

❸アクションでHTTPを選択


❹下記のように設定

HTTP method: Post
URL: Slackで作成したアプリのURL
Headers
Key: Content-Type
Value: application/json
Bodyは下記参照
Bodyには下記を入れる。
{
  "text": "新しい注文が入りました!\n\n*商品名:*\n{% for lineItems_item in order.lineItems %} {{lineItems_item.name}} x {{lineItems_item.quantity}}個\n{% endfor %}\n--------\n*小計:* {{order.subtotalPriceSet.shopMoney.amount}}円\n送料:{{order.shippingLine.originalPriceSet.shopMoney.amount}}\n税:{{order.currentTotalTaxSet.shopMoney.amount}}円\n--------\n*合計金額:* {{order.currentTotalPriceSet.shopMoney.amount}}円"
}
下記のファイルをダウンロードしてインポートして使えます。URLのところだけご自身のURLに変更してご使用ください。

最後にワークフローをオンにすれば完了です!
ご覧いただきありがとうございました。