【IT】AWS Cloud9をローカル環境へ構築
皆さま
こんにちは
今日は、AWS Cloud9をローカル環境に構築します。
月々数ドル程度ですのでクラウドを使用してもいいですが、
ローカル環境でも利用できる様にします。
環境は「Ubuntu 22.04.1 LTS」の仮想環境にインストールします。
大まか流れとして
1.専用ユーザの作成
2.nvmの導入
3.nodeの導入
4.cloud9の導入
の順番で実施します。
※$(一般ユーザ)と#(rootユーザ)はプロンプトとなります。
1.専用ユーザの作成
$ sudo su -

# useradd -m -s /bin/bash testc9

# passwd testc9
New password:
Retype new password:
passwd: password updated successfully

# usermod -aG docker testc9
# usermod -aG sudo testc9

# id testc9
uid=1007(testc9) gid=1008(testc9) groups=1008(testc9),27(sudo),998(docker)
2.nvmの導入
nvm(Node Version Manager)をインストールします。
$ curl -o- https://raw.githubusercontent.com/nvm-sh/nvm/v0.39.3/install.sh | bash

  % Total    % Received % Xferd  Average Speed   Time    Time     Time  Current
                                 Dload  Upload   Total   Spent    Left  Speed
100 15916  100 15916    0     0  31599      0 --:--:-- --:--:-- --:--:-- 31579
=> Downloading nvm from git to '/home/testc9/.nvm'
=> Cloning into '/home/testc9/.nvm'...
remote: Enumerating objects: 358, done.
remote: Counting objects: 100% (358/358), done.
remote: Compressing objects: 100% (304/304), done.
remote: Total 358 (delta 40), reused 166 (delta 28), pack-reused 0
Receiving objects: 100% (358/358), 219.04 KiB | 428.00 KiB/s, done.
Resolving deltas: 100% (40/40), done.
* (HEAD detached at FETCH_HEAD)
  master
=> Compressing and cleaning up git repository

=> Appending nvm source string to /home/testc9/.bashrc
=> Appending bash_completion source string to /home/testc9/.bashrc
=> You currently have modules installed globally with `npm`. These will no
=> longer be linked to the active version of Node when you install a new node
=> with `nvm`; and they may (depending on how you construct your `$PATH`)
=> override the binaries of modules installed with `nvm`:

/usr/local/lib
├── corepack@0.11.2
├── heroku@7.60.2
├── n@8.2.0
=> If you wish to uninstall them at a later point (or re-install them under your
=> `nvm` Nodes), you can remove them from the system Node as follows:

     $ nvm use system
     $ npm uninstall -g a_module

=> Close and reopen your terminal to start using nvm or run the following to use it now:

export NVM_DIR="$HOME/.nvm"
[ -s "$NVM_DIR/nvm.sh" ] && \. "$NVM_DIR/nvm.sh"  # This loads nvm
[ -s "$NVM_DIR/bash_completion" ] && \. "$NVM_DIR/bash_completion"  # This loads nvm bash_completion
3.nodeの導入
node は、AWS Cloud9のガイドにあるようにnode V12を
インストールします。
$ nvm list-remote
      ・
      ・
       v12.22.9   (LTS: Erbium)
      v12.22.10   (LTS: Erbium)
      v12.22.11   (LTS: Erbium)
      v12.22.12   (Latest LTS: Erbium)
        v13.0.0
        v13.0.1
        v13.1.0
      ・
      ・
$ nvm install v12.22.12
$ nvm use v12.22.12
Now using node v12.22.12 (npm v6.14.16)
$ node -v
v12.22.124.cloud9の導入
cloud9をGitHubより入手し導入します。
python2.7系が入っていない場合は、
前提条件となりますので導入しておきます。
入っていない場合は、
インストールスクリプト実施時に以下の警告が出ます。
Python version 2.7 is required to install pty.js.
Please install python 2.7 and try again.
You can find more information on how to install
Python in the docs:
https://docs.aws.amazon.com/cloud9/latest/user-guide/ssh-settings.html#ssh-settings-requirements
Python2.7をインストールする場合は、以下のコマンドで導入します。
$ sudo apt install python2.7

[sudo] password for testc9:
Reading package lists... Done
Building dependency tree... Done
Reading state information... Done
gcc is already the newest version (4:11.2.0-1ubuntu1).
The following additional packages will be installed:
  libpython2.7-minimal libpython2.7-stdlib python2.7-minimal
Suggested packages:
  python2.7-doc binfmt-support
The following NEW packages will be installed:
  libpython2.7-minimal libpython2.7-stdlib python2.7 python2.7-minimal
0 upgraded, 4 newly installed, 0 to remove and 0 not upgraded.
Need to get 3,967 kB of archives.
After this operation, 16.0 MB of additional disk space will be used.
   ・
      ・
$ git clone https://github.com/c9/core.git c9sdk

Cloning into 'c9sdk'...
remote: Enumerating objects: 52836, done.
remote: Total 52836 (delta 0), reused 0 (delta 0), pack-reused 52836
Receiving objects: 100% (52836/52836), 35.39 MiB | 16.66 MiB/s, done.
Resolving deltas: 100% (32430/32430), done.
GitHubの注意書きの
「Please note that if you are using npm version >=3 and run npm install manually, you need to run git checkout HEAD -- node_modules to restore the files deleted by npm. Cloud9 is known to work with node versions 0.10 to 8, but Newer versions should work too.」より
npm のバージョンが6.14.16ですので以下を実施します。
$ cd c9sdk/

$ git checkout HEAD -- node_modules
インストールスクリプトを実施します。(暫くかかります)
$ scripts/install-sdk.sh
      ・
      ・
  run `npm fund` for details

33 vulnerabilities (8 moderate, 17 high, 8 critical)

To address issues that do not require attention, run:
  npm audit fix

To address all issues possible (including breaking changes), run:
  npm audit fix --force

Some issues need review, and may require choosing
a different dependency.

Run `npm audit` for details.
--------------------------------------------------------------------
Success!
run 'node server.js -p 8080 -a :' to launch Cloud9
単体で動作するか確認します。
$ node server.js -p 8080 -a
Starting standalone
Connect server listening at http://127.0.0.1:8080
CDN: version standalone initialized /home/testc9/c9sdk/build
Started '/home/testc9/c9sdk/configs/standalone' with config 'standalone'!
Cloud9 is up and running
このままですとローカルIPでしか起動しませんので修正します。
$ cd c9sdk/configs/

$ cp -p standalone.js standalone.js.orig

$ diff standalone.js standalone.js.orig
108c108
<         host = config.host = "0.0.0.0";
---
>         host = config.host = "127.0.0.1";
ホームディレクトリ上に起動スクリプトを作成します。
$ pwd
/home/testc9

$ mkdir workspace

$ more cloud9.sh
#!/bin/bash

/home/testc9/.nvm/versions/node/v12.22.12/bin/node /home/testc9/c9sdk/server.js --listen 0.0.0.0 -p 8080 -w /home/testc9/workspace

$ chmod +x cloud9.sh
rootユーザへスイッチして起動スクリプトをサービスとして登録して自動起動とします。
$ sudo su -
[sudo] password for testc9:

# pwd
/etc/systemd/system

# more cloud9local.service
[Unit]
Type=simple
Description=Cloud9 Core
After=network.target

[Service]
WorkingDirectory=/home/testc9/c9sdk
ExecStart=/home/testc9/cloud9.sh
User=testc9
#ExecStop=/bin/kill -TERM ${MAINPID}
#Restart=always

[Install]
WantedBy=multi-user.target


# systemctl daemon-reload

# systemctl enable cloud9local.service
Created symlink /etc/systemd/system/multi-user.target.wants/cloud9local.service → /etc/systemd/system/cloud9local.service.

# systemctl start cloud9local.service
起動したことを確認します。(ポート8080を指定、他のかぶっていたら適宜変更ください)
$ netstat -lpnt
(Not all processes could be identified, non-owned process info
 will not be shown, you would have to be root to see it all.)
Active Internet connections (only servers)
Proto Recv-Q Send-Q Local Address           Foreign Address         State       PID/Program name
tcp        0      0 0.0.0.0:8080            0.0.0.0:*               LISTEN      66678/node
tcp        0      0 127.0.0.1:5433          0.0.0.0:*               LISTEN      -
tcp        0      0 0.0.0.0:5432            0.0.0.0:*               LISTEN      -
tcp        0      0 127.0.0.53:53           0.0.0.0:*               LISTEN      -
tcp        0      0 0.0.0.0:82              0.0.0.0:*               LISTEN      -
tcp        0      0 0.0.0.0:83              0.0.0.0:*               LISTEN      -
tcp        0      0 0.0.0.0:84              0.0.0.0:*               LISTEN      -
tcp        0      0 0.0.0.0:85              0.0.0.0:*               LISTEN      -
tcp        0      0 0.0.0.0:22              0.0.0.0:*               LISTEN      -
tcp6       0      0 :::5432                 :::*                    LISTEN      -
tcp6       0      0 :::82                   :::*                    LISTEN      -
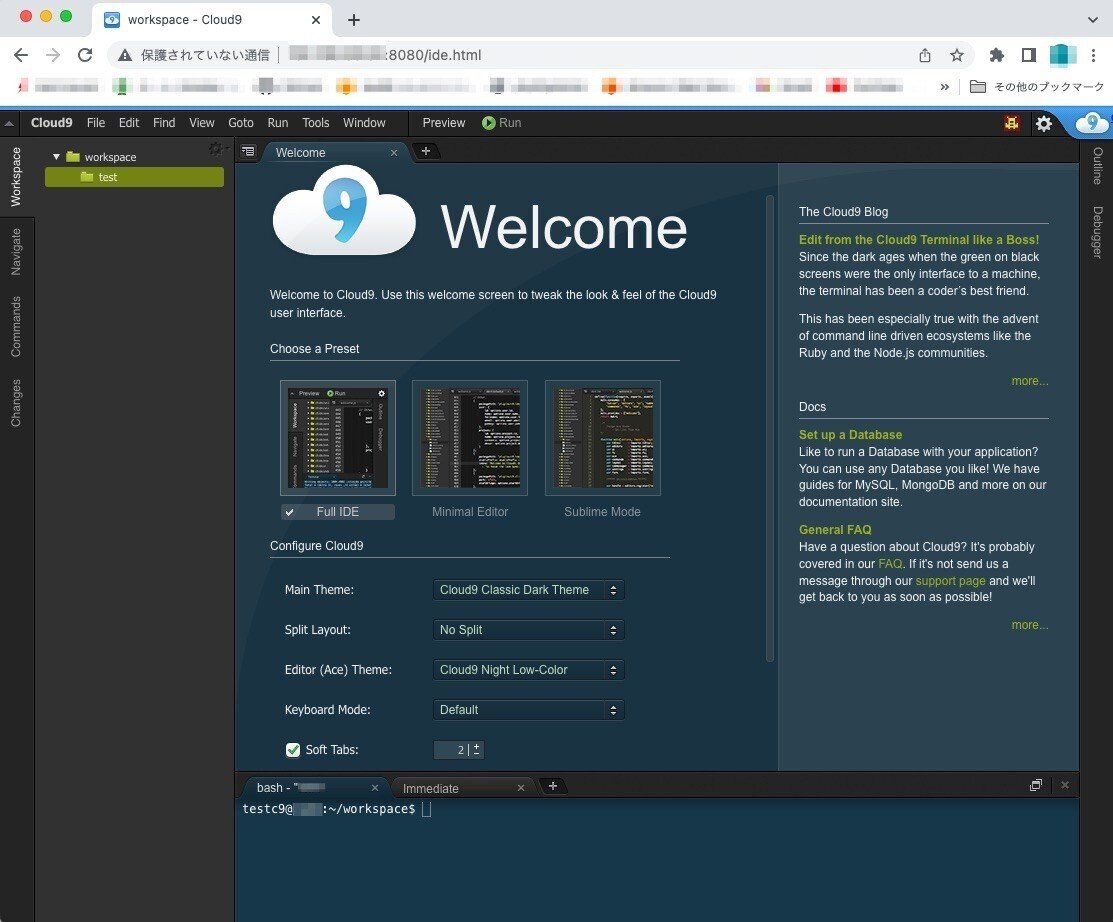
ブラウザーよりアクセスできるか確認します。

では
