
Babylon.js v6.3.1 Practiceめも⑥ 物理演算(Havok Physics)とカメラ操作

前回からのつづきです。 Babylon.jsの機能でボタンを表示して、タイトルにもある物理演算やカメラ操作を行うコードを作成しました。 物理演算ではBabylon.js v6で使えるようになった物理エンジンのHavok Physicsを使用してみました。
ちなみにこのnote、あとで自分でも参照できるようにとアレもコレもと書きすぎてしまったせいか、細かすぎ、長すぎになった気配ありですw、閲覧注意ですw。
コーディングは前回までのBabylon.jsコーディングと同じようにHTML、CSS、JavaScriptで行っています(Typescript使っていません)。 目次の各項目では、コードのタイトル文字列をクリックするとコードとその実行結果が見れるCodePenのページを開き、サムネイル画像をクリックすると実行結果をフルスクリーンで表示するCodePenのページを開きます。
現在CodePenに投稿しているBabylon.js v6.3.1のコードの一覧はCodePenのCollection機能で作成した「Babylon.js v6.3.1 Practice」で見ることができます。
ボタン設置
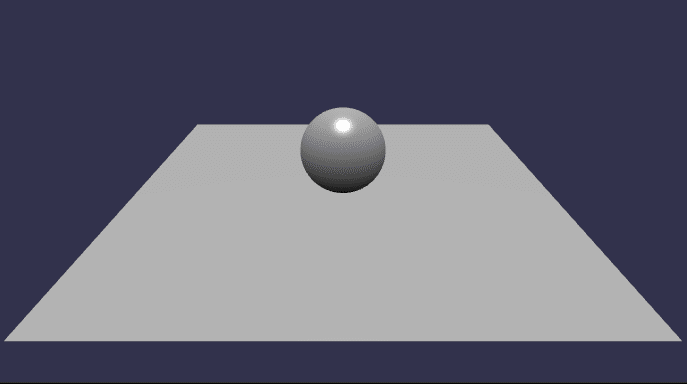
Babylon.js v6.3.1 Practice#53 glTF 3D Box Control by GUI Button
Babylon.js v6.3.1 Practice#53 glTF 3D Box Control by GUI Button

まずボタンを配置してみます。 ボタンによる赤いBoxの動きは座標を変更しているだけでまだ物理演算は行っていません。
HTML
<head>
    <meta http-equiv="Content-Type" content="text/html; charset=utf-8"/>
    <title>Babylon Template</title>

    <!-- <script src="https://cdnjs.cloudflare.com/ajax/libs/babylonjs/6.3.1/babylon.js"></script> -->
    <!-- <script src="https://cdnjs.cloudflare.com/ajax/libs/babylonjs/6.3.1/babylon.min.js"></script> -->


    <!-- <script src="https://cdn.jsdelivr.net/npm/babylonjs@6.3.1/babylon.js"></script> -->
    <script src="https://cdn.jsdelivr.net/npm/babylonjs@6.3.1/babylon.min.js"></script>

    <!-- <script src="https://unpkg.com/babylonjs@6.3.1/babylon.js"></script> -->


    <!-- <script src="https://cdn.jsdelivr.net/npm/babylonjs-loaders@6.3.1/babylonjs.loaders.min.js"></script> -->
    <!-- <script src="https://unpkg.com/babylonjs-loaders@6.3.1/babylonjs.loaders.min.js"></script> -->


    <script src="https://cdn.jsdelivr.net/npm/babylonjs-gui@6.3.1/babylon.gui.js"></script>
    <!-- <script src="https://unpkg.com/babylonjs-gui@6.3.1/babylon.gui.js"></script> -->


    <script src="https://code.jquery.com/pep/0.4.3/pep.js"></script>

</head>

<body>

    <canvas id="renderCanvas" touch-action="none"></canvas> <!--
    touch-action="none" for best results from PEP -->

</body>
CSS
html, body {
    overflow: hidden;
    width   : 100%;
    height  : 100%;
    margin  : 0;
    padding : 0;
}

#renderCanvas {
    width   : 100%;
    height  : 100%;
    touch-action: none;
}
JavaScript
main = () => {

    const canvas = document.getElementById("renderCanvas"); // Get the canvas element
    const engine = new BABYLON.Engine(canvas, true); // Generate the BABYLON 3D engine

    // Add your code here matching the playground format
    const createScene = () => {

        const scene = new BABYLON.Scene(engine);
        scene.clearColor = new BABYLON.Color3(0, 1, 1);

        // create a FreeCamera, and set its position to (x:0, y:5, z:-10)
        const camera = new BABYLON.FreeCamera("camera1", new BABYLON.Vector3(0, 5,-10), scene);
        // target the camera to scene origin
        camera.setTarget(BABYLON.Vector3.Zero());
        // attach the camera to the canvas
        camera.attachControl(canvas, true);


        // create a basic light, aiming 0,1,0 - meaning, to the sky
        const light = new BABYLON.HemisphericLight('light1', new BABYLON.Vector3(0,1,0), scene);


        // generate Sphere
        const sphere = BABYLON.Mesh.CreateSphere('sphere1', 16, 2, scene);
        sphere.position.y = 1;
        sphere.position.z = 5;

        // generate Box
        const box = BABYLON.Mesh.CreateBox("box", 3.0, scene);
        // generate and set Material of Box
        const material = new BABYLON.StandardMaterial("material01", scene);
        box.material = material;

        material.diffuseColor = new BABYLON.Color3(1, 0, 0);

        // genarate Ground
        const ground = BABYLON.Mesh.CreateGround('ground1', 16, 16, 2, scene);


        // UI
        const advancedTexture = BABYLON.GUI.AdvancedDynamicTexture.CreateFullscreenUI("UI");

        // Indicator label  Label part setting  Add directly to advancedTexture
        const label = new BABYLON.GUI.Rectangle("label");
        label.background = "#00ffff";
        label.height = "60px";
        label.alpha = 0.5;
        label.width = "300px";
        label.cornerRadius = 25;
        label.thickness = 1;
        //label2.linkOffsetY = 30;
        label.top = "5%";
        label.paddingLeft = "10px";
        label.paddingRight = "10px";
        advancedTexture.addControl(label);
        // Indicator label  Text part setting  Add to label
        const text = new BABYLON.GUI.TextBlock();
        text.text = "TEST";
        text.color = "black";
        text.fontSize = "20px";
        label.addControl(text);


        // Panel for all buttons  Put the buttons together here and then add them to advancedTexture
        const UiPanel = new BABYLON.GUI.StackPanel("horizontal");
        UiPanel.isVertical = false;
        UiPanel.top = "30%";
        UiPanel.width = "360px";
        UiPanel.height = "160px";
        UiPanel.fontSize = "14px";
        UiPanel.horizontalAlignment = BABYLON.GUI.Control.HORIZONTAL_ALIGNMENT_CENTER;
        UiPanel.verticalAlignment = BABYLON.GUI.Control.VERTICAL_ALIGNMENT_CENTER;
        advancedTexture.addControl(UiPanel);

        // Left Button
        const leftButton = BABYLON.GUI.Button.CreateSimpleButton("leftBut", "left");
        leftButton.paddingLeft = "10px";
        leftButton.width = "100px";
        leftButton.height = "50px";
        leftButton.cornerRadius = 5;
        leftButton.color = "white";
        leftButton.background = "black";
        leftButton.onPointerDownObservable.add(()=> {
            text.text = "Left Button \nPushed";
            box.position.x = box.position.x - 1;
        });
        UiPanel.addControl(leftButton);

        // Forward Button
        const forwardButton = BABYLON.GUI.Button.CreateSimpleButton("forwardBut", "forward");
        forwardButton.paddingLeft = "30px";
        forwardButton.paddingTop = "-50px";
        forwardButton.paddingBottom = "50px";
        forwardButton.paddingRight = "-20px";
        forwardButton.width = "100px";
        forwardButton.height = "50px";
        forwardButton.cornerRadius = 5;
        forwardButton.color = "white";
        forwardButton.background = "black";
        forwardButton.onPointerDownObservable.add(()=> {
            text.text = "Forward Button \nPushed";
            box.position.z = box.position.z + 1;
        });
        UiPanel.addControl(forwardButton);

        // Backward  Button
        const backwardButton = BABYLON.GUI.Button.CreateSimpleButton("backwardBut", "backward");
        backwardButton.paddingLeft = "-70px";
        backwardButton.paddingTop = "50px";
        backwardButton.paddingBottom = "-50px";
        backwardButton.paddingRight = "30px";
        backwardButton.width = "50px";
        backwardButton.height = "50px";
        backwardButton.cornerRadius = 5;
        backwardButton.color = "white";
        backwardButton.background = "black";
        backwardButton.onPointerDownObservable.add(()=> {
            text.text = "Backward Button \nPushed";
            box.position.z = box.position.z - 1;
        });
        UiPanel.addControl(backwardButton);

        // Right Button
        const rightButton = BABYLON.GUI.Button.CreateSimpleButton("rightButt", "right");
        rightButton.paddingRight = "10px";
        rightButton.width = "100px";
        rightButton.height = "50px";
        rightButton.cornerRadius = 5;
        rightButton.color = "white";
        rightButton.background = "black";
        rightButton.onPointerDownObservable.add(()=> {
            text.text = "Right Button \nPushed";
            box.position.x = box.position.x + 1;
        });
        UiPanel.addControl(rightButton);

        return scene;
    }

    const scene = createScene(); //Call the createScene function

    // Register a render loop to repeatedly render the scene
    engine.runRenderLoop(() => {
        scene.render();
    });

    // Watch for browser/canvas resize events
    window.addEventListener("resize", () => {
        engine.resize();
    });

}

// Start processing after all DOM elements have been loaded
window.addEventListener("DOMContentLoaded", main);
JavaScript内のコメント「 // UI 」以降の部分で、文字列表示用のラベルやボタンを作成・表示しています。
以下の自分のコードを参考にしつつ、ボタン設置のコードを作成しました。
Babylon.js v4.2.0 Practice#16 Box Control by GUI Button
物理演算
Havok Physicsを初めて使用するため、まず最初に4つのHavok Physics実験用コードを試作してから、ボタン操作による物理演算を行うコードを作成しました。
Havok Physicsライブラリの読み込み方を変えて2種類、Babylon.jsとHavok Physicsでオブジェクトを簡単に紐付けるできる?Aggregate機能を使うもの&使わないものに分けて2種類、2x2の4種類で、4つの試作コードを作成しました。
最初に
https://cdn.babylonjs.com/havok/HavokPhysics_umd.js
からライブラリを読み込んで、Aggregateを使うもの、使わないもの2つを
次に
https://rawcdn.githack.com/N8python/havokDemo/ba4311d600f3bfa708b29ce02ac74ffdcb420353/havok.js
からライブラリを読み込んで、Aggregateを使うもの、使わないもの2つを
作成しています。
2番目の、Twitterで見かけたThree.jsにHavok Physicsを使用されているもののgithack CDN経由での使用は、Babylon.js v6.3.1 Practiceめも① の最初のほうで書いているビビリ状況への対策ですw。
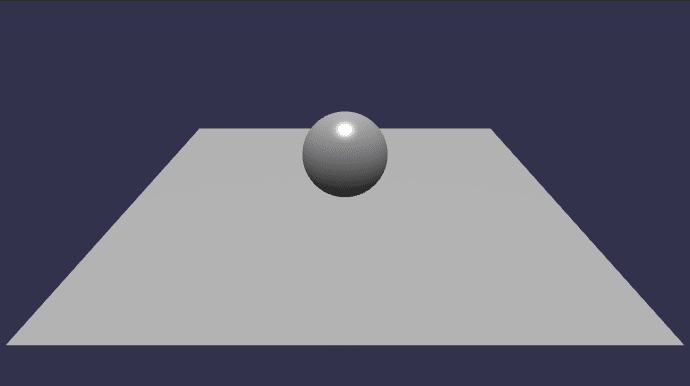
Babylon.js v6.3.1 Havoc PhysicsTest #01 with Aggregates by Official CDN
Babylon.js v6.3.1 Havoc PhysicsTest #01 with Aggregates by Official CDN

Havoc Physics Test #01は
https://cdn.babylonjs.com/havok/HavokPhysics_umd.js
からライブラリを読み込んで、Aggregateを使うものです。
HTML
<head>
    <meta http-equiv="Content-Type" content="text/html; charset=utf-8"/>
    <title>Babylon Template</title>

    <!-- <script src="https://cdnjs.cloudflare.com/ajax/libs/babylonjs/6.3.1/babylon.js"></script> -->
    <!-- <script src="https://cdnjs.cloudflare.com/ajax/libs/babylonjs/6.3.1/babylon.min.js"></script> -->


    <!-- <script src="https://cdn.jsdelivr.net/npm/babylonjs@6.3.1/babylon.js"></script> -->
    <script src="https://cdn.jsdelivr.net/npm/babylonjs@6.3.1/babylon.min.js"></script>

    <!-- <script src="https://unpkg.com/babylonjs@6.3.1/babylon.js"></script> -->


    <!-- <script src="https://cdn.jsdelivr.net/npm/babylonjs-loaders@6.3.1/babylonjs.loaders.min.js"></script> -->
    <!-- <script src="https://unpkg.com/babylonjs-loaders@6.3.1/babylonjs.loaders.min.js"></script> -->


    <script src="https://cdn.jsdelivr.net/npm/babylonjs-gui@6.3.1/babylon.gui.js"></script>
    <!-- <script src="https://unpkg.com/babylonjs-gui@6.3.1/babylon.gui.js"></script> -->


    <script src="https://cdn.babylonjs.com/havok/HavokPhysics_umd.js"></script>


    <script src="https://code.jquery.com/pep/0.4.3/pep.js"></script>

</head>

<body>

    <canvas id="renderCanvas" touch-action="none"></canvas> <!--
    touch-action="none" for best results from PEP -->

</body>
HTML内の
<script src="https://cdn.babylonjs.com/havok/HavokPhysics_umd.js"></script>部分でHavok Physicsを使用するためのライブラリを読み込んでいます。
CSS
html, body {
    overflow: hidden;
    width   : 100%;
    height  : 100%;
    margin  : 0;
    padding : 0;
}

#renderCanvas {
    width   : 100%;
    height  : 100%;
    touch-action: none;
}
JavaScript
main = () => {

    const canvas = document.getElementById("renderCanvas");
    const engine = new BABYLON.Engine(canvas, true, { preserveDrawingBuffer: true, stencil: true, disableWebGL2Support: false });


    const createScene = async function () {

        // This creates a basic Babylon Scene object (non-mesh)
        const scene = new BABYLON.Scene(engine);

        // This creates and positions a free camera (non-mesh)
        const camera = new BABYLON.FreeCamera("camera1", new BABYLON.Vector3(0, 5, -10), scene);

        // This targets the camera to scene origin
        camera.setTarget(BABYLON.Vector3.Zero());

        // This attaches the camera to the canvas
        camera.attachControl(canvas, true);

        // This creates a light, aiming 0,1,0 - to the sky (non-mesh)
        const light = new BABYLON.HemisphericLight("light", new BABYLON.Vector3(0, 1, 0), scene);

        // Default intensity is 1. Let's dim the light a small amount
        light.intensity = 0.7;

        // Our built-in 'sphere' shape.
        const sphere = BABYLON.MeshBuilder.CreateSphere("sphere", { diameter: 2, segments: 32 }, scene);

        // Move the sphere upward at 4 units
        sphere.position.y = 4;

        // Our built-in 'ground' shape.
        const ground = BABYLON.MeshBuilder.CreateGround("ground", { width: 10, height: 10 }, scene);

        // initialize plugin
        const havokInstance = await HavokPhysics();
        // pass the engine to the plugin
        const hk = new BABYLON.HavokPlugin(true, havokInstance);
        // enable physics in the scene with a gravity
        scene.enablePhysics(new BABYLON.Vector3(0, -9.8, 0), hk);

        // Create a sphere shape and the associated body. Size will be determined automatically.
        const sphereAggregate = new BABYLON.PhysicsAggregate(sphere, BABYLON.PhysicsShapeType.SPHERE, { mass: 1, restitution: 0.75 }, scene);

        // Create a static box shape.
        const groundAggregate = new BABYLON.PhysicsAggregate(ground, BABYLON.PhysicsShapeType.BOX, { mass: 0 }, scene);

        return scene;
    };

    createScene().then((scene) => {
        engine.runRenderLoop(function () {
            if (scene) {
                scene.render();
            }
        });
    });


    // Resize
    window.addEventListener("resize", function () {
        engine.resize();
    });

}

// Start processing after all DOM elements have been loaded
window.addEventListener("DOMContentLoaded", main);
JavaScript内の
// initialize plugin
const havokInstance = await HavokPhysics();
// pass the engine to the plugin
const hk = new BABYLON.HavokPlugin(true, havokInstance);
// enable physics in the scene with a gravity
scene.enablePhysics(new BABYLON.Vector3(0, -9.8, 0), hk);

// Create a sphere shape and the associated body. Size will be determined automatically.
const sphereAggregate = new BABYLON.PhysicsAggregate(sphere, BABYLON.PhysicsShapeType.SPHERE, { mass: 1, restitution: 0.75 }, scene);

// Create a static box shape.
const groundAggregate = new BABYLON.PhysicsAggregate(ground, BABYLON.PhysicsShapeType.BOX, { mass: 0 }, scene);
でHavok Physicsを使用した物理演算プログラムを作成しています。 Babylon.jsで作成した sphere と ground オブジェクトを、必要な引数とともにPhysicsAggregateに渡すとそれだけで sphere と ground に物理演算が行われるようになりました。 sphere と ground といったBabylon.jsの基本的な3Dオブジェクトには対応するAggregateが標準で準備されているようでした。
また、createScene関数にasyncが付いたことに対応して、createSceneとrunRenderLoopの呼び出しが以下のようになりました。
    createScene().then((scene) => {
        engine.runRenderLoop(function () {
            if (scene) {
                scene.render();
            }
        });
    });
参考にさせていただいたサイト&コード
Using Havok and the Havok Plugin
Migrate from Physics V1
Sample Code (Shapes test)
Babylon.js v6.3.1 Havoc PhysicsTest #02 with No Aggregates by Official CDN
Babylon.js v6.3.1 Havoc PhysicsTest #02 with No Aggregates by Official CDN
Havoc Physics Test #02は
https://cdn.babylonjs.com/havok/HavokPhysics_umd.js
からライブラリを読み込んで、Aggregateを使わないものです。
HTML Havoc Physics Test #01と共通です
CSS Havoc Physics Test #01と共通です
JavaScript
main = () => {

    const canvas = document.getElementById("renderCanvas");
    const engine = new BABYLON.Engine(canvas, true, { preserveDrawingBuffer: true, stencil: true, disableWebGL2Support: false });


    const createScene = async function () {

        // This creates a basic Babylon Scene object (non-mesh)
        const scene = new BABYLON.Scene(engine);

        // This creates and positions a free camera (non-mesh)
        const camera = new BABYLON.FreeCamera("camera1", new BABYLON.Vector3(0, 5, -10), scene);

        // This targets the camera to scene origin
        camera.setTarget(BABYLON.Vector3.Zero());

        // This attaches the camera to the canvas
        camera.attachControl(canvas, true);

        // This creates a light, aiming 0,1,0 - to the sky (non-mesh)
        const light = new BABYLON.HemisphericLight("light", new BABYLON.Vector3(0, 1, 0), scene);

        // Default intensity is 1. Let's dim the light a small amount
        light.intensity = 0.7;

        // Our built-in 'sphere' shape.
        //const sphere = BABYLON.MeshBuilder.CreateSphere("sphere", { diameter: 2, segments: 32 }, scene);

        // Move the sphere upward at 4 units
        //sphere.position.y = 4;

        // Our built-in 'ground' shape.
        //const ground = BABYLON.MeshBuilder.CreateGround("ground", { width: 10, height: 10 }, scene);

        // initialize plugin
        const havokInstance = await HavokPhysics();
        // pass the engine to the plugin
        const hk = new BABYLON.HavokPlugin(true, havokInstance);
        // enable physics in the scene with a gravity
        scene.enablePhysics(new BABYLON.Vector3(0, -9.8, 0), hk);


        // Create a sphere shape and the associated body. Size will be determined automatically.
        //const sphereAggregate = new BABYLON.PhysicsAggregate(sphere, BABYLON.PhysicsShapeType.SPHERE, { mass: 1, restitution: 0.75 }, scene);


        // Create a sphere shape and the associated body.
        const sphere = BABYLON.MeshBuilder.CreateSphere("sphere", { diameter: 2, segments: 32 }, scene);
        // Move the sphere upward at 4 units
        sphere.position.y = 4;

        const sphereShape = new BABYLON.PhysicsShapeSphere(new BABYLON.Vector3(0, 0, 0), 1, scene);
        //const sphereBody = new BABYLON.PhysicsBody(sphere, BABYLON.PhysicsMotionType.DYNAMIC, scene);
        const sphereBody = new BABYLON.PhysicsBody(sphere, BABYLON.PhysicsMotionType.DYNAMIC, false, scene);
        sphereShape.material = { friction: 0.2, restitution: 0.5 };
        sphereBody.shape = sphereShape;
        sphereBody.setMassProperties({ mass: 1 });


        // Create a static box shape.
        //const groundAggregate = new BABYLON.PhysicsAggregate(ground, BABYLON.PhysicsShapeType.BOX, { mass: 0 }, scene);


        // Create a box shape and the associated body.
        const ground = BABYLON.MeshBuilder.CreateGround("ground", { width: 10, height: 10 }, scene);

        const groundShape = new BABYLON.PhysicsShapeBox(new BABYLON.Vector3(0, 0, 0), new BABYLON.Quaternion(0, 0, 0, 1), new BABYLON.Vector3(5, 0.05, 5), scene);
        //const groundBody = new BABYLON.PhysicsBody(ground, BABYLON.PhysicsMotionType.DYNAMIC, scene);
        const groundBody = new BABYLON.PhysicsBody(ground, BABYLON.PhysicsMotionType.DYNAMIC, false, scene);
        groundShape.material = { friction: 0.2, restitution: 0.3 };
        groundBody.shape = groundShape;
        groundBody.setMassProperties({ mass: 0 });


        return scene;
    };

    createScene().then((scene) => {
        engine.runRenderLoop(function () {
            if (scene) {
                scene.render();
            }
        });
    });


    // Resize
    window.addEventListener("resize", function () {
        engine.resize();
    });

}

// Start processing after all DOM elements have been loaded
window.addEventListener("DOMContentLoaded", main);
JavaScript内の
// initialize plugin
const havokInstance = await HavokPhysics();
// pass the engine to the plugin
const hk = new BABYLON.HavokPlugin(true, havokInstance);
// enable physics in the scene with a gravity
scene.enablePhysics(new BABYLON.Vector3(0, -9.8, 0), hk);


// Create a sphere shape and the associated body. Size will be determined automatically.
//const sphereAggregate = new BABYLON.PhysicsAggregate(sphere, BABYLON.PhysicsShapeType.SPHERE, { mass: 1, restitution: 0.75 }, scene);


// Create a sphere shape and the associated body.
const sphere = BABYLON.MeshBuilder.CreateSphere("sphere", { diameter: 2, segments: 32 }, scene);
// Move the sphere upward at 4 units
sphere.position.y = 4;

const sphereShape = new BABYLON.PhysicsShapeSphere(new BABYLON.Vector3(0, 0, 0), 1, scene);
//const sphereBody = new BABYLON.PhysicsBody(sphere, BABYLON.PhysicsMotionType.DYNAMIC, scene);
const sphereBody = new BABYLON.PhysicsBody(sphere, BABYLON.PhysicsMotionType.DYNAMIC, false, scene);
sphereShape.material = { friction: 0.2, restitution: 0.5 };
sphereBody.shape = sphereShape;
sphereBody.setMassProperties({ mass: 1 });


// Create a static box shape.
//const groundAggregate = new BABYLON.PhysicsAggregate(ground, BABYLON.PhysicsShapeType.BOX, { mass: 0 }, scene);


// Create a box shape and the associated body.
const ground = BABYLON.MeshBuilder.CreateGround("ground", { width: 10, height: 10 }, scene);

const groundShape = new BABYLON.PhysicsShapeBox(new BABYLON.Vector3(0, 0, 0), new BABYLON.Quaternion(0, 0, 0, 1), new BABYLON.Vector3(5, 0.05, 5), scene);
//const groundBody = new BABYLON.PhysicsBody(ground, BABYLON.PhysicsMotionType.DYNAMIC, scene);
const groundBody = new BABYLON.PhysicsBody(ground, BABYLON.PhysicsMotionType.DYNAMIC, false, scene);
groundShape.material = { friction: 0.2, restitution: 0.3 };
groundBody.shape = groundShape;
groundBody.setMassProperties({ mass: 0 });
で物理演算のための設定を行っています。
Aggregateを使用しないコードですが、比較のためにAggreageteのコードをコメントアウトで残しています(ただ読みにくくなっているだけかもしれませんが。。。)。 また、サンプルコードではfalse(真偽値)が無かったけれど、実際にはfalseを設定しないと動かなかったコードもコメントアウトで残しています。
こちらのAggregateしないものは、物理演算のためのBodyとShapeを使い分けるといった感じのものでしょうか? あまりよく理解してませんがw。 groundにはうまくShapeの設定ができなかったので、BoxをShapeに使用することとして代替としています。 あまりよく理解できてないのでけっこうテキトーめですw。
参考にさせていただいたサイト&コード
Havoc Physics Test #01と共通です
Babylon.js v6.3.1 Havoc PhysicsTest #03 with Aggregates by Another CDN
Babylon.js v6.3.1 Havoc PhysicsTest #03 with Aggregates by Another CDN

Havoc Physics Test #03は
https://rawcdn.githack.com/N8python/havokDemo/ba4311d600f3bfa708b29ce02ac74ffdcb420353/havok.js
からライブラリを読み込んで、Aggregateを使うものです。
HTML
<head>
    <meta http-equiv="Content-Type" content="text/html; charset=utf-8"/>
    <title>Babylon Template</title>

    <!-- <script src="https://cdnjs.cloudflare.com/ajax/libs/babylonjs/6.3.1/babylon.js"></script> -->
    <!-- <script src="https://cdnjs.cloudflare.com/ajax/libs/babylonjs/6.3.1/babylon.min.js"></script> -->


    <!-- <script src="https://cdn.jsdelivr.net/npm/babylonjs@6.3.1/babylon.js"></script> -->
    <script src="https://cdn.jsdelivr.net/npm/babylonjs@6.3.1/babylon.min.js"></script>

    <!-- <script src="https://unpkg.com/babylonjs@6.3.1/babylon.js"></script> -->


    <!-- <script src="https://cdn.jsdelivr.net/npm/babylonjs-loaders@6.3.1/babylonjs.loaders.min.js"></script> -->
    <!-- <script src="https://unpkg.com/babylonjs-loaders@6.3.1/babylonjs.loaders.min.js"></script> -->


    <script src="https://cdn.jsdelivr.net/npm/babylonjs-gui@6.3.1/babylon.gui.js"></script>
    <!-- <script src="https://unpkg.com/babylonjs-gui@6.3.1/babylon.gui.js"></script> -->


    <!-- <script src="https://cdn.babylonjs.com/havok/HavokPhysics_umd.js"></script> -->
<script src="https://rawcdn.githack.com/N8python/havokDemo/ba4311d600f3bfa708b29ce02ac74ffdcb420353/havok.js"></script>


    <script src="https://code.jquery.com/pep/0.4.3/pep.js"></script>

</head>

<body>

    <canvas id="renderCanvas" touch-action="none"></canvas> <!--
    touch-action="none" for best results from PEP -->

</body>
HTML内の
<script src="https://rawcdn.githack.com/N8python/havokDemo/ba4311d600f3bfa708b29ce02ac74ffdcb420353/havok.js"></script>部分でHavok Physicsを使用するためのライブラリを読み込んでいます。
CSS Havoc Physics Test #01と共通です
JavaScript
main = () => {

    const canvas = document.getElementById("renderCanvas");
    const engine = new BABYLON.Engine(canvas, true, { preserveDrawingBuffer: true, stencil: true, disableWebGL2Support: false });


    const createScene = async function () {

        // This creates a basic Babylon Scene object (non-mesh)
        const scene = new BABYLON.Scene(engine);

        // This creates and positions a free camera (non-mesh)
        const camera = new BABYLON.FreeCamera("camera1", new BABYLON.Vector3(0, 5, -10), scene);

        // This targets the camera to scene origin
        camera.setTarget(BABYLON.Vector3.Zero());

        // This attaches the camera to the canvas
        camera.attachControl(canvas, true);

        // This creates a light, aiming 0,1,0 - to the sky (non-mesh)
        const light = new BABYLON.HemisphericLight("light", new BABYLON.Vector3(0, 1, 0), scene);

        // Default intensity is 1. Let's dim the light a small amount
        light.intensity = 0.7;

        // Our built-in 'sphere' shape.
        //const sphere = BABYLON.MeshBuilder.CreateSphere("sphere", { diameter: 2, segments: 32 }, scene);

        // Move the sphere upward at 4 units
        //sphere.position.y = 4;

        // Our built-in 'ground' shape.
        //const ground = BABYLON.MeshBuilder.CreateGround("ground", { width: 10, height: 10 }, scene);

        // initialize plugin
        const havokInstance = await HavokPhysics();
        // pass the engine to the plugin
        const hk = new BABYLON.HavokPlugin(true, havokInstance);
        // enable physics in the scene with a gravity
        scene.enablePhysics(new BABYLON.Vector3(0, -9.8, 0), hk);


        // Create a sphere shape and the associated body. Size will be determined automatically.
        //const sphereAggregate = new BABYLON.PhysicsAggregate(sphere, BABYLON.PhysicsShapeType.SPHERE, { mass: 1, restitution: 0.75 }, scene);


        // Create a sphere shape and the associated body.
        const sphere = BABYLON.MeshBuilder.CreateSphere("sphere", { diameter: 2, segments: 32 }, scene);
        // Move the sphere upward at 4 units
        sphere.position.y = 4;

        const sphereShape = new BABYLON.PhysicsShapeSphere(new BABYLON.Vector3(0, 0, 0), 1, scene);
        //const sphereBody = new BABYLON.PhysicsBody(sphere, BABYLON.PhysicsMotionType.DYNAMIC, scene);
        const sphereBody = new BABYLON.PhysicsBody(sphere, BABYLON.PhysicsMotionType.DYNAMIC, false, scene);
        sphereShape.material = { friction: 0.2, restitution: 0.5 };
        sphereBody.shape = sphereShape;
        sphereBody.setMassProperties({ mass: 1 });


        // Create a static box shape.
        //const groundAggregate = new BABYLON.PhysicsAggregate(ground, BABYLON.PhysicsShapeType.BOX, { mass: 0 }, scene);


        // Create a box shape and the associated body.
        const ground = BABYLON.MeshBuilder.CreateGround("ground", { width: 10, height: 10 }, scene);

        const groundShape = new BABYLON.PhysicsShapeBox(new BABYLON.Vector3(0, 0, 0), new BABYLON.Quaternion(0, 0, 0, 1), new BABYLON.Vector3(5, 0.05, 5), scene);
        //const groundBody = new BABYLON.PhysicsBody(ground, BABYLON.PhysicsMotionType.DYNAMIC, scene);
        const groundBody = new BABYLON.PhysicsBody(ground, BABYLON.PhysicsMotionType.DYNAMIC, false, scene);
        groundShape.material = { friction: 0.2, restitution: 0.3 };
        groundBody.shape = groundShape;
        groundBody.setMassProperties({ mass: 0 });


        return scene;
    };

    createScene().then((scene) => {
        engine.runRenderLoop(function () {
            if (scene) {
                scene.render();
            }
        });
    });


    // Resize
    window.addEventListener("resize", function () {
        engine.resize();
    });

}

// Start processing after all DOM elements have been loaded
window.addEventListener("DOMContentLoaded", main);
JavaScript内で行っている物理演算の処理は基本的に、Aggregateを使用している「 Havoc Physics Test #01 」のコードと同じです(少しパラメーター等変えたかもしれませんが)。
参考にさせていただいたサイト&コード
[Havok ] New plugin physics “HK” is not defined
8th wall × Babylon.js havok physicsで物理できるかな?
Unable to load Havok plugin (error while loading .wasm file from browser)
Babylon.js 6 と HavokEngine を Vite 4 で動作させるサンプル
Babylon.js v6.3.1 Havoc PhysicsTest #04 with No Aggregates by Another CDN
Babylon.js v6.3.1 Havoc PhysicsTest #04 with No Aggregates by Another CDN
Havoc Physics Test #04は
https://rawcdn.githack.com/N8python/havokDemo/ba4311d600f3bfa708b29ce02ac74ffdcb420353/havok.js
からライブラリを読み込んで、Aggregateを使わないものです。
HTML Havoc Physics Test #03と共通です
CSS Havoc Physics Test #01と共通です
JavaScript
main = () => {

    const canvas = document.getElementById("renderCanvas");
    const engine = new BABYLON.Engine(canvas, true, { preserveDrawingBuffer: true, stencil: true, disableWebGL2Support: false });


    const createScene = async function () {

        // This creates a basic Babylon Scene object (non-mesh)
        const scene = new BABYLON.Scene(engine);

        // This creates and positions a free camera (non-mesh)
        const camera = new BABYLON.FreeCamera("camera1", new BABYLON.Vector3(0, 5, -10), scene);

        // This targets the camera to scene origin
        camera.setTarget(BABYLON.Vector3.Zero());

        // This attaches the camera to the canvas
        camera.attachControl(canvas, true);

        // This creates a light, aiming 0,1,0 - to the sky (non-mesh)
        const light = new BABYLON.HemisphericLight("light", new BABYLON.Vector3(0, 1, 0), scene);

        // Default intensity is 1. Let's dim the light a small amount
        light.intensity = 0.7;

        // Our built-in 'sphere' shape.
        //const sphere = BABYLON.MeshBuilder.CreateSphere("sphere", { diameter: 2, segments: 32 }, scene);

        // Move the sphere upward at 4 units
        //sphere.position.y = 4;

        // Our built-in 'ground' shape.
        //const ground = BABYLON.MeshBuilder.CreateGround("ground", { width: 10, height: 10 }, scene);

        // initialize plugin
        const havokInstance = await HavokPhysics();
        // pass the engine to the plugin
        const hk = new BABYLON.HavokPlugin(true, havokInstance);
        // enable physics in the scene with a gravity
        scene.enablePhysics(new BABYLON.Vector3(0, -9.8, 0), hk);


        // Create a sphere shape and the associated body. Size will be determined automatically.
        //const sphereAggregate = new BABYLON.PhysicsAggregate(sphere, BABYLON.PhysicsShapeType.SPHERE, { mass: 1, restitution: 0.75 }, scene);


        // Create a sphere shape and the associated body.
        const sphere = BABYLON.MeshBuilder.CreateSphere("sphere", { diameter: 2, segments: 32 }, scene);
        // Move the sphere upward at 4 units
        sphere.position.y = 4;

        const sphereShape = new BABYLON.PhysicsShapeSphere(new BABYLON.Vector3(0, 0, 0), 1, scene);
        //const sphereBody = new BABYLON.PhysicsBody(sphere, BABYLON.PhysicsMotionType.DYNAMIC, scene);
        const sphereBody = new BABYLON.PhysicsBody(sphere, BABYLON.PhysicsMotionType.DYNAMIC, false, scene);
        sphereShape.material = { friction: 0.2, restitution: 0.5 };
        sphereBody.shape = sphereShape;
        sphereBody.setMassProperties({ mass: 1 });


        // Create a static box shape.
        //const groundAggregate = new BABYLON.PhysicsAggregate(ground, BABYLON.PhysicsShapeType.BOX, { mass: 0 }, scene);


        // Create a box shape and the associated body.
        const ground = BABYLON.MeshBuilder.CreateGround("ground", { width: 10, height: 10 }, scene);

        const groundShape = new BABYLON.PhysicsShapeBox(new BABYLON.Vector3(0, 0, 0), new BABYLON.Quaternion(0, 0, 0, 1), new BABYLON.Vector3(5, 0.05, 5), scene);
        //const groundBody = new BABYLON.PhysicsBody(ground, BABYLON.PhysicsMotionType.DYNAMIC, scene);
        const groundBody = new BABYLON.PhysicsBody(ground, BABYLON.PhysicsMotionType.DYNAMIC, false, scene);
        groundShape.material = { friction: 0.2, restitution: 0.3 };
        groundBody.shape = groundShape;
        groundBody.setMassProperties({ mass: 0 });


        return scene;
    };

    createScene().then((scene) => {
        engine.runRenderLoop(function () {
            if (scene) {
                scene.render();
            }
        });
    });


    // Resize
    window.addEventListener("resize", function () {
        engine.resize();
    });

}

// Start processing after all DOM elements have been loaded
window.addEventListener("DOMContentLoaded", main);
JavaScript内で行っている物理演算の処理は基本的に、Aggregateを使用していない「 Havoc Physics Test #02 」のコードと同じです(少しパラメーター等変えたかもしれませんが)。
参考にさせていただいたサイト&コード
Havoc Physics Test #03と共通です
Babylon.js v6.3.1 Practice#54 glTF Collision Detection Test by Havoc with Aggregates
Babylon.js v6.3.1 Practice#54 glTF Collision Detection Test by Havoc with Aggregates

上記のボタンを作成したPractice#53のコード、物理演算を試した4つのHavok Physics Testのコードの実験をふまえて、ボタン押下で青いBoxを物理演算により操作するコードを作成しました。 こちらのコードは、コードのタイトルにもあるようにAggregateを使用しています。
HTML
<head>
    <meta http-equiv="Content-Type" content="text/html; charset=utf-8"/>
    <title>Babylon Template</title>

    <!-- <script src="https://cdnjs.cloudflare.com/ajax/libs/babylonjs/6.3.1/babylon.js"></script> -->
    <!-- <script src="https://cdnjs.cloudflare.com/ajax/libs/babylonjs/6.3.1/babylon.min.js"></script> -->


    <!-- <script src="https://cdn.jsdelivr.net/npm/babylonjs@6.3.1/babylon.js"></script> -->
    <script src="https://cdn.jsdelivr.net/npm/babylonjs@6.3.1/babylon.min.js"></script>

    <!-- <script src="https://unpkg.com/babylonjs@6.3.1/babylon.js"></script> -->


    <!-- <script src="https://cdn.jsdelivr.net/npm/babylonjs-loaders@6.3.1/babylonjs.loaders.min.js"></script> -->
    <!-- <script src="https://unpkg.com/babylonjs-loaders@6.3.1/babylonjs.loaders.min.js"></script> -->


    <script src="https://cdn.jsdelivr.net/npm/babylonjs-gui@6.3.1/babylon.gui.js"></script>
    <!-- <script src="https://unpkg.com/babylonjs-gui@6.3.1/babylon.gui.js"></script> -->


<script src="https://cdn.babylonjs.com/havok/HavokPhysics_umd.js"></script>


    <script src="https://code.jquery.com/pep/0.4.3/pep.js"></script>

</head>

<body>

    <canvas id="renderCanvas" touch-action="none"></canvas> <!--
    touch-action="none" for best results from PEP -->

</body>
CSS これまでの他のコードと共通
JavaScript
main = () => {

    const canvas = document.getElementById("renderCanvas"); // Get the canvas element
    const engine = new BABYLON.Engine(canvas, true); // Generate the BABYLON 3D engine

    // Add your code here matching the playground format
    //const createScene = () => {
    //const createScene = async function () {
    const createScene = async () => {

        const scene = new BABYLON.Scene(engine);
        scene.clearColor = new BABYLON.Color3(0, 1, 1);

        // create a FreeCamera, and set its position to (x:0, y:5, z:-10)
        const camera = new BABYLON.FreeCamera("camera1", new BABYLON.Vector3(0, 5,-10), scene);
        // target the camera to scene origin
        camera.setTarget(BABYLON.Vector3.Zero());
        // attach the camera to the canvas
        camera.attachControl(canvas, true);


        // create a basic light, aiming 0,1,0 - meaning, to the sky
        const light = new BABYLON.HemisphericLight('light1', new BABYLON.Vector3(0,1,0), scene);


        // create built-in 'sphere' shape.
        const sphere = BABYLON.MeshBuilder.CreateSphere("sphere", { diameter: 2, segments: 32 }, scene);

        // move the sphere
        sphere.position.y = 4;
        sphere.position.z = 4;

        // set sphere material
        let sphereMaterial = new BABYLON.StandardMaterial("box material", scene);
        sphere.material = sphereMaterial;
        sphere.material.diffuseColor = BABYLON.Color3.Red();


        // create built-in 'ground' shape.
        const ground = BABYLON.MeshBuilder.CreateGround("ground", { width: 10, height: 10 }, scene);

        // set ground material
        let groundMaterial = new BABYLON.StandardMaterial("box material", scene);
        ground.material = groundMaterial;
        ground.material.diffuseColor = BABYLON.Color3.Yellow();


        // create built-in 'box' shape
        const box = BABYLON.MeshBuilder.CreateBox("box", {height: 2, width:2, depth: 2});

        // move the box
        box.position.y = 2;
        box.position.z = -1;

        // set box material
        let boxMaterial = new BABYLON.StandardMaterial("box material", scene);
        box.material = boxMaterial;
        box.material.diffuseColor = BABYLON.Color3.Blue();


        // initialize plugin
        const havokInstance = await HavokPhysics();
        // pass the engine to the plugin
        const hk = new BABYLON.HavokPlugin(true, havokInstance);
        // enable physics in the scene with a gravity
        scene.enablePhysics(new BABYLON.Vector3(0, -9.8, 0), hk);


        // Create a sphere shape and the associated body. Size will be determined automatically.
        const sphereAggregate = new BABYLON.PhysicsAggregate(sphere, BABYLON.PhysicsShapeType.SPHERE, { mass: 1, restitution: 0.75 }, scene);

        // Create a static box shape.
        const groundAggregate = new BABYLON.PhysicsAggregate(ground, BABYLON.PhysicsShapeType.BOX, { mass: 0 }, scene);
        groundAggregate.shape.material = { friction: 0.1, restitution: 0.01 };

        // Create a static box shape.
        const boxAggregate = new BABYLON.PhysicsAggregate(box, BABYLON.PhysicsShapeType.BOX, { mass: 1.75, rotation: box.rotationQuaternion }, scene);
        boxAggregate.shape.material = { friction: 0.1, restitution: 0.01 };


        // UI
        const advancedTexture = BABYLON.GUI.AdvancedDynamicTexture.CreateFullscreenUI("UI");

        // Indicator label  Label part setting  Add directly to advancedTexture
        const label = new BABYLON.GUI.Rectangle("label");
        label.background = "#00ffff";
        label.height = "60px";
        label.alpha = 0.5;
        label.width = "300px";
        label.cornerRadius = 25;
        label.thickness = 1;
        //label2.linkOffsetY = 30;
        label.top = "5%";
        label.paddingLeft = "10px";
        label.paddingRight = "10px";
        advancedTexture.addControl(label);
        // Indicator label  Text part setting  Add to label
        const text = new BABYLON.GUI.TextBlock();
        text.text = "TEST";
        text.color = "black";
        text.fontSize = "20px";
        label.addControl(text);


        // Panel for all buttons  Put the buttons together here and then add them to advancedTexture
        const UiPanel = new BABYLON.GUI.StackPanel("horizontal");
        UiPanel.isVertical = false;
        UiPanel.top = "30%";
        UiPanel.width = "360px";
        UiPanel.height = "160px";
        UiPanel.fontSize = "14px";
        UiPanel.horizontalAlignment = BABYLON.GUI.Control.HORIZONTAL_ALIGNMENT_CENTER;
        UiPanel.verticalAlignment = BABYLON.GUI.Control.VERTICAL_ALIGNMENT_CENTER;
        advancedTexture.addControl(UiPanel);

        // Left Button
        const leftButton = BABYLON.GUI.Button.CreateSimpleButton("leftBut", "left");
        leftButton.paddingLeft = "10px";
        leftButton.width = "100px";
        leftButton.height = "50px";
        leftButton.cornerRadius = 5;
        leftButton.color = "white";
        leftButton.background = "black";
        leftButton.onPointerDownObservable.add(()=> {
            text.text = "Left Button \nPushed";

            // Left rotation
            boxAggregate.body.setAngularVelocity(new BABYLON.Vector3(0, -0.75, 0));

            //console.log(box.rotation);
            //console.log(box.rotationQuaternion);

        });
        UiPanel.addControl(leftButton);

        // Forward Button
        const forwardButton = BABYLON.GUI.Button.CreateSimpleButton("forwardBut", "forward");
        forwardButton.paddingLeft = "30px";
        forwardButton.paddingTop = "-50px";
        forwardButton.paddingBottom = "50px";
        forwardButton.paddingRight = "-20px";
        forwardButton.width = "100px";
        forwardButton.height = "50px";
        forwardButton.cornerRadius = 5;
        forwardButton.color = "white";
        forwardButton.background = "black";
        forwardButton.onPointerDownObservable.add(()=> {
            text.text = "Forward Button \nPushed";

            // Forward
            let directionVec = new BABYLON.Vector3(0, 0, 1);
            //console.log(directionVec);

            directionVec = directionVec.applyRotationQuaternion(box.rotationQuaternion);
            //console.log("after calc \n" + directionVec);

            directionVec = directionVec.multiplyByFloats(1.5, 0, 1.5);
            //console.log(directionVec);

            boxAggregate.body.setLinearVelocity(directionVec);
            //console.log(directionVec);

        });
        UiPanel.addControl(forwardButton);

        // Backward Button
        const backwardButton = BABYLON.GUI.Button.CreateSimpleButton("backwardBut", "backward");
        backwardButton.paddingLeft = "-70px";
        backwardButton.paddingTop = "50px";
        backwardButton.paddingBottom = "-50px";
        backwardButton.paddingRight = "30px";
        backwardButton.width = "50px";
        backwardButton.height = "50px";
        backwardButton.cornerRadius = 5;
        backwardButton.color = "white";
        backwardButton.background = "black";
        backwardButton.onPointerDownObservable.add(()=> {
            text.text = "Backward Button \nPushed";

            // Backward
            let directionVec = new BABYLON.Vector3(0, 0, -1);

            directionVec = directionVec.applyRotationQuaternion(box.rotationQuaternion);

            directionVec = directionVec.multiplyByFloats(1.5, 0, 1.5);

            boxAggregate.body.setLinearVelocity(directionVec);

        });
        UiPanel.addControl(backwardButton);

        // Right Button
        const rightButton = BABYLON.GUI.Button.CreateSimpleButton("rightButt", "right");
        rightButton.paddingRight = "10px";
        rightButton.width = "100px";
        rightButton.height = "50px";
        rightButton.cornerRadius = 5;
        rightButton.color = "white";
        rightButton.background = "black";
        rightButton.onPointerDownObservable.add(()=> {
            text.text = "Right Button \nPushed";

            // Right rotation
            boxAggregate.body.setAngularVelocity(new BABYLON.Vector3(0, 0.75, 0));

        });
        UiPanel.addControl(rightButton);

        return scene;
    }

    //const scene = createScene(); //Call the createScene function

    // Register a render loop to repeatedly render the scene
    //engine.runRenderLoop(() => {
    //    scene.render();
    //});


    createScene().then((scene) => {
        engine.runRenderLoop(function () {
            if (scene) {
                scene.render();
            }
        });
    });

    // Watch for browser/canvas resize events
    window.addEventListener("resize", () => {
        engine.resize();
    });

}

// Start processing after all DOM elements have been loaded
window.addEventListener("DOMContentLoaded", main);
比較のため、後で見返す、等々のため、いろいろ使用しなくなったコードもコメントアウトで残しています(見にくいかも、です。。。)。
Boxの操作について、画面向かっての左回転(left)操作は
// Left rotation
boxAggregate.body.setAngularVelocity(new BABYLON.Vector3(0, -0.75, 0));
でsetAngularVelocityという関数を使用してY軸を軸にBoxを回転させることによって行っています。 左回転ではnew BABYLON.Vector3(0, -0.75, 0)というふうに回転に加える力のベクトル?速度のベクトル?が設定されますが、右回転では -0.75 が 0.75 となり、 BABYLON.Vector3(0, 0.75, 0)のベクトルが設定されます。
向かって正面に進む(Forward)操作は
// Forward
let directionVec = new BABYLON.Vector3(0, 0, 1);
//console.log(directionVec);

directionVec = directionVec.applyRotationQuaternion(box.rotationQuaternion);
//console.log("after calc \n" + directionVec);

directionVec = directionVec.multiplyByFloats(1.5, 0, 1.5);
//console.log(directionVec);

boxAggregate.body.setLinearVelocity(directionVec);
//console.log(directionVec);
で行っています。 操作Boxを動かすための力?速度?となるベクトルを作成して、操作Boxにそのベクトルを反映することで操作Boxを前進させています。
コードでは、まず最初に基準となるベクトルBABYLON.Vector3(0, 0, 1)を作成します。 Z軸成分だけの1は、奥向き・奥行き成分としてZ軸の1、と自分は理解。 そのベクトルにBoxの回転を表すQuaternionを適応させてベクトルにBoxの方向を反映させます。 その後multiplyByFloatsでベクトルのX軸とZ軸の成分だけサイズを拡大調整して(Y軸を加えると上向きのジャンプ成分になります※)操作Boxに加える力のベクトル?を作成します。 最後にsetLinearVelocity関数を使用して実際に操作Boxに力のベクトル?を加えます。
正面に進む処理(Forward)では BABYLON.Vector3(0, 0, 1) というふうに奥向き・奥行き成分のZ軸の「 1 」が設定されますが、後退処理(Backward)では 「 1 」 が 「 -1 」となり、 BABYLON.Vector3(0, 0, -1) のベクトルが設定されます。
以上の説明は自分の理解のイメージです。 実際の理論・処理・ライブラリとはデザイン・仕様が一部異なる場合がございますw。
※
設定した摩擦の影響で操作Boxが地面に対して少しでもつんのめったりするとY軸方向のベクトル成分もできるのか、console.logによるログ確認時にY軸成分がゼロになることはありませんでした。 なので、multiplyByFloatsで都度Y軸成分にゼロをかけて、setLinearVelocityではX軸とZ軸の成分のベクトルしか設定しないようにしています。
Babylon.js v6.3.1 Practice#55 glTF Collision Detection Test by Havoc with No Aggregates
Babylon.js v6.3.1 Practice#55 glTF Collision Detection Test by Havoc with No Aggregates

つづいて、Aggregateを使用せずに、ボタンで青いBoxを物理演算により操作するコードを作成しました。
HTML Practice#54と共通
CSS これまでの他のコードと共通
JavaScript
main = () => {

    const canvas = document.getElementById("renderCanvas"); // Get the canvas element
    const engine = new BABYLON.Engine(canvas, true); // Generate the BABYLON 3D engine

    // Add your code here matching the playground format
    //const createScene = () => {
    //const createScene = async function () {
    const createScene = async () => {

        const scene = new BABYLON.Scene(engine);
        scene.clearColor = new BABYLON.Color3(0, 1, 1);

        // create a FreeCamera, and set its position to (x:0, y:5, z:-10)
        const camera = new BABYLON.FreeCamera("camera1", new BABYLON.Vector3(0, 5,-10), scene);
        // target the camera to scene origin
        camera.setTarget(BABYLON.Vector3.Zero());
        // attach the camera to the canvas
        camera.attachControl(canvas, true);


        // create a basic light, aiming 0,1,0 - meaning, to the sky
        const light = new BABYLON.HemisphericLight('light1', new BABYLON.Vector3(0,1,0), scene);


        // initialize plugin
        const havokInstance = await HavokPhysics();
        // pass the engine to the plugin
        const hk = new BABYLON.HavokPlugin(true, havokInstance);
        // enable physics in the scene with a gravity
        scene.enablePhysics(new BABYLON.Vector3(0, -9.8, 0), hk);


        // create a sphere shape and the associated body
        const sphere = BABYLON.MeshBuilder.CreateSphere("sphere", { diameter: 2, segments: 32 }, scene);

        // move the sphere
        sphere.position.y = 4;
        sphere.position.z = 3;

        // set sphere material
        let sphereMaterial = new BABYLON.StandardMaterial("box material", scene);
        sphere.material = sphereMaterial;
        sphere.material.diffuseColor = BABYLON.Color3.Red();

        const sphereShape = new BABYLON.PhysicsShapeSphere(new BABYLON.Vector3(0, 0, 0), 1, scene);
        const sphereBody = new BABYLON.PhysicsBody(sphere, BABYLON.PhysicsMotionType.DYNAMIC, false, scene);
        sphereShape.material = { friction: 0.95, restitution: 0.1 };
        sphereBody.shape = sphereShape;
        sphereBody.setMassProperties({ mass: 1 });


        // create a ground by box shape and the associated body
        const ground = BABYLON.MeshBuilder.CreateGround("ground", { width: 10, height: 10 }, scene);

        // set ground material
        let groundMaterial = new BABYLON.StandardMaterial("box material", scene);
        ground.material = groundMaterial;
        ground.material.diffuseColor = BABYLON.Color3.Yellow();

        const groundShape = new BABYLON.PhysicsShapeBox(new BABYLON.Vector3(0, 0, 0), new BABYLON.Quaternion(0, 0, 0, 1), new BABYLON.Vector3(10, 0.01, 10), scene);
        const groundBody = new BABYLON.PhysicsBody(ground, BABYLON.PhysicsMotionType.STATIC, false, scene);
        groundShape.material = { friction: 0.2, restitution: 0.3 };
        groundBody.shape = groundShape;
        groundBody.setMassProperties({ mass: 0 });


        // create a box shape and the associated body
        const box = BABYLON.MeshBuilder.CreateBox("box", {height: 2, width:2, depth: 2});

        // move the box
        box.position.y = 2;
        box.position.z = -2;

        // set box material
        let boxMaterial = new BABYLON.StandardMaterial("box material", scene);
        box.material = boxMaterial;
        box.material.diffuseColor = BABYLON.Color3.Blue();

        const boxShape = new BABYLON.PhysicsShapeBox(new BABYLON.Vector3(0, -1, 0), new BABYLON.Quaternion(0, 0, 0, 1), new BABYLON.Vector3(1, 1, 1), scene);
        const boxBody = new BABYLON.PhysicsBody(box, BABYLON.PhysicsMotionType.DYNAMIC, false, scene);
        boxShape.material = { friction: 0.2, restitution: 0.3 };
        boxBody.shape = boxShape;
        boxBody.setMassProperties({ mass: 1 });


        // UI
        const advancedTexture = BABYLON.GUI.AdvancedDynamicTexture.CreateFullscreenUI("UI");

        // Indicator label  Label part setting  Add directly to advancedTexture
        const label = new BABYLON.GUI.Rectangle("label");
        label.background = "#00ffff";
        label.height = "60px";
        label.alpha = 0.5;
        label.width = "300px";
        label.cornerRadius = 25;
        label.thickness = 1;
        //label2.linkOffsetY = 30;
        label.top = "5%";
        label.paddingLeft = "10px";
        label.paddingRight = "10px";
        advancedTexture.addControl(label);
        // Indicator label  Text part setting  Add to label
        const text = new BABYLON.GUI.TextBlock();
        text.text = "TEST";
        text.color = "black";
        text.fontSize = "20px";
        label.addControl(text);


        // Panel for all buttons  Put the buttons together here and then add them to advancedTexture
        const UiPanel = new BABYLON.GUI.StackPanel("horizontal");
        UiPanel.isVertical = false;
        UiPanel.top = "30%";
        UiPanel.width = "360px";
        UiPanel.height = "160px";
        UiPanel.fontSize = "14px";
        UiPanel.horizontalAlignment = BABYLON.GUI.Control.HORIZONTAL_ALIGNMENT_CENTER;
        UiPanel.verticalAlignment = BABYLON.GUI.Control.VERTICAL_ALIGNMENT_CENTER;
        advancedTexture.addControl(UiPanel);

        // Left Button
        const leftButton = BABYLON.GUI.Button.CreateSimpleButton("leftBut", "left");
        leftButton.paddingLeft = "10px";
        leftButton.width = "100px";
        leftButton.height = "50px";
        leftButton.cornerRadius = 5;
        leftButton.color = "white";
        leftButton.background = "black";
        leftButton.onPointerDownObservable.add(()=> {
            text.text = "Left Button \nPushed";

            // Left rotation
            boxBody.setAngularVelocity(new BABYLON.Vector3(0, -0.75, 0));

            //console.log(box.rotation);
            //console.log(box.rotationQuaternion);

        });
        UiPanel.addControl(leftButton);

        // Forward Button
        const forwardButton = BABYLON.GUI.Button.CreateSimpleButton("forwardBut", "forward");
        forwardButton.paddingLeft = "30px";
        forwardButton.paddingTop = "-50px";
        forwardButton.paddingBottom = "50px";
        forwardButton.paddingRight = "-20px";
        forwardButton.width = "100px";
        forwardButton.height = "50px";
        forwardButton.cornerRadius = 5;
        forwardButton.color = "white";
        forwardButton.background = "black";
        forwardButton.onPointerDownObservable.add(()=> {
            text.text = "Forward Button \nPushed";

            // Forward
            let directionVec = new BABYLON.Vector3(0, 0, 1);
            //console.log(directionVec);

            directionVec = directionVec.applyRotationQuaternion(box.rotationQuaternion);
            //console.log("after calc \n" + directionVec);

            directionVec = directionVec.multiplyByFloats(1.5, 0, 1.5);
            //console.log(directionVec);

            boxBody.setLinearVelocity(directionVec);
            //console.log(directionVec);

        });
        UiPanel.addControl(forwardButton);

        // Backward Button
        const backwardButton = BABYLON.GUI.Button.CreateSimpleButton("backwardBut", "backward");
        backwardButton.paddingLeft = "-70px";
        backwardButton.paddingTop = "50px";
        backwardButton.paddingBottom = "-50px";
        backwardButton.paddingRight = "30px";
        backwardButton.width = "50px";
        backwardButton.height = "50px";
        backwardButton.cornerRadius = 5;
        backwardButton.color = "white";
        backwardButton.background = "black";
        backwardButton.onPointerDownObservable.add(()=> {
            text.text = "Backward Button \nPushed";

            // Backward
            let directionVec = new BABYLON.Vector3(0, 0, -1);

            directionVec = directionVec.applyRotationQuaternion(box.rotationQuaternion);

            directionVec = directionVec.multiplyByFloats(1.5, 0, 1.5);

            boxBody.setLinearVelocity(directionVec);

        });
        UiPanel.addControl(backwardButton);

        // Right Button
        const rightButton = BABYLON.GUI.Button.CreateSimpleButton("rightButt", "right");
        rightButton.paddingRight = "10px";
        rightButton.width = "100px";
        rightButton.height = "50px";
        rightButton.cornerRadius = 5;
        rightButton.color = "white";
        rightButton.background = "black";
        rightButton.onPointerDownObservable.add(()=> {
            text.text = "Right Button \nPushed";

            // Right rotation
            boxBody.setAngularVelocity(new BABYLON.Vector3(0, 0.75, 0));

        });
        UiPanel.addControl(rightButton);

        return scene;
    }

    //const scene = createScene(); //Call the createScene function

    // Register a render loop to repeatedly render the scene
    //engine.runRenderLoop(() => {
    //    scene.render();
    //});


    createScene().then((scene) => {
        engine.runRenderLoop(function () {
            if (scene) {
                scene.render();
            }
        });
    });

    // Watch for browser/canvas resize events
    window.addEventListener("resize", () => {
        engine.resize();
    });

}

// Start processing after all DOM elements have been loaded
window.addEventListener("DOMContentLoaded", main);
Aggregateを使用せず、といった違い以外は基本的な処理はPractice#54のものと一緒です。
カメラ操作
最後に操作Boxのまわりを移動するカメラの機能を作成しました。
また、さらにコードの貼り付けが長ったらしくなりそうなので、最終的な完成品Practice#58のコードだけ載せるようにして、そこまでの過程となる他2つのPracitce#56・57のコードは省略しています。
Babylon.js v6.3.1 Practice#56 Camera Movement Around Target Object
Babylon.js v6.3.1 Practice#56 Camera Movement Around Target Object

まず最初にこのコードではPractice#54・55ではできていなかった、ボタン押しっぱなしで操作Boxが前進・後退、左右回転できる処理を追加しました。 その後、カメラを操作するボタンを追加作成しました。
HTML 省略
CSS 省略
JavaScript 省略
カメラを操作するボタンを追加作成するために、以下の自分のコードを参考にしました
Babylon.js v4.2.0 Practice#18 Camera Movement Around Target Object
Babylon.js v6.3.1 Practice#57 Camera Movement Around Target Object Revision
Babylon.js v6.3.1 Practice#57 Camera Movement Around Target Object Revision

今度はこのコードで、Practice#56ではできていなかった、ボタン押しっぱなしでカメラの操作ボタン、LeftRotとRightRot、が機能するように修正しました。 次のPractice#58のコードを作成するための準備・バックアップのような位置づけのコードです。
HTML 省略
CSS 省略
JavaScript 省略
Practice#57のコードはPractice#58の途中経過・バックアップ的なコードなので、参考にさせていただいたサイト&コードはPractice#58と同じになります。
Babylon.js v6.3.1 Practice#58 Camera Movement Around Target Object Revision02
Babylon.js v6.3.1 Practice#58 Camera Movement Around Target Object Revision02

Practice#57から、カメラのDefaultボタンが想定どおりに動くように修正しました。 Defaultボタンでカメラが青い操作Boxの背後(真後ろ)に回りこむようにしました。 Defaultボタンの機能は、ここやここのThree.jsからのコードをBabylon.jsに移植したものです。
参考
Three.jsのカメラ機能を実装したコードに関連したnote その1
Three.jsのカメラ機能を実装したコードに関連したnote その2(←このnoteの最後のコードが対象です)
HTML
<head>
    <meta http-equiv="Content-Type" content="text/html; charset=utf-8"/>
    <title>Babylon Template</title>

    <!-- <script src="https://cdnjs.cloudflare.com/ajax/libs/babylonjs/6.3.1/babylon.js"></script> -->
    <!-- <script src="https://cdnjs.cloudflare.com/ajax/libs/babylonjs/6.3.1/babylon.min.js"></script> -->


    <!-- <script src="https://cdn.jsdelivr.net/npm/babylonjs@6.3.1/babylon.js"></script> -->
    <script src="https://cdn.jsdelivr.net/npm/babylonjs@6.3.1/babylon.min.js"></script>

    <!-- <script src="https://unpkg.com/babylonjs@6.3.1/babylon.js"></script> -->


    <!-- <script src="https://cdn.jsdelivr.net/npm/babylonjs-loaders@6.3.1/babylonjs.loaders.min.js"></script> -->
    <!-- <script src="https://unpkg.com/babylonjs-loaders@6.3.1/babylonjs.loaders.min.js"></script> -->


    <script src="https://cdn.jsdelivr.net/npm/babylonjs-gui@6.3.1/babylon.gui.js"></script>
    <!-- <script src="https://unpkg.com/babylonjs-gui@6.3.1/babylon.gui.js"></script> -->


<script src="https://cdn.babylonjs.com/havok/HavokPhysics_umd.js"></script>


    <script src="https://code.jquery.com/pep/0.4.3/pep.js"></script>

</head>

<body>

    <canvas id="renderCanvas" touch-action="none"></canvas> <!--
    touch-action="none" for best results from PEP -->

</body>
CSS
html, body {
    overflow: hidden;
    width   : 100%;
    height  : 100%;
    margin  : 0;
    padding : 0;
}

#renderCanvas {
    width   : 100%;
    height  : 100%;
    touch-action: none;
}
JavaScript(長いです)
main = () => {

// カメラの操作対象3Dオブジェクトからの距離に関する変数・定数の設定
// 距離の最小値
//const MIM_CAMERA_DIST = 15;
// 距離の最大値
//const MAX_CAMERA_DIST = 30;
// 距離の初期値
const DEFFAULT_CAMERA_DIST = 14;
// 距離の計算単位
//const CAMERA_DIST_CALC_UNIT = 5;


// カメラの高さに関する変数・定数の設定
// 高さの最小値
//const MIM_CAMERA_HEIGHT = 5;
// 高さの最大値
//const MAX_CAMERA_HEIGHT = 25;
// 高さの初期値
const DEFFAULT_CAMERA_HEIGHT = 7;
// 高さの計算単位
//const CAMERA_HEIGHT_CALC_UNIT = 5;

// 高さの計算に使用する変数
// 高さの初期値を設定
//let cameraHeight = DEFFAULT_CAMERA_HEIGHT;


    // 「left」「forward」「backward」「right」ボタンの押下状態を保持
    // variables to keep sates of the "left", "forward", "backward", and "right" buttons
    let isLeftRotBtnDwn = false;
    let isForwardBtnDwn = false;
    let isBackwardBtnDwn = false;
    let isRightRotBtnDwn = false;


    // カメラ回転用
    // For camera rotation
    let camLeftRotButtonOn = false;
    let camRightRotButtonOn = false;
    let camResetButtonOn = false;


    let rot = 0; // 角度  Angle
    let targetRot = 0;
    let cameraDistance = -14;

    let camera;

    let box;
    let boxAggregate;

    const canvas = document.getElementById("renderCanvas"); // Get the canvas element
    const engine = new BABYLON.Engine(canvas, true); // Generate the BABYLON 3D engine


    const createScene = async () => {

        const scene = new BABYLON.Scene(engine);
        scene.clearColor = new BABYLON.Color3(0, 1, 1);

        // create a FreeCamera, and set its position to (x:0, y:5, z:-10)
        camera = new BABYLON.FreeCamera("camera1", new BABYLON.Vector3(0, 5,-10), scene);
        // target the camera to scene origin
        camera.setTarget(BABYLON.Vector3.Zero());
        // attach the camera to the canvas
        camera.attachControl(canvas, true);


        // create a basic light, aiming 0,1,0 - meaning, to the sky
        const light = new BABYLON.HemisphericLight('light1', new BABYLON.Vector3(0,1,0), scene);


        // create built-in 'sphere' shape.
        const sphere = BABYLON.MeshBuilder.CreateSphere("sphere", { diameter: 2, segments: 32 }, scene);

        // move the sphere
        sphere.position.y = 4;
        sphere.position.z = 4;

        // set sphere material
        let sphereMaterial = new BABYLON.StandardMaterial("box material", scene);
        sphere.material = sphereMaterial;
        sphere.material.diffuseColor = BABYLON.Color3.Red();


        // create built-in 'ground' shape.
        const ground = BABYLON.MeshBuilder.CreateGround("ground", { width: 20, height: 20 }, scene);

        // set ground material
        let groundMaterial = new BABYLON.StandardMaterial("box material", scene);
        ground.material = groundMaterial;
        ground.material.diffuseColor = BABYLON.Color3.Yellow();


        // create built-in 'box' shape
        box = BABYLON.MeshBuilder.CreateBox("box", {height: 2, width:2, depth: 2});

        // move the box
        box.position.y = 2;
        box.position.z = -4;

        // set box material
        let boxMaterial = new BABYLON.StandardMaterial("box material", scene);
        box.material = boxMaterial;
        box.material.diffuseColor = BABYLON.Color3.Blue();

        // boxオブジェクトをカメラのターゲットとして設定
        // set box object as camera target
        camera.lockedTarget = box; //version 2.5 onwards


        // initialize plugin
        const havokInstance = await HavokPhysics();
        // pass the engine to the plugin
        const hk = new BABYLON.HavokPlugin(true, havokInstance);
        // enable physics in the scene with a gravity
        scene.enablePhysics(new BABYLON.Vector3(0, -9.8, 0), hk);


        // Create a sphere shape and the associated body by PhysicsAggregate
        const sphereAggregate = new BABYLON.PhysicsAggregate(sphere, BABYLON.PhysicsShapeType.SPHERE, { mass: 1, restitution: 0.75 }, scene);

        // Create a box shape and the associated body by PhysicsAggregate
        const groundAggregate = new BABYLON.PhysicsAggregate(ground, BABYLON.PhysicsShapeType.BOX, { mass: 0 }, scene);
        groundAggregate.shape.material = { friction: 0.1, restitution: 0.01 };

        // Create a box shape and the associated body by PhysicsAggregate
        boxAggregate = new BABYLON.PhysicsAggregate(box, BABYLON.PhysicsShapeType.BOX, { mass: 1.75, rotation: box.rotationQuaternion }, scene);
        boxAggregate.shape.material = { friction: 0.1, restitution: 0.01 };


        // UI
        const advancedTexture = BABYLON.GUI.AdvancedDynamicTexture.CreateFullscreenUI("UI");


        // ここから上段UIの設定
        // Upper UI settings from here

        // 上段ボタンまとめ用パネル ここにボタンをまとめてからadvancedTextureに追加
        // Upper Button Summary Panel: Add buttons to advancedTexture after collecting them here.
        const UiPanel01 = new BABYLON.GUI.StackPanel("horizontal");
        UiPanel01.isVertical = false;
        UiPanel01.top = "-40%";
        UiPanel01.left = "-9%";
        UiPanel01.width = "400px";
        UiPanel01.height = "160px";
        UiPanel01.fontSize = "14px";
        UiPanel01.horizontalAlignment = BABYLON.GUI.Control.HORIZONTAL_ALIGNMENT_CENTER;
        UiPanel01.verticalAlignment = BABYLON.GUI.Control.VERTICAL_ALIGNMENT_CENTER;
        advancedTexture.addControl(UiPanel01);


        // 上段 カメラ左回転ボタン
        // Upper UI Camera left rotate button
        const camLeftRotButton = BABYLON.GUI.Button.CreateSimpleButton("leftRotBut", "LeftRot");
        camLeftRotButton.paddingLeft = "10px";
        camLeftRotButton.width = "80px";
        camLeftRotButton.height = "50px";
        camLeftRotButton.cornerRadius = 5;
        camLeftRotButton.color = "white";
        camLeftRotButton.background = "black";
        camLeftRotButton.onPointerDownObservable.add(()=> {
            camLeftRotButtonOn = true;
            text.text = "Camera Left Rotation Button \nPushed";
        });
        camLeftRotButton.onPointerUpObservable.add(()=> {
            camLeftRotButtonOn = false;
            text.text = "Camera Left Rotation Button \nReleased";
        });
        camLeftRotButton.onPointerOutObservable.add(()=> {
            camLeftRotButtonOn = false;
            text.text = "";
        });
        UiPanel01.addControl(camLeftRotButton);


        // 上段 カメラ右回転ボタン
        // Upper UI Camera right rotate button
        const camRightRotButton = BABYLON.GUI.Button.CreateSimpleButton("rightRotBut", "RightRot");
        camRightRotButton.paddingLeft = "10px";
        camRightRotButton.width = "80px";
        camRightRotButton.height = "50px";
        camRightRotButton.cornerRadius = 5;
        camRightRotButton.color = "white";
        camRightRotButton.background = "black";
        camRightRotButton.onPointerDownObservable.add(()=> {
            camRightRotButtonOn = true;
            text.text = "Camera Right Rotation Button \nPushed";
        });
        camRightRotButton.onPointerUpObservable.add(()=> {
            camRightRotButtonOn = false;
            text.text = "Camera Right Rotation Button \nReleased";
        });
        camRightRotButton.onPointerOutObservable.add(()=> {
            camRightRotButtonOn = false;
            text.text = "";
        });
        UiPanel01.addControl(camRightRotButton);


        // 上段 カメラ高さ変更ボタン
        // Upper UI Camera height change button
        const camHeightButton = BABYLON.GUI.Button.CreateSimpleButton("heightBut", "Height");
        camHeightButton.paddingLeft = "10px";
        camHeightButton.width = "80px";
        camHeightButton.height = "50px";
        camHeightButton.cornerRadius = 5;
        camHeightButton.color = "white";
        camHeightButton.background = "black";
        camHeightButton.onPointerDownObservable.add(()=> {
            camera.position.y = camera.position.y + 2;
            if (camera.position.y > 15) {
                camera.position.y = 7;
            }
            text.text = "Camera Height Change Button \nPushed";
        });
        camHeightButton.onPointerUpObservable.add(()=> {
            text.text = "Camera Height Change Button \nReleased";
        });
        camHeightButton.onPointerOutObservable.add(()=> {
            text.text = "";
        });
        UiPanel01.addControl(camHeightButton);


        // 上段 カメラ距離変更ボタン
        // Upper UI Camera distance change button
        const camDistanceButton = BABYLON.GUI.Button.CreateSimpleButton("distanceBut", "Distance");
        camDistanceButton.paddingLeft = "10px";
        camDistanceButton.width = "80px";
        camDistanceButton.height = "50px";
        camDistanceButton.cornerRadius = 5;
        camDistanceButton.color = "white";
        camDistanceButton.background = "black";
        camDistanceButton.onPointerDownObservable.add(()=> {
            cameraDistance = cameraDistance + 2;
            if (cameraDistance > -8){
                cameraDistance = -20;
            }
            text.text = "Camera Dist. Change Button \nPushed";
        });
        camDistanceButton.onPointerUpObservable.add(()=> {
            text.text = "Camera Dist. Change Button \nReleased";
        });
        camDistanceButton.onPointerOutObservable.add(()=> {
            text.text = "";
        });
        UiPanel01.addControl(camDistanceButton);


        // 上段 カメラを初期状態にもどすボタン
        // Upper UI Button to return the camera to its initial state
        const camDefaultButton = BABYLON.GUI.Button.CreateSimpleButton("defaultBut", "Default");
        camDefaultButton.paddingLeft = "10px";
        camDefaultButton.width = "69px";
        camDefaultButton.height = "50px";
        camDefaultButton.cornerRadius = 5;
        camDefaultButton.color = "white";
        camDefaultButton.background = "black";
        camDefaultButton.onPointerDownObservable.add(()=> {

            camResetButtonOn = true;

            //camera.position.y  =  7;
            //targetRot = 0;
            //cameraDistance = -14;

            text.text = "Camera Reset Button \nPushed";

        });
        camDefaultButton.onPointerUpObservable.add(()=> {
            camResetButtonOn = false;
            text.text = "Camera Reset Button \nReleased";
        });
        camDefaultButton.onPointerOutObservable.add(()=> {
            camResetButtonOn = false;
            text.text = "";
        });
        UiPanel01.addControl(camDefaultButton);


        // ここから下段UIの設定
        // Lower UI settings from here

        // 情報表示用ラベル  ラベル設定後に直接advancedTextureに追加する
        // Indicator Label  Label part setting  Add directly to advancedTexture
        const label = new BABYLON.GUI.Rectangle("label");
        label.background = "#00ffff";
        label.height = "60px";
        label.alpha = 0.5;
        label.width = "300px";
        label.cornerRadius = 25;
        label.thickness = 1;
        //label2.linkOffsetY = 30;
        label.top = "5%";
        label.paddingLeft = "10px";
        label.paddingRight = "10px";
        advancedTexture.addControl(label);
        // Indicator label  Text part setting  Add to label
        const text = new BABYLON.GUI.TextBlock();
        text.text = "TEST";
        text.color = "black";
        text.fontSize = "20px";
        label.addControl(text);


        // 下段ボタンまとめ用パネル ここにボタンをまとめてからadvancedTextureに追加
        // Panel for all buttons  Put the buttons together here and then add them to advancedTexture
        const UiPanel = new BABYLON.GUI.StackPanel("horizontal");
        UiPanel.isVertical = false;
        UiPanel.top = "30%";
        UiPanel.width = "360px";
        UiPanel.height = "160px";
        UiPanel.fontSize = "14px";
        UiPanel.horizontalAlignment = BABYLON.GUI.Control.HORIZONTAL_ALIGNMENT_CENTER;
        UiPanel.verticalAlignment = BABYLON.GUI.Control.VERTICAL_ALIGNMENT_CENTER;
        advancedTexture.addControl(UiPanel);


        // 下段 左回転ボタン
        // Lower UI Left Rotation Button
        const leftRotButton = BABYLON.GUI.Button.CreateSimpleButton("leftRotBut", "leftRot");
        leftRotButton.paddingLeft = "10px";
        leftRotButton.width = "100px";
        leftRotButton.height = "50px";
        leftRotButton.cornerRadius = 5;
        leftRotButton.color = "white";
        leftRotButton.background = "black";
        leftRotButton.onPointerDownObservable.add(()=> {
            text.text = "Left Button \nPushed";
            isLeftRotBtnDwn = true;
        });
        leftRotButton.onPointerUpObservable.add(()=> {
            text.text = "Left Button \nReleased";
            isLeftRotBtnDwn = false;
        });
        leftRotButton.onPointerOutObservable.add(()=> {
            text.text = "";
            isLeftRotBtnDwn = false;
        });
        UiPanel.addControl(leftRotButton);


        // 下段 前進ボタン
        // Lower UI Forward Buttonn
        const forwardButton = BABYLON.GUI.Button.CreateSimpleButton("forwardBut", "forward");
        forwardButton.paddingLeft = "30px";
        forwardButton.paddingTop = "-50px";
        forwardButton.paddingBottom = "50px";
        forwardButton.paddingRight = "-20px";
        forwardButton.width = "100px";
        forwardButton.height = "50px";
        forwardButton.cornerRadius = 5;
        forwardButton.color = "white";
        forwardButton.background = "black";
        forwardButton.onPointerDownObservable.add(()=> {
            text.text = "Forward Button \nPushed";
            isForwardBtnDwn = true;
        });
        forwardButton.onPointerUpObservable.add(()=> {
            text.text = "Forward Button \nReleased";
            isForwardBtnDwn = false;
        });
        forwardButton.onPointerOutObservable.add(()=> {
            text.text = "";
            isForwardBtnDwn = false;
        });
        UiPanel.addControl(forwardButton);


        // 下段 後退ボタン
        // Lower UI Backward Buttonn
        const backwardButton = BABYLON.GUI.Button.CreateSimpleButton("backwardBut", "backward");
        backwardButton.paddingLeft = "-70px";
        backwardButton.paddingTop = "50px";
        backwardButton.paddingBottom = "-50px";
        backwardButton.paddingRight = "30px";
        backwardButton.width = "50px";
        backwardButton.height = "50px";
        backwardButton.cornerRadius = 5;
        backwardButton.color = "white";
        backwardButton.background = "black";
        backwardButton.onPointerDownObservable.add(()=> {
            text.text = "Backward Button \nPushed";
            isBackwardBtnDwn = true;
        });
        backwardButton.onPointerUpObservable.add(()=> {
            text.text = "Backward Button \nReleased";
            isBackwardBtnDwn = false;
        });
        backwardButton.onPointerOutObservable.add(()=> {
            text.text = "";
            isBackwardBtnDwn = false;
        });
        UiPanel.addControl(backwardButton);


        // 下段 右回転ボタン
        // Lower UI Right Rotation Button
        const rightRotButton = BABYLON.GUI.Button.CreateSimpleButton("rightRotButt", "rightRot");
        rightRotButton.paddingRight = "10px";
        rightRotButton.width = "100px";
        rightRotButton.height = "50px";
        rightRotButton.cornerRadius = 5;
        rightRotButton.color = "white";
        rightRotButton.background = "black";
        rightRotButton.onPointerDownObservable.add(()=> {
            text.text = "Right Button \nPushed";
            isRightRotBtnDwn = true;
        });
        rightRotButton.onPointerUpObservable.add(()=> {
            text.text = "Right Button \nReleased";
            isRightRotBtnDwn = false;
        });
        rightRotButton.onPointerOutObservable.add(()=> {
            text.text = "";
            isRightRotBtnDwn = false;
        });
        UiPanel.addControl(rightRotButton);


        return scene;
    }


    createScene().then((scene) => {

        engine.runRenderLoop(function () {

            if (scene) {

                // 左回転ボタン押下時 Boxを左回転
                // Left Rotation button is pressed: Box is rotated to the left.
                if(isLeftRotBtnDwn) {

                    // Left rotation
                    boxAggregate.body.setAngularVelocity(new BABYLON.Vector3(0, -0.5, 0));
                }

                // 前進ボタン押下時 Boxを前進させる
                // Forward button is pressed: Box is moved forward.
                if(isForwardBtnDwn) {

                    // Forward
                    let directionVec = new BABYLON.Vector3(0, 0, 1);

                    directionVec = directionVec.applyRotationQuaternion(box.rotationQuaternion);

                    directionVec = directionVec.multiplyByFloats(2.5, 0, 2.5);

                    boxAggregate.body.setLinearVelocity(directionVec);
                }

                // 後退ボタン押下時 Boxを後退させる
                // Backward button is pressed: Box is moved backward.
                if(isBackwardBtnDwn) {

                    // Backward
                    let directionVec = new BABYLON.Vector3(0, 0, -1);

                    directionVec = directionVec.applyRotationQuaternion(box.rotationQuaternion);

                    directionVec = directionVec.multiplyByFloats(2.5, 0, 2.5);

                    boxAggregate.body.setLinearVelocity(directionVec);
                }

                // 右回転ボタン押下時 Boxを右回転
                // Right Rotation button is pressed: Box is rotated to the Right.
                if(isRightRotBtnDwn) {

                    boxAggregate.body.setAngularVelocity(new BABYLON.Vector3(0, 0.5, 0));
                }


                // ★カメラ操作の計算・設定 Start ★
                // カメラ左回転ボタン押下時
                if ( camLeftRotButtonOn ) {
                    targetRot = targetRot + 2;
                // カメラ右回転ボタン押下時
                } else if ( camRightRotButtonOn ) {
                    targetRot = targetRot - 2;
                }


                // 「Default」ボタン押下時処理
                //
                // カメラを操作Boxの背後(真後ろ)に配置しなおす
                // 操作Box&カメラの関連ベクトル&クォータニオンによりカメラ位置計算・設定後
                // 操作Boxのクォータニオン → 弧度法 → 度数法 と変換して、以降のカメラ角度設定ためのtargetRotの値をセット
                //
                // テキトーな理解でのテキトーコード作成のためこの方法での位置計算が一般的かは疑わしい。。。
                if ( camResetButtonOn ) {

                    // カメラ設定
                    // カメラの位置をベクトルとクォータニオンで設定

                    // Z軸方向のベクトルを作成(進行方向のベクトルを作成)
                    let directionVec = new BABYLON.Vector3( 0, 0, 1 );

                    // Z軸方向のベクトル(進行方向のベクトル)にカメラの角度の元となるクォータニオンを適応
                    directionVec.applyRotationQuaternion(box.rotationQuaternion);

                    // カメラの距離をベクトル的に掛け算
                    directionVec = directionVec.multiplyByFloats( DEFFAULT_CAMERA_DIST, 0, DEFFAULT_CAMERA_DIST );


                    // .negate()関数を使用してカメラの位置が操作Boxの背後となるように設定
                    let cameraDirection = directionVec.clone().negate();


                    // 操作Boxの位置をベクトルで取得
                    let opBoxPosition = new BABYLON.Vector3( box.position.x, box.position.y, box.position.z );


                    // カメラの高さを表すベクトルを取得
                    let camHeightVec = new BABYLON.Vector3( 0, DEFFAULT_CAMERA_HEIGHT, 0 );


                    // 操作Boxの位置ベクトル + カメラの(角度を含む)位置ベクトル + カメラの高さベクトル
                    // → 現在のカメラの位置ベクトルを演算
                    const cameraPosition =  cameraDirection.add(opBoxPosition).add(camHeightVec);

                    // カメラの位置ベクトルをカメラに設定
                    camera.position = cameraPosition;


                    // クォータニオンから角度への変換について参考にさせていただいたサイト
                    // Rotation Quaternions
                    // https://doc.babylonjs.com/features/featuresDeepDive/mesh/transforms/center_origin/rotation_quaternions
                    // Class Quaternion
                    // https://doc.babylonjs.com/typedoc/classes/BABYLON.Quaternion
                    // Class Angle
                    // https://doc.babylonjs.com/typedoc/classes/BABYLON.Angle


                    // カメラの回転操作には度数法の角度を使用しているので
                    // まず、操作Boxの向く方向(=カメラの向く方向)のクォータニオンを取得して
                    // クォータニオン→ラジアン(オイラー角)→角度(度数法)と変換
                    // その角度をカメラ操作用の変数にセット

                    // 以下はエラーが出た camera.rotationQuaternion は undefined?
                    //let cloneCamPosQuat = camera.rotationQuaternion.clone();

                    let cloneCamPosQuat = box.rotationQuaternion.clone();

                    let tempEuler = cloneCamPosQuat.toEulerAngles();

                    let tempAngle = new BABYLON.Angle(tempEuler.y);

                    targetRot = tempAngle.degrees();


                }


                // rot += 0.5; // 毎フレーム角度を0.5度ずつ足していく
                // イージングの公式を用いて滑らかにする
                // 値 += (目標値 - 現在の値) * 減速値
                rot += (targetRot - rot) * 0.05;

                // 角度に応じてカメラの位置を設定
                // Set camera position according to angle
                camera.position.x = box.position.x + cameraDistance * Math.sin(rot * Math.PI / 180);
                camera.position.z = box.position.z + cameraDistance * Math.cos(rot * Math.PI / 180);


                scene.render();

            }
        });
    });

    // Watch for browser/canvas resize events
    window.addEventListener("resize", () => {
        engine.resize();
    });

}

// Start processing after all DOM elements have been loaded
window.addEventListener("DOMContentLoaded", main);
カメラの機能は基本的な部分をこちらのサイトを参考に作成して(←Three.jsをはじめた頃から参考にしてます)、そこから長々と修正を行って作成しました。
JavaScript内での、カメラ操作の処理は以下コードで行っています。 そのほとんどが、カメラを操作Boxの背後(真後ろ)にもどすための
if ( camResetButtonOn )
内での処理となっています。
// ★カメラ操作の計算・設定 Start ★
// カメラ左回転ボタン押下時
if ( camLeftRotButtonOn ) {
    targetRot = targetRot + 2;
// カメラ右回転ボタン押下時
} else if ( camRightRotButtonOn ) {
    targetRot = targetRot - 2;
}


// 「Default」ボタン押下時処理
//
// カメラを操作Boxの背後(真後ろ)に配置しなおす
// 操作Box&カメラの関連ベクトル&クォータニオンによりカメラ位置計算・設定後
// 操作Boxのクォータニオン → 弧度法 → 度数法 と変換して、以降のカメラ角度設定ためのtargetRotの値をセット
//
// テキトーな理解でのテキトーコード作成のためこの方法での位置計算が一般的かは疑わしい。。。
if ( camResetButtonOn ) {

    // カメラ設定
    // カメラの位置をベクトルとクォータニオンで設定

    // Z軸方向のベクトルを作成(進行方向のベクトルを作成)
    let directionVec = new BABYLON.Vector3( 0, 0, 1 );

    // Z軸方向のベクトル(進行方向のベクトル)にカメラの角度の元となるクォータニオンを適応
    directionVec.applyRotationQuaternion(box.rotationQuaternion);

    // カメラの距離をベクトル的に掛け算
    directionVec = directionVec.multiplyByFloats( DEFFAULT_CAMERA_DIST, 0, DEFFAULT_CAMERA_DIST );


    // .negate()関数を使用してカメラの位置が操作Boxの背後となるように設定
    let cameraDirection = directionVec.clone().negate();


    // 操作Boxの位置をベクトルで取得
    let opBoxPosition = new BABYLON.Vector3( box.position.x, box.position.y, box.position.z );


    // カメラの高さを表すベクトルを取得
    let camHeightVec = new BABYLON.Vector3( 0, DEFFAULT_CAMERA_HEIGHT, 0 );


    // 操作Boxの位置ベクトル + カメラの(角度を含む)位置ベクトル + カメラの高さベクトル
    // → 現在のカメラの位置ベクトルを演算
    const cameraPosition =  cameraDirection.add(opBoxPosition).add(camHeightVec);

    // カメラの位置ベクトルをカメラに設定
    camera.position = cameraPosition;


    // クォータニオンから角度への変換について参考にさせていただいたサイト
    // Rotation Quaternions
    // https://doc.babylonjs.com/features/featuresDeepDive/mesh/transforms/center_origin/rotation_quaternions
    // Class Quaternion
    // https://doc.babylonjs.com/typedoc/classes/BABYLON.Quaternion
    // Class Angle
    // https://doc.babylonjs.com/typedoc/classes/BABYLON.Angle


    // カメラの回転操作には度数法の角度を使用しているので
    // まず、操作Boxの向く方向(=カメラの向く方向)のクォータニオンを取得して
    // クォータニオン→ラジアン(オイラー角)→角度(度数法)と変換
    // その角度をカメラ操作用の変数にセット

    // 以下はエラーが出た camera.rotationQuaternion は undefined?
    //let cloneCamPosQuat = camera.rotationQuaternion.clone();

    let cloneCamPosQuat = box.rotationQuaternion.clone();

    let tempEuler = cloneCamPosQuat.toEulerAngles();

    let tempAngle = new BABYLON.Angle(tempEuler.y);

    targetRot = tempAngle.degrees();


}


// rot += 0.5; // 毎フレーム角度を0.5度ずつ足していく
// イージングの公式を用いて滑らかにする
// 値 += (目標値 - 現在の値) * 減速値
rot += (targetRot - rot) * 0.05;

// 角度に応じてカメラの位置を設定
// Set camera position according to angle
camera.position.x = box.position.x + cameraDistance * Math.sin(rot * Math.PI / 180);
camera.position.z = box.position.z + cameraDistance * Math.cos(rot * Math.PI / 180);
カメラを操作Boxの真後ろに戻す処理は、カメラの位置・rotによる角度を指定するため、まずカメラの位置と方向をベクトルとクォータニオンから計算、カメラ位置を設定、カメラの方向を表すクォータニオン→ラジアン→角度と変換し、角度rotの計算に使うTargetRotに設定しています。
さらに細かい設定・計算については、雑かもしれませんがコード内のコメントに書いています。
今回のThree.jsからBabylon.jsへの移植では、(Three.jsには必要かもしれませんが)コードの余計な部分がいくらか削れたような気がします。
参考にさせていただいたサイト&コード
すでに上記の文章中にいくつかのリンク先が出てきていますが、改めてリストしてみます。 最初は自分のnoteとコードになります。
まず最初に、それらしいカメラの操作の処理を実装できたコードです。
Three.js r146 + cannon-es v0.20.0 Test10 Physics Engine & Camera Rotation
になります。
そのコードについての説明などを書いたnoteが
Three.js r146 と cannon-es v0.20.0 で物理エンジンとカメラ回転のテスト
になります。
さらにそこからいろいろ(パラメータの指定的に?)逆っぽくなっているカメラ操作の処理を修正したコードが、
Three.js r149 Buffer Geometry Test18 Textured Heightfield Test08
から修正して作成した
Three.js r149 Buffer Geometry Test19 Textured Heightfield Test09
のコードとなります。 Test18とTest19の最初のカメラが設定される状態を見比べると、「パラメータの指定的に逆っぽくなっているカメラ操作の処理」がなんとなくわかるかもしれません。 ちなみにTest18の状態のままの、最初にカメラ視点がやけにグルグルまわる動き、自分はわりと好きでしたw。
そのあたりのことについて書いたnoteが
Three.js r149 で Buffer Geometry つかってみるテストその2
になります。 ↑このnoteの最後のほうにコードについての説明と、コードそのものを貼り付けています。
Babylon.jsでのクォータニオンから角度への変換については、Babylon.js本家サイトの以下のページを参考にさせていただきました。
Rotation Quaternions