Babylon.js v6.3.1 Practiceめも⑦ (失敗)HeightMapと物理演算
前回からのつづきです。 Babylon.jsのHeightMapと物理演算との連携を試してみました。 結果、失敗です。。。 いつかまた再トライするときのための記録として、その過程とともに残しておきます。。。 コードは、最終的には想定どおりに動かず失敗だった&かなり長くなってきたので、(失敗ですが)最終成果物のPractice#62のコードだけを載せています。
HeightMapと物理演算の連携は、HeightMapによる地形に物理演算が反映されたり、されなかったりして、コードの実行が安定しないので失敗としました。 asyncをどこかにうまく設定すればHeightMap & 物理演算をうまく安定的に実行できたのかもしれませんが、自分にはわかりませんでした。
他にHeightMap & 物理演算による地形は、(他のオブジェクトでは固定された状態となる)massの値を0に設定しても、massの値を0以外に設定した操作Boxや赤いSphereが乗っかるとその重さで傾いたりしていました。 仕様なのか?、バグなのか?、自分のコードの問題なのか?、切り分けられませんでした。 なので、最後のPractice#62のコードでは物理演算によるHeightMapとは別に、groundとその物理演算による平面を作成して、そこにHeightMapをひっかけるようにして、HeightMap地形が傾かないようにムリヤリ支えていますw。
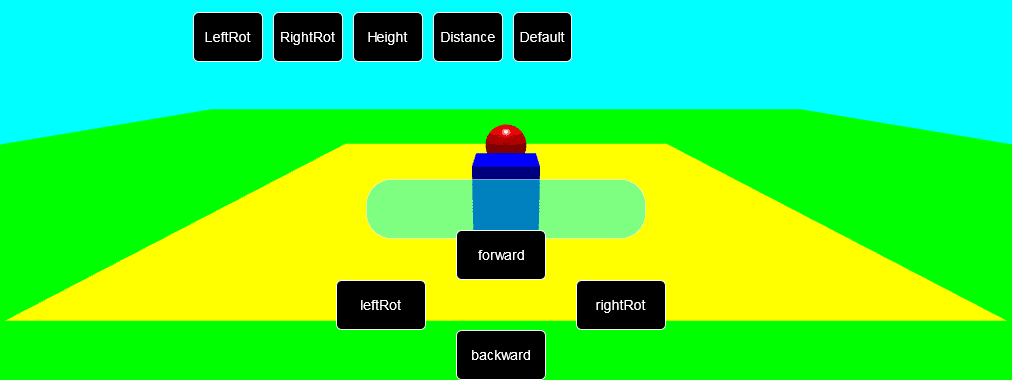
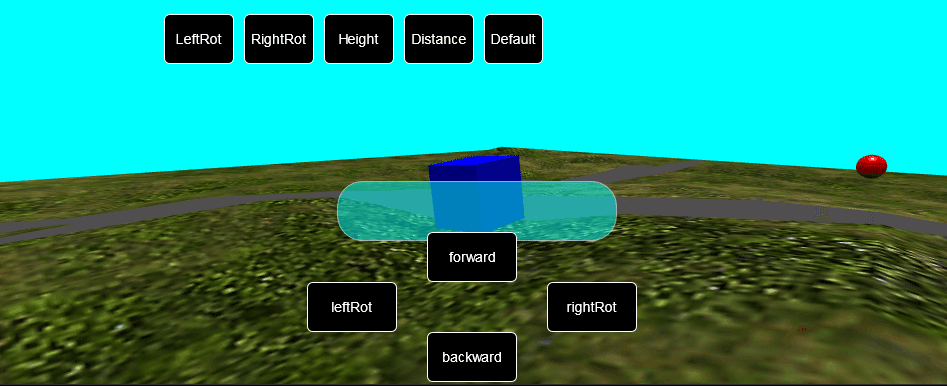
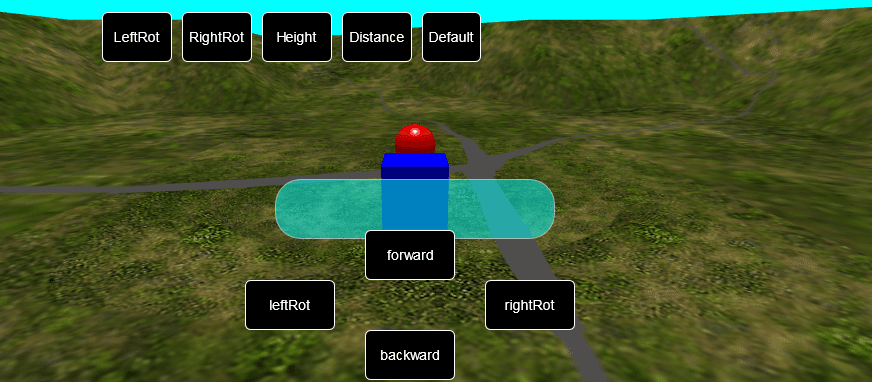
以上から、最後のPractice#62のコードでは、うまくHeightMapと物理演算が読み込まれて反映されればデコボコ地面、そうではなくgroundのほうが反映されれば滑らかな地面、となりますw。
これらの経緯から、今後使うならHeightMapはとりあえず背景として使うぐらいしか思いつかなかったですw。 かわりに最後のPractice#62のコードで追加したキーボードによる操作などは、まぁまぁうまくいったかと思います。 画面ボタンか、PCキーボードの上下左右(操作Box)、ASDWR(カメラ)、ZSpace(ジャンプ)でBoxを操作できます。
ここまでの結果で、Three.jsでも、Babylon.jsでも、HeightMapの操作は自分にはまだまだ難しい、との知見を得るのに大いに成功しましたw。
コーディングは前回までのBabylon.jsコーディングと同じようにHTML、CSS、JavaScriptで行っています(Typescript使っていません)。 目次の各項目では、コードのタイトル文字列をクリックするとコードとその実行結果が見れるCodePenのページを開き、サムネイル画像をクリックすると実行結果をフルスクリーンで表示するCodePenのページを開きます。
現在CodePenに投稿しているBabylon.js v6.3.1のコードの一覧はCodePenのCollection機能で作成した「Babylon.js v6.3.1 Practice」で見ることができます。
最後のJavaScriptコードの貼り付けがかなり長くなったのと、いつもの「参考にさせていただいたサイト&コード」も文章長くなったので、今回は「参考に…」も移動用に目次に加えました。
Babylon.js v6.3.1 Practice#59 HeightMap with Physics01
Babylon.js v6.3.1 Practice#59 HeightMap with Physics01

HTML 省略
CSS 省略
JavaScript 省略
Babylon.js v6.3.1 Practice#60 HeightMap with Physics02
Babylon.js v6.3.1 Practice#60 HeightMap with Physics02

HTML 省略
CSS 省略
JavaScript 省略
Babylon.js v6.3.1 Practice#61 HeightMap with Physics03
Babylon.js v6.3.1 Practice#61 HeightMap with Physics03

HTML 省略
CSS 省略
JavaScript 省略
Babylon.js v6.3.1 Practice#62 HeightMap with Physics04(failure)
Babylon.js v6.3.1 Practice#62 HeightMap with Physics04(failure)

結局、HeightMapと物理演算の連携を安定させることができなかった最終成果物コードです。 asyncを使いこなして設定等すれば、うまく連携できるのでしょうか?
かわりにキーボードによる操作の設定などは、まぁまぁうまくいったかと思います。 画面ボタンか、PCキーボードの上下左右(操作Box)、ASDWR(カメラ)、ZSpace(ジャンプ)でBoxを操作できます。 おまけに、(文字列の表示がされるだけですが)Execボタンや、キーボードのXボタンも「決定ボタン」的なものとして作成してみました。 ちなみに、ボタンのレイアウトの指定は想像していたよりかなり難しかったですw。
HTML
<head>
    <meta http-equiv="Content-Type" content="text/html; charset=utf-8"/>
    <title>Babylon Template</title>

    <!-- <script src="https://cdnjs.cloudflare.com/ajax/libs/babylonjs/6.3.1/babylon.js"></script> -->
    <!-- <script src="https://cdnjs.cloudflare.com/ajax/libs/babylonjs/6.3.1/babylon.min.js"></script> -->


    <!-- <script src="https://cdn.jsdelivr.net/npm/babylonjs@6.3.1/babylon.js"></script> -->
    <script src="https://cdn.jsdelivr.net/npm/babylonjs@6.3.1/babylon.min.js"></script>

    <!-- <script src="https://unpkg.com/babylonjs@6.3.1/babylon.js"></script> -->


    <!-- <script src="https://cdn.jsdelivr.net/npm/babylonjs-loaders@6.3.1/babylonjs.loaders.min.js"></script> -->
    <!-- <script src="https://unpkg.com/babylonjs-loaders@6.3.1/babylonjs.loaders.min.js"></script> -->


    <script src="https://cdn.jsdelivr.net/npm/babylonjs-gui@6.3.1/babylon.gui.js"></script>
    <!-- <script src="https://unpkg.com/babylonjs-gui@6.3.1/babylon.gui.js"></script> -->


<script src="https://cdn.babylonjs.com/havok/HavokPhysics_umd.js"></script>


    <script src="https://code.jquery.com/pep/0.4.3/pep.js"></script>

</head>

<body>

    <canvas id="renderCanvas" touch-action="none"></canvas> <!--
    touch-action="none" for best results from PEP -->

</body>
CSS
html, body {
    overflow: hidden;
    width   : 100%;
    height  : 100%;
    margin  : 0;
    padding : 0;
}

#renderCanvas {
    width   : 100%;
    height  : 100%;
    touch-action: none;
}
JavaScript(長いです)
main = () => {
// カメラの操作対象3Dオブジェクトからの距離に関する変数・定数の設定
// 距離の初期値(絶対値)
const DEFFAULT_CAMERA_DIST = 14;
// 距離の計算単位
const CAMERA_DIST_CALC_UNIT = 2;
// カメラの高さに関する変数・定数の設定
// 高さの初期値
const DEFFAULT_CAMERA_HEIGHT = 7;
// 高さの計算単位
const CAMERA_HEIGHT_CALC_UNIT = 2;
// PCキーボードの←↑↓→ボタン(左上下右の矢印ボタン)の押下状態を保持
let isLeftRotBtnDwn = false;
let isForwardBtnDwn = false;
let isBackwardBtnDwn = false;
let isRightRotBtnDwn = false;
// 「left」「forward」「backward」「right」ボタンの押下状態を保持
// variables to keep sates of the "left", "forward", "backward", and "right" buttons
let isLeftArrowBtnDwn = false;
let isUpArrowBtnBtnDwn = false;
let isDownArrowBtnDwn = false;
let isRightArrowBtnDwn = false;
// カメラ回転用
// For camera rotation
let camLeftRotButtonOn = false;
let camRightRotButtonOn = false;
let camResetButtonOn = false;
let rot = 0; // 角度 Angle
let targetRot = 0;
let cameraDistance = -14;
let camera;
let box;
let boxAggregate;
const canvas = document.getElementById("renderCanvas"); // Get the canvas element
const engine = new BABYLON.Engine(canvas, true); // Generate the BABYLON 3D engine
let largeGround;
let scene;
const createScene = async () => {
//const scene = new BABYLON.Scene(engine);
scene = new BABYLON.Scene(engine);
scene.clearColor = new BABYLON.Color3(0, 1, 1);
// create a FreeCamera, and set its position to (x:0, y:5, z:-10)
camera = new BABYLON.FreeCamera("camera1", new BABYLON.Vector3(0, 5,-10), scene);
// target the camera to scene origin
camera.setTarget(BABYLON.Vector3.Zero());
// attach the camera to the canvas
//camera.attachControl(canvas, true);
camera.detachControl();
// create a basic light, aiming 0,1,0 - meaning, to the sky
const light = new BABYLON.HemisphericLight('light1', new BABYLON.Vector3(0,1,0), scene);
// create built-in 'sphere' shape.
const sphere = BABYLON.MeshBuilder.CreateSphere("sphere", { diameter: 2, segments: 32 }, scene);
// move the sphere
sphere.position.y = 4;
sphere.position.z = 4;
// set sphere material
let sphereMaterial = new BABYLON.StandardMaterial("box material", scene);
sphere.material = sphereMaterial;
sphere.material.diffuseColor = BABYLON.Color3.Red();
// create built-in 'ground' shape.
const ground = BABYLON.MeshBuilder.CreateGround("ground", { width: 15, height: 15 }, scene);
// set ground material
let groundMaterial = new BABYLON.StandardMaterial("box material", scene);
ground.material = groundMaterial;
ground.material.diffuseColor = BABYLON.Color3.Yellow();
ground.position.y = 1.0;
ground.material.alpha = 0.9;
const heightMapKeeper01 = BABYLON.MeshBuilder.CreateGround("heightMapKeeper01", { width: 150, height: 150 }, scene);
// set material
let heightMapKeeper01Mat = new BABYLON.StandardMaterial("heightMapKeeper01 material", scene);
heightMapKeeper01.material = heightMapKeeper01Mat;
heightMapKeeper01.material.diffuseColor = BABYLON.Color3.Red();
heightMapKeeper01.position.y = -0.02;
heightMapKeeper01.material.alpha = 0.9;
// create built-in 'box' shape
box = BABYLON.MeshBuilder.CreateBox("box", {height: 2, width:2, depth: 2});
// move the box
box.position.y = 5;
box.position.z = -4;
// set box material
let boxMaterial = new BABYLON.StandardMaterial("box material", scene);
box.material = boxMaterial;
box.material.diffuseColor = BABYLON.Color3.Blue();
// boxオブジェクトをカメラのターゲットとして設定
// set box object as camera target
camera.lockedTarget = box; //version 2.5 onwards
//
// 5-01: 遠くの丘 (Distant Hills)
// https://zenn.dev/chomado/books/babylonjs-tutorial-ja/viewer/5-01
//
// Babylon.js tutorial : 5-01b-add-texture
// https://codepen.io/chomado/pen/KKQPeLP
//
// 村の地面をつくる
const smallGroundMat = new BABYLON.StandardMaterial("smallGroundMat");
smallGroundMat.diffuseTexture = new BABYLON.Texture("https://assets.babylonjs.com/environments/villagegreen.png");
smallGroundMat.diffuseTexture.hasAlpha = true;
const smallGround = BABYLON.MeshBuilder.CreateGround("smallGround", {width:24, height:24});
smallGround.material = smallGroundMat;
// 大きな地面 (全体の地面)
let largeGroundMat = new BABYLON.StandardMaterial("largeGroundMat", scene);
largeGroundMat.diffuseTexture = new BABYLON.Texture("https://assets.babylonjs.com/environments/valleygrass.png");
largeGround = BABYLON.MeshBuilder.CreateGroundFromHeightMap("largeGround", "https://assets.babylonjs.com/environments/villageheightmap.png", {width:150, height :150, subdivisions: 10, maxHeight: 10});
largeGround.material = largeGroundMat;
largeGround.position.y = - 0.01;
// initialize plugin
const havokInstance = await HavokPhysics();
// pass the engine to the plugin
const hk = new BABYLON.HavokPlugin(true, havokInstance);
// enable physics in the scene with a gravity
scene.enablePhysics(new BABYLON.Vector3(0, -9.8, 0), hk);
// async関数内でHeightMapのPhysics関連処理を初期化することで、HeightMap関連の物理演算の準備ができるまで待つようにする
// →機能せず→確実にHeightMapのPhysicsを機能させる方法わからず→とりあえずHeightMapは背景に使うぐらいしか使用法わからず
//initHeightMapPhysics().then(() => {
await initHeightMapPhysics();
// Create a sphere shape and the associated body by PhysicsAggregate
const sphereAggregate = new BABYLON.PhysicsAggregate(sphere, BABYLON.PhysicsShapeType.SPHERE, { mass: 1, restitution: 0.75 }, scene);
// Create a box shape and the associated body by PhysicsAggregate
const groundAggregate = new BABYLON.PhysicsAggregate(ground, BABYLON.PhysicsShapeType.BOX, { mass: 0 }, scene);
groundAggregate.shape.material = { friction: 0.7, restitution: 0.01 };
// Create a box shape and the associated body by PhysicsAggregate
const heightMapKeeper01Aggr = new BABYLON.PhysicsAggregate(heightMapKeeper01, BABYLON.PhysicsShapeType.BOX, { mass: 0 }, scene);
heightMapKeeper01Aggr.shape.material = { friction: 0.7, restitution: 0.01 };
// Create a box shape and the associated body by PhysicsAggregate
boxAggregate = new BABYLON.PhysicsAggregate(box, BABYLON.PhysicsShapeType.BOX, { mass: 1.75, rotation: box.rotationQuaternion }, scene);
boxAggregate.shape.material = { friction: 0.7, restitution: 0.01 };
//});
// UI
const advancedTexture = BABYLON.GUI.AdvancedDynamicTexture.CreateFullscreenUI("UI");
// ここから上段UIの設定
// Upper UI settings from here
// 上段ボタンまとめ用パネル ここにボタンをまとめてからadvancedTextureに追加
// Upper Button Summary Panel: Add buttons to advancedTexture after collecting them here.
const UiPanel01 = new BABYLON.GUI.StackPanel("horizontal");
UiPanel01.isVertical = false;
UiPanel01.top = "-40%";
UiPanel01.left = "-9%";
UiPanel01.width = "400px";
UiPanel01.height = "160px";
UiPanel01.fontSize = "14px";
UiPanel01.horizontalAlignment = BABYLON.GUI.Control.HORIZONTAL_ALIGNMENT_CENTER;
UiPanel01.verticalAlignment = BABYLON.GUI.Control.VERTICAL_ALIGNMENT_CENTER;
advancedTexture.addControl(UiPanel01);
// 上段 カメラ左回転ボタン
// Upper UI Camera left rotate button
const camLeftRotButton = BABYLON.GUI.Button.CreateSimpleButton("leftRotBut", "LeftRot");
camLeftRotButton.paddingLeft = "10px";
camLeftRotButton.width = "80px";
camLeftRotButton.height = "50px";
camLeftRotButton.cornerRadius = 5;
camLeftRotButton.color = "white";
camLeftRotButton.background = "black";
camLeftRotButton.onPointerDownObservable.add(()=> {
camLeftRotButtonOn = true;
text.text = "Camera Left Rotation Button \nPushed";
});
camLeftRotButton.onPointerUpObservable.add(()=> {
camLeftRotButtonOn = false;
text.text = "Camera Left Rotation Button \nReleased";
});
camLeftRotButton.onPointerOutObservable.add(()=> {
camLeftRotButtonOn = false;
text.text = "";
});
UiPanel01.addControl(camLeftRotButton);
// 上段 カメラ右回転ボタン
// Upper UI Camera right rotate button
const camRightRotButton = BABYLON.GUI.Button.CreateSimpleButton("rightRotBut", "RightRot");
camRightRotButton.paddingLeft = "10px";
camRightRotButton.width = "80px";
camRightRotButton.height = "50px";
camRightRotButton.cornerRadius = 5;
camRightRotButton.color = "white";
camRightRotButton.background = "black";
camRightRotButton.onPointerDownObservable.add(()=> {
camRightRotButtonOn = true;
text.text = "Camera Right Rotation Button \nPushed";
});
camRightRotButton.onPointerUpObservable.add(()=> {
camRightRotButtonOn = false;
text.text = "Camera Right Rotation Button \nReleased";
});
camRightRotButton.onPointerOutObservable.add(()=> {
camRightRotButtonOn = false;
text.text = "";
});
UiPanel01.addControl(camRightRotButton);
// 上段 カメラ高さ変更ボタン
// Upper UI Camera height change button
const camHeightButton = BABYLON.GUI.Button.CreateSimpleButton("heightBut", "Height");
camHeightButton.paddingLeft = "10px";
camHeightButton.width = "80px";
camHeightButton.height = "50px";
camHeightButton.cornerRadius = 5;
camHeightButton.color = "white";
camHeightButton.background = "black";
camHeightButton.onPointerDownObservable.add(()=> {
camera.position.y = camera.position.y + CAMERA_HEIGHT_CALC_UNIT;
if (camera.position.y > 15) {
camera.position.y = 7;
}
text.text = "Camera Height Change Button \nPushed";
});
camHeightButton.onPointerUpObservable.add(()=> {
text.text = "Camera Height Change Button \nReleased";
});
camHeightButton.onPointerOutObservable.add(()=> {
text.text = "";
});
UiPanel01.addControl(camHeightButton);
// 上段 カメラ距離変更ボタン
// Upper UI Camera distance change button
const camDistanceButton = BABYLON.GUI.Button.CreateSimpleButton("distanceBut", "Distance");
camDistanceButton.paddingLeft = "10px";
camDistanceButton.width = "80px";
camDistanceButton.height = "50px";
camDistanceButton.cornerRadius = 5;
camDistanceButton.color = "white";
camDistanceButton.background = "black";
camDistanceButton.onPointerDownObservable.add(()=> {
cameraDistance = cameraDistance + CAMERA_DIST_CALC_UNIT;
if (cameraDistance > -8){
cameraDistance = -20;
}
text.text = "Camera Dist. Change Button \nPushed";
});
camDistanceButton.onPointerUpObservable.add(()=> {
text.text = "Camera Dist. Change Button \nReleased";
});
camDistanceButton.onPointerOutObservable.add(()=> {
text.text = "";
});
UiPanel01.addControl(camDistanceButton);
// 上段 カメラを初期状態にもどすボタン
// Upper UI Button to return the camera to its initial state
const camDefaultButton = BABYLON.GUI.Button.CreateSimpleButton("defaultBut", "Default");
camDefaultButton.paddingLeft = "10px";
camDefaultButton.width = "69px";
camDefaultButton.height = "50px";
camDefaultButton.cornerRadius = 5;
camDefaultButton.color = "white";
camDefaultButton.background = "black";
camDefaultButton.onPointerDownObservable.add(()=> {
camResetButtonOn = true;
//camera.position.y = 7;
//targetRot = 0;
//cameraDistance = -14;
text.text = "Camera Reset Button \nPushed";
});
camDefaultButton.onPointerUpObservable.add(()=> {
camResetButtonOn = false;
text.text = "Camera Reset Button \nReleased";
});
camDefaultButton.onPointerOutObservable.add(()=> {
camResetButtonOn = false;
text.text = "";
});
UiPanel01.addControl(camDefaultButton);
// ここから下段UIの設定
// Lower UI settings from here
// 情報表示用ラベル ラベル設定後に直接advancedTextureに追加する
// Indicator Label Label part setting Add directly to advancedTexture
const label = new BABYLON.GUI.Rectangle("label");
label.background = "#00ffff";
label.height = "60px";
label.alpha = 0.5;
label.width = "300px";
label.cornerRadius = 25;
label.thickness = 1;
//label2.linkOffsetY = 30;
label.top = "5%";
label.paddingLeft = "10px";
label.paddingRight = "10px";
advancedTexture.addControl(label);
// Indicator label Text part setting Add to label
const text = new BABYLON.GUI.TextBlock();
text.text = "TEST";
text.color = "black";
text.fontSize = "20px";
label.addControl(text);
// 下段ボタンまとめ用パネル ここにボタンをまとめてからadvancedTextureに追加
// Panel for all buttons Put the buttons together here and then add them to advancedTexture
const UiPanel = new BABYLON.GUI.StackPanel("horizontal");
UiPanel.isVertical = false;
UiPanel.top = "30%";
UiPanel.width = "500px";
UiPanel.height = "160px";
UiPanel.fontSize = "14px";
UiPanel.horizontalAlignment = BABYLON.GUI.Control.HORIZONTAL_ALIGNMENT_CENTER;
UiPanel.verticalAlignment = BABYLON.GUI.Control.VERTICAL_ALIGNMENT_CENTER;
advancedTexture.addControl(UiPanel);
// 下段 左回転ボタン
// Lower UI Left Rotation Button
const leftRotButton = BABYLON.GUI.Button.CreateSimpleButton("leftRotBut", "leftRot");
leftRotButton.paddingLeft = "10px";
leftRotButton.width = "100px";
leftRotButton.height = "40px";
leftRotButton.cornerRadius = 5;
leftRotButton.color = "white";
leftRotButton.background = "black";
leftRotButton.onPointerDownObservable.add(()=> {
text.text = "Left Button \nPushed";
isLeftRotBtnDwn = true;
});
leftRotButton.onPointerUpObservable.add(()=> {
text.text = "Left Button \nReleased";
isLeftRotBtnDwn = false;
});
leftRotButton.onPointerOutObservable.add(()=> {
text.text = "";
isLeftRotBtnDwn = false;
});
UiPanel.addControl(leftRotButton);
// 下段 前進ボタン
// Lower UI Forward Buttonn
const forwardButton = BABYLON.GUI.Button.CreateSimpleButton("forwardBut", "forward");
forwardButton.paddingLeft = "30px";
forwardButton.paddingTop = "-50px";
forwardButton.paddingBottom = "50px";
forwardButton.paddingRight = "-20px";
forwardButton.width = "100px";
forwardButton.height = "40px";
forwardButton.cornerRadius = 5;
forwardButton.color = "white";
forwardButton.background = "black";
forwardButton.onPointerDownObservable.add(()=> {
text.text = "Forward Button \nPushed";
isForwardBtnDwn = true;
});
forwardButton.onPointerUpObservable.add(()=> {
text.text = "Forward Button \nReleased";
isForwardBtnDwn = false;
});
forwardButton.onPointerOutObservable.add(()=> {
text.text = "";
isForwardBtnDwn = false;
});
UiPanel.addControl(forwardButton);
// 下段 後退ボタン
// Lower UI Backward Buttonn
const backwardButton = BABYLON.GUI.Button.CreateSimpleButton("backwardBut", "backward");
backwardButton.paddingLeft = "-70px";
backwardButton.paddingTop = "50px";
backwardButton.paddingBottom = "-50px";
backwardButton.paddingRight = "30px";
backwardButton.width = "50px";
backwardButton.height = "40px";
backwardButton.cornerRadius = 5;
backwardButton.color = "white";
backwardButton.background = "black";
backwardButton.onPointerDownObservable.add(()=> {
text.text = "Backward Button \nPushed";
isBackwardBtnDwn = true;
});
backwardButton.onPointerUpObservable.add(()=> {
text.text = "Backward Button \nReleased";
isBackwardBtnDwn = false;
});
backwardButton.onPointerOutObservable.add(()=> {
text.text = "";
isBackwardBtnDwn = false;
});
UiPanel.addControl(backwardButton);
// 下段 右回転ボタン
// Lower UI Right Rotation Button
const rightRotButton = BABYLON.GUI.Button.CreateSimpleButton("rightRotButt", "rightRot");
rightRotButton.paddingRight = "10px";
rightRotButton.width = "100px";
rightRotButton.height = "40px";
rightRotButton.cornerRadius = 5;
rightRotButton.color = "white";
rightRotButton.background = "black";
rightRotButton.onPointerDownObservable.add(()=> {
text.text = "Right Button \nPushed";
isRightRotBtnDwn = true;
});
rightRotButton.onPointerUpObservable.add(()=> {
text.text = "Right Button \nReleased";
isRightRotBtnDwn = false;
});
rightRotButton.onPointerOutObservable.add(()=> {
text.text = "";
isRightRotBtnDwn = false;
});
UiPanel.addControl(rightRotButton);
// 下段 ジャンプボタン
// Lower UI Jump Button
const jumpButton = BABYLON.GUI.Button.CreateSimpleButton("jumpButt", "jump");
//jumpButton.paddingRight = "20px";
jumpButton.paddingLeft = "10px";
//jumpButton.paddingTop = "-5px";
//jumpButton.paddingLeft = "1px";
jumpButton.width = "50px";
jumpButton.height = "40px";
jumpButton.cornerRadius = 4;
jumpButton.color = "white";
jumpButton.background = "black";
jumpButton.onPointerDownObservable.add(()=> {
text.text = "Jump Button \nPushed";
boxAggregate.body.setLinearVelocity(new BABYLON.Vector3(0, 6, 0));
});
jumpButton.onPointerUpObservable.add(()=> {
text.text = "Jump Button \nReleased";
});
jumpButton.onPointerOutObservable.add(()=> {
text.text = "";
});
UiPanel.addControl(jumpButton);
// 下段 決定ボタン
// Lower UI Exec. Button
const execButton = BABYLON.GUI.Button.CreateSimpleButton("execButt", "Exec");
//execButton.paddingRight = "20px";
execButton.paddingLeft = "10px";
//execButton.paddingTop = "-5px";
//execButton.paddingLeft = "1px";
execButton.width = "50px";
execButton.height = "40px";
execButton.cornerRadius = 4;
execButton.color = "white";
execButton.background = "black";
execButton.onPointerDownObservable.add(()=> {
text.text = "Exec Button \nPushed";
//boxAggregate.body.setLinearVelocity(new BABYLON.Vector3(0, 6, 0));
});
execButton.onPointerUpObservable.add(()=> {
text.text = "Jump Button \nReleased";
});
execButton.onPointerOutObservable.add(()=> {
text.text = "";
});
UiPanel.addControl(execButton);
// ■キーボード入力について参考にさせていただいたサイト
//
// JavaScript | キーボードの入力イベントを実装する方法
// https://1-notes.com/javascript-addeventlistener-key-ivent/
//
// JavaScript でのキーボード制御
// https://ics.media/tutorial-createjs/keyboard_basic/
//
// 押したキーのキーコードを取得
// https://shanabrian.com/web/javascript/keycode.php
//
//
// PCキーボードのボタンが押された場合の処理
// Babylon.jsで作成されたボタンによる操作Boxとカメラに対する操作、ジャンプ・決定処理と同じことを
// PCキーボードのボタンでもできるように設定
window.addEventListener("keydown", (event) => {
//document.addEventListener("keypress", (event) => {
// ASWDRボタンが押された場合の処理(カメラを操作する処理)
if (event.keyCode == 65) { // A(カメラ左回転へ)
text.text = "A Key \nPushed";
camLeftRotButtonOn = true;
}
if (event.keyCode == 87) { // W(カメラの高さ変更)
text.text = "W Key \nPushed";
camera.position.y = camera.position.y + CAMERA_HEIGHT_CALC_UNIT;
if (camera.position.y > 15) {
camera.position.y = 7;
}
}
if (event.keyCode == 83) { // S(カメラの距離変更)
text.text = "S Key \nPushed";
cameraDistance = cameraDistance + CAMERA_DIST_CALC_UNIT;
if (cameraDistance > -8){
cameraDistance = -20;
}
}
if (event.keyCode == 68) { // D(カメラ右回転へ)
text.text = "D Key \nPushed";
camRightRotButtonOn = true;
}
if (event.keyCode == 82) { // R(カメラをデフォルト状態へ(操作Boxを真後ろへ移動))
text.text = "R Key \nPushed";
camResetButtonOn = true;
}
// ←↑↓→、Z、X、スペースのボタンが押された場合の処理(操作Boxを動かす処理、ジャンプ・決定処理)
if (event.keyCode == 37) { // 左
text.text = "Left Key \nPushed";
//isLeftRotBtnDwn = true;
isLeftArrowBtnDwn = true;
}
if (event.keyCode == 38) { // 上
text.text = "Forward Key \nPushed";
//isForwardBtnDwn = true;
isUpArrowBtnBtnDwn = true;
}
if (event.keyCode == 40) { // 下
text.text = "Backward Key \nPushed";
//isBackwardBtnDwn = true;
isDownArrowBtnDwn = true;
}
if (event.keyCode == 39) { // 右
text.text = "Left Key \nPushed";
//isRightRotBtnDwn = true;
isRightArrowBtnDwn = true;
}
if (event.keyCode == 90) { // Z(ジャンプ)
text.text = "Z Key \nPushed";
boxAggregate.body.setLinearVelocity(new BABYLON.Vector3(0, 6, 0));
}
if (event.keyCode == 88) { // X(決定)
text.text = "X Key \nPushed";
}
if (event.keyCode == 32) { // スペース(ジャンプ)
text.text = "Space Key \nPushed";
boxAggregate.body.setLinearVelocity(new BABYLON.Vector3(0, 6, 0));
}
});
// PCキーボードのボタンが離された場合の処理
window.addEventListener("keyup", (event) => {
// ASWDRボタンが離された場合の処理(カメラを操作する処理)
if (event.keyCode == 65) { // A(カメラ左回転へ)
text.text = "A Key \nReleased";
camLeftRotButtonOn = false;
}
if (event.keyCode == 87) { // W(カメラの高さ変更)
text.text = "W Key \nReleased";
}
if (event.keyCode == 83) { // S(カメラの距離変更)
text.text = "S Key \nReleased";
}
if (event.keyCode == 68) { // D(カメラ右回転へ)
text.text = "D Key \nReleased";
camRightRotButtonOn = false;
}
if (event.keyCode == 82) { // R(カメラをデフォルト状態へ(操作Box真後ろへ移動))
text.text = "R Key \nReleased";
camResetButtonOn = false;
}
// ←↑↓→、Z、X、スペースのボタンが離された場合の処理
if (event.keyCode == 37) { // 左
text.text = "Left Key \nReleased";
//isLeftRotBtnDwn = false;
isLeftArrowBtnDwn = false;
}
if (event.keyCode == 38) { // 上
text.text = "Forward Key \nReleased";
//isForwardBtnDwn = false;
isUpArrowBtnBtnDwn = false;
}
if (event.keyCode == 40) { // 下
text.text = "Backward Key \nReleased";
//isBackwardBtnDwn = false;
isDownArrowBtnDwn = false;
}
if (event.keyCode == 39) { // 右
text.text = "Left Key \nReleased";
//isRightRotBtnDwn = false;
isRightArrowBtnDwn = false;
}
if (event.keyCode == 90) { // Z(ジャンプ)
text.text = "Z Key \nReleased";
}
if (event.keyCode == 88) { // X(決定)
text.text = "X Key \nReleased";
}
if (event.keyCode == 32) { // スペース(ジャンプ)
text.text = "Space Key \nReleased";
}
});
return scene;
}
// HeightMapの物理演算用の初期化を行う
// async関数を使用することで物理演算用の初期化が行われるまで待つようにしている
// 参考: 初期化が行われる前に操作Box等が動くと(HeightMap部分に触れると?)、
// HeightMap部分の物理演算が効かないようになり、衝突判定できずにすり抜けてしまうよう
// →結局この関数は想定どおりに機能せず→HeightMapのPhysics機能を安定されることができず
// →HeightMapの物理演算の使用はあきらめる
initHeightMapPhysics = async () => {
const heightMapGroundShape = new BABYLON.PhysicsShapeMesh(
largeGround, // mesh from which to calculate the collisions
scene // scene of the shape
);
const heightMapGroundBody = new BABYLON.PhysicsBody(largeGround, BABYLON.PhysicsMotionType.DYNAMIC, false, scene);
heightMapGroundShape.material = { friction: 0.3, restitution: 0.3 };
heightMapGroundBody.shape = heightMapGroundShape;
heightMapGroundBody.setMassProperties({ mass: 0 });
}
createScene().then((scene) => {
engine.runRenderLoop(function () {
if (scene) {
// 左回転ボタン押下時 Boxを左回転
// Left Rotation button is pressed: Box is rotated to the left.
if(isLeftRotBtnDwn || isLeftArrowBtnDwn) {
// Left rotation
boxAggregate.body.setAngularVelocity(new BABYLON.Vector3(0, -1.5, 0));
}
// 前進ボタン押下時 Boxを前進させる
// Forward button is pressed: Box is moved forward.
if(isForwardBtnDwn || isUpArrowBtnBtnDwn) {
// Forward
let directionVec = new BABYLON.Vector3(0, 0, 3);
directionVec = directionVec.applyRotationQuaternion(box.rotationQuaternion);
directionVec = directionVec.multiplyByFloats(2.5, 0, 2.5);
boxAggregate.body.setLinearVelocity(directionVec);
}
// 後退ボタン押下時 Boxを後退させる
// Backward button is pressed: Box is moved backward.
if(isBackwardBtnDwn || isDownArrowBtnDwn) {
// Backward
let directionVec = new BABYLON.Vector3(0, 0, -2);
directionVec = directionVec.applyRotationQuaternion(box.rotationQuaternion);
directionVec = directionVec.multiplyByFloats(2.5, 0, 2.5);
boxAggregate.body.setLinearVelocity(directionVec);
}
// 右回転ボタン押下時 Boxを右回転
// Right Rotation button is pressed: Box is rotated to the Right.
if(isRightRotBtnDwn || isRightArrowBtnDwn) {
boxAggregate.body.setAngularVelocity(new BABYLON.Vector3(0, 1.5, 0));
}
// ★カメラ操作の計算・設定 Start ★
// カメラ左回転ボタン押下時
if ( camLeftRotButtonOn ) {
targetRot = targetRot + 2;
// カメラ右回転ボタン押下時
} else if ( camRightRotButtonOn ) {
targetRot = targetRot - 2;
}
// 「Default」ボタン押下時処理
//
// カメラを操作Boxの背後(真後ろ)に配置しなおす
// 操作Box&カメラの関連ベクトル&クォータニオンによりカメラ位置計算・設定後
// 操作Boxのクォータニオン → 弧度法 → 度数法 と変換して、以降のカメラ角度設定ためのtargetRotの値をセット
//
// テキトーな理解でのテキトーコード作成のためこの方法での位置計算が一般的かは疑わしい。。。
if ( camResetButtonOn ) {
// カメラ設定
// カメラの位置をベクトルとクォータニオンで設定
// Z軸方向のベクトルを作成(進行方向のベクトルを作成)
let directionVec = new BABYLON.Vector3( 0, 0, 1 );
// Z軸方向のベクトル(進行方向のベクトル)にカメラの角度の元となるクォータニオンを適応
directionVec.applyRotationQuaternion(box.rotationQuaternion);
// カメラの距離をベクトル的に掛け算
directionVec = directionVec.multiplyByFloats( DEFFAULT_CAMERA_DIST, 0, DEFFAULT_CAMERA_DIST );
// .negate()関数を使用してカメラの位置が操作Boxの背後となるように設定
let cameraDirection = directionVec.clone().negate();
// 操作Boxの位置をベクトルで取得
let opBoxPosition = new BABYLON.Vector3( box.position.x, box.position.y, box.position.z );
// カメラの高さを表すベクトルを取得
let camHeightVec = new BABYLON.Vector3( 0, DEFFAULT_CAMERA_HEIGHT, 0 );
// 操作Boxの位置ベクトル + カメラの(角度を含む)位置ベクトル + カメラの高さベクトル
// → 現在のカメラの位置ベクトルを演算
const cameraPosition = cameraDirection.add(opBoxPosition).add(camHeightVec);
// カメラの位置ベクトルをカメラに設定
camera.position = cameraPosition;
// クォータニオンから角度への変換について参考にさせていただいたサイト
// Rotation Quaternions
// https://doc.babylonjs.com/features/featuresDeepDive/mesh/transforms/center_origin/rotation_quaternions
// Class Quaternion
// https://doc.babylonjs.com/typedoc/classes/BABYLON.Quaternion
// Class Angle
// https://doc.babylonjs.com/typedoc/classes/BABYLON.Angle
// カメラの回転操作には度数法の角度を使用しているので
// まず、操作Boxの向く方向(=カメラの向く方向)のクォータニオンを取得して
// クォータニオン→ラジアン(オイラー角)→角度(度数法)と変換
// その角度をカメラ操作用の変数にセット
// 以下はエラーが出た camera.rotationQuaternion は undefined?
//let cloneCamPosQuat = camera.rotationQuaternion.clone();
let cloneCamPosQuat = box.rotationQuaternion.clone();
let tempEuler = cloneCamPosQuat.toEulerAngles();
let tempAngle = new BABYLON.Angle(tempEuler.y);
targetRot = tempAngle.degrees();
}
// rot += 0.5; // 毎フレーム角度を0.5度ずつ足していく
// イージングの公式を用いて滑らかにする
// 値 += (目標値 - 現在の値) * 減速値
rot += (targetRot - rot) * 0.05;
// 角度に応じてカメラの位置を設定
// Set camera position according to angle
camera.position.x = box.position.x + cameraDistance * Math.sin(rot * Math.PI / 180);
camera.position.z = box.position.z + cameraDistance * Math.cos(rot * Math.PI / 180);
let angleVel = new BABYLON.Vector3(0, 0, 0);
boxAggregate.body.getAngularVelocityToRef(angleVel);
//console.log( "angle velocity > x : " + angleVel.x + " y : " + angleVel.y + " z : " + angleVel.z );
//console.log("angle velocity > y : " + angleVel.y);
//console.log("angle velocitz > z : " + angleVel.z);
boxAggregate.body.setAngularVelocity(new BABYLON.Vector3(0, angleVel.y, 0));
scene.render();
}
});
});
// Watch for browser/canvas resize events
window.addEventListener("resize", () => {
engine.resize();
});
}
// Start processing after all DOM elements have been loaded
window.addEventListener("DOMContentLoaded", main);
参考にさせていただいたサイト&コード
■HeightMapとHavok Physicsの連携について参考にさせていただきました
Physics V2 core concepts
https://doc.babylonjs.com/features/featuresDeepDive/physics/rigidBodies
Physics V2 Shapes
https://doc.babylonjs.com/features/featuresDeepDive/physics/shapes
Babylon.js v6.3.1 Havoc PhysicsTest #02 with No Aggregates by Official CDN
https://codepen.io/siouxcitizen/pen/RwezrRm
■カメラについて参考にさせていただきました
babylon.js 最初の一歩: シーンを描画する
https://qiita.com/il-m-yamagishi/items/fa0460830de7a17a8f89
「ドラッグで視点回転、矢印キーで移動」の記述あり
→キーボードの機能作成のために非常に助かったコメントでした
→そこから、カメラのデフォルト思いやり機能?を無効化することを思いついて実行
【Babylon.js】カメラについて
https://yumenomoto.com/babylonjs-camera/
いろいろカメラ種類の説明あり
Universal Camera説明・実装あり
→Universal Cameraについては、今後の参考にもさせてもらうかもしれません
Class TouchCamera
https://doc.babylonjs.com/typedoc/classes/BABYLON.TouchCamera
Class UniversalCamera
https://doc.babylonjs.com/typedoc/classes/BABYLON.UniversalCamera
BABYLON UniversalCamera
http://www.babylonjs.com.cn/api/classes/babylon-506.html
inputs
keysDown
keysLeft
keysRight
keysUp
detachControl
といった機能の説明あり
Babylon.js Editorで移動するglbキャラクターにカメラをつける方法
https://www.crossroad-tech.com/entry/babylonjs-editor-character-following-camera
Arc Rotate Cameraの説明あり
radius、 alpha、 beta の説明あり
■HeightMapについて参考にさせていただきました
5-01: 遠くの丘 (Distant Hills)
https://zenn.dev/chomado/books/babylonjs-tutorial-ja/viewer/5-01
Babylon.js tutorial : 5-01b-add-texture
https://codepen.io/chomado/pen/KKQPeLP
HeightMapにテクスチャを設定する参考させていただきました
HeightMapの元になる.pngファイル、テクスチャになる画像ファイルもこれらのサイトからのものを使用させてもらっています
Babylon.js v6.3.1 Practice#12 HeighMap Display01 with low subdivision
https://codepen.io/siouxcitizen/pen/PoyxebB
Babylon.js v6.3.1 Practice#13 HeighMap Display02 with high subdivision
https://codepen.io/siouxcitizen/pen/BaqGxZG
subdivision等の設定で、自分のコードもいくつか参照しました
■キーボード入力について参考にさせていただきました
JavaScript | キーボードの入力イベントを実装する方法
https://1-notes.com/javascript-addeventlistener-key-ivent/
JavaScript でのキーボード制御
https://ics.media/tutorial-createjs/keyboard_basic/
押したキーのキーコードを取得
https://shanabrian.com/web/javascript/keycode.php
次回
underconstruction
