
DeepLabCut - Standalone GUI - 5

本記事は、DeepLabCut - Standalone GUI - 4の続きです。
Step 6. Evaluate network
前回「Train network」の学習が終了するとCommand Promptに、
The network is now trained and ready to evaluate.
Use the function 'evaluate_network' to evaluate the network.
と表示されます。次はトレーニングを評価します。評価は、 the mean average Euclidean error (MAE)という、二乗平均平方根に比例する指標でおこないます。
「Evaluate network」タブをクリックします。「Want to plot predictions?」をYesに変更します。他はデフォルトのままでいいです。「Specify the videotype」は複数のvideoを選択した場合のオプションです。今回はどれを選んでも関係ありません。「Specify the shuffle」は1,「Specify the trainingset index」は0,「Compare all bodypars?」はYes。OKをクリックします。評価が始まります。Command Promptに、
Use the function 'analyze_video' to make predictions on new videos.
Otherwise consider retraining the network (see DeepLabCut workflow Fig 2)
と表示されたら評価は完了しています。評価された結果は、
C:\Users\(YourUserName)\(Name of the Project) - (Name of the experimenter) - (Date)
の「evaluation_results」フォルダに保存されています。評価の結果をフォルダ内にある画像で確認してみましょう(下図)。
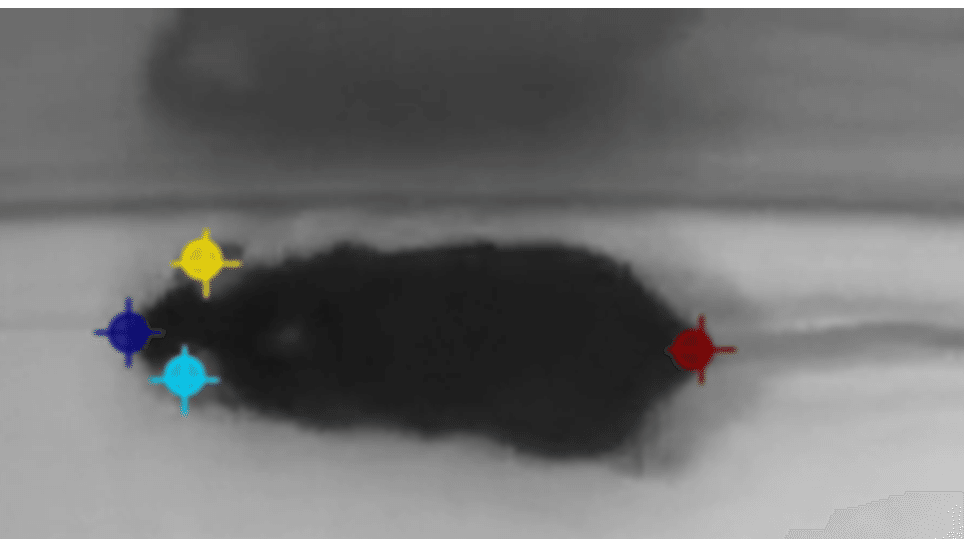
シンボル「+」がご自身でラベルされた位置です。シンボル「●」がDeepLabCutが推測した位置です。DLCによる推測が正しい位置かを確認します。両者の位置のズレを見て許容範囲内であれば次のステップへ、許容できなければ以前のステップに戻りましょう。以前のステップに戻っても、同じことを繰り返しては結果は変わリません。修正・確認するポイントは、
・「Label frames」で、正しい位置にラベルされているか?確認・修正しましょう。ラベル部位が画像に写っていないときは無理にラベルしてはいけません。
・「Train network」で、Command Promptに表示されるlossが収束しているか?確認しましょう。収束していなければ、ラベル位置が不適切か、「Maximum iterations」の回数が少ない可能性があります。
・「Create training dataset」で、「Select the augmentation method」のaugmentationアルゴリズムを変更するのも効果があります。
・(オプション)「Refine labels(後のステップ)」で、ラベル画像を追加するのも効果があります。
DeepLabCut - Standalone GUI - 6に続きます。
参考サイト・文献