
Beginners' guide to climbing Mt Fuji.

For the second time in two years, I went to Mt Fuji. I'm almost a beginner.
Before I forget what happened then...
The second time I used Sunshine Tour was the best!!
I hope this will be helpful to those who are thinking of climbing Mt Fuji.
For young and old, men and women, and you, the passerby.
*This is a long article with many photos.
If you find it useful, please press the ♡ button. Thank you.
This article is current as of 8/2/2024.
Dollar figures are current as of August 2024.
I'm this kind of person → Self Introduction (It's Japanese)
※In recent years, the number of foreigners attempting unreasonable climbs has been increasing. There have even been fatalities. If you are thinking of climbing Mt. Fuji, please do not overestimate your own physical strength, but listen carefully to the advice of experienced climbers and enjoy a safe and enjoyable climb.
6:30am Meet at Tokyo Station
Since this was a tour, those in the Tokyo Station group gathered at the Yaesu exit.
First, head to Shinjuku Station by bus.
Divide your luggage into two so you can go to a hot spring on the way back from the tour.
・Bath set (change of clothes)
・Climbing equipment

but it would be nice if you could store your trekking poles on the side.
One backpack.
I was so lightly dressed that I even worried about myself:)
Because, I had been told a lot of things during my last Mt. Fuji climb.
『Try to reduce your luggage by every gram!!』
Because I knew it was right.
7:15am Arrived at Shinjuku Station
I met up with a friend here. I wasn't in Japan at this time last year, so it was the first time we'd seen each other in over a year!!
(We both participated alone on the previous tour. We became good friends.)
Tour participants gathered from each prefecture and boarded their assigned buses.
This time I saw many tourists abroad because coronavirus pandemic ended, inbound tourism became popular again, and moreover, it was August, a vacation season for everyone!
There was also a tour group for foreigners that spoke English.
From here, we head for the fifth station of Mt. Fuji.(Deep sleep)
10:30am Arrived at the Yoshidaguchi entrance to the 5th station of Mt. Fuji(2305m)

Upon arrival, we were met by two tour guides.
Here is a brief description of what you need to do before entering the mountain.
Tokyo has been experiencing extremely hot days, so I was worried about the heat, but since it's in the mountains, the sun is strong, but it wasn't oppressively hot.

Starting this year, the entrance fee to climb Mount Fuji will be 2000 yen.(Approximately $14)

Please wear the band you receive on your wrist or somewhere visible on your backpack.
The band has a QR code that shows information about the Yoshida route.
There is a counter just before the trailhead where you can pay by cash, electronic payment, or make reservations in advance.

This time I lined up and paid in cash, but it seems you can also pay online in advance, which would save time.
It seems like a long line when it's crowded, so do whatyou can in advance.↓↓
If you pay 1,000 yen (Approximately$7)as a contribution to the Mt. Fuji conservation effort, you will receive this.

After that, change your clothes and put anything you don't need in the locker.
For Sunshine Tours, the designated changing area is always on the third floor of Fujikyu Unjokaku.
Change clothes in the women's only changing room on the third floor.

Lockers cost 300 yen.
You will need a lot of 100 yen coins when climbing Mt. Fuji. It is recommended that you prepare them in advance.
This facility also has a restaurant, souvenir shop, and rental shop.
Toilets are available for a fee.(300 yen.)
I think all the mountain huts at the fifth station are the same.
Luggage to take on a mountain climb
The key is to make your luggage as light as possible, even by the gram.
I know you might think you need this and that, but you'll end up regretting your heavy backpack later.
Also, all trash must be taken home, so the idea of "if it's heavy, I can just throw it away" doesn't work.
Specifically, you don't need everything that's listed as a typical item to bring.
I have toilet paper and I think I'll need water, but I'll only bring a liter.
If you run out, buy some at the mountain huts along the way. They're expensive though (starting at 500 yen per bottle).
I think the weight of the luggage causes fatigue without you realizing it.
I think the trick to reaching the summit is to climb while conserving your energy, even to the extreme.
And breathing. Altitude sickness is something you can't control.
At the fifth station is Fujisan Komitake Shrine.

12:15pm Start of Entry
Enter the Yoshida route with great energy!
Starting Item
Top: Long sleeve T-shirt・T-shirt
Bottoms: leggings, quick-drying sweatshirts, snowboard socks
Other: Keep a hiking scarf and windbreaker easily accessible.

I think there were about 30 people in this team.
There were guides in front and behind us.
I think 30% of us were foreign nationals.
If you're not confident in your stamina, go to the front....
We were having fun at the very back lol

The destination for the first day is "GORAIKOUKAN", the mountain hut closest to the summit on the Yoshida trail.
Of course, it's best to make a reservation in advance.
This time it was included in the tour.

For reference: Horse prices
I'm sure there are people who use it for various reasons, but it's sad to see them.
It's kind of sad. It must be hot. It must be boring.
There are a few voices like that on the internet.

From here, we start climbing for about 7 hours to our destination.
This 7 hours is without any long breaks and without a slow pace.
Let's try to reach our destination before the sun goes down!!

From the start of the mountain to the 6th station, there is a descent and it is relatively easy. It is a route to get your body used to it.
But, let's start saving our energy from now on!!
Don't waste your energy by having fun with your friends.
Here are some tips from the previous guide, and my own personal opinion.
It's a simple thing, but I think there's a big difference in how much energy you use up after doing this for 7 hours!
・Little by little, with small steps
・Even when climbing large rocks, you don't climb them in one step, but rather take small detours with short strides.
(Because lifting your leg up is more tiring than putting your leg forward.)
・Breathing is very important to prevent altitude sickness
・Be conscious of exhaling rather than inhaling (because exhaling makes you inhale)
・If you focus on inhaling, you will hyperventilate, so exhale!
・Imagine putting out a candle within reach.
・Talk a lot with your friends and guides (because talking helps you breathe)
・If you feel tired, take 2-3 slow, deep breaths.
・Enjoy the scenery and breathe in the air
1:00pm Arrived at the sixth station
This is just practice to get your body used to it.
There is a toilet here, so it's best to go there.
If you think about what to do, make sure you go.Important things.

All toilets on Mount Fuji are paid toilets, so be sure to bring plenty of 100 yen coins.

You can also rent helmets here. The deposit is 2000 yen.
You will get a refund if you return the helmet when you descend the mountain, so it's a good idea to rent one if you're worried about falling rocks or slipping off.

*Only those descending the mountain can buy water at this location at the 6th station (600 yen)
Remember, this is the only place on the descent route where you can buy water.
2:30pm Passing the seventh station
The weather is very nice and the sun is close so sunscreen and sunglasses are a must.
The slope continues until halfway to the sixth station, but from the middle point it becomes rocky.

Here it is strongly recommended to use shortened trekking poles and wear gloves instead of storing trekking poles.

This is because when climbing by grabbing rocks, one has to move the upper body very much to grab the rock. So you get tired in an instant.

So basically you climb by leaning forward and supporting your upper body with your trekking poles, and if it gets difficult, just grab hold of the rocks with your gloved hands.
It's a hassle, but make sure to shorten your trekking poles.

I did grab onto some rocks here.
Keep your poles straps tied around your wrists.

Of course, the weather on the mountains is different every day, and if a strong wind blows you backwards, you'll just slide off, so you have to be flexible.
And if you feel tired, take a look at the view!
You are climbing Mount Fuji now. Feel the excitement!!
4:30pm A short break at the eighth station
I bought a bottle of Sports drinks at a mountain hut on the way.
It was 500 yen per bottle, the price of Mt. Fuji. Cash only.
Credit cards are not accepted.

After that, we took a long break at the eighth station, which has a nice view.
It was only about 15 minutes.
The weather was good and the sea of clouds was beautiful!

During breaks like this, take a deep breath and inhale fresh air, equip yourself with items if it's cold, or tie your shoelaces properly, so don't just let it be a break, but prepare for the next time.
→How to tie shoelaces
5:00pm Eat "RAMEN" at the eighth station
I didn't have much time that day, so I only ate one frankfurter(a large grilled sausage on skewer) at the fifth station.
I was hungry so I took a 30 minute break here and had some high quality ramen.

It was already cold here and even eating piping hot ramen left me freezing.
By the time I got here it was already very cold so I put on the rainwear I had brought with me.
to this point
Top: Long sleeve T-shirt, T-shirt, windbreaker
Bottoms: leggings, quick-drying sweatshirts, snowboard socks
※Be careful not to let your stomach or back get cold because you are sweating.
Other: Mountaineering scarf around the neck
Wear this in addition
Top: Rainwear
Bottom: Rain pants
Other: Snowboard neck warmers
(It covers your eyes, lets you breathe, and protects you from dust and sand.)
*If you put on too much clothing too early, you will get hot while climbing and the discomfort index will increase, so be flexible.
5:40pm Temple stamp at the eighth station (3250m)
Luckily, some FUJIKOU people came by and I was told that I could get the legendary red seal, so I took a short break.
(My friend was collecting red seals.)

6:15pm A sea of clouds spread out and the shadow of Mt. Fuji was visible (3350m).
We took a short break here. The sea of clouds looked very beautiful, and without it we would not be able to see the shadow of Mt. Fuji.
This is called KAGEFIJI in Japan.


6:40pm Arrived at GORAIKOUKAN!!!(3450m)
It's been two years since I last visited!!!
It's amazing that there's a mountain hut in a place like this.

It was tough going up the mountain but we arrived soon after.
When we arrived, we were finally able to take off our shoes and feel a sense of freedom!! Yaaaay!!

I was so happy to be able to put all my luggage down and have hot tea and a warm meal.
I'm really grateful.

The toilet here costs 300 yen.
Water for washing your hands is also scarce.


You basically can't wash even your face, so it's a good idea to bring body sheets or facial cleansing sheets with you.
When I wiped my face it was pitch black lol
8:00pm Getting ready for bed
I wiped my face, body, and feet, took off everything I was wearing, and then went to sleep in just a long-sleeved T-shirt and leggings.
This sleeping bag is surprisingly warm.
In fact, it's a little hot.

It seems that altitude sickness can occur even while you are sleeping, so make sure you get a good night's sleep in preparation for the next day.
8:30pm GORAIKOUKAN completely lights out
Before going to bed, I went outside the mountain hut for a little while. It was really cold, but the stars looked so beautiful.


0:00am Awakened by an incident
I climbed up to the eighth station at great speed and fell asleep in an instant as soon as the lights were turned off at 8:30pm.
I woke up once around 11pm but went back to sleep right away for the next day.
And then...
At around midnight, inside Goraikoukan, in pitch black and everyone else asleep, one of the guests...
I heard him vomiting a huge amount while sleeping, probably from altitude sickness. I felt sorry for him, he was drowning.
I couldn't sleep after that. I closed my eyes to prepare for the next day.
2:00am Full wake up
I heard we were leaving at 2:30 so I woke up at 2:00.
The sky was darker at this time and the stars were beautiful.


When we left the mountain hut, we had heard that it would be cold at the top of the mountain, so we put on everything we had.
Top: Long sleeve T-shirt, T-shirt, windbreaker
Bottoms: leggings, quick-drying sweatshirts, snowboard socks
※Wear layers around your stomach to keep your body warm!!
Other: Snowboard neck warmers, work gloves, headlights
Plus
Above: UNIQLO Ultra Light Down, Rainwear
Bottom: Rain pants, gaiters

The main purpose is to prevent rain, snow, pebbles, etc. from getting into your shoes, keeping you warm and dry. On muddy roads, it can also protect your pants from getting dirty.
If a pebble gets inside your shoe, the discomfort level will reach its maximum, so it's a good idea to have this.
I needed it when descending the mountain, so I put it on from here.
Get branding iron
I asked if I could get the branding done after I woke up.
(I thought it would take a long time to heat up the iron.)
Actually, they start accepting the tickets from 4am after the tour starts, but they did a special thing for us!! (300 yen)

By the way, you can get the branding done at each mountain hut and I think each one costs a few hundred yen.
At the fifth station, wooden sticks (kongoudzue) of various lengths are sold and some people collect the branding marks of each mountain hut on them.It seems to be called branding complete.

I got one at Goraikoukan last time, so I got the 2024 version stamped on it again this time!
3:00am Heading for the summit

It took about an hour to get from Goraikoukan to the summit.
However, it was crowded and there was a traffic jam, so it was good to take a break.
On the other hand, if you find it difficult to climb at your own pace, ask the person behind you to go ahead!!
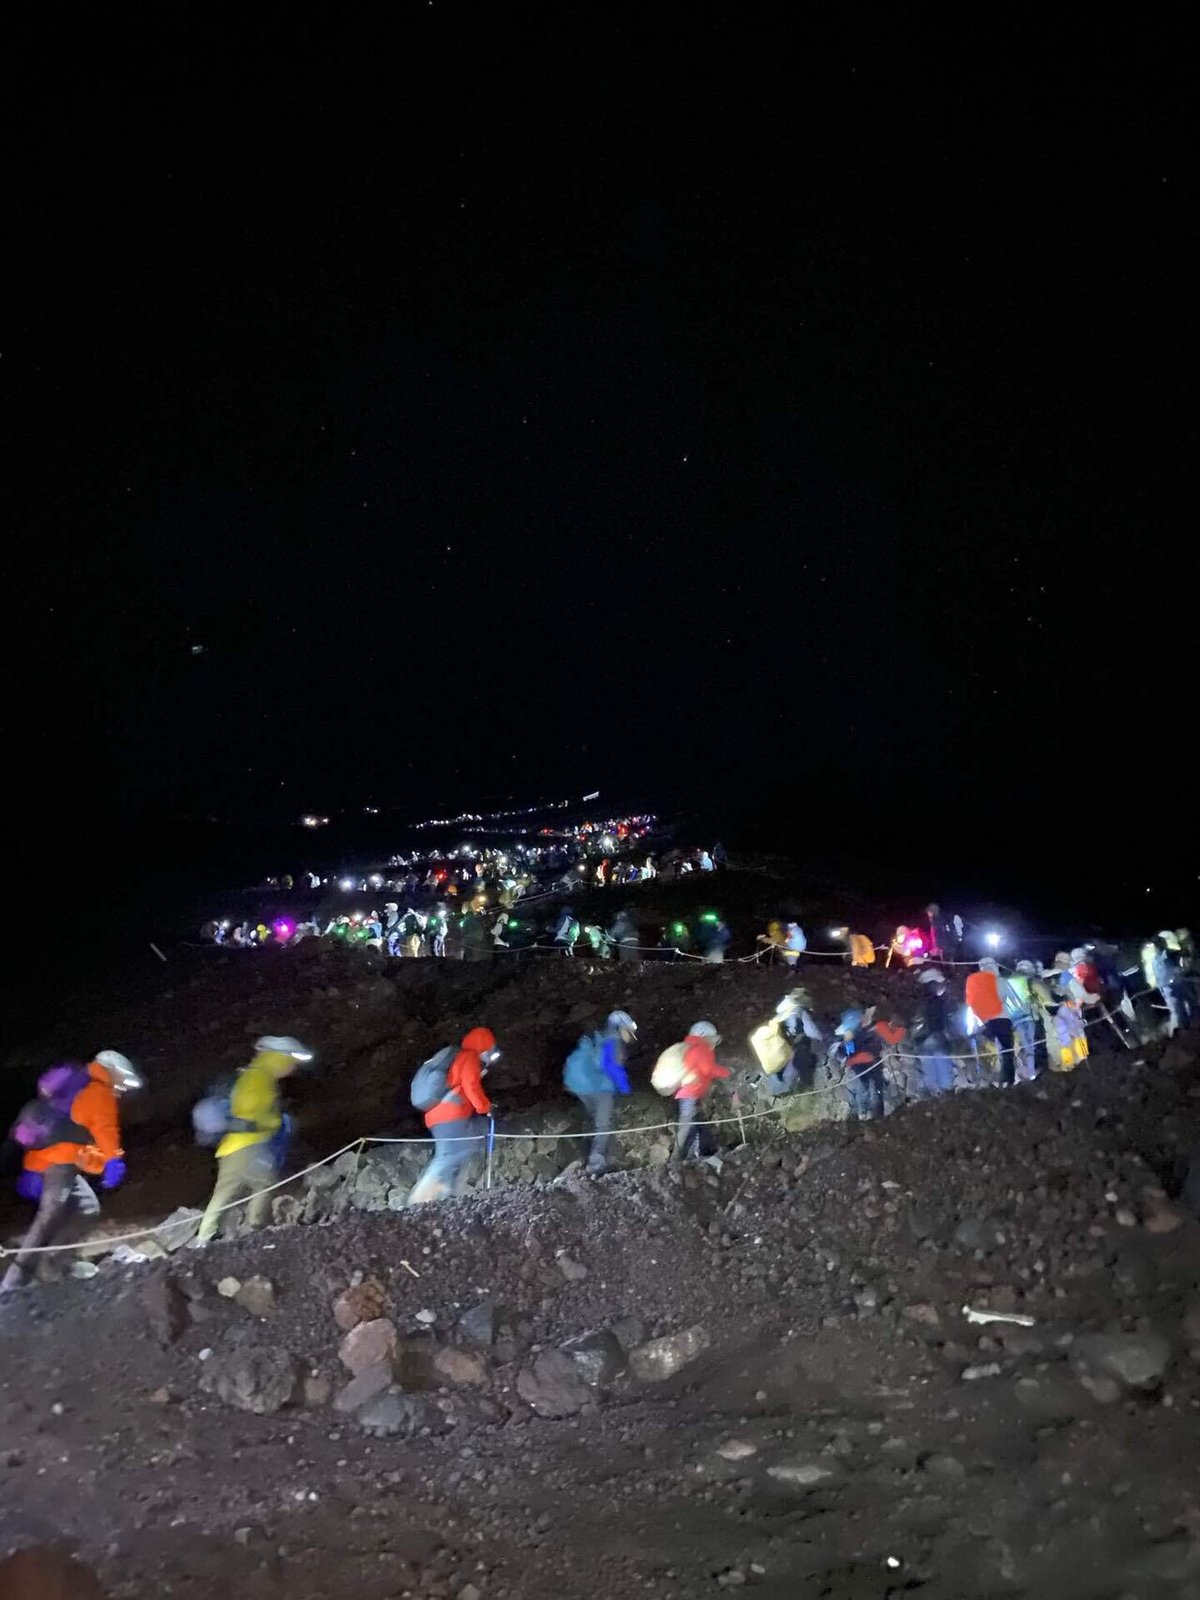
The rocky area ahead became quite steep, and although I used trekking poles, there were surprisingly many places where I couldn't climb without holding on with my hands.
Maybe because it was summer vacation, there were security guards standing around at various points along the way, telling people, "You can also climb from this side!!"
A measure to prevent traffic congestion.
Anyway, we were climbing in a very difficult area, so I didn't have time to take photos.
4:00am Reached the summit!!

This is the last TORII gate on the mountain!!
(There were still more stairs ahead)
It was foggy and I was walking through the clouds, but I felt like I'd finally made it this far!!

The Earth is already beautiful.
What an amazing view.

Our guide who has led us this far!
He was climbing while carrying a very heavy AED.
Awesome (applause!!!!!!)

4:50am Sunrise(GORAIKOU)

It was freezing cold while waiting for the sunrise but it was very beautiful.
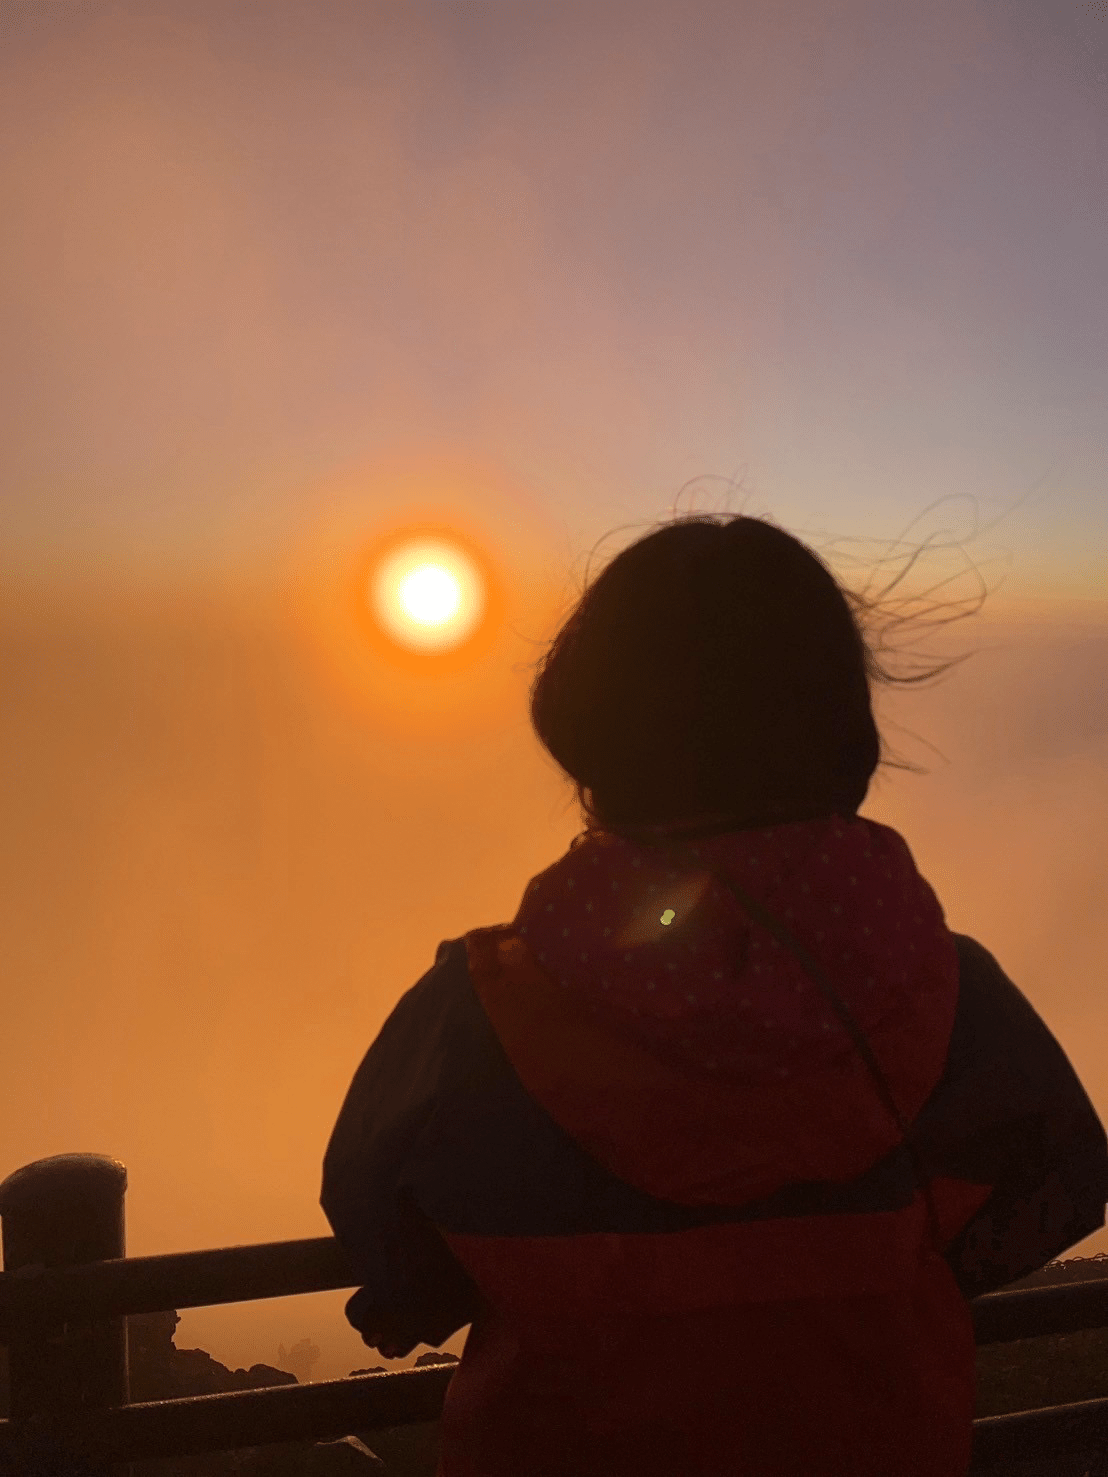
So beautiful.

There was a ring around the sun that looked like a rainbow.

5:10am Breakfast at the mountain hut on the summit
Since we were on a tour, we were given priority seating.
It was Mount Fuji prices, but it was cold and everything looked delicious.

Here we ate the lunch box we had received from Goraikoukan and some high-quality pork soup (1,000 yen).
So the pork soup was absolutely delicious.(TONJIRU in Japanese)
Maybe it was because we ate it at the top of the mountain, but it was really delicious.
Finally, I put rice balls in the pork soup.
I am grateful to have been born in Japan because I was able to experience this so easily. I'm happy.

Some people are freezing in the mountain huts.
Aluminum sheets seem to be on sale.
Some people outside were wrapping it around their bodies, so it is clear that it is cold on the top of the mountain and you need appropriate equipment.

Here our team split into two teams: one to descend the mountain and one to circle the crater rim.
I'm on the descent team lol
Will there really be a next time?!
But rather than finishing everything, having some things left to do gives you a reason to come back again.
The same is true when traveling.
※You won't be able to buy any water until the 6th station, so now is the time to buy some!!
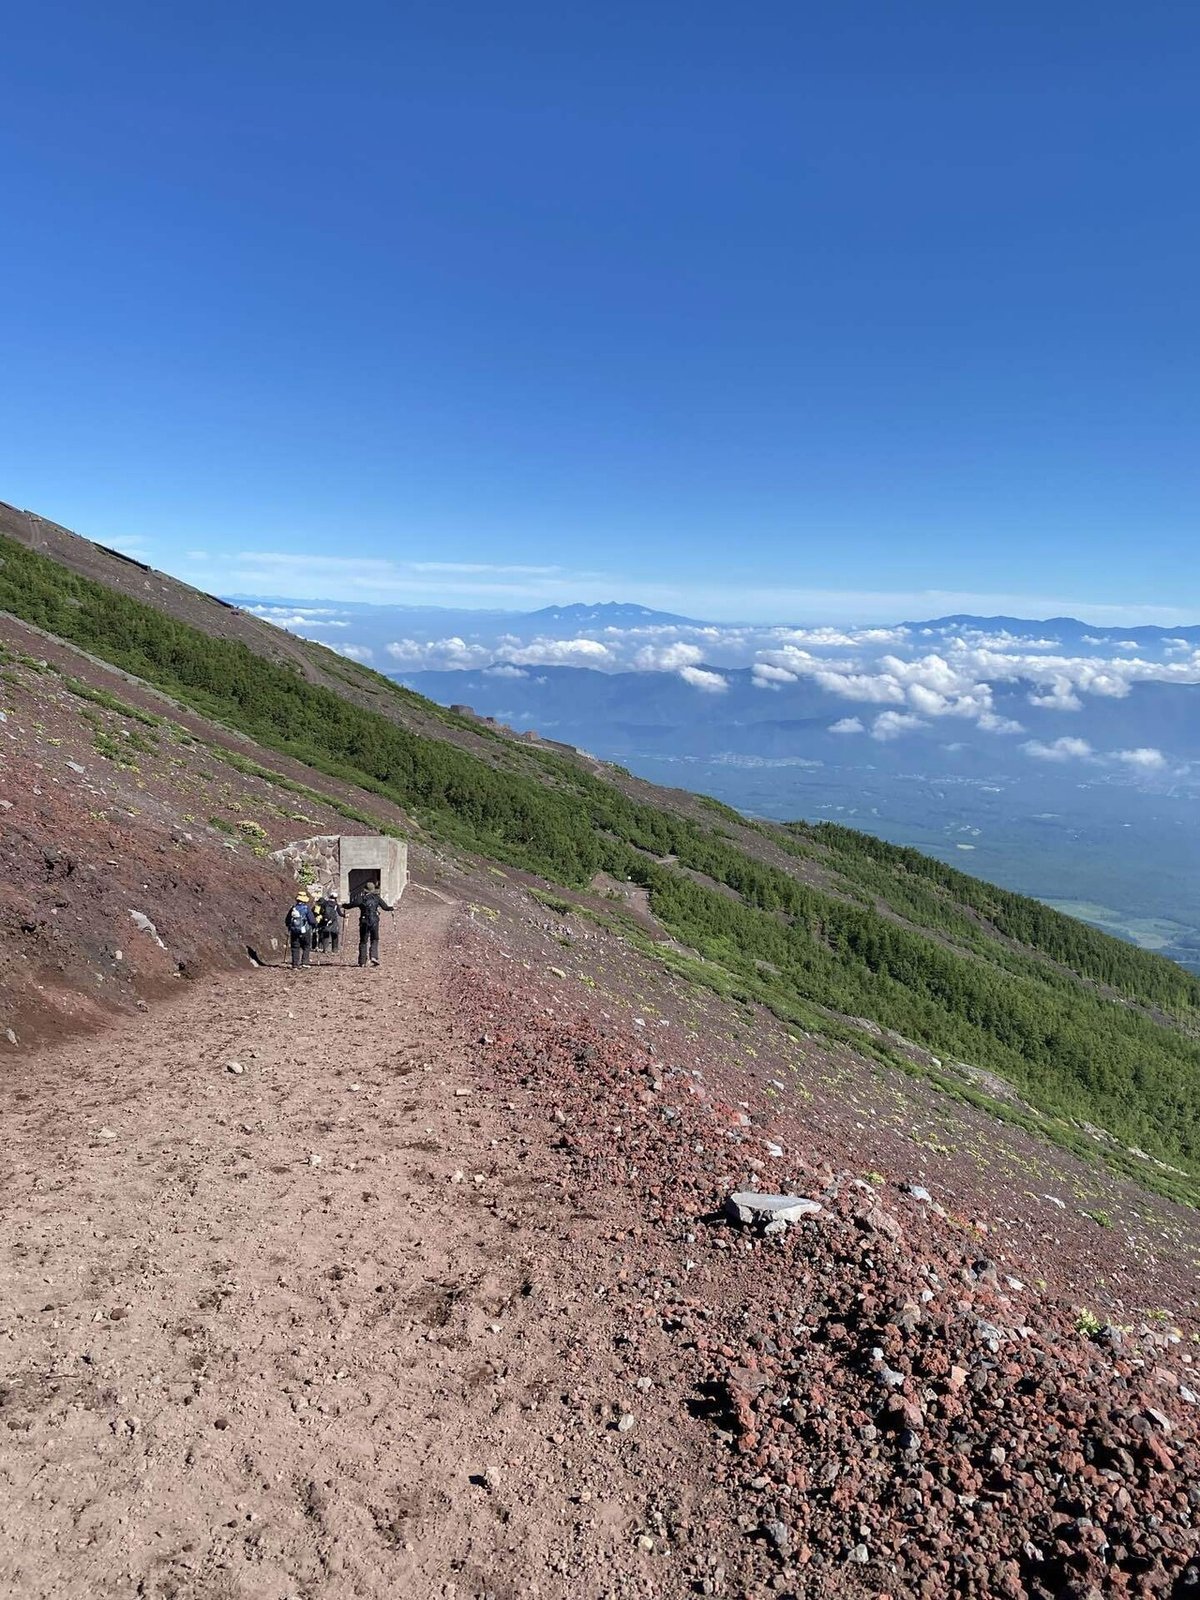
5:45am Starting the descent

The descent is just a continuous walk down a boring gravel road.
You are free to act from the middle.

But I think it's more difficult to go descent.
I didn't fell last time, but I fell about three times this time.
Tips for descending on gravel roads
・Trekking poles are long
・Walking on deep gravel
・Always bury your feet in from the heel
・Image of wide stride and wide-legged walking
・Grab the sand with your heels and slide forward
・Let's go down the mountain with force! You'll get the hang of it!
Huh? Did you get it across?

Once you get used to it you can descend the mountain easily.
(But I fell on the ground actually lol)
I think you'll get the hang of it if you try going down with some momentum.
Anyway, from the heels.
Sometimes, even though you think the gravel is deep, it is actually shallow or there are large rocks that can trip you up.

Also, it's mid-morning and the sun is close.
As the temperature rises and the discomfort index increases, sunscreen and sunglasses are essential.

Also, at some point, take off the clothes you've been wearing a lot.
It's cool, it's refreshing, and you can enjoy the view as you make your way down the mountain!!
So. The only place you can buy water on the way down is the helmet return area (600 yen).
And unexpectedly, from here on out, the path that seems like the final punishment game continues.
Let's keep going until we can see the mountain hut at the fifth station!!
9:40am Goal up to the fifth station
I was so tired after coming down the mountain that all I had were pictures of horses lol
(I'm not riding)

When you descend the mountain, there is a descent checklist in the designated area of the mountain hut, so mark your name on it.
Now it's all done!! I did it! Yay yay!
10:20am Change clothes and have a beer
Anyway, take off all your equipment, wipe down your whole body, and then have a beeeeeeer!!

I wanted to get a second drink but it was so crowded I gave up.
It looks like people who are about to enter the mountain have come to eat.
Let's drink a lot while it's still empty!
11:30am Meeting time
Sunshine Tour participants gather and are assigned to board buses based on their get-off locations.
I'm from Shinjuku/Tokyo.
(Almost no photos from here)
During the trip, everyone fell asleep.
1:15pm Arrival at the hot spring

The good thing about this tour is that it includes hot springs and all-you-can-eat.
Bath towels are available for rental for 200 yen and all bath amenities are provided.
You can come empty-handed! →Here
I only wore Climbing shoes, but it might be a good idea to bring sandals or regular shoes for the trip there and back.
After washing my whole body and feeling refreshed, I was finally able to put on clean clothes and then ate lunch.

Two years ago it was surprisingly empty, but this time it was crowded.
Depart from the hot spring facility at 2:45pm
6:25pm Arriving at Tokyo Station
I went back from here by bike.

Afterword
It seems I didn't walk as many steps as I thought I would on both days.
14,240 steps on the first day of climbing.

The second day down the mountain: 21,497 steps.

In fact, I thought he might be walking a lot more with a heavy backpack on while overseas.
Even so, I hadn't really been walking for a few days before that.
This time I didn't do any exercise beforehand.
And I had been drinking the day before.
The only thing I did.
I ate a lean steak the day before!
And I ate a lot lol

The last time I climbed Mt. Fuji, I did some research and saw that meat is good for you, so this time too I went to ``Yappari Steak'' and ate some meat for good luck!

Because it uses lava rocks from Mt. Fuji.
(Doesn't that seem somehow good?)
I ate meat at the next restaurant too!!

I was also recommended this, and drank it before starting my climb and before going to bed at Goraikoukan Hall at the eighth station.

I don't know if it worked, but I felt so energized!
I was tired again this time, but looking back it was fun.
You can only climb Mount Fuji for abouttwo months out of the year.
If you think about doing it next year, you'll just get older and older.
If you feel like climbing, go right away!
Someday...
So, when will that someday come?
That's what happens.
I also posted a video of my climb up Mount Fuji on my Instagram stories, so be sure to check out the highlights!
Mami Instagram → View Story
(You can see the highlight at 2024 Mt.Fuji)
Well then. Everyone, be safe!
And have a great time climbing Mt. Fuji!
Oh, that's right! Once you reach the summit, you'll see Mt. Fuji in a different light, and you'll think, "I was standing in that place"
Yaaaaa!!!
If you found this helpful, please press ♡!
See you!