カスタムReact UIライブラリの作成とNPMでのホスティング
クリエイター : Bishal Bhattarai , 株式会社readytowork ネパール支店長
Reactライブラリは、ユーザーインターフェイスを構築するために広く使用されており、React Webプロジェクトで使用したり統合したりできる大規模なUIライブラリがreactに存在する可能性があります。これは時間の節約と生産性の向上に役立ちますが、これらのライブラリは必ずしも特定のニーズやスタイルの好みを満たすとは限りません。そこでこの記事では、独自のカスタムreact UIライブラリを構築し、NPMレジストリに公開することに焦点を当てる。
今回は、UIライブラリにtypescriptを使います。さっそく手を動かしてみよう。
ステップ1: UIコンポーネントでプロジェクトをセットアップする
typescriptを使用して新しいcreate react appプロジェクトをセットアップしてみましょう。
yarn create react-app cra-ui --template typescript
プロジェクトにストーリーブックを追加してみよう。UIコンポーネントを単体で開発するのに便利だ。
npx storybook init
ここで、ストーリーブックを初期化すると、組み込みのダミーストーリーを含むstoriesフォルダが作成されます。デフォルトでは、ストーリースクリプトはpackage.jsonに追加されます。
yarn storybook
ベアストーリーは必要ないので、コンポーネントを作成するときに作成する。
srcフォルダからpublicとすべてのファイルを削除する。scrフォルダは、必要なコンポーネントを追加するためのエントリポイントになることに注意してください。
uiライブラリのビルドとしてコンポーネントを追加してみましょう。
yarn add antd
スタイリング用styledComponentsとタイプ/styled-componentsの追加
yarn add styled-components && yarn add -d @types/styled-components
UIライブラリにテーマを追加しよう。
theme.ts
export const theme = {
    gray7: "#8C8C8C",
    gray8: "#595959",
    gray9: "#262626",
    primary: "#121212",
    borderColorBase: "#d9d9d9",
    placeholder: "#9f9f9f",
    link: "#1890ff",
    signupLink: "#19389C",
    secondaryLight: "#C2C2C2",
    secondaryDark: "#8E8E8E",
    yellow1: "#F7CD48",
    yellow2: "#EAB82D",
    blue1: "#19389C",
    blue2: "#1751D5",
    blue4: "#2B478B",
    accentMid: "#F5FAFF",
    base: "#FFFFFF",
    darkGrey: "#E7E9ED",
    primaryLine: "#DCDCDC",
    face1: "#FFB27D",
    face2: "#E2915A",
    gray: "#F8F8F8",
    alert: "#EB5757",
    lightBlue: "#B9CBF2",
    bgColor: "#f3f4f6",
  }
それではUIコンポーネントを作成しましょう。componentフォルダの中にatomsフォルダを作成し、atomの中にButtonコンポーネントを作成します。これはアトミック設計の原則に従っているからです。
Buttonフォルダには、実際のコンポーネントのindex.tsと、ストーリーブックに表示するコンポーネントのindex.stories.tsxの2つのファイルを作成する必要があります。
import { ReactNode } from "react"
import styled from "styled-components"
import { theme } from "../../../theme"
import { Button } from "antd"

type ButtonType = "primary" | "link"
export interface ButtonProps {
    children?: React.ReactNode
    htmlType?: "button" | "submit" | "reset"
    type?: ButtonType
    width?: string
    block?: boolean
    padding?: string
    loading?: boolean
    disabled?: boolean
    icon?: ReactNode
    minheight?: number
    minwidth?: number
    boxshadow?: string
    background?: string
    borderradius?: string
    noradius?: boolean
    typography?: any
    color?: string
    fontSize?: string
    bold?: boolean
    margin?: string
    // eslint-disable-next-line no-unused-vars
    onClick?: (event: React.MouseEvent<HTMLButtonElement>) => void
    bordercolor?: string
}

const Wrapper = styled.div`
  display: contents;
  & .ant-btn-primary {
    background: ${theme.blue2};

    box-shadow: 0px 0px 12px rgba(28, 86, 225, 0.51);
    font-size: 16px;
    line-height: 30px;
    font-weight: 700;
  }

  & .ant-btn-link {
    box-shadow: none;
    background: transparent;
    color: ${theme.blue2};
  }
`
const StyledButton = styled(Button)`
  ${({ typography }: ButtonProps) => {
        if (typography) {
            return typography
        }
    }}
  &[disabled] {
    background-color: ${theme.secondaryLight};
    border: none;
    box-shadow: none !important;
    color: ${theme.base};
  }
  border-color: ${theme.blue2};

  border-radius: ${({ borderradius, noradius }: ButtonProps) => {
        return noradius ? "none" : borderradius ? borderradius : "100px"
    }};
  margin: ${({ margin }: ButtonProps) => {
        return margin && margin
    }};
  padding: ${({ type, padding }: ButtonProps) => {
        if (padding) {
            return `${padding} !important`
        }
        switch (type) {
            case "primary":
                return "0px 36px 0px 37px"
            default:
                return "0px 36px 0px 37px"
        }
    }};

  background: ${({ background }: ButtonProps) => {
        return background ? background : theme.blue2
    }};

  color: ${({ color }: ButtonProps) => {
        return color ? `${color} !important` : theme.base
    }};
  font-size: ${({ fontSize }: ButtonProps) => {
        return fontSize && fontSize
    }};
  font-weight: ${({ bold }: ButtonProps) => {
        return bold && "bold"
    }};
  min-width: ${({ minwidth }: ButtonProps) => {
        return minwidth && `${minwidth}px`
    }};
  width: ${({ width }: ButtonProps) => {
        return width && `${width}`
    }};
  min-height: ${({ minheight }: ButtonProps) => {
        return minheight && `${minheight}px`
    }};
`

export const ButtonComponent: React.FC<ButtonProps> = ({
    children,
    htmlType,
    loading,
    onClick,
    ...rest
}) => {
    return (
        <Wrapper {...rest}>
            <StyledButton
                onClick={onClick as any}
                htmlType={htmlType}
                loading={loading}
                {...rest}
            >
                {children}
            </StyledButton>
        </Wrapper>
    )
}
ブラウザ上でどのように見えるかを確認するために、ストーリー・コンポーネントを作成してみましょう。buttonフォルダ内にindex.stories.tsxというファイルを作成します。
import React from "react"
import { action } from "@storybook/addon-actions"
import { ButtonComponent } from "."

export default {
    title: "Components/Atoms",
    component: ButtonComponent,
    parameters: {
        docs: {
            description: {
                component: "A simple button component",
            },
        },
    },
    args: {
        type: "primary",
    },
    argTypes: {
        color: {
            description: "Color of the text",
            control: "color",
        },
    },
}
const Template = (args: any) => (
    <ButtonComponent onClick={action("onClickAction")} {...args}>
        {"Button"}
    </ButtonComponent>
)
export const Button = Template.bind({})
http://localhost:6006、バックグラウンドでストーリーブックを実行しているので、コンポーネントがどのように見えるかを見ることができる。
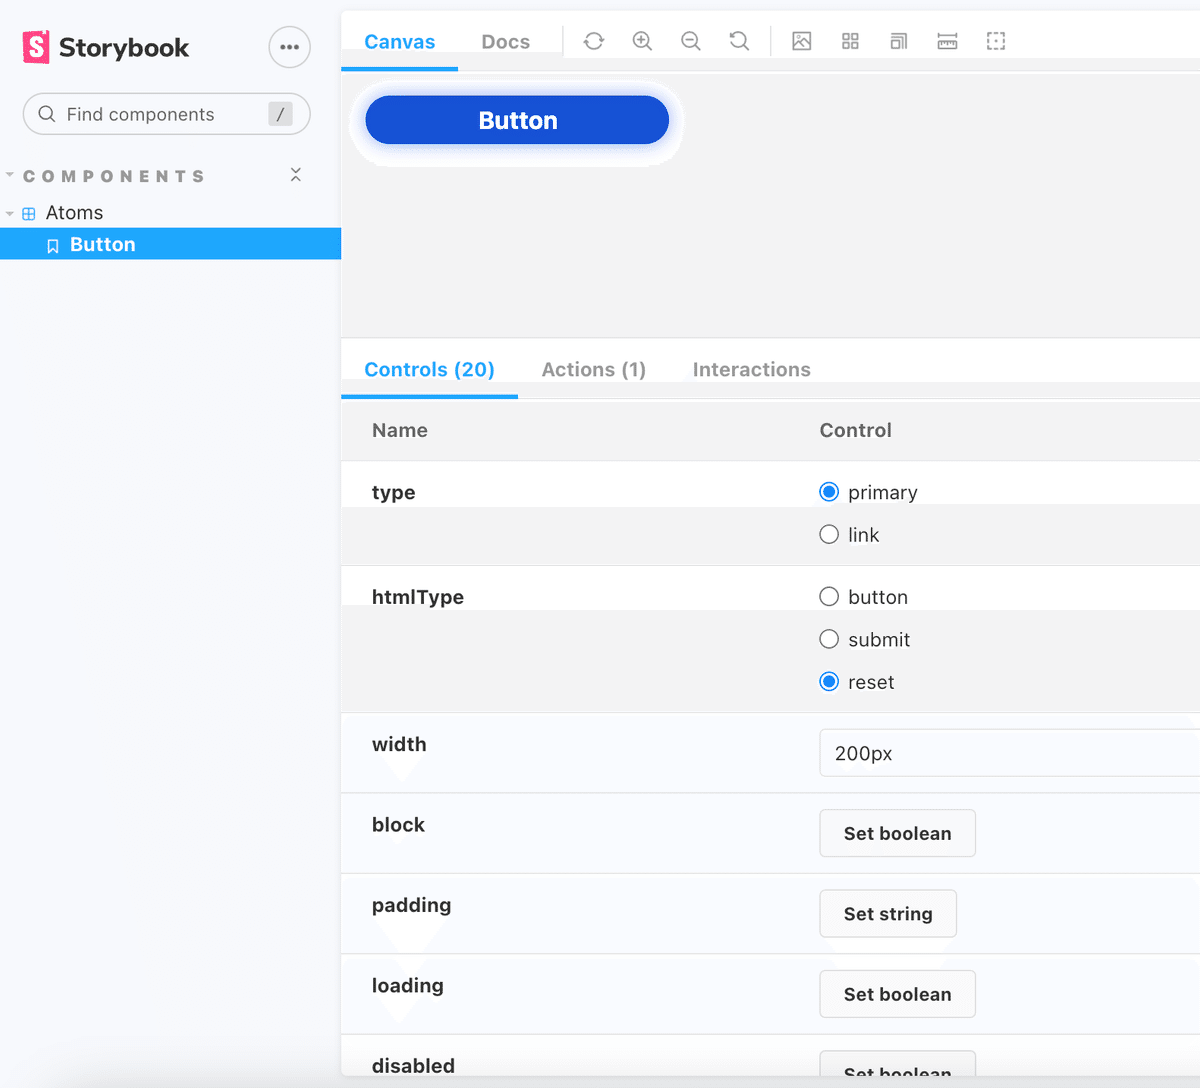
メイン・エントリー・ファイルからUiコンポーネントをエクスポートできるように、srcにindex.tsフォルダを作成する。
export * from "./components"これで、再利用可能なコンポーネントのセットアップが完了した。
ステップ2:エクスポート可能なライブラリのロールアップ設定
Rollupは、React UIライブラリのproduction-readyビルドを作成するために使用できるモジュール・バンドラーです。
ロールアップのインストール
yarn add -d rollup
ライブラリをバンドルするために必要なプラグインを追加しよう。
yarn add @rollup/plugin-commonjs @rollup/plugin-json @rollup/plugin-node-resolve @rollup/plugin-typescript @rollup/plugin-babel rollup-plugin-dts rollup-plugin-peer-deps-external rollup-plugin-postcss rollup-plugin-terser --dev
このファイルはrollupからビルドするときに作成されるが、モジュール、ソース、タイプを指定しているので、rollup configで使用できる。
"main": "dist/cjs/index.js",
"module": "dist/esm/index.js",
"source": "src/index.ts",
"types": "dist/index.d.ts",
"files": [
  "dist"
]
プロジェクトのルートにrollup設定ファイルを作成し、エントリーポイント、出力フォーマット、バンドルの前処理を設定する。以下のコードスニペットをコピーして、rollup.config.ts ファイルに貼り付けます。
import babel from "rollup-plugin-babel"
import resolve from "@rollup/plugin-node-resolve"
import external from "rollup-plugin-peer-deps-external"
import typescript from "@rollup/plugin-typescript"
import postcss from "rollup-plugin-postcss"
import commonjs from "@rollup/plugin-commonjs"
import json from "@rollup/plugin-json"
import { terser } from "rollup-plugin-terser"
import dts from "rollup-plugin-dts"
const packageJson = require("./package.json")

export default [
  {
    input: packageJson.source,
    output: [
      {
        file: packageJson.main,
        format: "cjs",
        sourcemap: true,
      },
      {
        file: packageJson.module,
        format: "esm",
        sourcemap: true,
      },
    ],
    plugins: [
      typescript({ tsconfig: "./tsconfig.json" }),
      postcss({
        plugins: [],
        minimize: true,
      }),
      commonjs(),
      json(),
      babel({
        exclude: "node_modules/**",
        presets: ["@babel/preset-react"],
      }),
      external(),
      resolve(),
      terser(),
    ],
  },
  {
    input: "dist/esm/index.d.ts",
    output: [{ file: "dist/index.d.ts", format: "esm" }],
    plugins: [dts()],
  },
]
ここでは、入力ソース、つまりsrc/index.tsをコンパイルして、cjsとesモジュールファイルを含むdistフォルダを出力したい。
typescript、postcss、commonjs、jsonをコンパイルするプラグインを追加し、nodeモジュールのコンパイルも除外したい。
rollup-plugin-peer-deps-externalライブラリは、Rollupプラグインで、自動的にピア依存関係を外部としてマークすることで、ライブラリバンドルに含まれないようにします。
package.jsonに以下のコードを追加する。
  "peerDependencies": {
    "react": ">=18.2.0",
    "react-dom": ">=18.2.0"
  }
rollup/plugin-node-resolveプラグインはnode_modulesディレクトリにあるパッケージを探し、依存関係を解決しようとします。Yarn のようなデフォルト以外のパッケージマネージャでインストールされたパッケージも扱えます。
rollup-plugin-terserは、Terser JavaScriptコンプレッサーを使用して出力バンドルを最小化・最適化し、空白、コメント、セミコロンなどの不要な文字を削除してコードのサイズを縮小するプラグインです。
ライブラリをビルドするには、rollupコマンドを実行する必要がある。rollupコマンドを実行すると、npmに公開したり、別のプロジェクトで使用したりできるように、本番環境に対応したライブラリのバンドルが生成される。以下のコードは、distフォルダを削除し、パッケージをビルドします。
"build-lib": "rimraf dist && rollup -c"
では、ライブラリを構築してみよう。
yarn build-lib
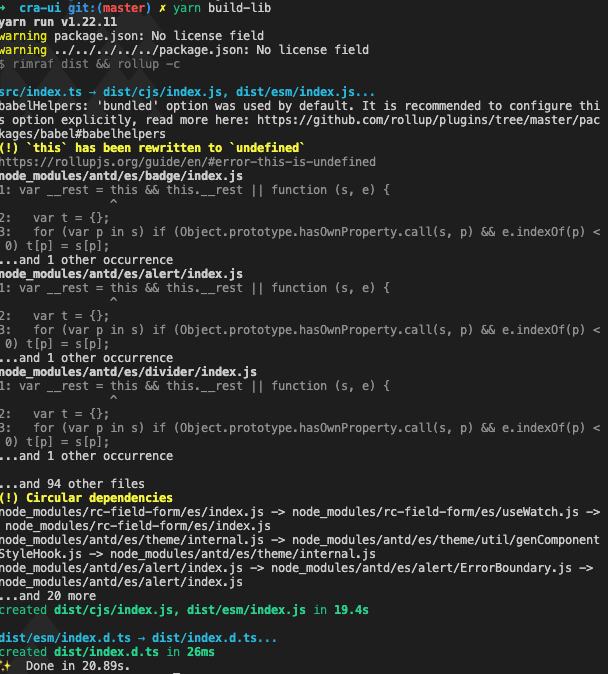
これでdistフォルダが削除され、出力ファイルCJSとESMでビルドされます。

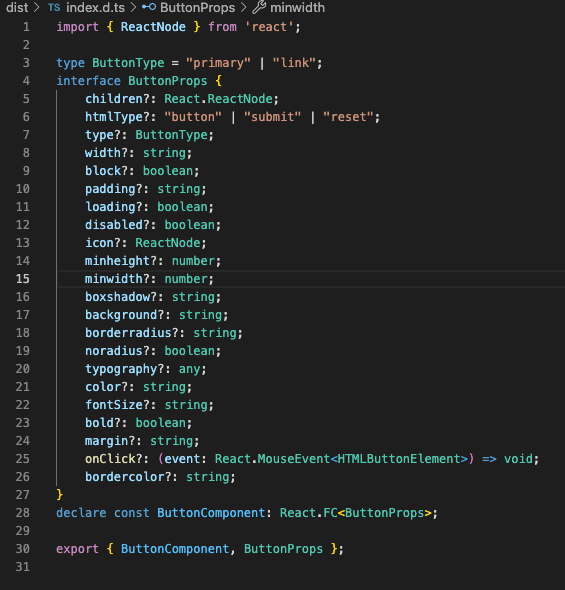
ステップ3: NPMを使用して、バンドルされたフォルダをNPMレジストリに公開します。
モジュールをnpmに公開するには、まずnpmにログインする必要がある。
npm login
モジュールをnpmに公開するには
npm publish
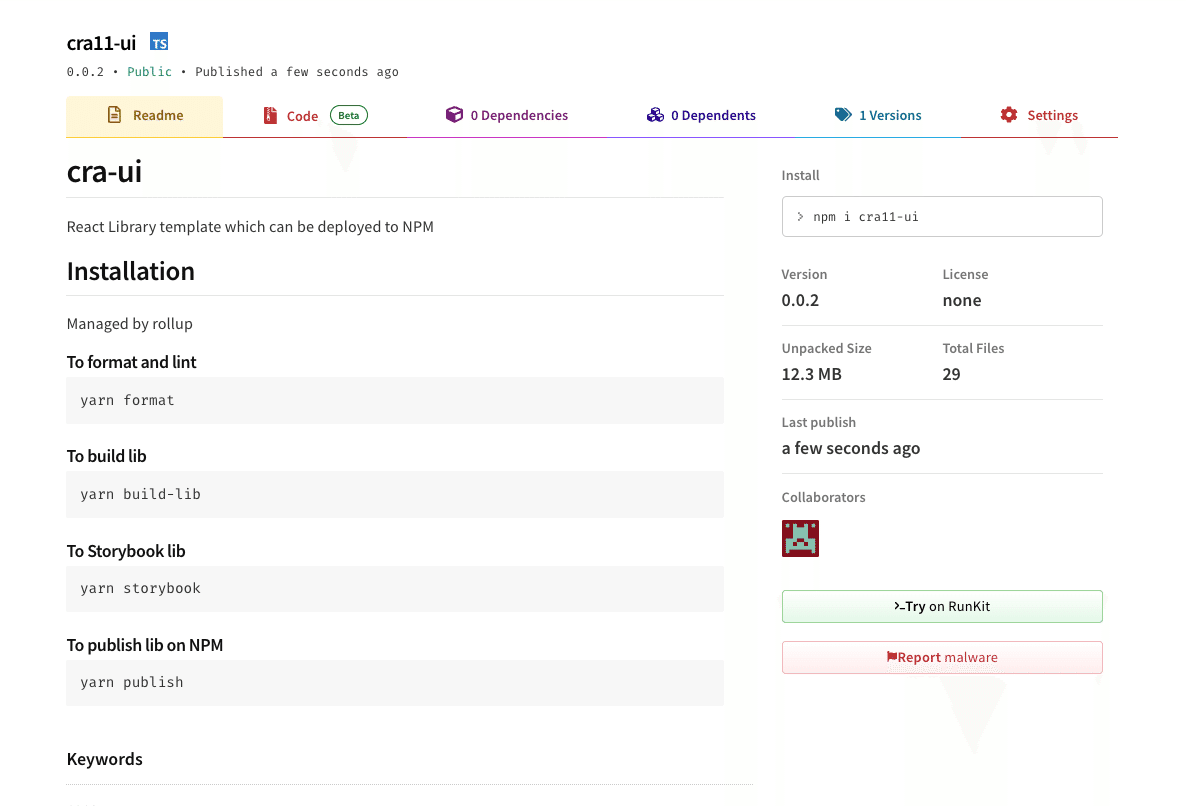
yarn info cra11-ui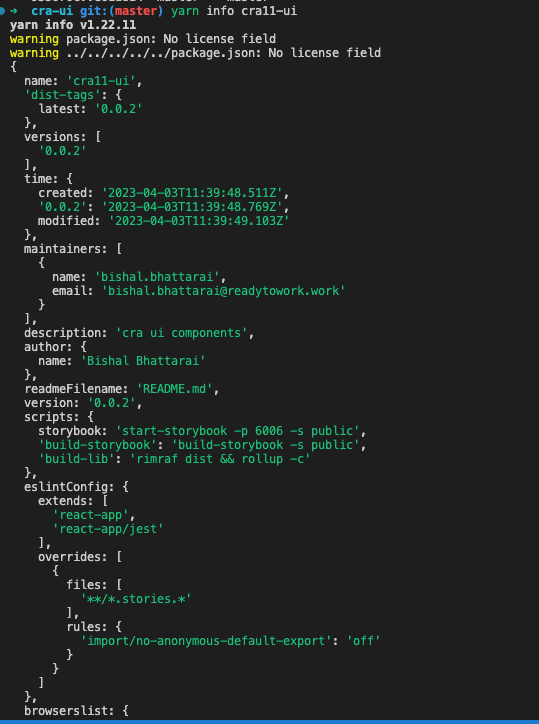
UIライブラリの作成に成功し、NPMに公開した。これで、以下のコマンドを使ってライブラリを任意のプロジェクトに追加できるようになった。
Thank you. happy coding 🎉
Reference:
協業開発及び開発パートナーをお探しのお客様へ
弊社は、ネパールに海外拠点を持ち、生成AI、モバイルアプリ、システム開発を中心に事業を展開する企業です。
自社サービスの開発経験を活かし、クライアント様と共に事業を創造することを重視し、創業以来、スタートアップから中小企業、大手企業、自治体まで、幅広い開発実績があります。プロダクトはユーザーが使いやすいように設計しており、企画から開発、保守運用まで対応しています。開発技術を厳選し限定することで、セキュリティ、プロダクトの品質向上に努めており、事業開発に関する課題を深く理解し、最適なご提案が可能です
お問い合わせはこちらから:
お問い合わせフォーム:https://readytowork.jp/
直通番号:080-8940-7169
