
PythonとVisual Studio Codeの組み合わせでPythonの環境を構築する

Pythonの開発環境をVisual Studio Codeで整えます。OSはWindows 11です。Webで検索すれば本家PythonとVisual Studio Codeのインストール方法がひっかかるのでしょうが、そういうのをみないでやっていきます。何か手落ちがあれば、その都度対処していきます。どんな職業でも、なにかあってもなんとかしちゃうスキルってのは求められるので、そのスキルを使って対処していきます。
それではPythonとVisual Studio Codeのダウンロードをしていきます。
Pythonのダウンロード
Pythonの本家へアクセスし、ダウンロードします。
Pythonにはいろいろなディストリビューションがあって、それぞれの違いや特徴などが分からないので、そういうときは本家からダウンロードでしょ、ということで、本家からダウンロードしたものを使います。
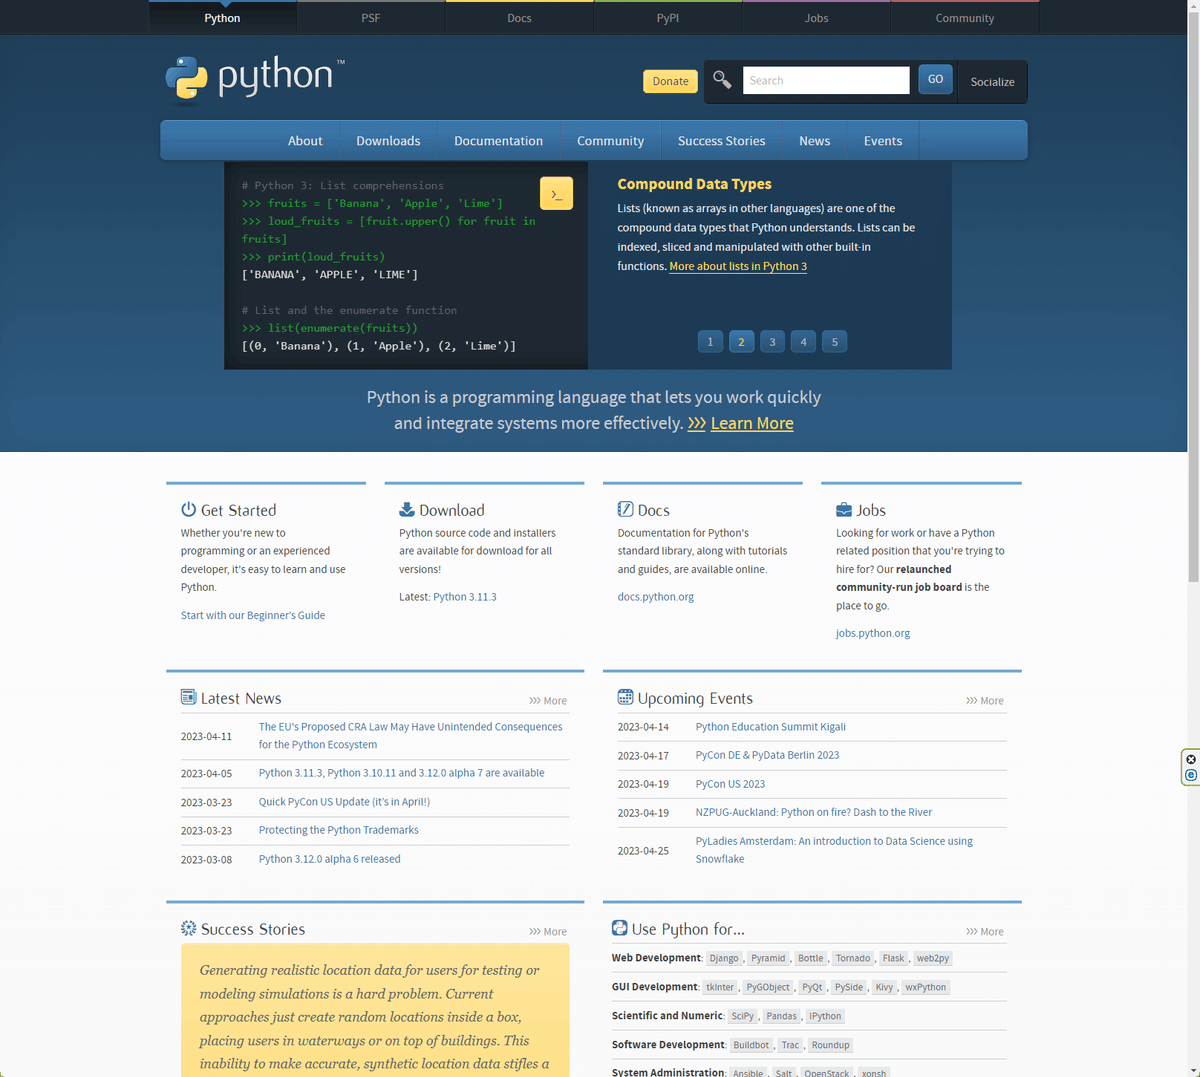
Python本家のWebページはこちらになります。
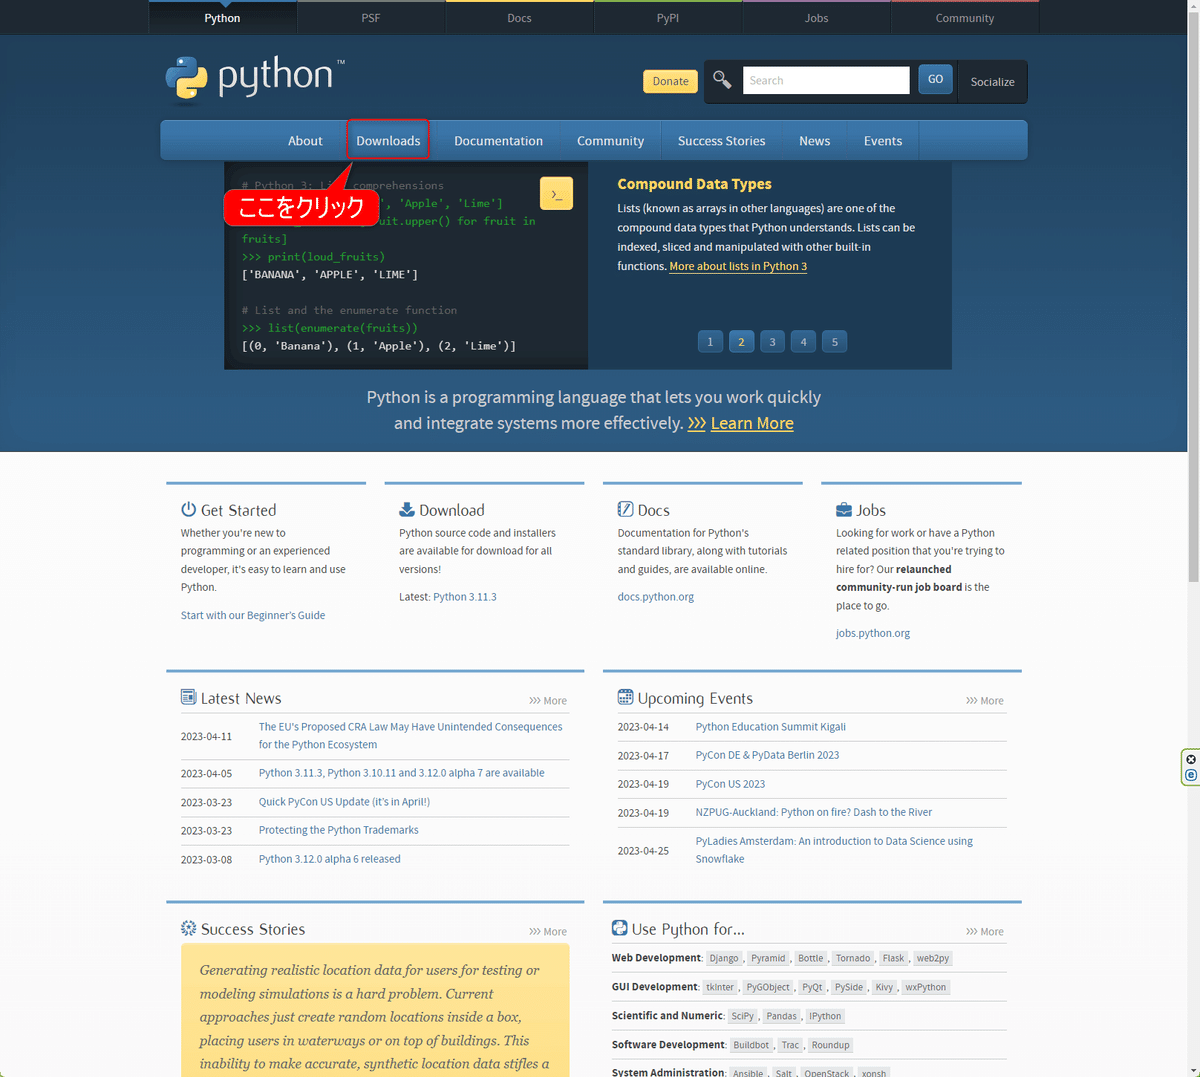
[Downloads]をクリックします。
OS別ダウンロードメニューが表示されますが、[Download for Windows]となっているのを確認し、[Python 3.11.3]をクリックします。
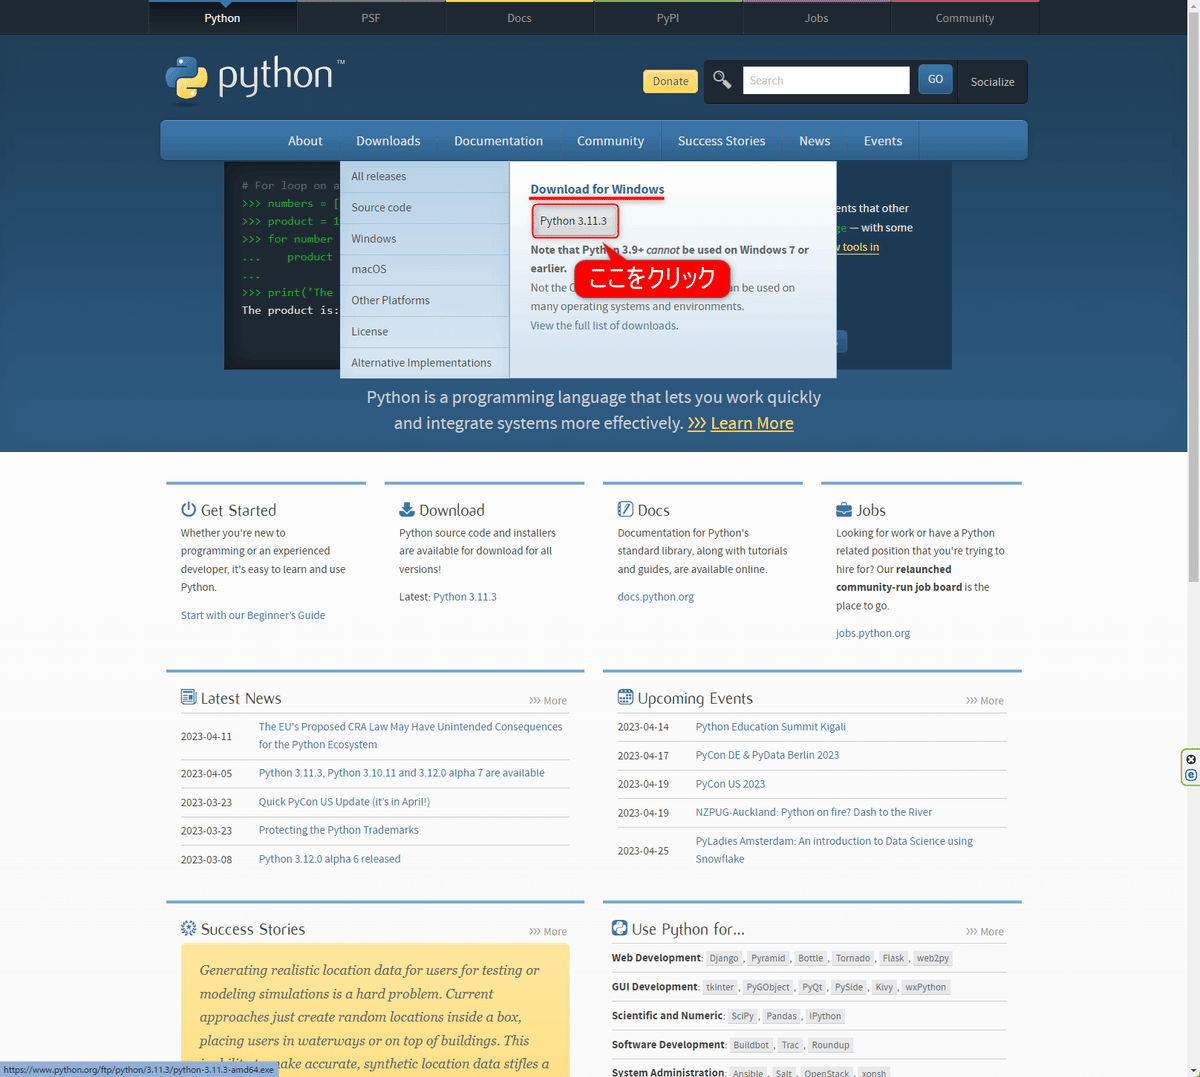
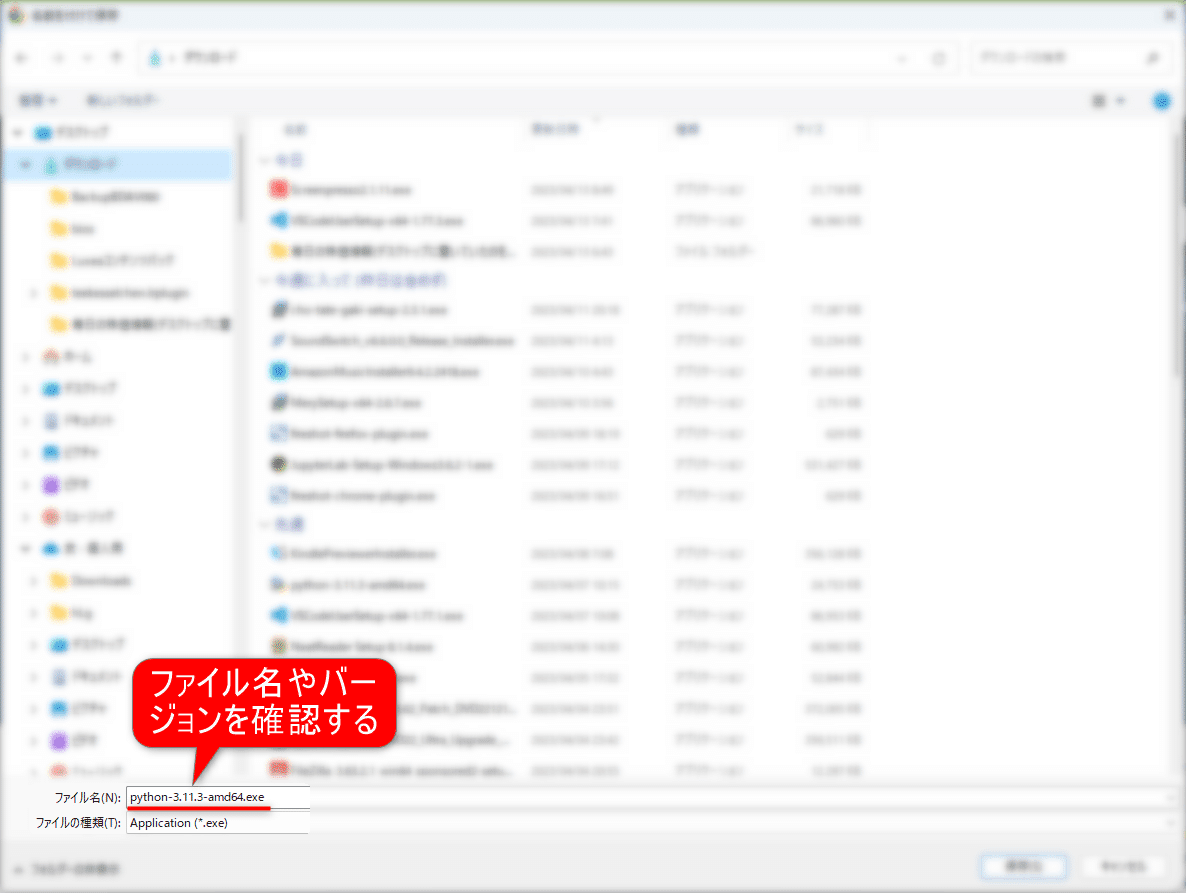
ダウンロード先を指定します。このときダウンロードするPythonは日本時間2023年4月13日 07:35時点の最新バージョンでは3.11.3(ファイル名はpython-3.11.3-amd64.exe)でした。
Visual Studio Codeのダウンロード
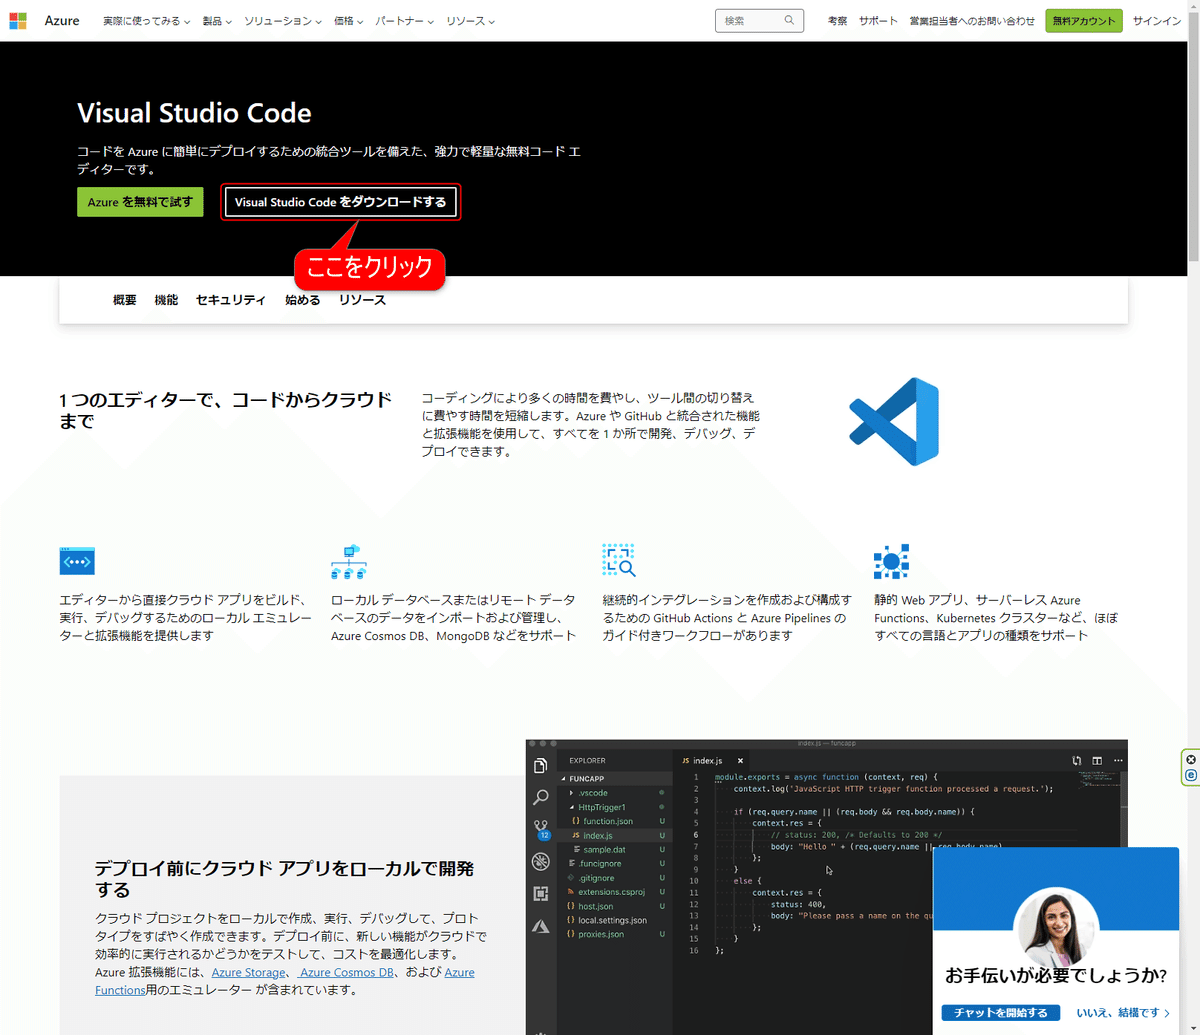
次にVisual Studio CodeのWebページにアクセスし、ダウンロードします。
[Visual Studio Codeをダウンロードする]をクリックします。
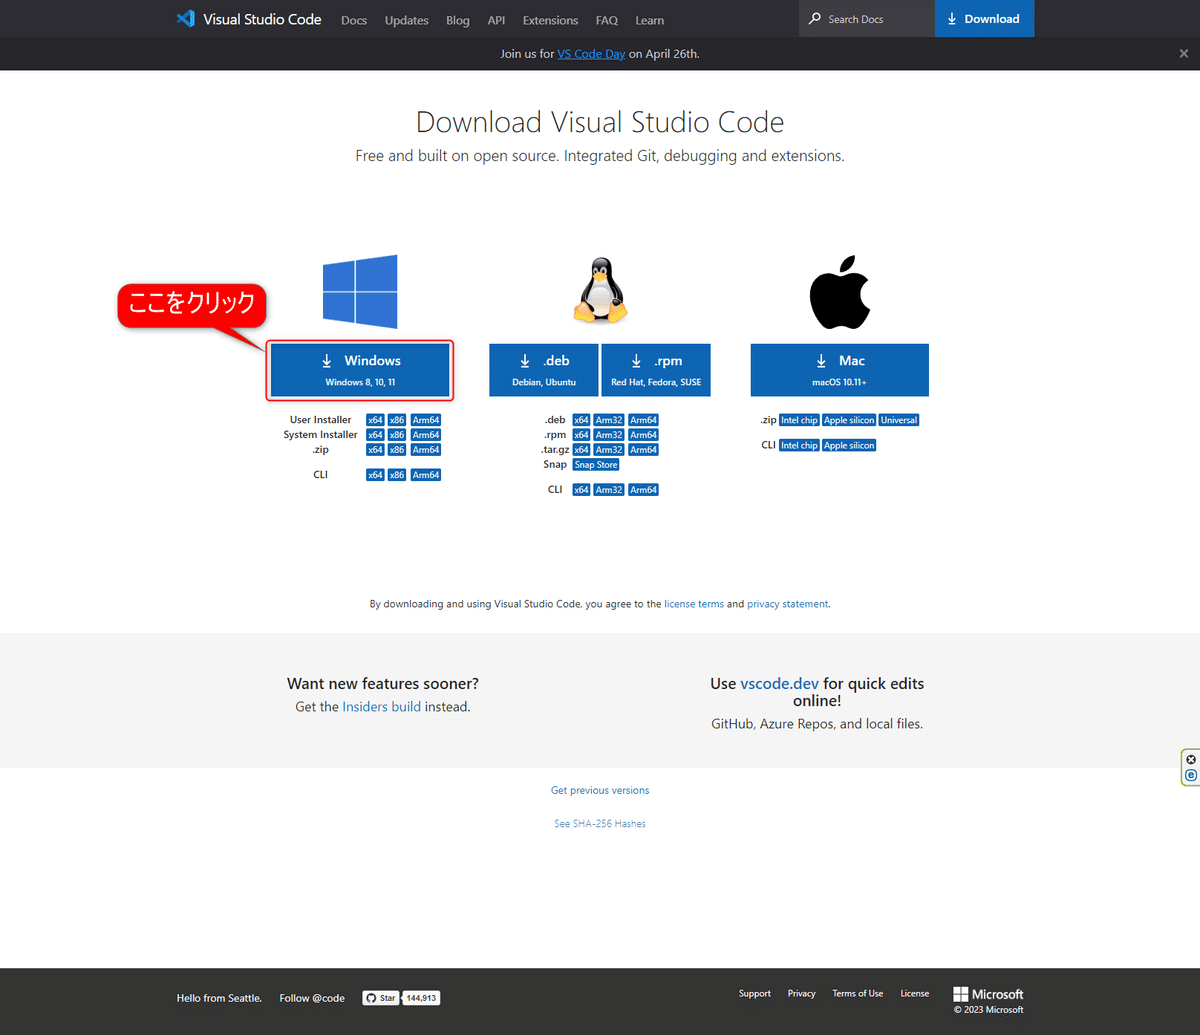
[Windows]をクリックします。
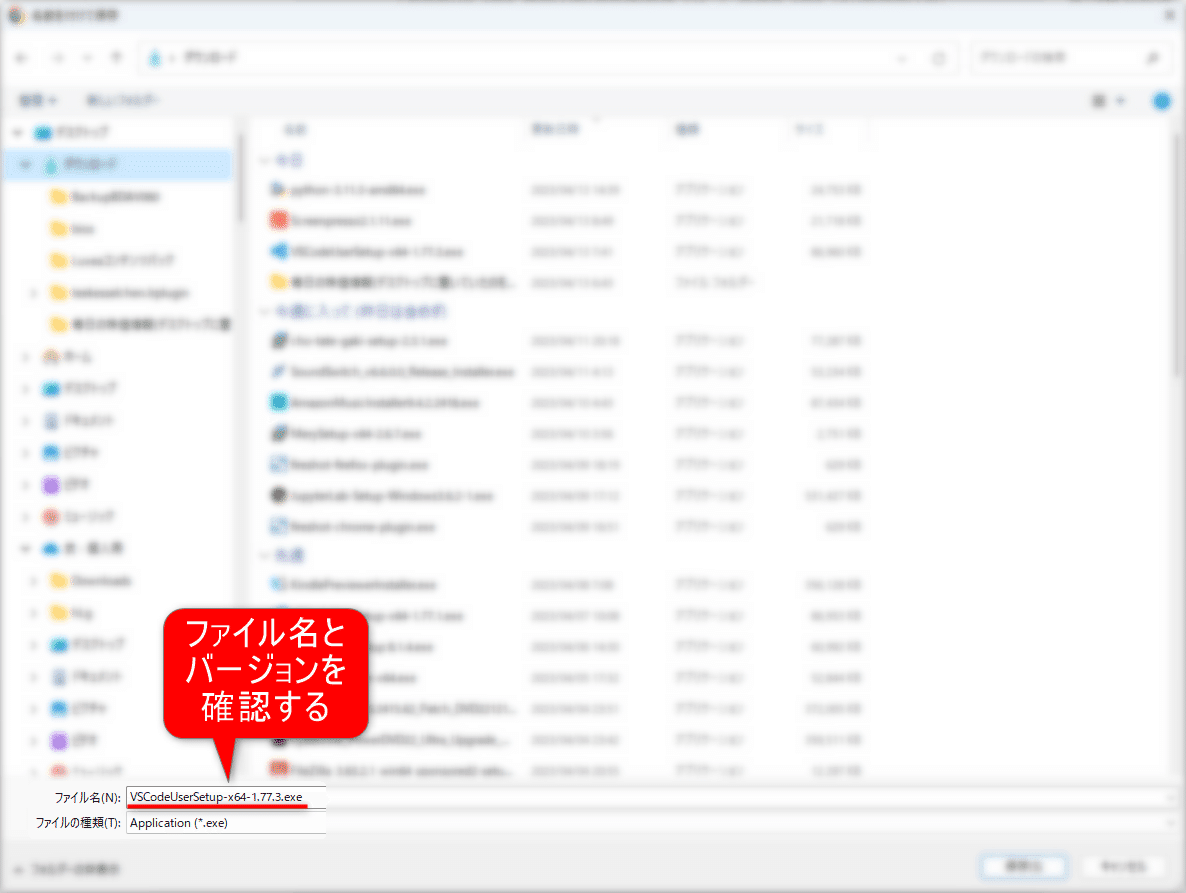
ダウンロード先を指定します。このときダウンロードするVisual Studio Codeは日本時間2023年4月13日 07:50時点の最新バージョンは1.77.3(ファイル名はVSCodeUserSetup-x64-1.77.3.exe)でした。
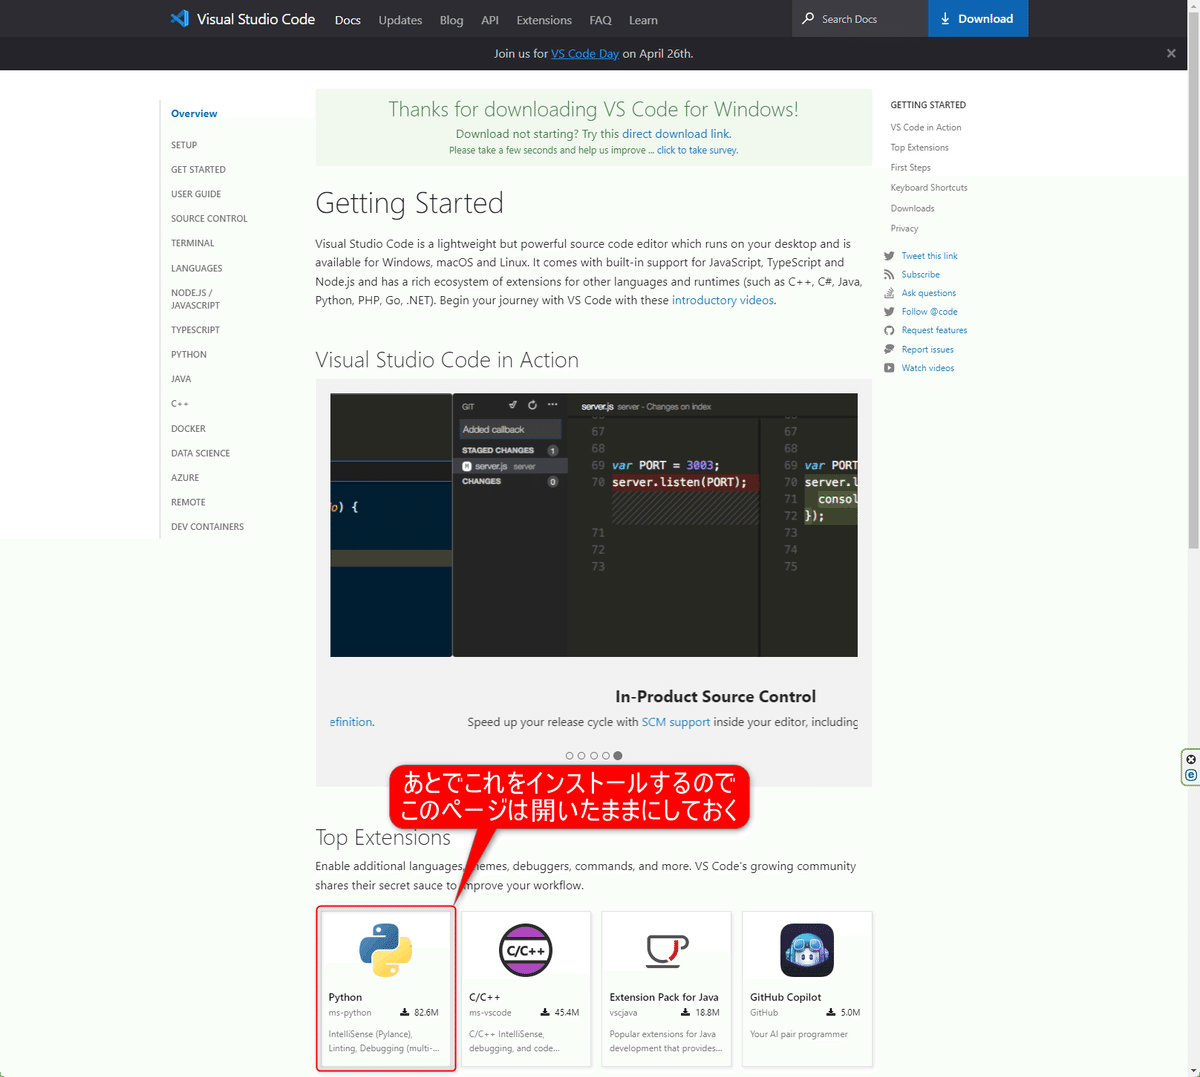
ダウンロードが完了するとWebブラウザはこのような画面が表示されますが、あとでここからさらに作業を進めますので、このページは表示したままにしておきます。
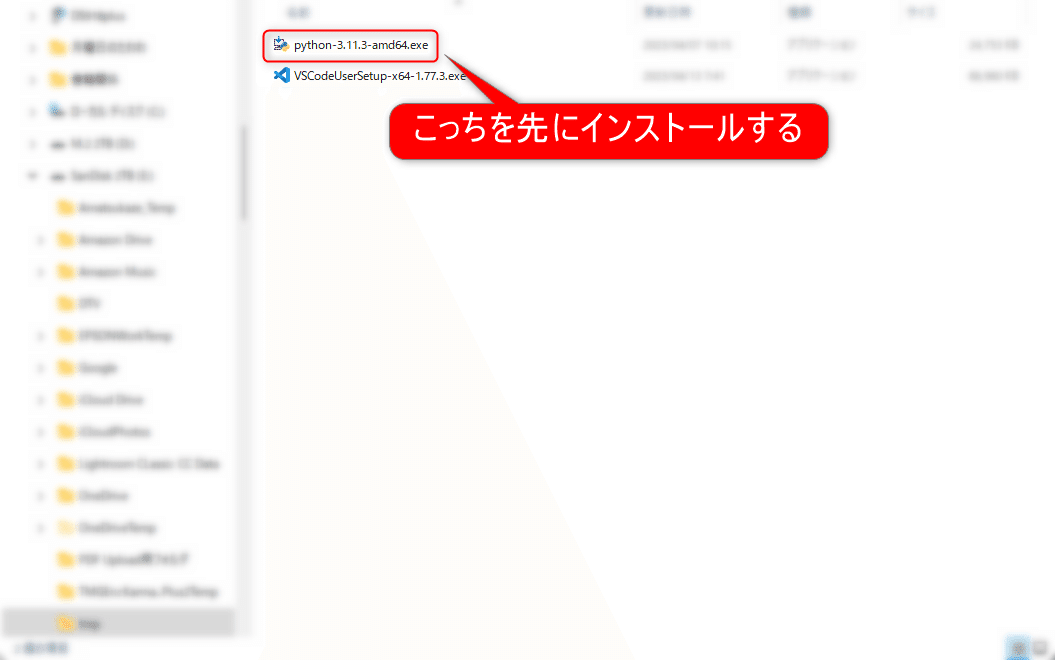
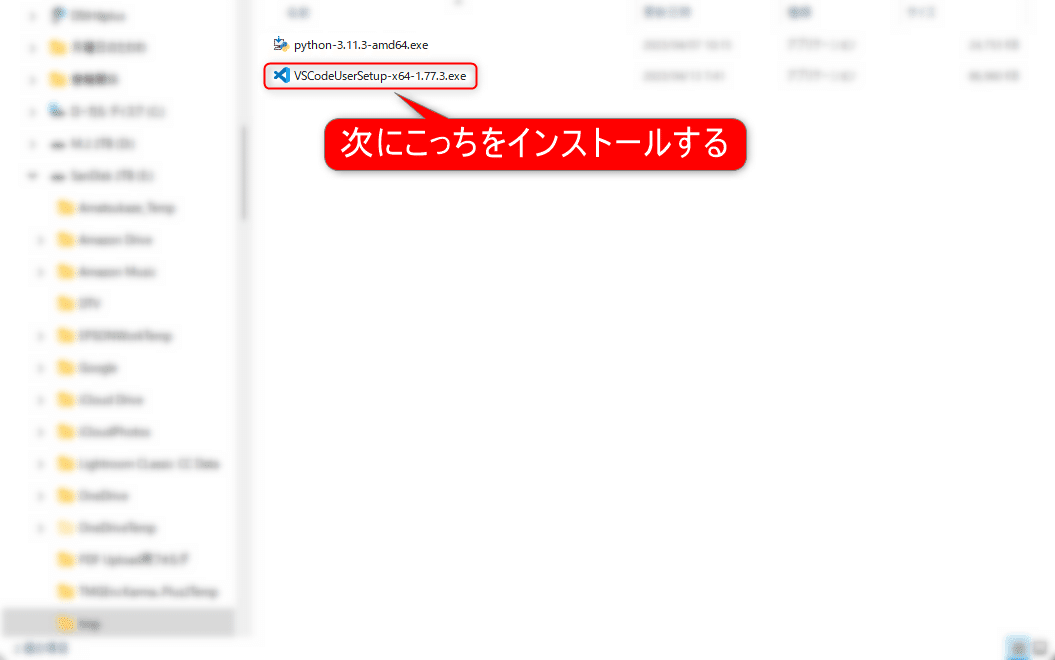
それぞれをダウンロードしましたら、先にPythonをインストールします。
Pythonのインストール
python-3.11.3-amd64.exeをダブルクリックします。
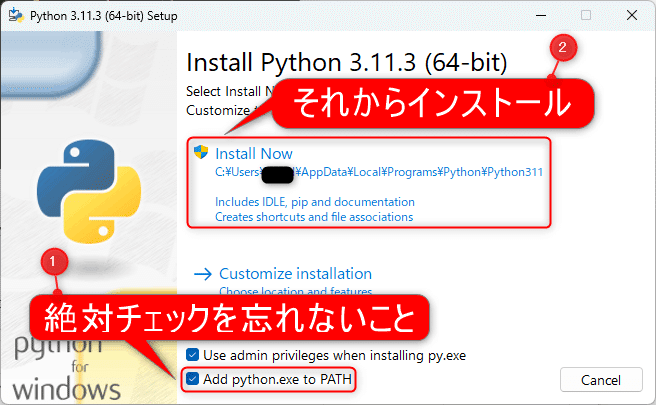
ウィンドウの下の[Add python.exe to PATH]にチェックを入れて、[Install Now]をクリックします。
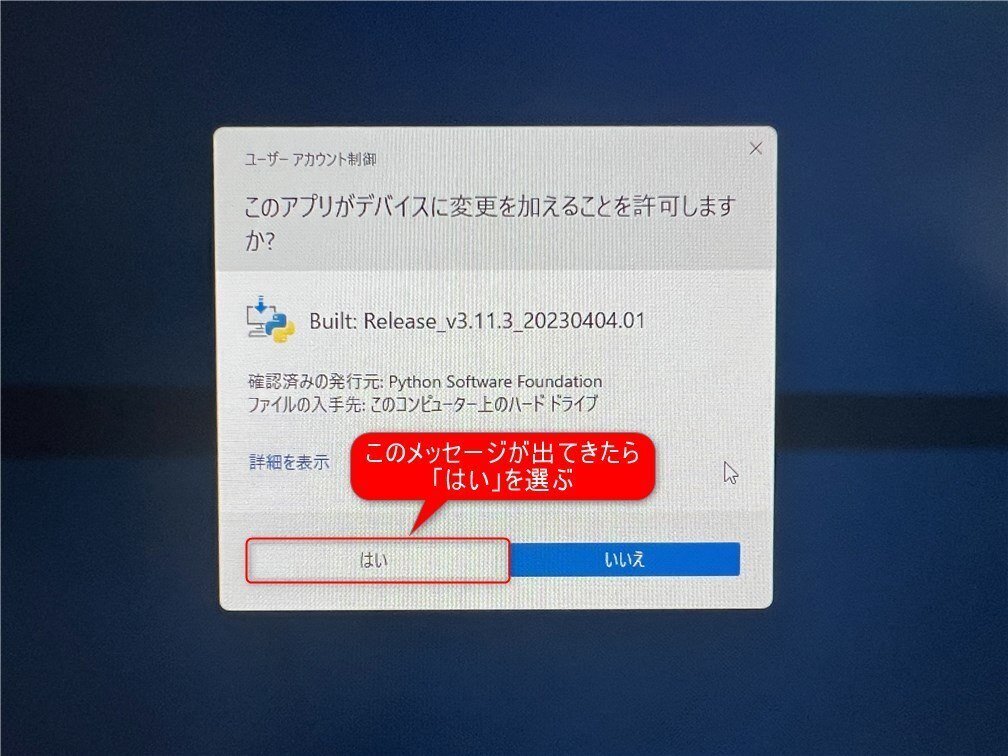
[このアプリがデバイスに変更を加えることを許可しますか?]には[はい]をクリックしてインストールを始めます。
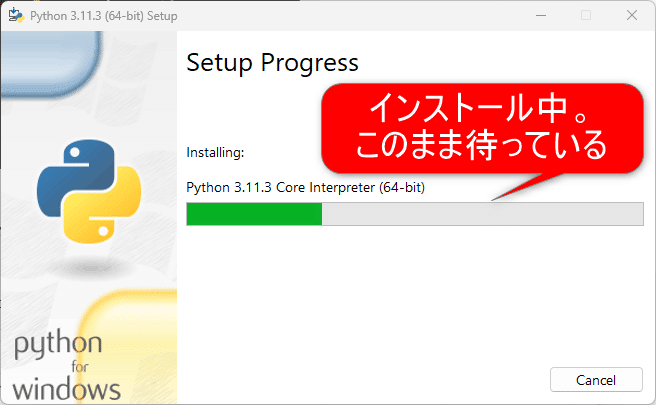
インストールしているとこのようなウィンドウが表示され、緑色のバーが右に伸びていきます。
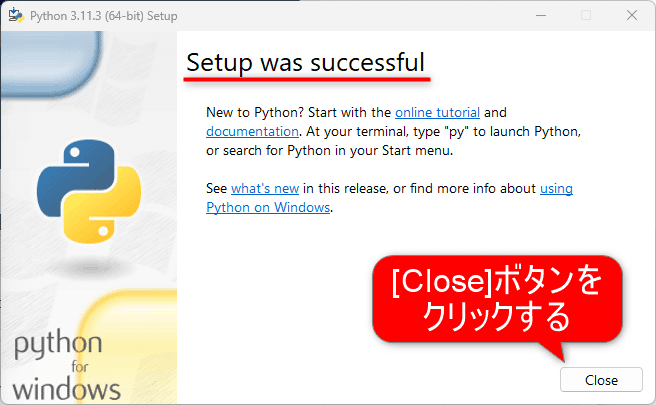
インストールに成功すると、このようなメッセージが表示されます。[Close]ボタンをクリックし、インストールを終了させます。
Visual Studio Codeのインストール
VSCodeUserSetup-x64-1.77.3.exeをダブルクリックします。
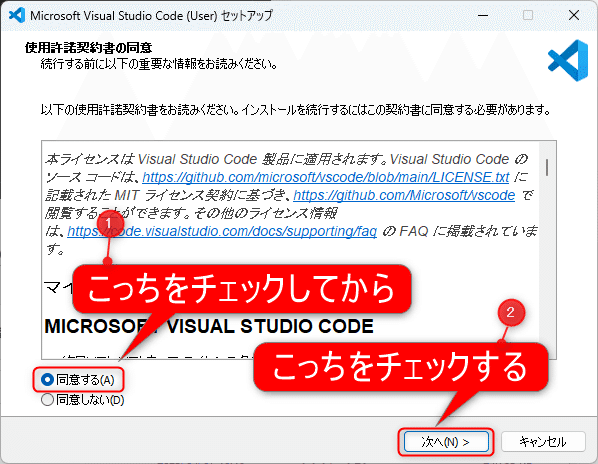
[使用許諾契約書の同意]の画面が表示されます。[同意する]にチェックを入れ、[次へ]ボタンをクリックします。
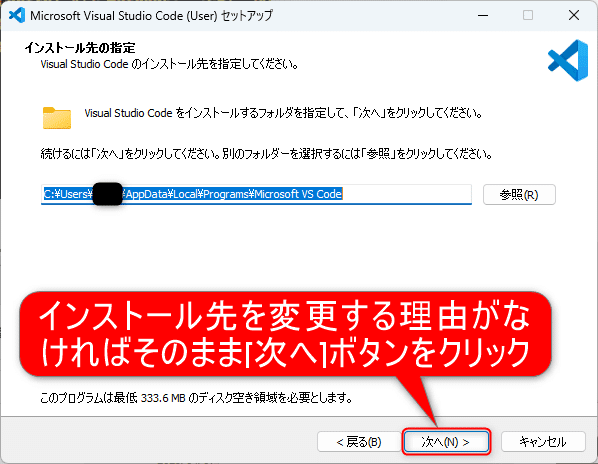
インストール先の指定をしますが、特に理由がなければそのまま[次へ]ボタンをクリックします。
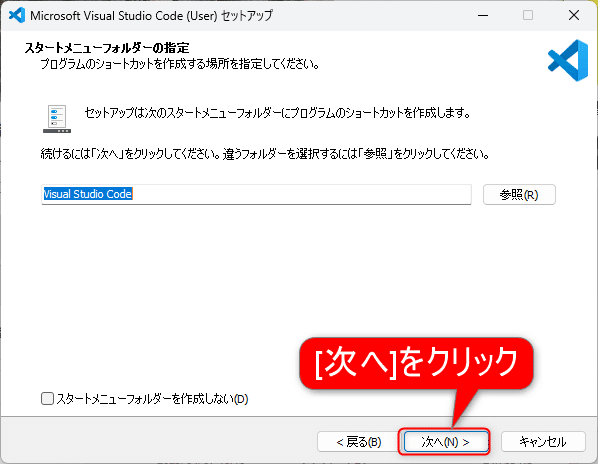
[スタートメニューフォルダーの指定]の画面が表示されますが、そのまま[次へ]ボタンをクリックします。
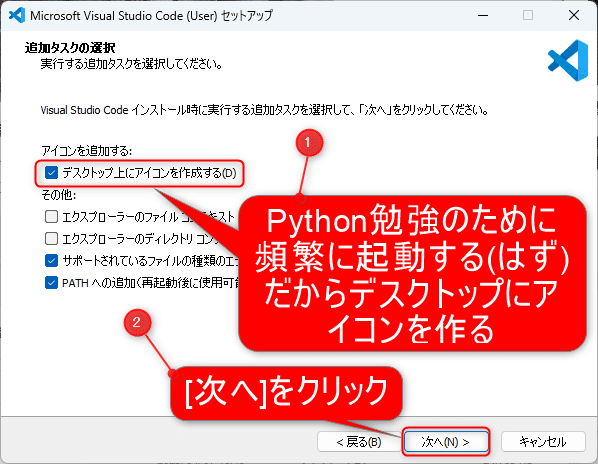
[デスクトップ上にアイコンを作成する]にチェックを入れて、[次へ]ボタンをクリックします。スタートメニューから起動するならばチェックしないまま[次へ]ボタンをクリックします。
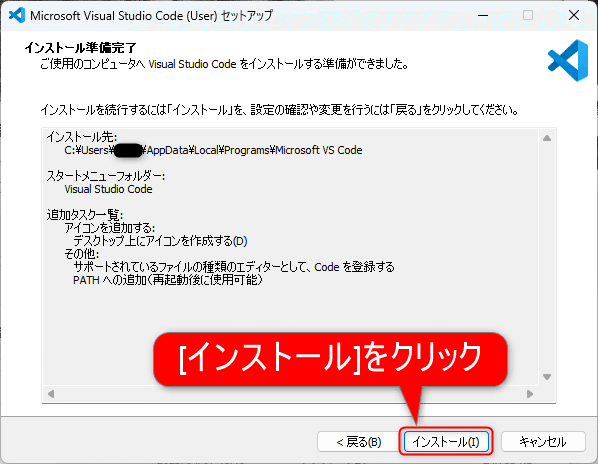
[インストール準備完了]画面が表示されます。インストール先やデスクトップにアイコンを作るなどの設定に問題がなければ[インストール]ボタンをクリックします。
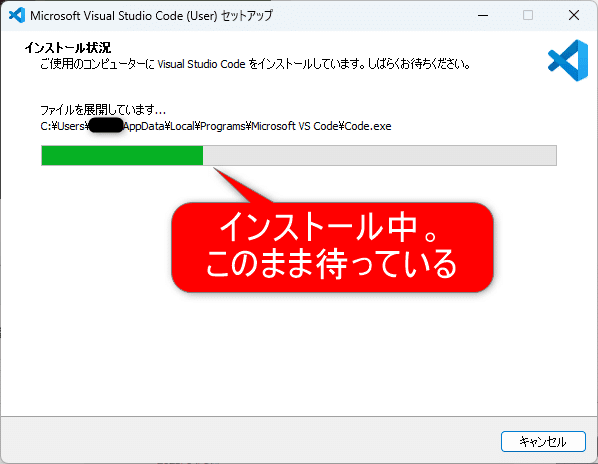
インストールしているとこのようなウィンドウが表示され、緑色のバーが右に伸びていきます。
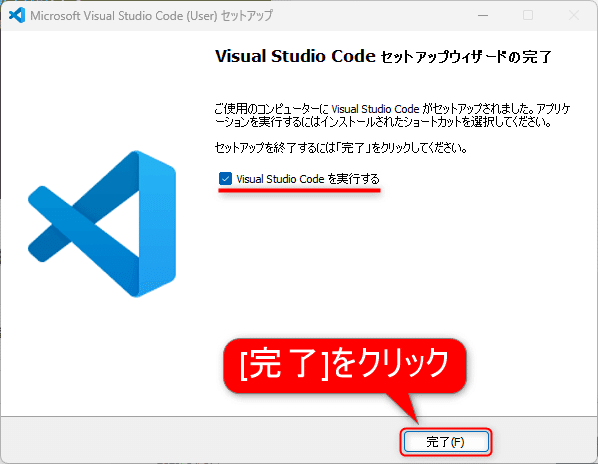
このような画面が表示されれば、インストールは完了です。
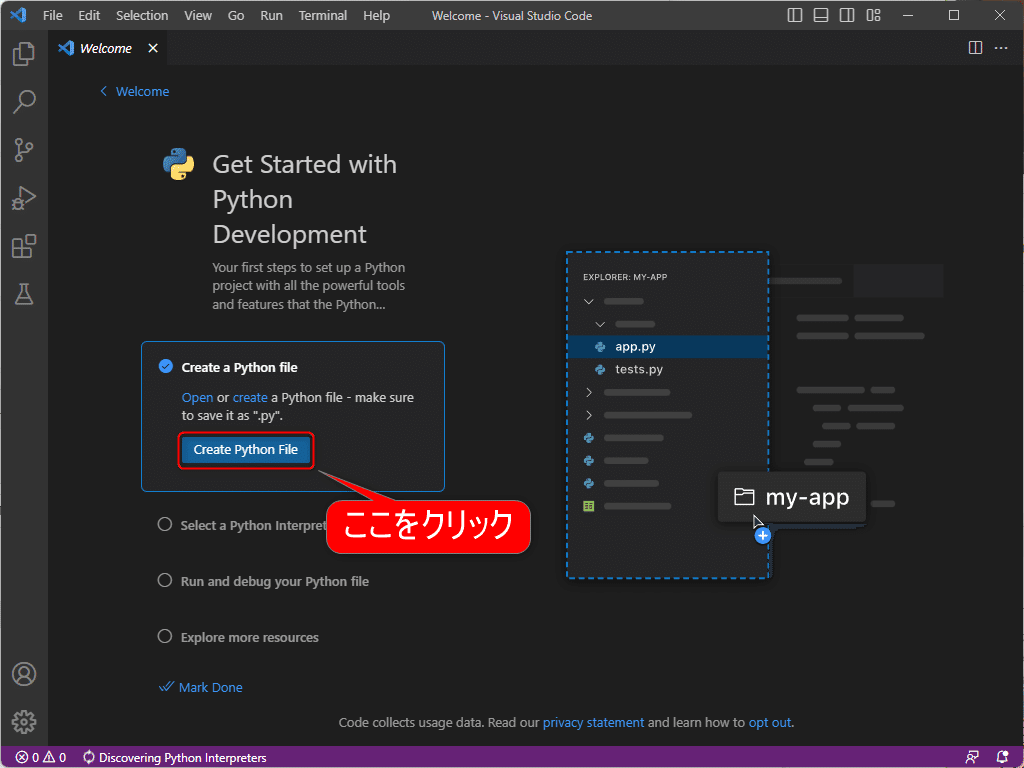
このままVisual Studio Codeを実行すれば、このような画面が表示されます。Pythonを使う場合は[Create a Python file]ボタンをクリックします。
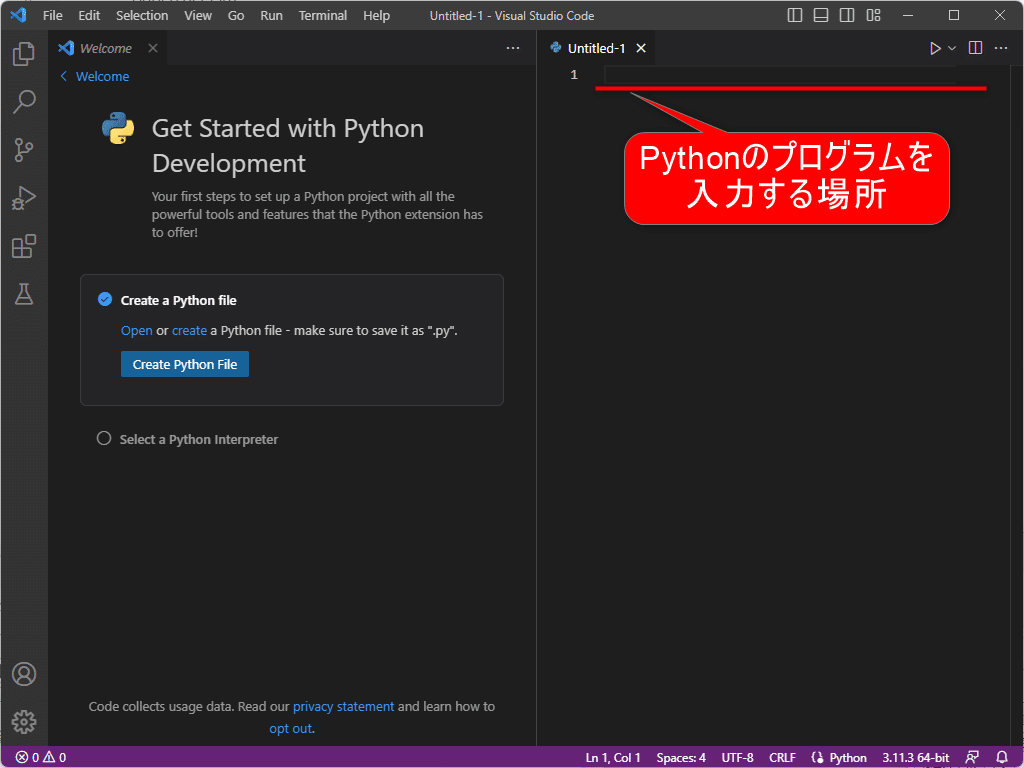
Visual Studio CodeでPythonが動くか確認する
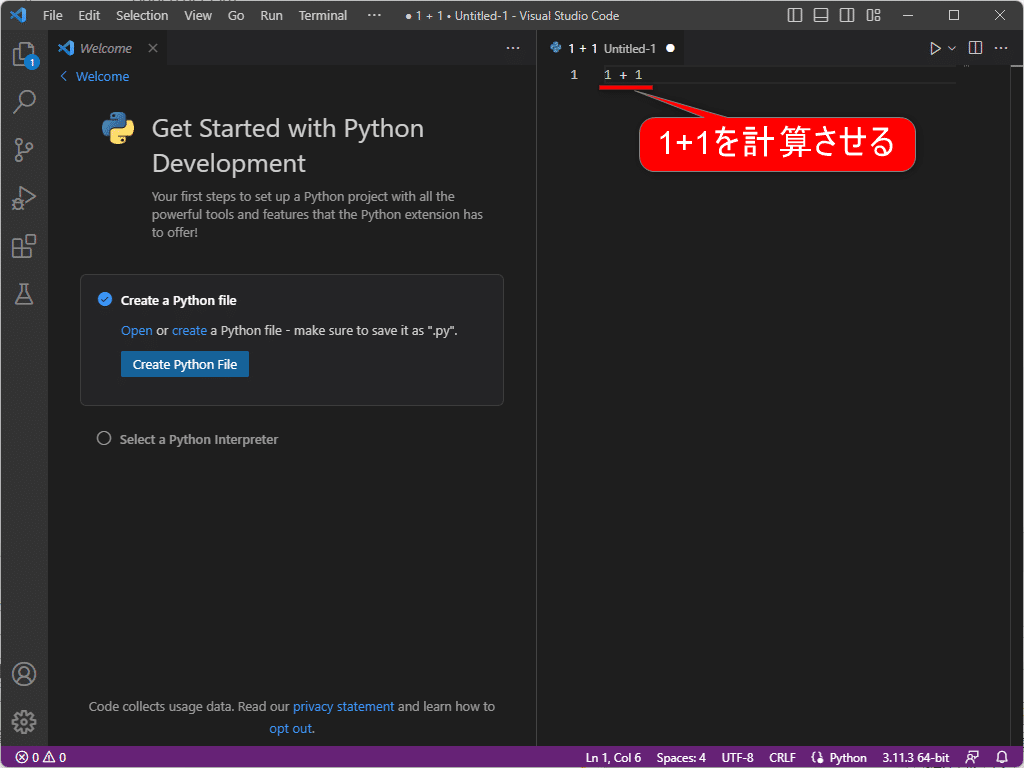
ウィンドウの右側がPythonの環境になります。
ここではPythonに「1 + 1」と入力して、計算させようと思います。「1 + 1」と入力した後、、Shiftキーを押しながらEnterキーを押します。
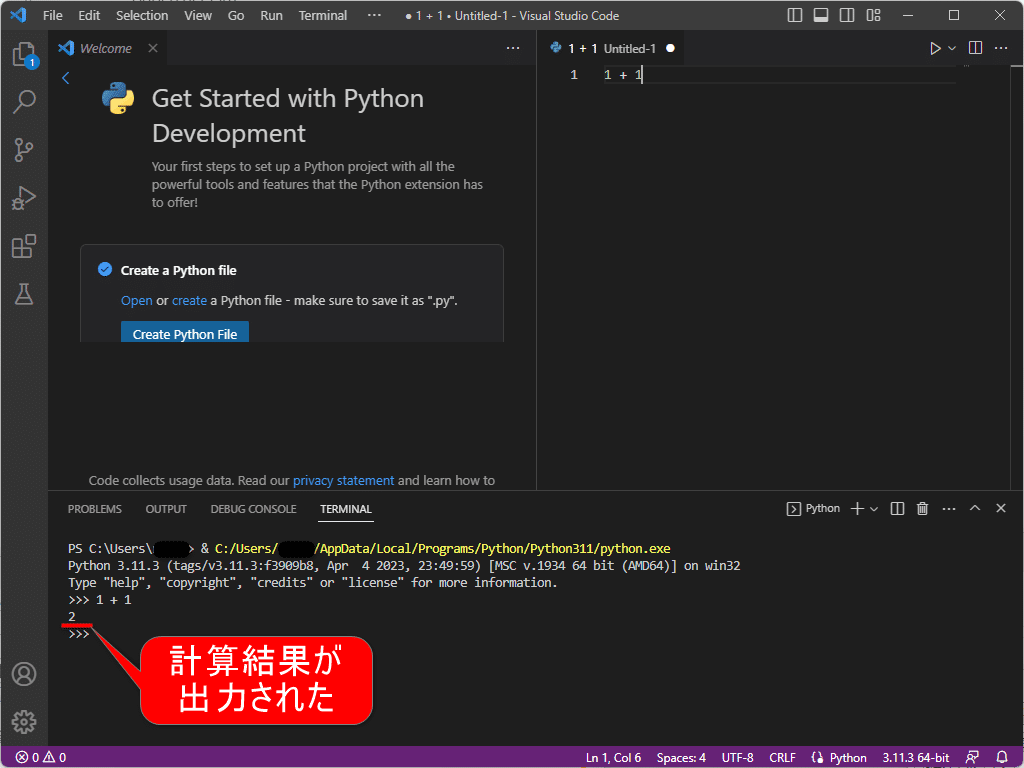
ウィンドウの下部分にPythonの実行環境が表示され、1 + 1の結果の2が表示されています。これでちゃんとPythonとVisual Studio Codeが連携して動いていることが確認できました。
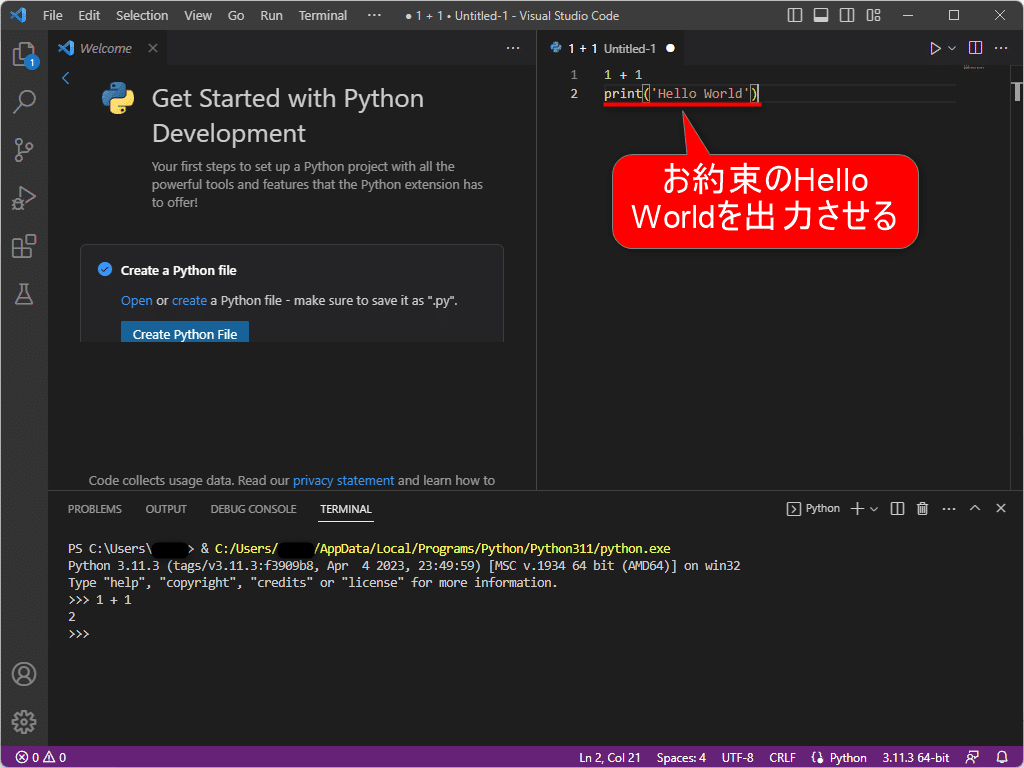
では、お約束のHello Worldを表示させたいと思います。
右上の画面でEnterキーを押し、2行目を表示させます。そしてprint('Hello World')と入力し、
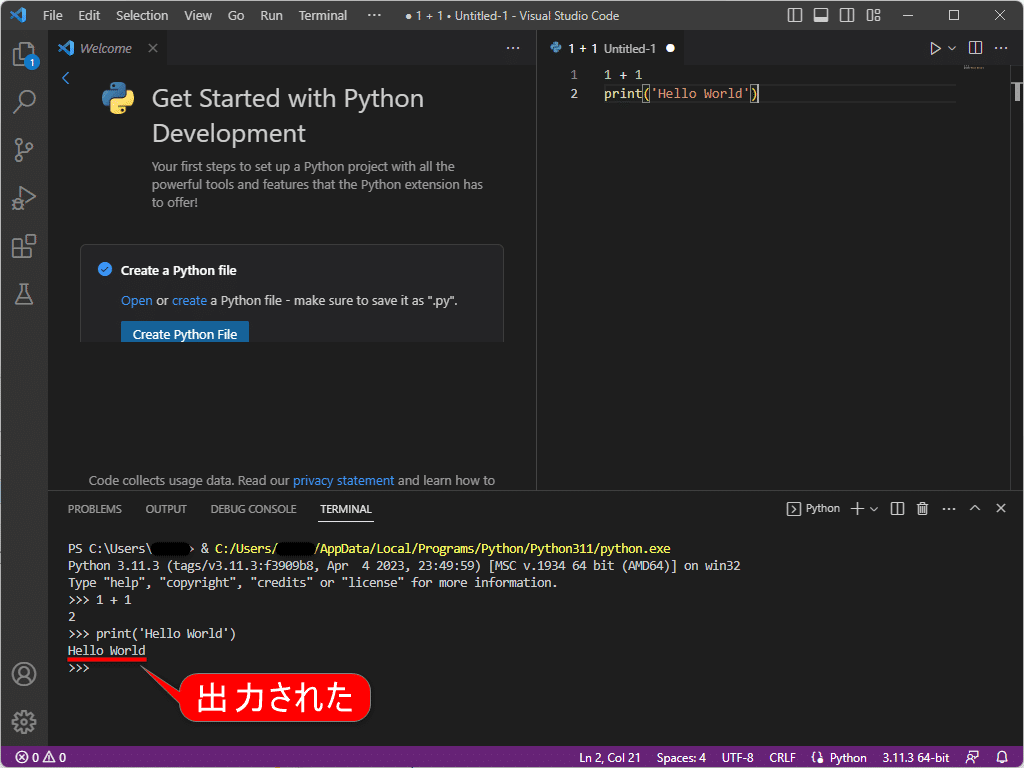
Shiftキーと押しながらEnterキーを押すと、ウィンドウ下にHello Worldが表示されます。
Pythonに命令を実行させる場合はShiftキーを押しながらEnterキーを押します。Enterキーだけ押すと改行されるだけで、命令は実行されませんので注意が必要です。間違ってEnterキーだけを押した場合は、マウスで実行させたい命令の行をクリックするか、カーソルキーを上下させて実行させたい命令の行に移動し、Shiftキーを押しながらEnterキーを押せば実行されます。
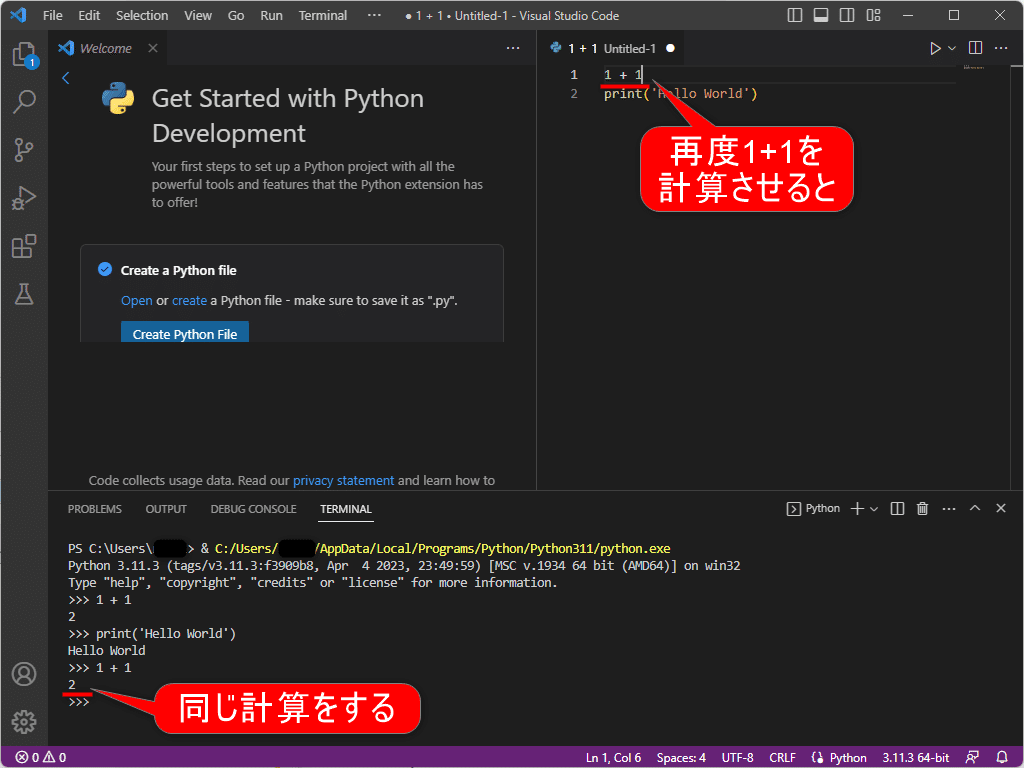
最初に「1 + 1」を計算させましたが、またこれを実行したい場合、マウスでこの行をクリックするか、カーソルキーでこの行に移動し、Shiftキーを押しながらEnterキーを押します。すると再度「1 + 1」の結果が表示されます。
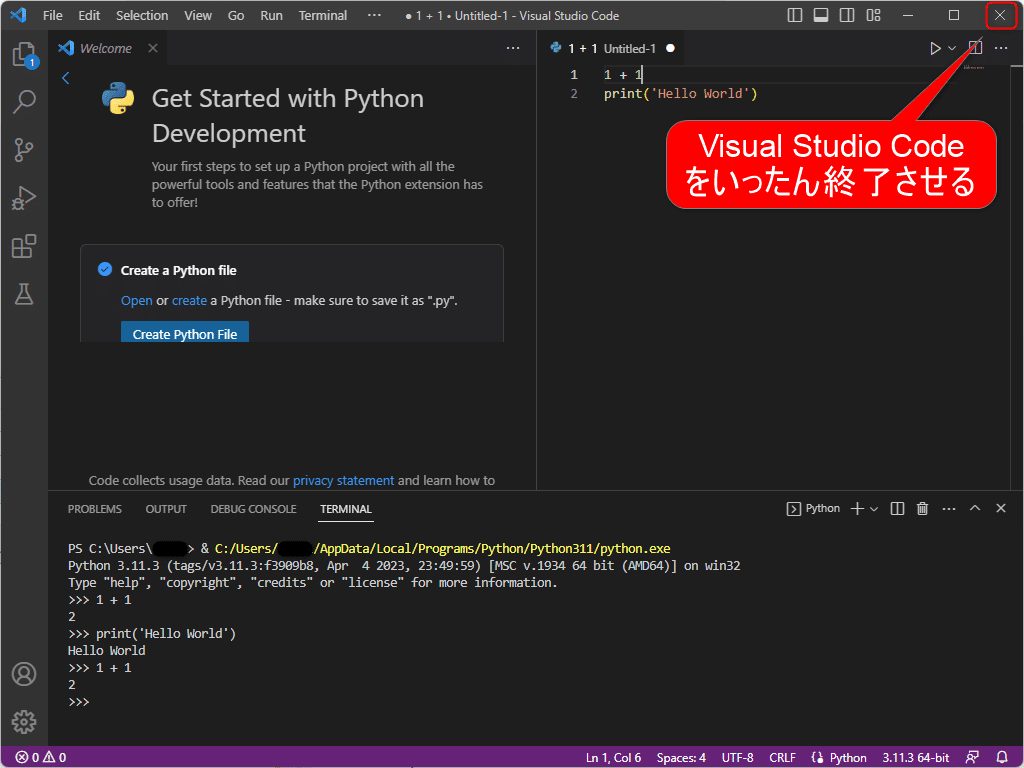
Visual Studio CodeでPythonが動く環境はこれでもいいのですが、さらにPythonのプログラミングをする上で便利になるようなVisual Studio Codeの機能拡張があります。それをインストールするために、一度Visual Studio Codeを終了させます。
Visual Studio Codeの機能拡張をインストールする
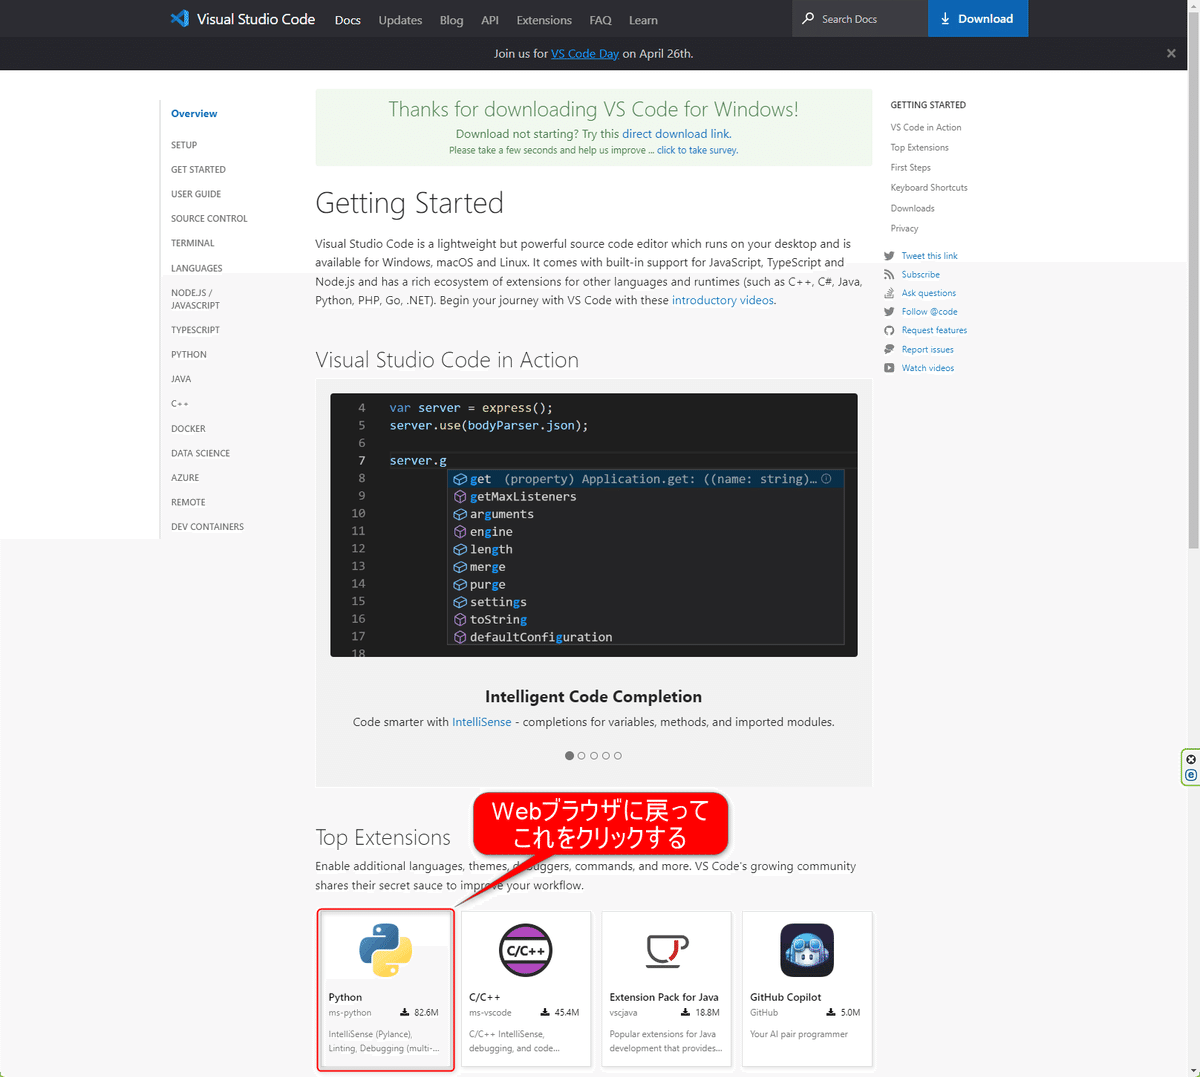
Visual Studio Codeをダウンロードしたあと、そのまま表示しておくように言った画面の下の[Python]をクリックします。
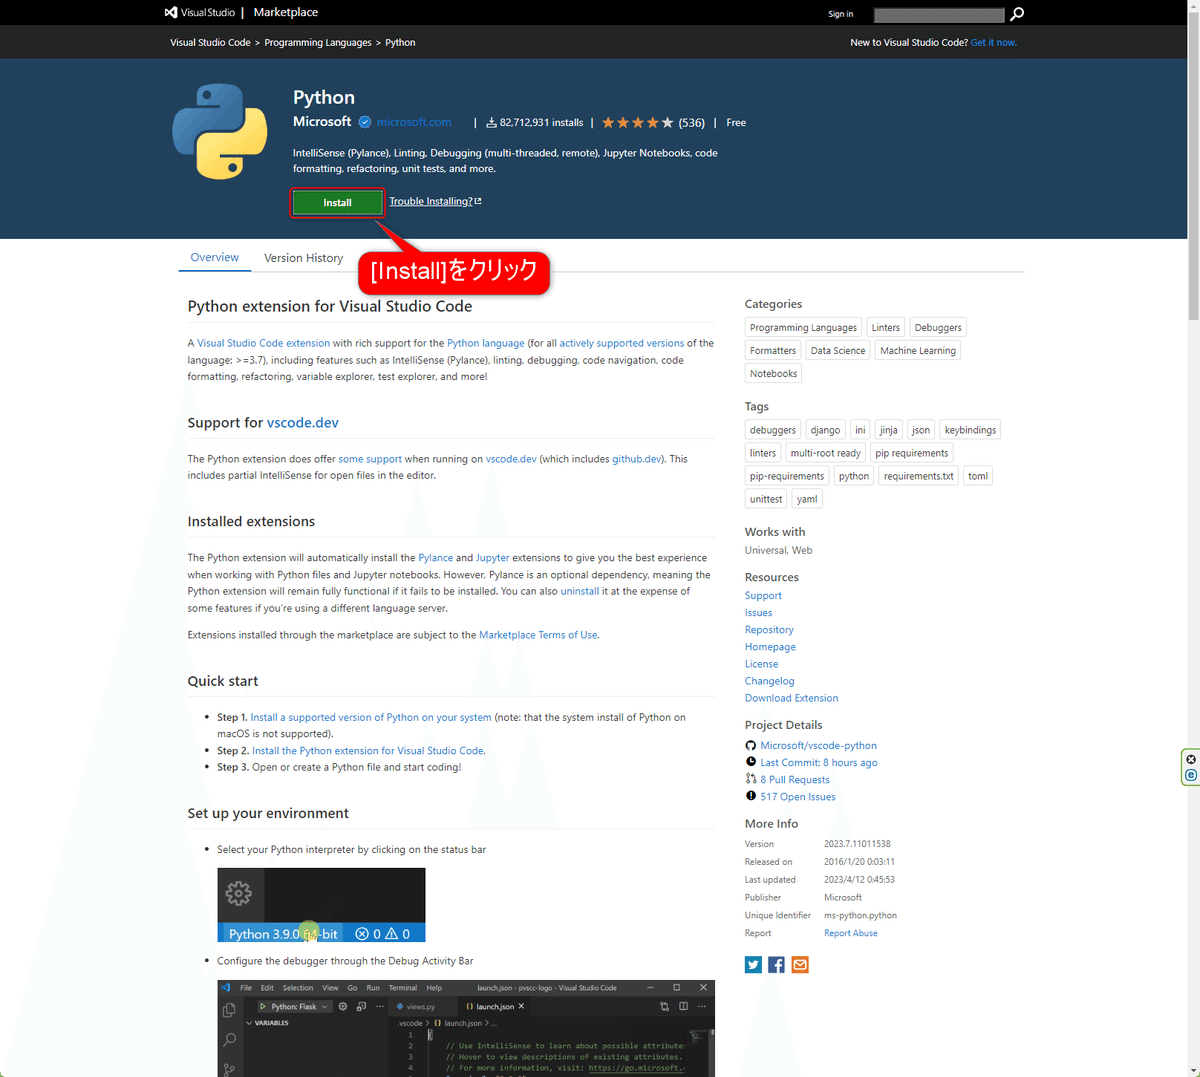
次に画面上部にある[Install]ボタンをクリックします。
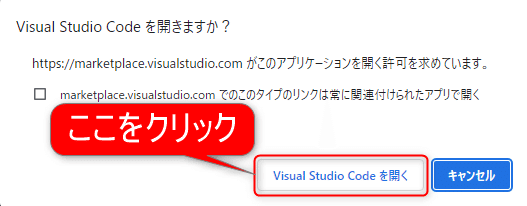
Visual Studio Codeを開くかどうか聞いてきますので、[Visual Studio Codeを開く]ボタンをクリックします。
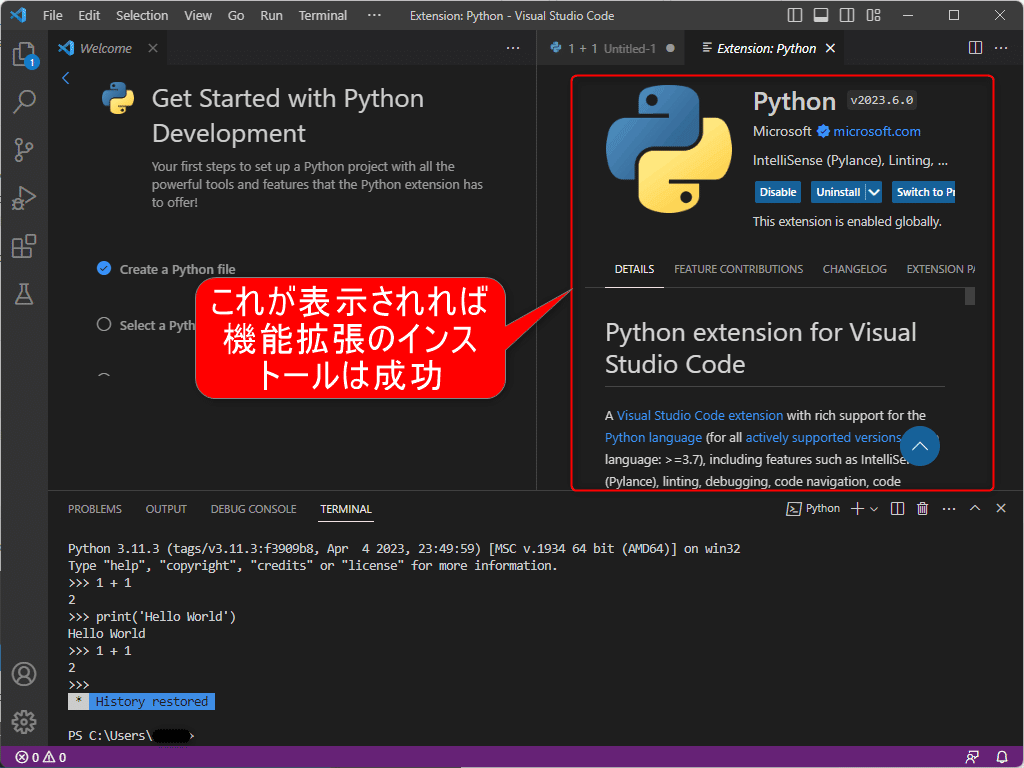
このような画面が表示されたらインストール完了です。ウィンドウの右側のEXTENSION PACK(文字が画面のように途中で切れている場合はウィンドウの幅を広げると全部読めます)をクリックします。
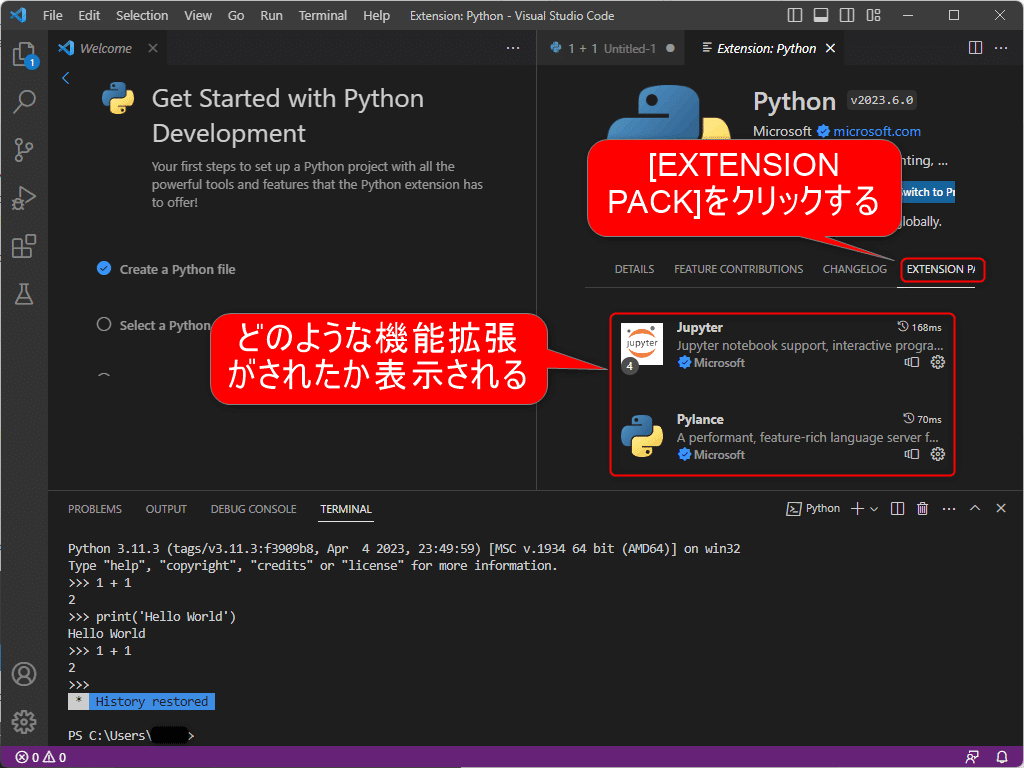
するとどのような拡張パックがインストールされたかが表示され、今回はJupyter Notebookが入っているのが分かります。
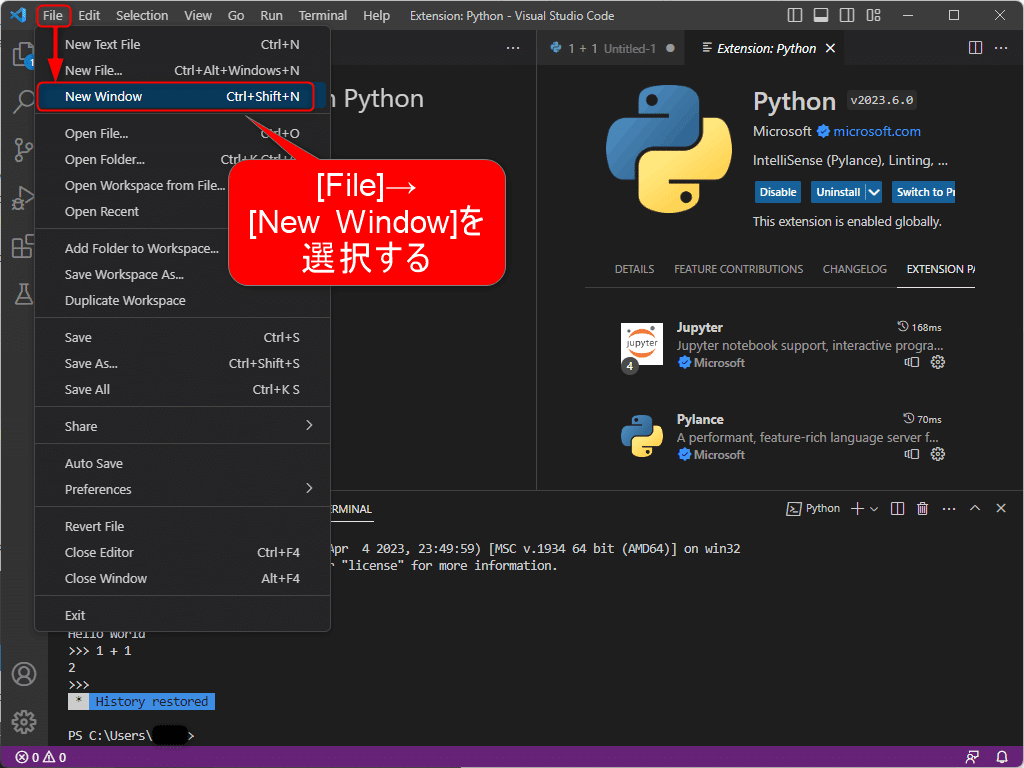
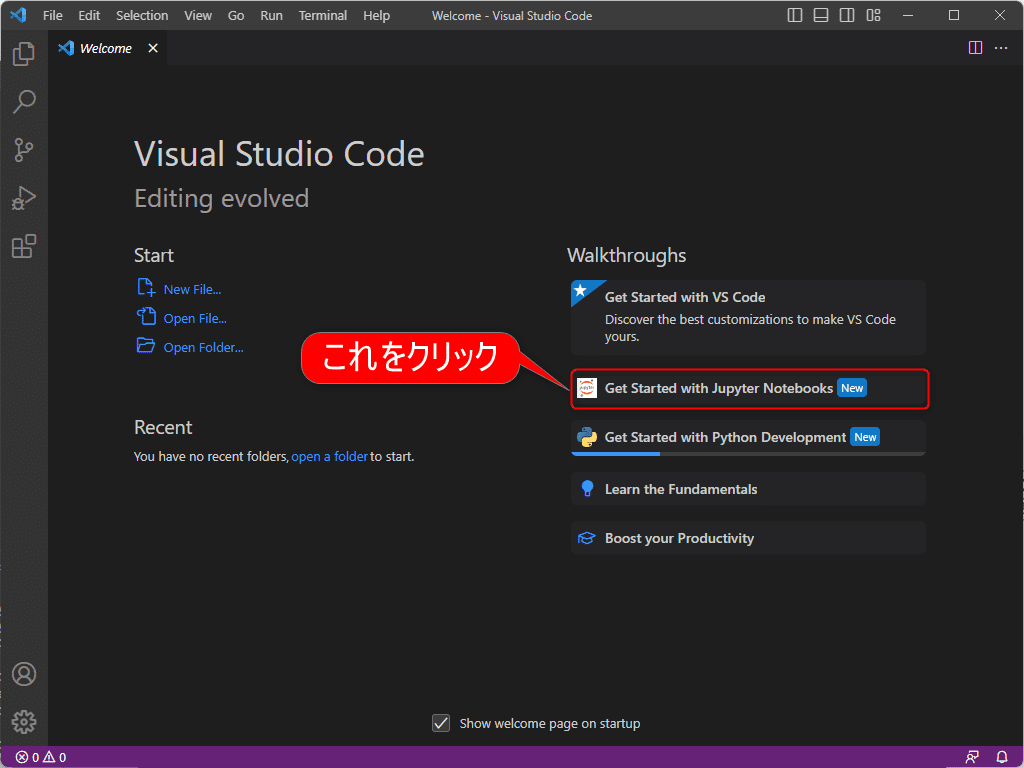
Jupyterを使いたい場合はプルダウンメニューから[File]→[New Window]を選択します。
すると新しいWindowsでJupyter Notebookを使う選択肢が出てきますので、これをクリックします。
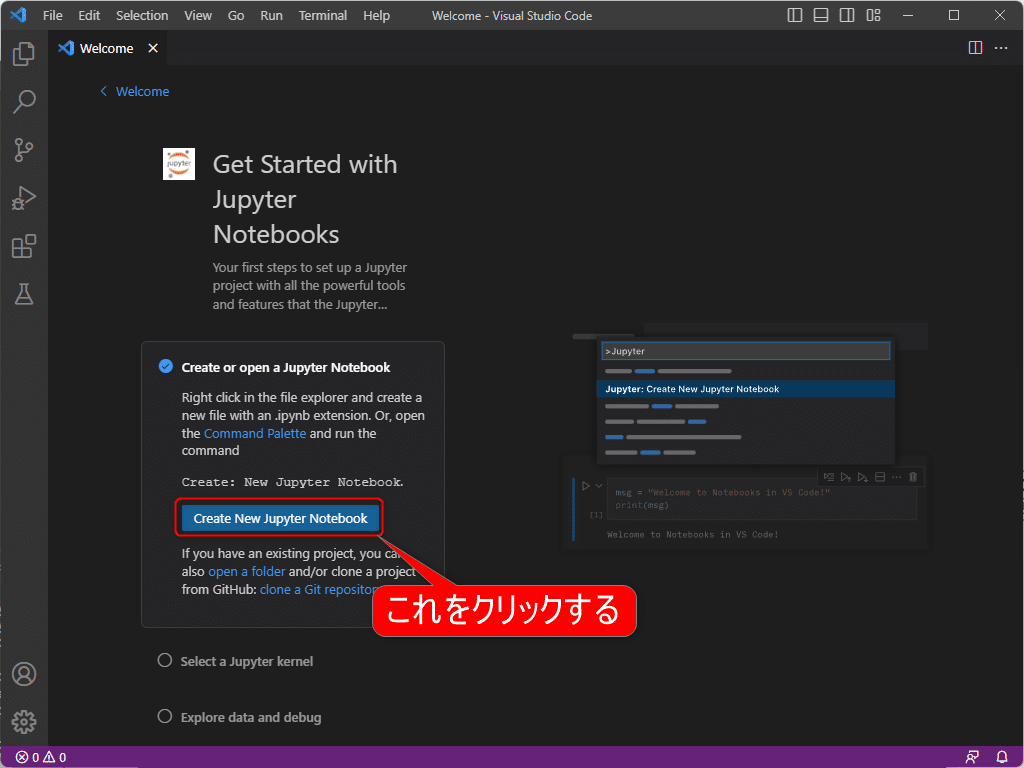
そして[Create New Jupyter Notebook]をクリックします。
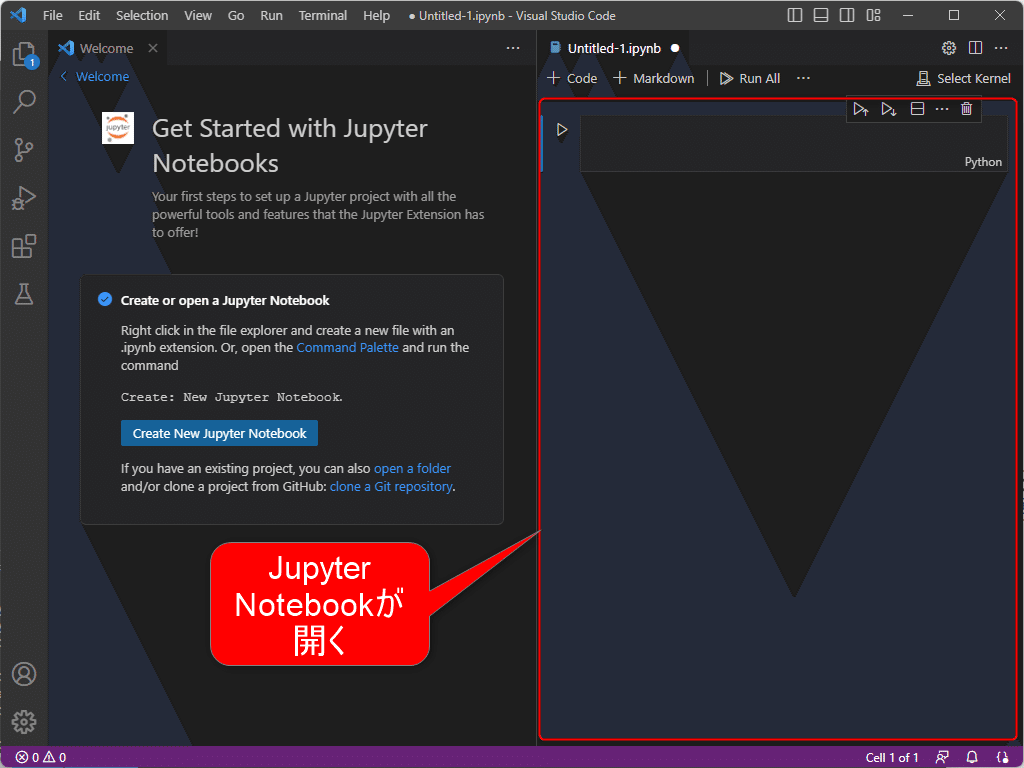
そうするとウィンドウ右側がJupyter Notebookになります(VIsual Studio Codeインストール直後の画面と違うのが分かるでしょうか)。
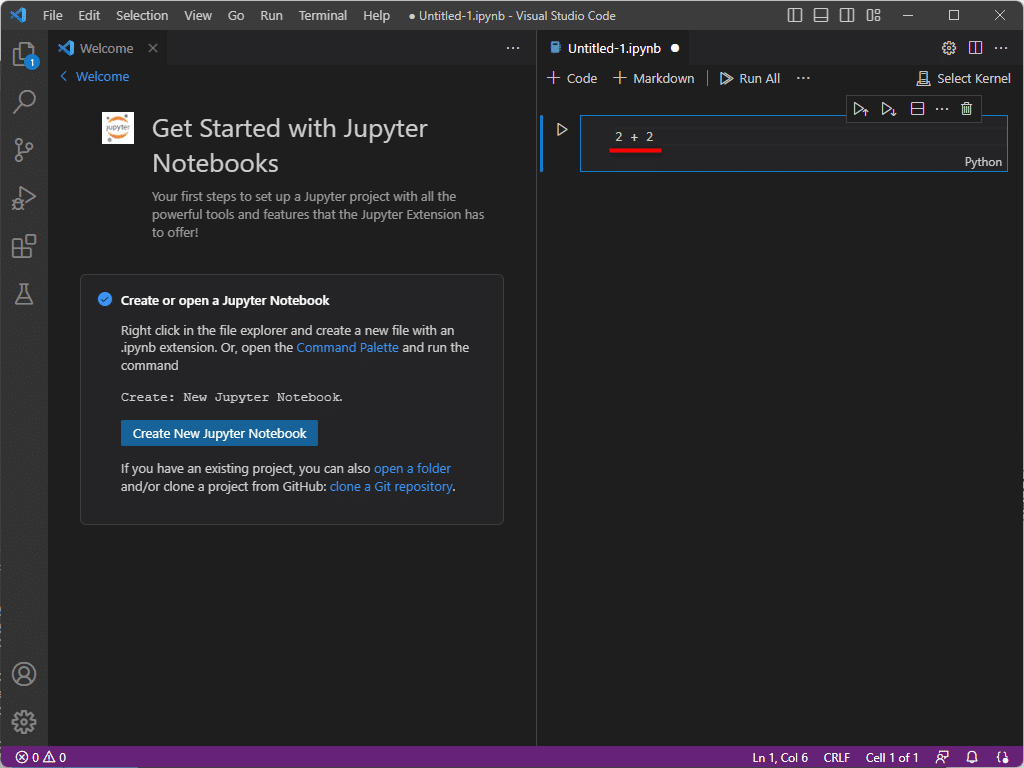
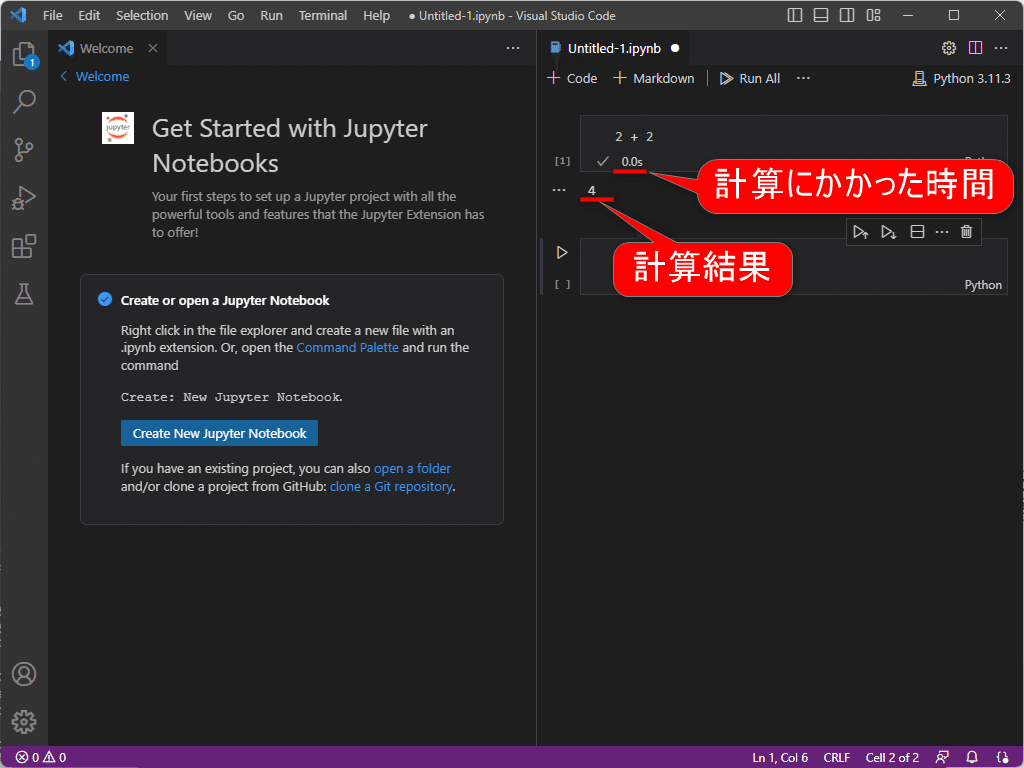
今度は2 + 2を計算させようと思います。2 + 2と入力後、Shiftキーを押しながらEnterキーを押します。
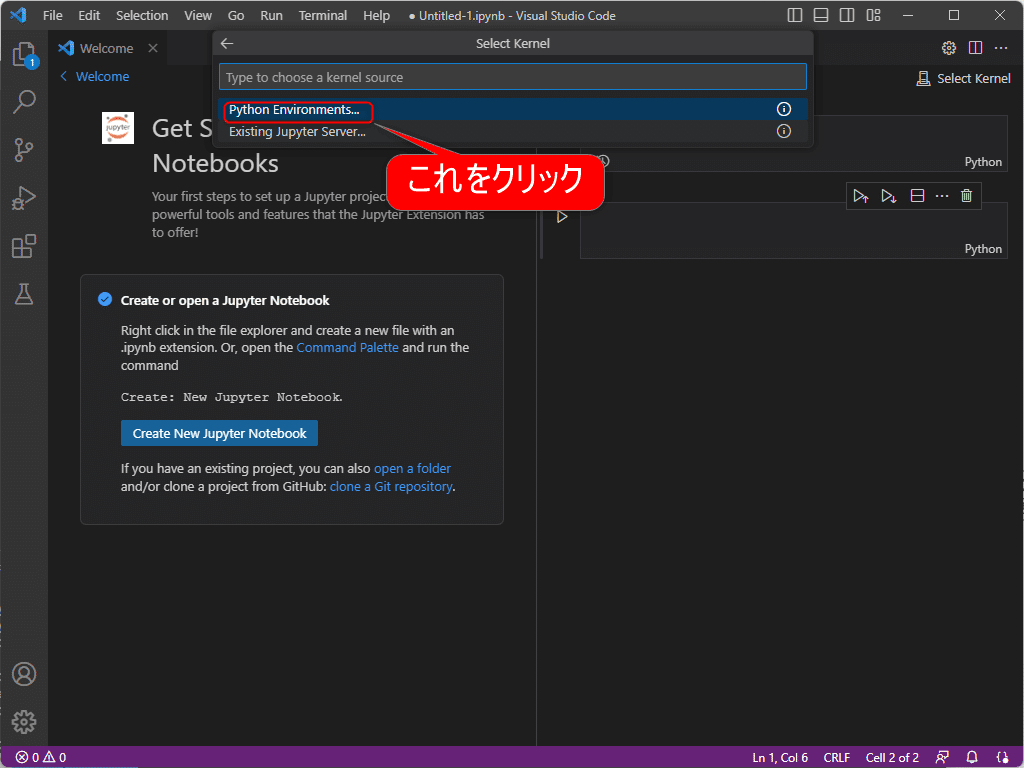
そしたらKernel(ここではPythonを動かすための心臓部と言ったらいいのでしょうか)を選択するように求めてきます。ここは[Python Environments...]を選択します。
するとどのPythonの環境を使うか求められます。Recommendedとなっている★付きのPython 3.11.3を選択します。

すると2 + 2の計算にかかった時間とともに、計算結果である4が表示されました。
ここで、Jupyter NotebookでHello Worldを表示させようとした場合の動画をお見せしたいと思います。
見ての通り、命令を入力していくと、それを手助けするために関連するキーワードや括弧やシングルクォーテーションの補完といったことをしてくれます。ちょっとプログラミングを助けてくれます(これはVisual Studio CodeをインストールしてPythonと連携させた直後でも同じ)。
以上でPythonとVisual Studio Codeのインストールと連携、そしてついでにJupyter Notebookのインストールとそれを利用するところまで持って行くことが出来ました。
他にもいろいろと環境設定をしなければいけなかったり、今回のインストールでやってない環境設定があるかもしれません。ですが一応動くところまで持って行くことが出来ました。
後はPythonを勉強しながら追い追い環境を整えていきたいと思います。