UE5 C++&BP 04【Blueprint版】Componentを追加する

Unreal Engine 5から始める C++ & Blueprint執筆のために朝活続いています。
やはり目標が決まると、朝起きる力がもらえます。
寒さに負けない!
公開するまでに何を書けばいいか、頭の中にあるロードマップをGitHubに書き起こしました。
基本文法のタスクがすべて「Shipped Zenn Book」に移動すれば公開です。
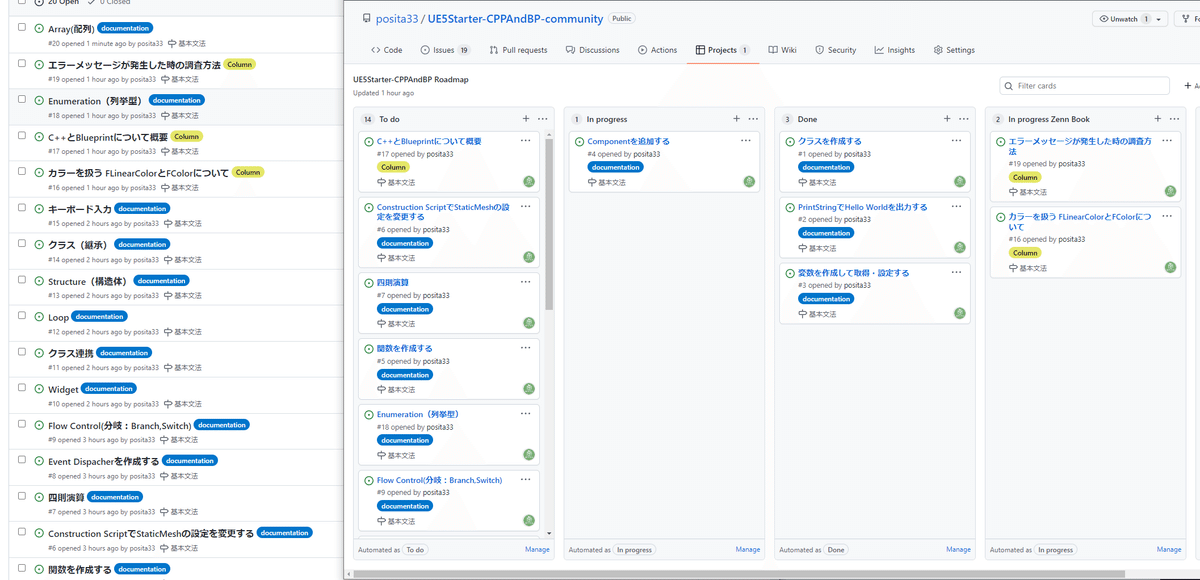
Zennに進捗報告をするScrapを作成しました。
逐一、出来上がったところまで報告します。
前回は「変数を作成して取得・設定する」方法について調査しました。
今回は「Componentを追加する」方法について調査していきます。
【Blueprint版】Componentを追加する
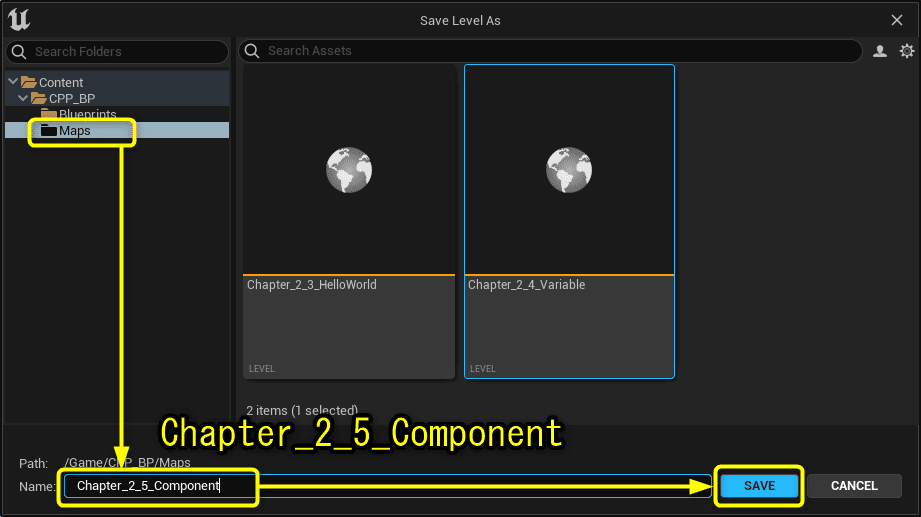
学習用の新規レベル「Chapter_2_5_Component」を作成する
学習用の新規レベルを作成します。
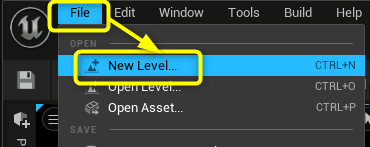
[File]から[New Level…]を選択します。
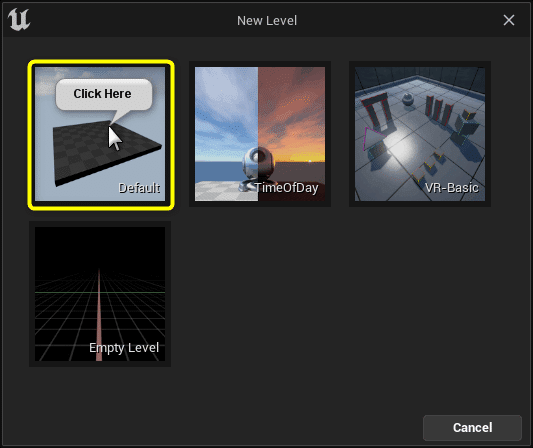
[Default]を選択します。
「Maps」フォルダに「Chapter_2_5_Component」を入力し、[Save]ボタンをクリックします。
Engine ContentからStaticMeshとMaterialをコピーする
「Engine Content」に入っているStaticMeshをプロジェクトフォルダにコピーして使用します。
[Content Browser]の[Settings]ボタンをクリックし、[Show Engine Content]を有効にします。
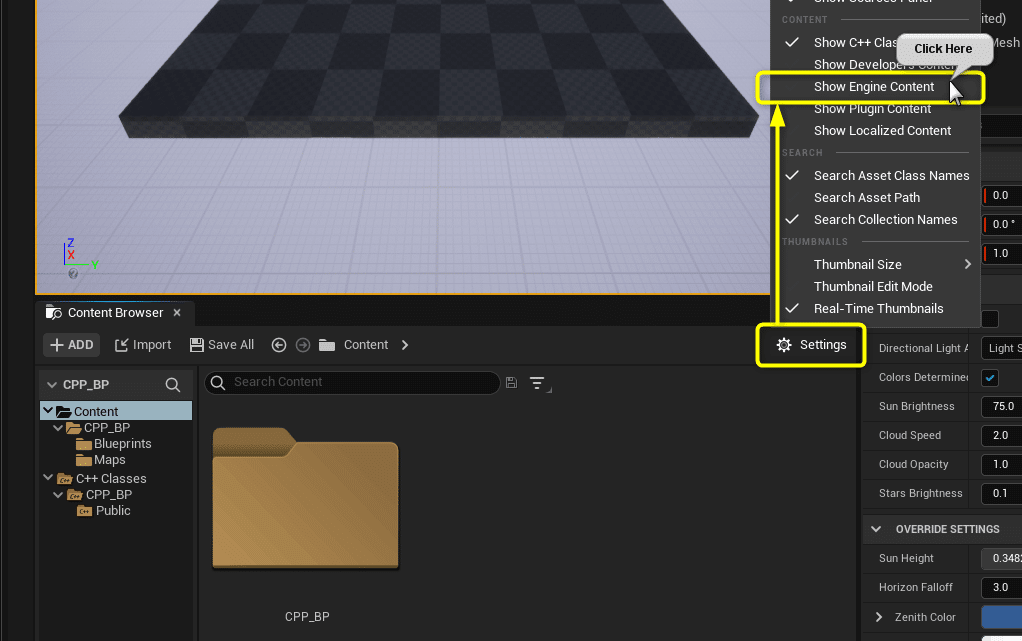
[Show Engine Content]を有効にすると[Content Browser]が表示されます。
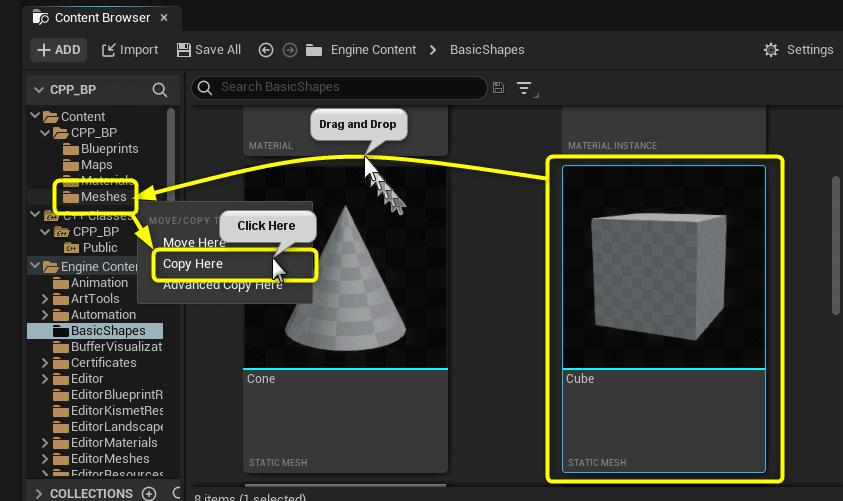
「Engine Content」から「StaticMesh」と「Material」をコピーするので、「CPP_BP」に「Materials」、「Meshes」フォルダを作成します。
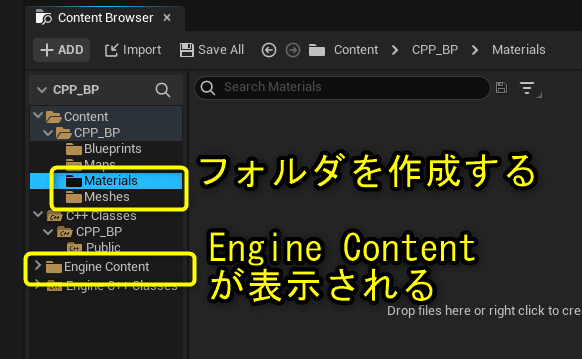
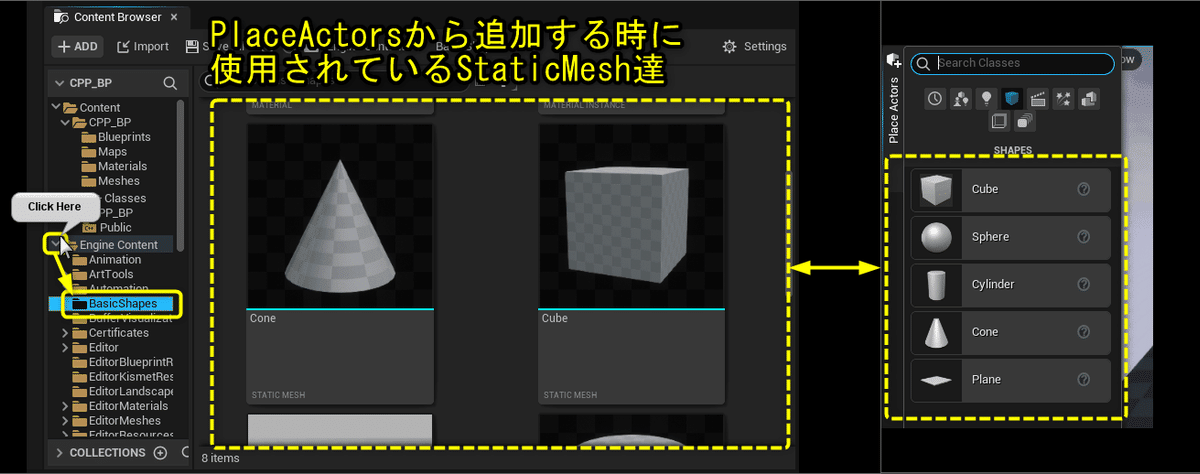
「Engine Content」の「BasicShaps」フォルダに移動します。
「BasicShaps」フォルダには、PlaceActorからDrag&DropでViewportに追加することが出来るプリミティブのメッシュが格納されています。
[Engine Content]を直接変更してしまうと、他のプロジェクトでEngine Contentを使用している箇所にも影響してしまいます。
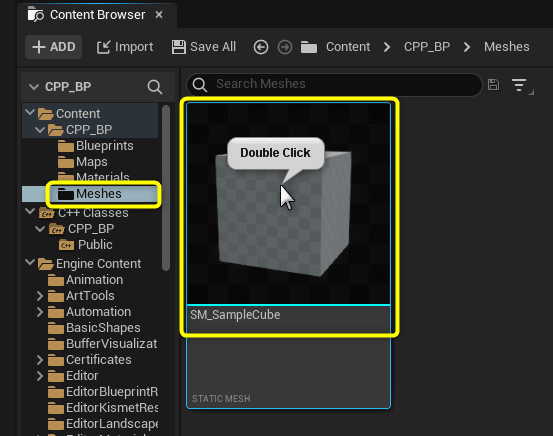
[Engine Content]のStaticMesh「Cube」を先ほど作成した「Meshes」フォルダにコピーします。
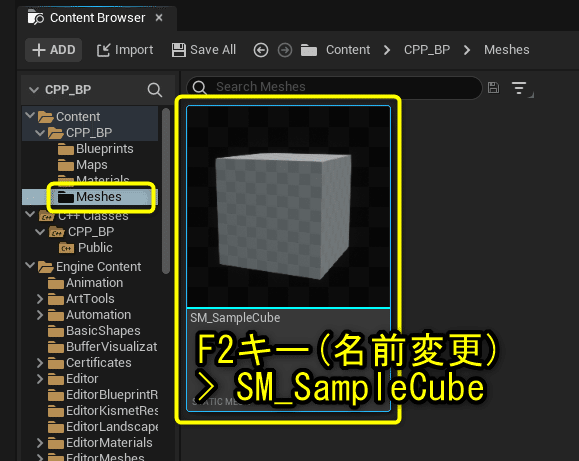
「Meshes」フォルダに「Cube」がコピーされました。
名前を「SM_SampleCube」に変更します。
「SM_SampleCube」の質感を設定するためのMaterial「BasicShapeMaterial」を「Materials」フォルダにコピーします。
「BasicShapesフォルダ」の「BasicShapeMaterial」を「Materials」フォルダにDrag&Drop > [Copy Here]を選択
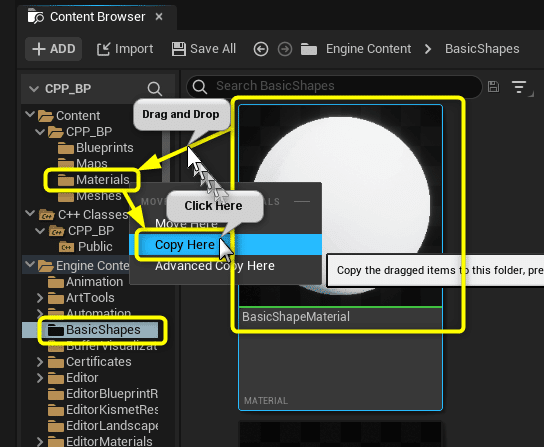
> [Copy Here]を選択
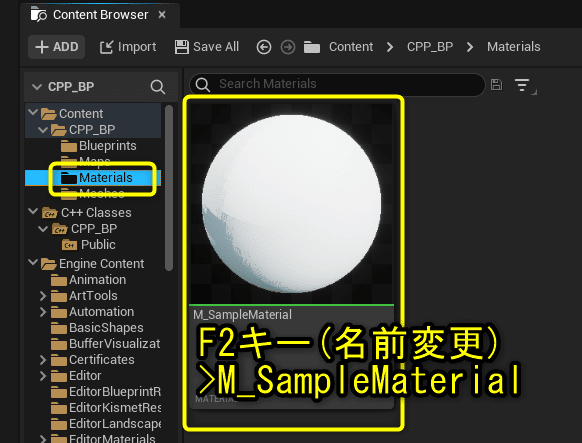
「Materials」フォルダに「BasicShapeMaterial」がコピーされます。
名前を「M_SampleMaterial」に変更します。
「Meshes」フォルダの「SM_SampleCube」をダブルクリックしてStaticMesh Editorを開きます。
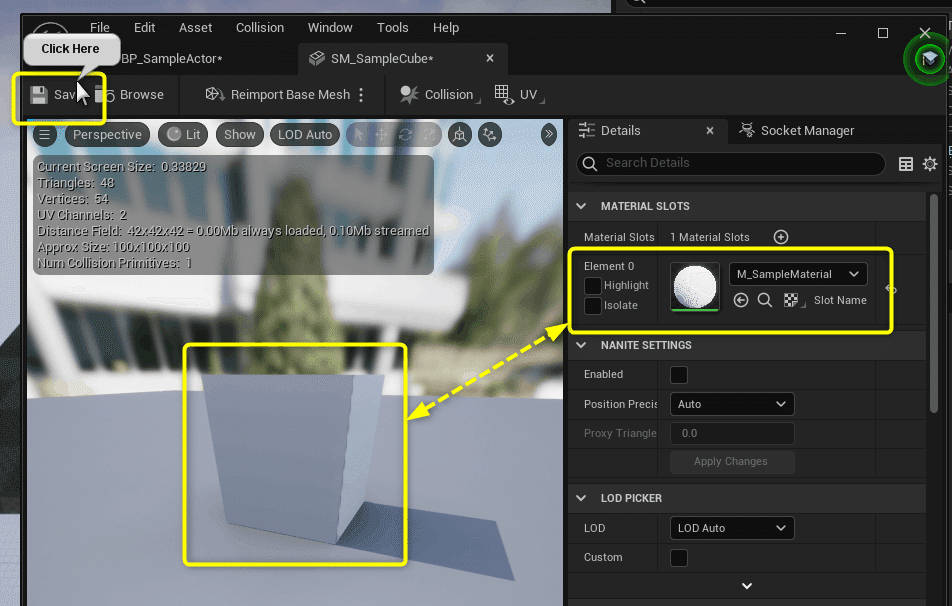
StaticMesh Editorの[Detil]パネルでMaterialを「M_SampleMaterial」に設定します。
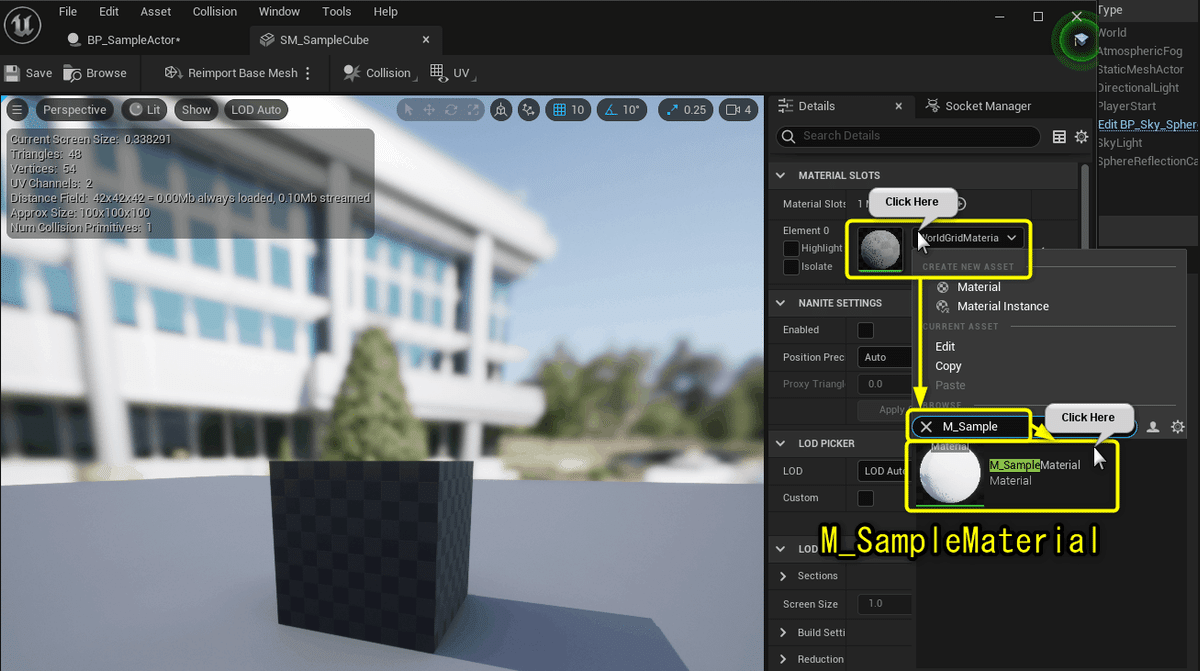
Cubeの質感が、「M_SampleMaterial」で設定している白い色に変わります。[Compile]ボタンをクリックします。
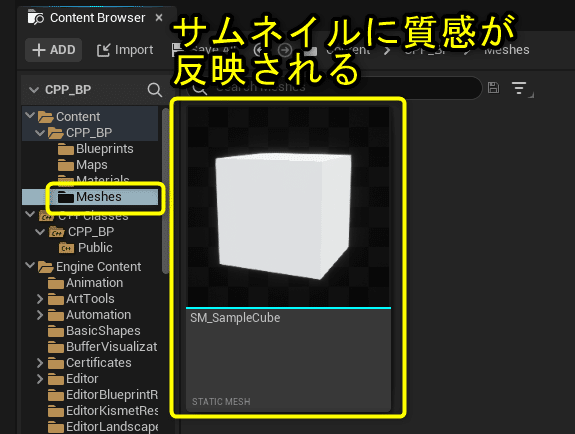
Content Browserの「SM_SampleCube」のサムネイルも「M_SampleCube」の質感が反映されました。
StaticMeshComponentを追加する
「Component(コンポーネント)」を追加します。
UnrealEngineのComponentは「Actor(俳優)」の「Component(部品、構成要素)」といった意味です。レベルに配置することが出来るBlueprintの構成要素を組み込みます。
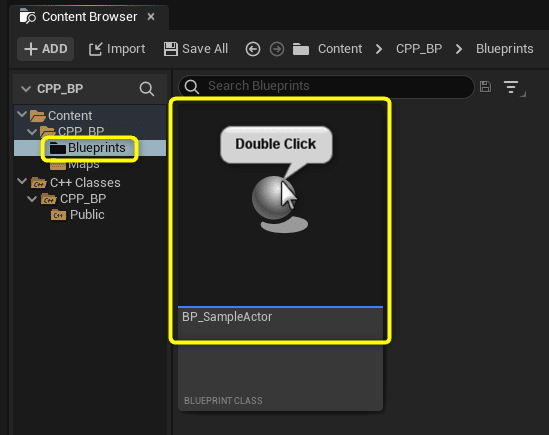
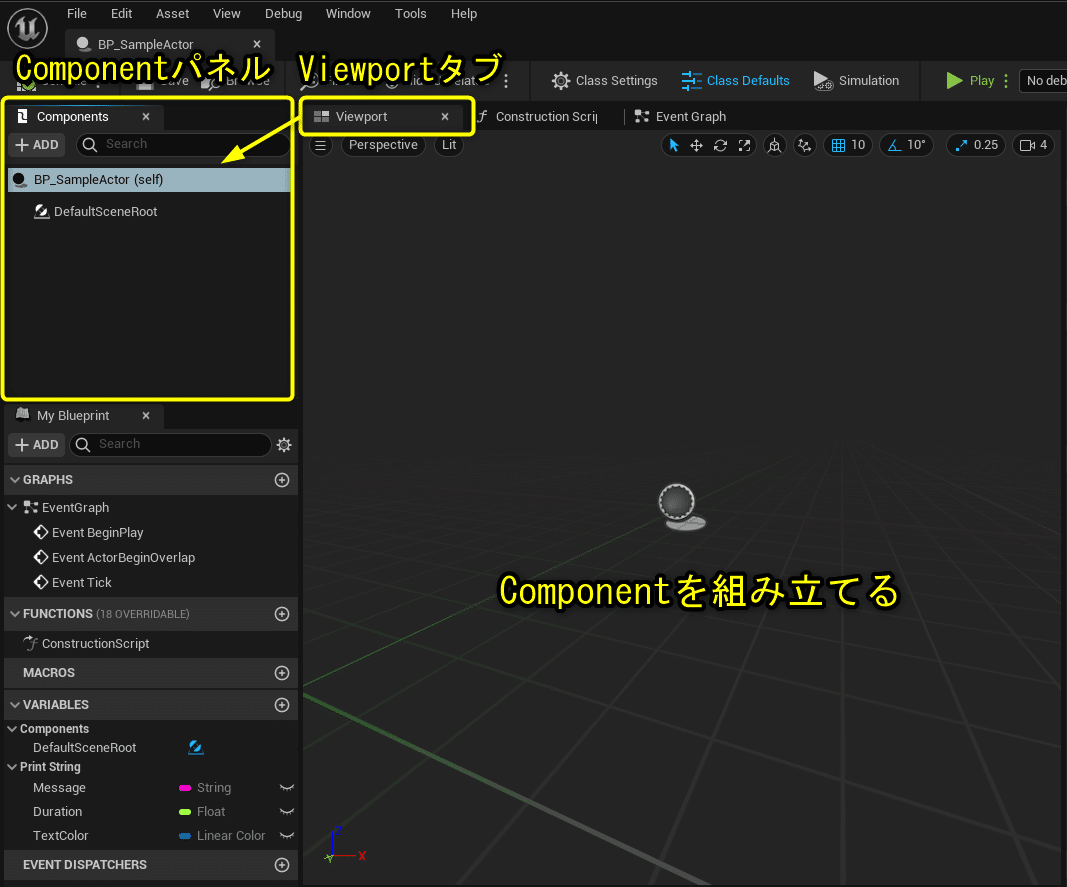
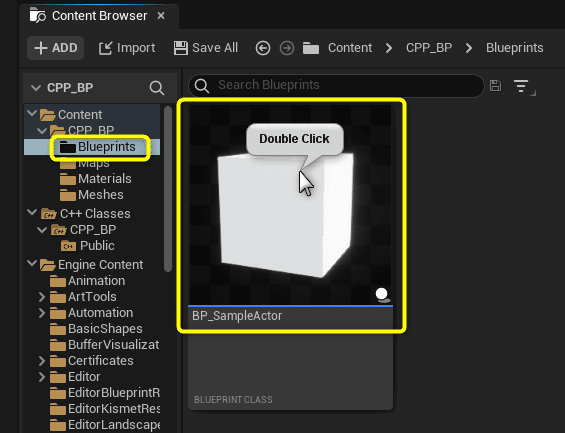
「BP_SampleActor」をダブルクリックしてBlueprint Editorを開きます。
「Component」は「Viewport」タブで確認しながら、「Component」パネルからコンポーネント追加・設定します。
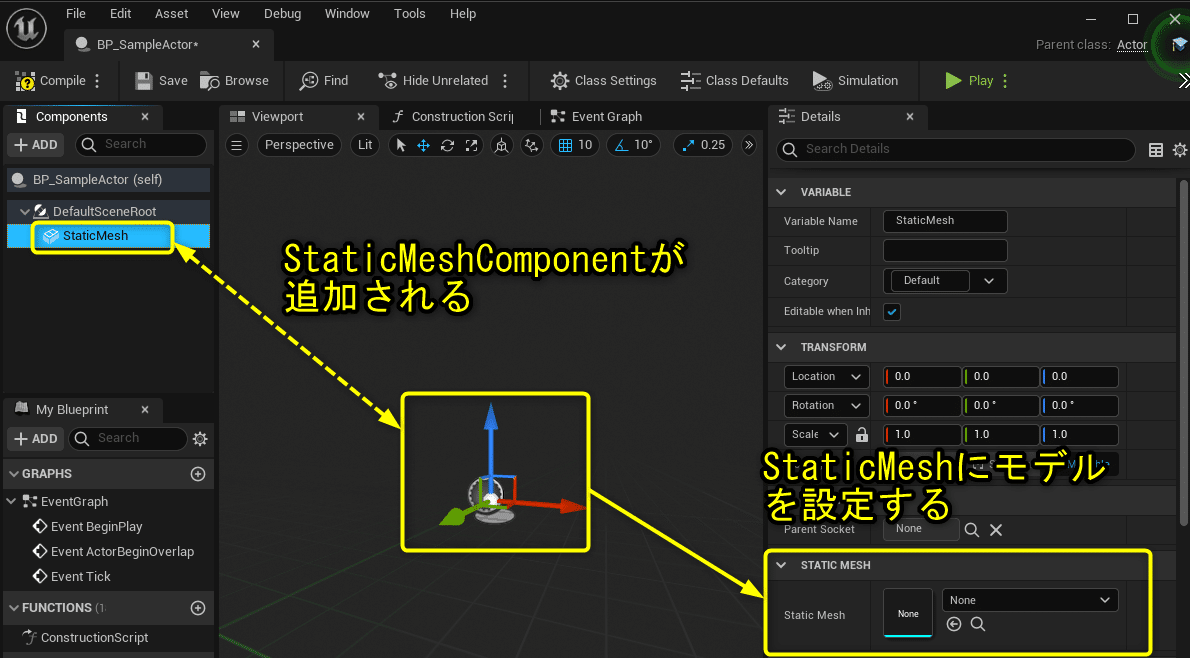
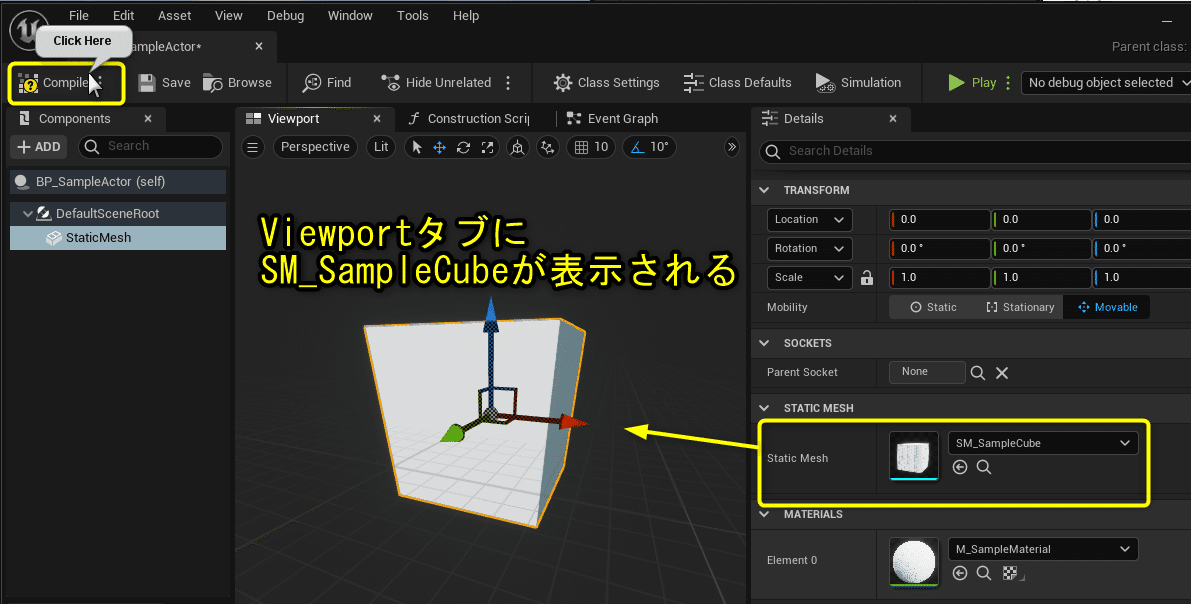
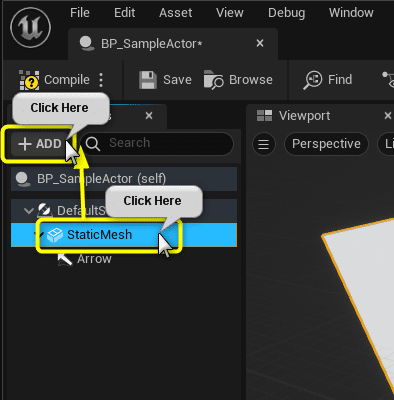
[Static Mesh Component]を追加します。
[Component]パネルの[Add]ボタンから[Static Mesh]を選択します。

[Component]パネルに[StaticMesh]が追加されます。
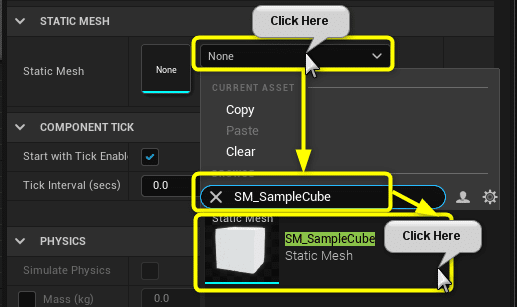
[StaticMesh]Componentの[Detail]パネルから先ほど準備した「SM_SampleCube」を設定します。
[Detail]パネルの[StaticMesh]のリストをクリックし、「SM_SampleCube」を検索して選択します。
Viewportタブに「SM_SampleCube」が表示されます。
[Compile]ボタンをクリックします。
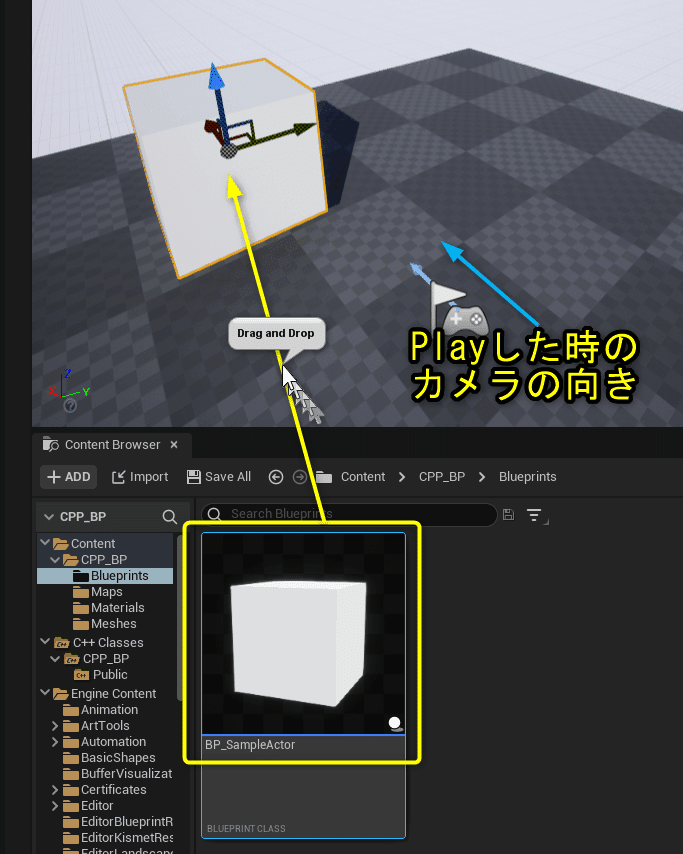
Level Editorに戻り、「BP_SampleActor」をDrag&Dropします。
Viewportで確認したStaticMeshComponentが表示されます。
コントローラーのアイコンが表示されているActorの水色の矢印の先に移動させます。
コントローラのアイコンはPlayerStartというPlayした時にプレイヤーの開始位置になります。水色の矢印はPlay開始時にプレイヤーの向いている方向です。
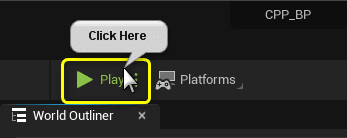
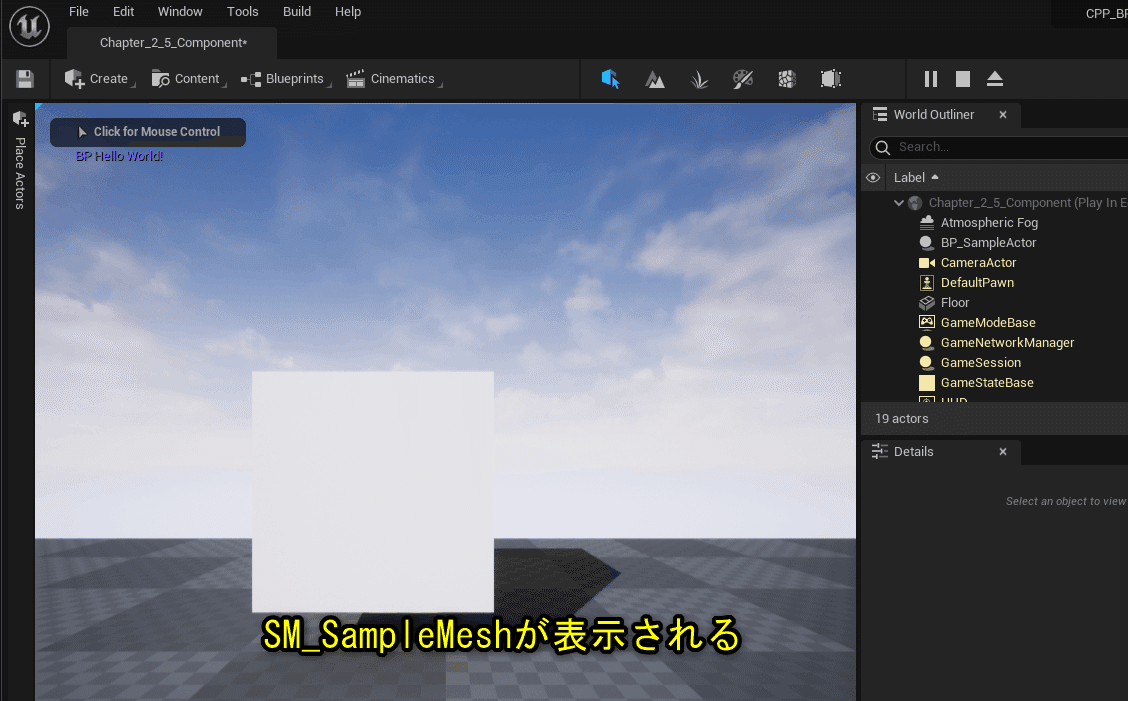
[Play]ボタンをクリックします。
SM_SampleMeshが表示されます。
ArrowComponentを追加する
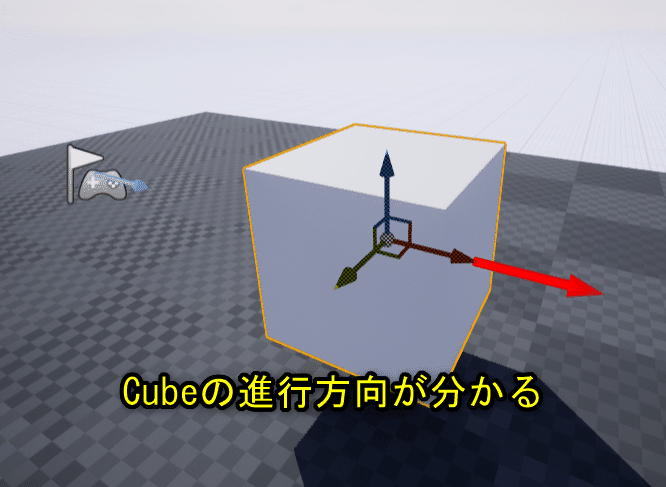
「Cube」は前後左右が分からないので、方向を表示する「ArrowComponent」を追加します。
「BP_SampleActor」をダブルクリックしてBlueprint Editorを開きます。
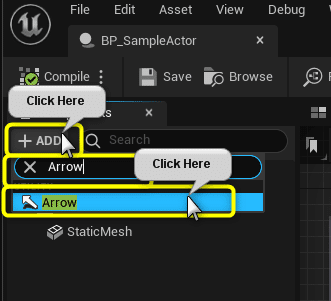
[Component]パネルの[Add]ボタンをクリックし、[Arrow]で検索し、[Arrow]を選択します。
Viewportタブを確認すると、赤い矢印が表示されます。
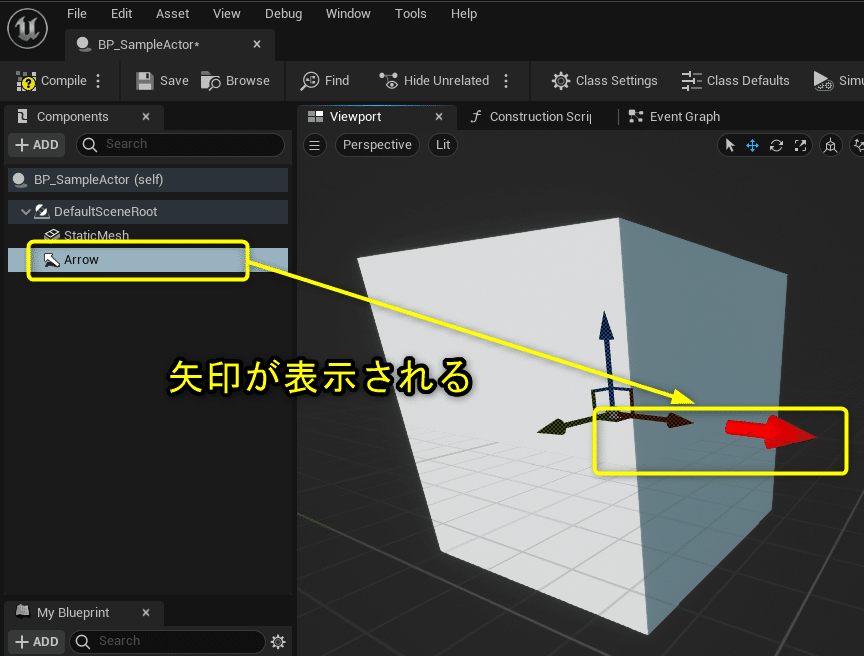
Cube内に埋もれているので、矢印が確認しやすいように移動します。

ArrowComponentをStaticMeshComponentにアタッチする
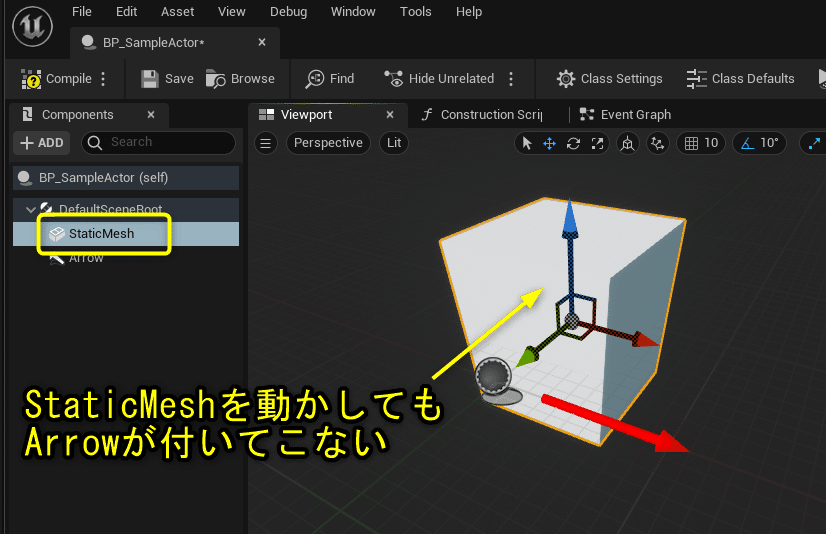
StaticMeshComponentを移動させた時に、ArrowComponentを一緒に移動できるように設定します。
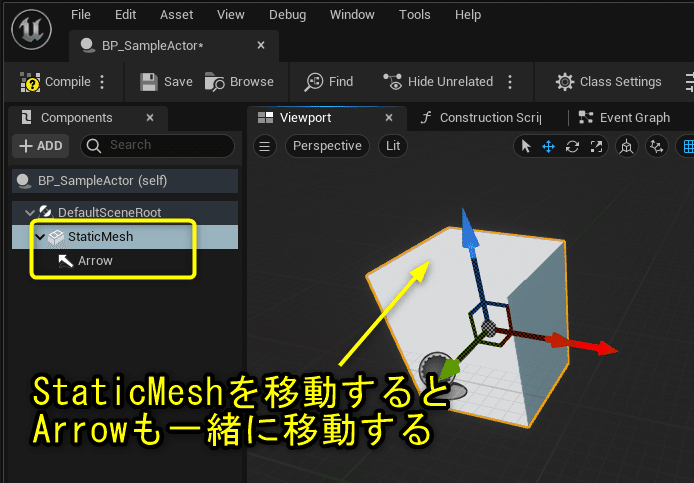
図のようなStaticMeshComponentとArrowComponentが同じ階層にある場合に、StaticMeshComponentを移動させるとStaticMeshComponentのみが移動します。
[ArrowComponent]を[StaticMeshComponent]にDrag&Dropします。
[ArrowComponent]を[StaticMeshComponent]にAttach(取り付ける)する。と言います。
(他には、ArrowComponentをStaticMeshComponentの子にする。)
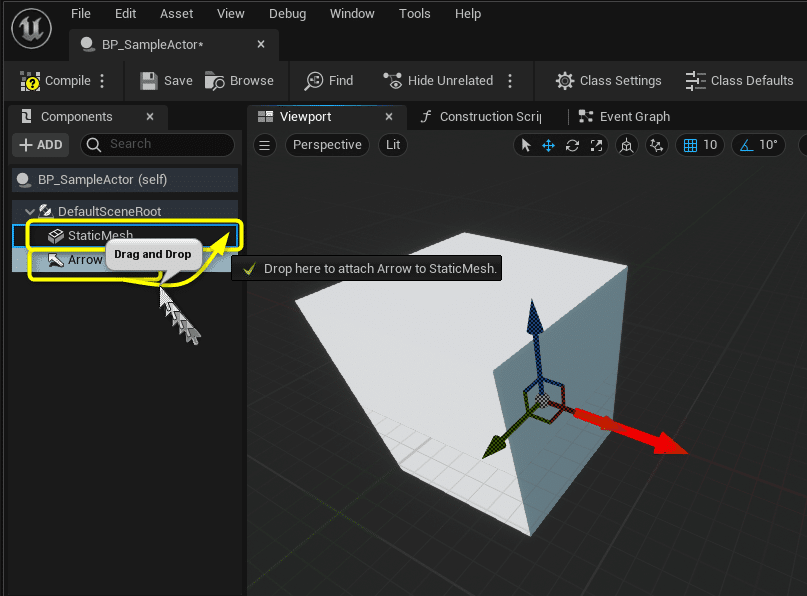
ComponentをAttachすると親子関係ができます。
親である[StaticMeshComponent]を移動すると、子である[ArrowComponent]が一緒に移動します。
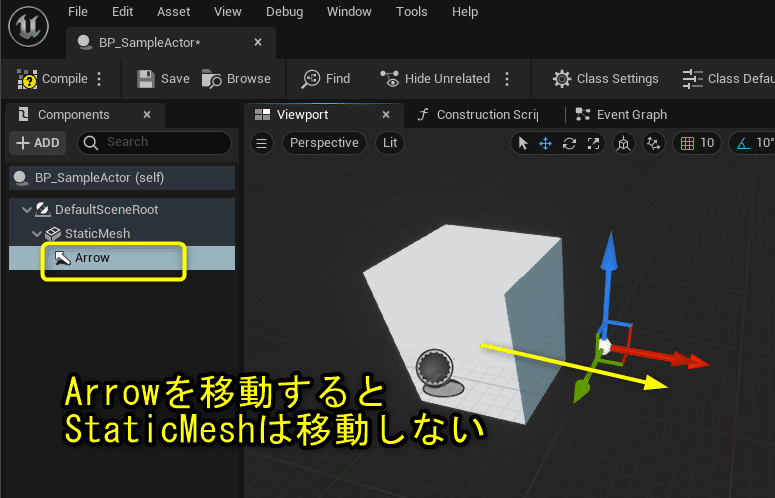
子である[ArrowComponent]を移動しても、親である[StaticMeshComponent]は移動しません。
親は子に影響を及ぼしますが、子は親に影響しません。
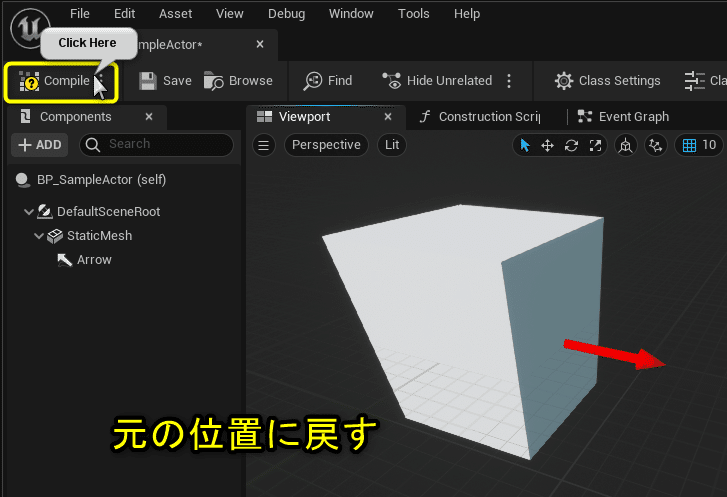
ComponentのAttach(親子関係)が把握できたので、[ArrowComponent]と[StaticMeshComponent]の位置を元に戻します。
[Compile]ボタンをクリックします。
LevelEditorのViewportに配置した「BP_SampleActor」を確認します。
[ArrowComponent]が表示されているので、[Cube]の向きが確認できます。
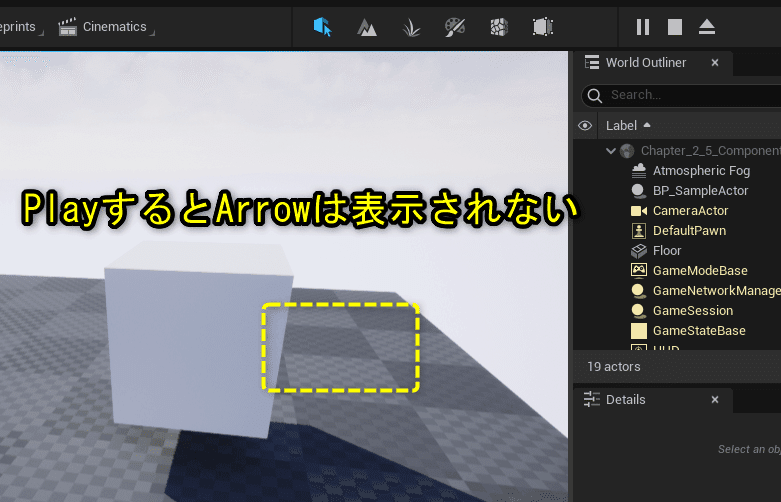
[Play]ボタンをクリックします。
[ArrowComponent]はPlayすると表示されません。
[ArrowComponent]は配置した時に方向を確認するために使用するComponentです。
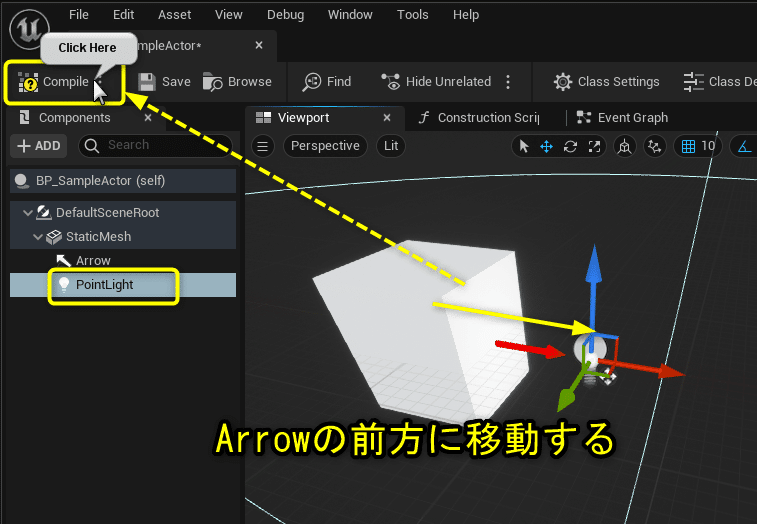
PointLightComponentを追加する
Cubeの前方にLight追加することで、[Play]ボタンを押した後にもCubeの前方が分かるようにします。
「BP_SampleActor」をダブルクリックしてBlueprint Editorを開きます。
[StaticMesh]を選択し、[Add]ボタンをクリックします。
[Component]パネルの[Add]ボタンをクリックし、[Point]で検索し、[Point Light]を選択します。
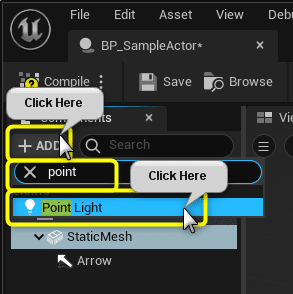
[StaticMesh]を選択した状態で、Componentを追加すると、子としてComponentを追加することが出来ます。最初から構成が決まっているのであれば、選択してからComponentを追加するとAttachする手間が省けます。
[PointLight]を[Arrow]の前方に移動します。
[Compile]ボタンをクリックします。
LevelEditorのViewportで[Arrow]の前方が明るくなりました。
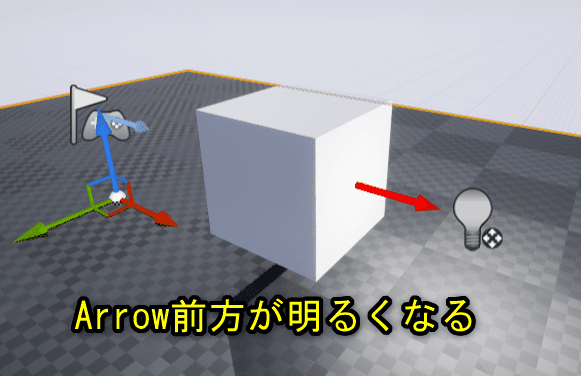
[Play]ボタンをクリックします。
[Play]してからでもArrowの矢印が向いている方が明るいので、前方がどちらかが分かります。

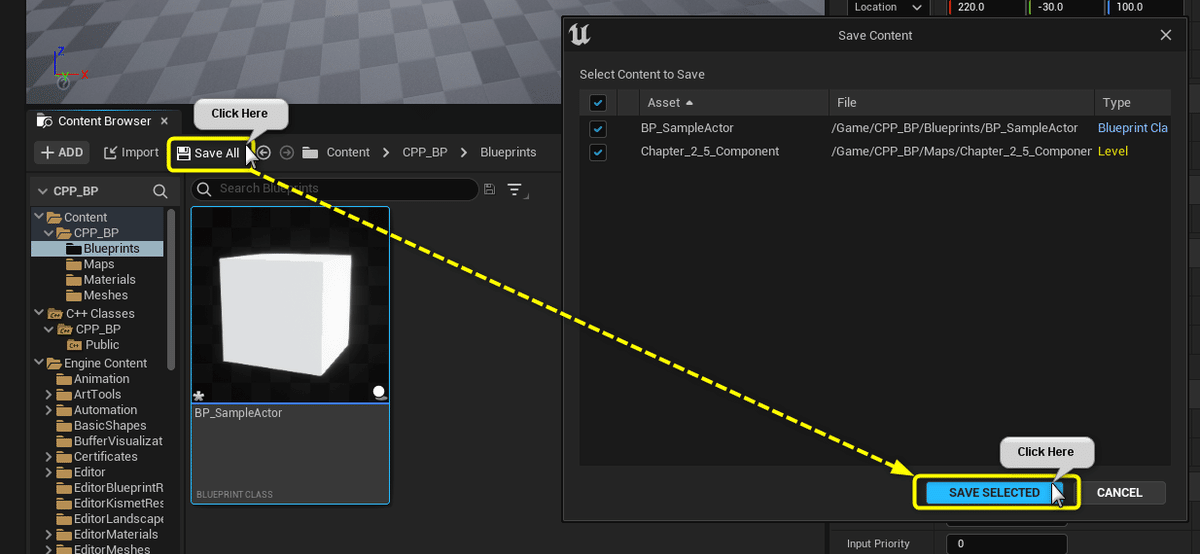
全て保存して、Blueprint側は終了
Blueprint側の説明はここまでになります。
[Content Browser]から[Save All]ボタンをクリックし、[Save Selected]ボタンをクリックしてプロジェクトの変更のあったアセットをすべて保存します。
まとめ
これくらいの文字数が一番読みやすいですね。
基本的なことほど手順も丁寧に書かないといけないので、説明すると長くなってしまいます。
簡単なことほど簡単に説明するのが難しいです。
魂は細部に宿るので、手抜きは出来ない。
引き続きC++側でComponentを追加する方法についてまとめます。