UE5から始める C++ & BP 07 【C++版】Flow Control(Branch)

if文は一個使うごとにバグを1つ増やす
気軽に使うな
昔、上司から言われて魂に刻み付けられた言葉です。
ソフトウェア開発だとコーディングはソフトウェア開発の大体1~2割くらいしかしません。
ほとんどの時間を設計かテストに当てられます。
if文を1つ使えばテストが1つ増えます。
映画に拳銃が出てきたらその銃は打たれる
そんな法則がソフトウェア開発でも起こるので、
テストが1つ増えれば、バグが一つ増えます。
いざ作り始めると、ifの連続です。
迷わず進め!行けばわかるさ!迷わず進むことは出来ず、グネグネ道の迷路です。
進まないとゴールには近づけない。
365歩のマーチのように進んでは戻って少しずつ前へ
と言う訳で、【Blueprint版】 Flow Control(Branch)をC++で再現していきましょう。
【C++版】Flow Control(Branch)
VisualStudioを開いて、編集するファイルを作成する
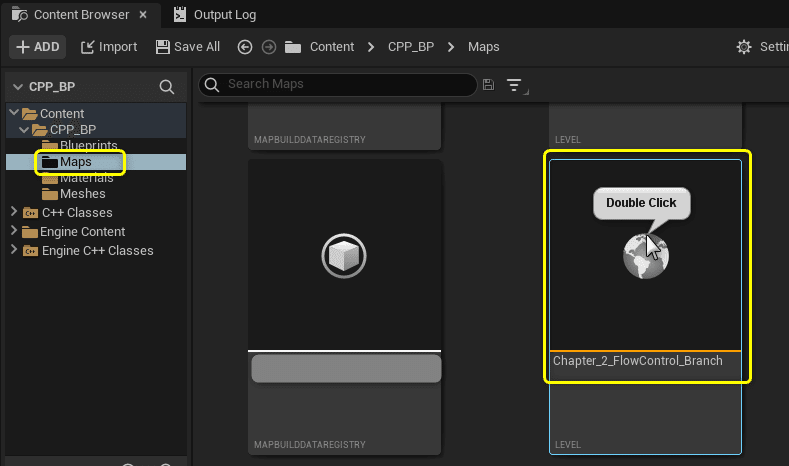
プロジェクトを閉じていたら、プロジェクトを開き、
「Chapter_2_FlowControl_Branch」を開きます。
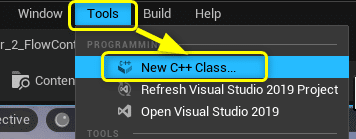
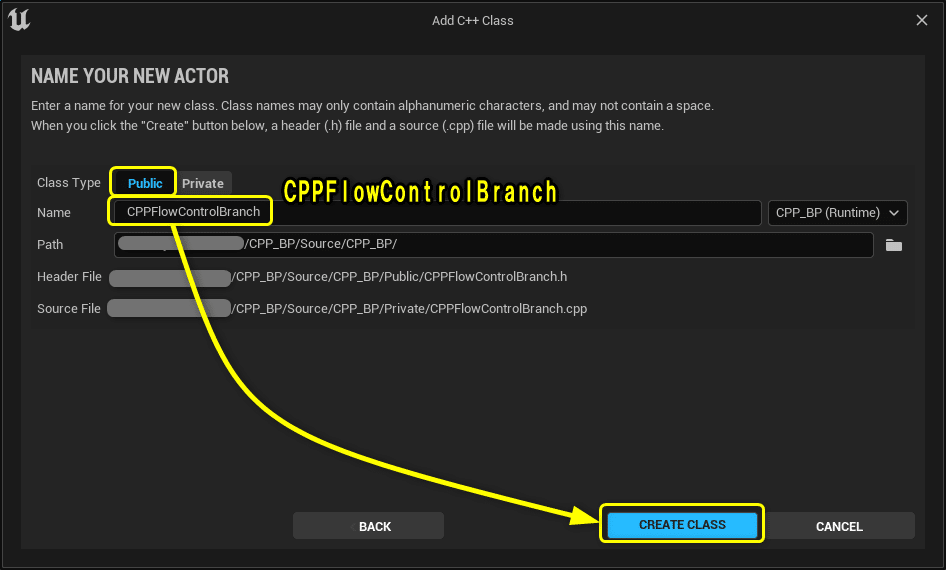
[Tools]メニューから[New C++ Class]を開きます。
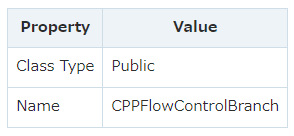
親クラスに[Actor]を選択します。

ClassTypeとClass名を設定します。
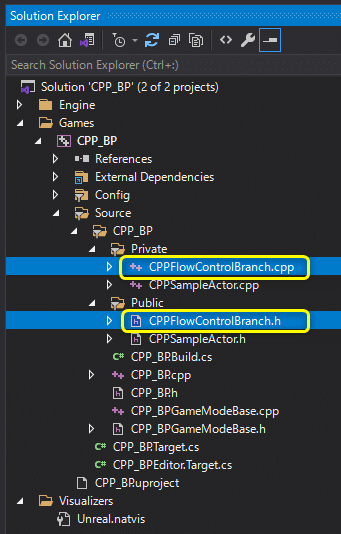
Solution Explorerから今回編集する2つのファイルを開きます。
CPPFlowControlBranch.h
CPPFlowControlBranch.cpp
開いたファイルを学習する初期状態に修正します。
CPPFlowControlBranch.h
// Fill out your copyright notice in the Description page of Project Settings.

#pragma once

#include "CoreMinimal.h"
#include "GameFramework/Actor.h"
#include "CPPFlowControlBranch.generated.h"

UCLASS()
class CPP_BP_API ACPPFlowControlBranch : public AActor
{
	GENERATED_BODY()

protected:
	// Called when the game starts or when spawned
	virtual void BeginPlay() override;

private:
	// PrintString関数のDurationに設定する変数
	const float Duration = 10.0f;

	// PrintString関数のTextColorに設定する変数
	const FLinearColor TextColor = FColor(255, 255, 255);

	// 計算用の変数
	int32 CalcVarA = 7;
	int32 CalcVarB = 3;
};
CPPFlowControlBranch.cpp
// Fill out your copyright notice in the Description page of Project Settings.


#include "CPPFlowControlBranch.h"
#include "Kismet/KismetSystemLibrary.h"

// Called when the game starts or when spawned
void ACPPFlowControlBranch::BeginPlay()
{
	Super::BeginPlay();

	FString Message = "C++ Hello World!";

	// PrintStringノードと同じ処理
	// UKismetSystemLibraryクラスのPrintString関数を呼び出す
	UKismetSystemLibrary::PrintString(this, Message, true, true, TextColor, Duration);

	// Add(足し算)の処理
	int32 ResultAdd = CalcVarA + CalcVarB;
	FString StrResultAdd = FString::Printf(TEXT("%d"), ResultAdd);
	UKismetSystemLibrary::PrintString(this, StrResultAdd, true, true, FColor::Red, Duration);

	// Subtract(引き算)の処理
	int32 ResultSubtract = CalcVarA - CalcVarB;
	FString StrResultSubtract = FString::Printf(TEXT("%d"), ResultSubtract);
	UKismetSystemLibrary::PrintString(this, StrResultSubtract, true, true, FColor::Yellow
		, Duration);

	// Multiply(掛け算)の処理
	int32 ResultMultiply = CalcVarA * CalcVarB;
	FString StrResultMultiply = FString::Printf(TEXT("%d"), ResultMultiply);
	UKismetSystemLibrary::PrintString(this, StrResultMultiply, true, true, FColor::Green, Duration);

	// Divide(割り算)の処理(int > float)
	float ResultDivide = (float)CalcVarA / (float)CalcVarB;
	FString StrResultDivide = FString::Printf(TEXT("%f"), ResultDivide);
	UKismetSystemLibrary::PrintString(this, StrResultDivide, true, true, FColor::Blue, Duration);
}
C++でBlueprintのFlow Control(Branch)を再現する
[Branch]ノード処理を切り替える

比較演算子ノードで処理を切り替える

論理演算子ノードで処理を切り替える
複数の選択肢で分岐する
Flow Controlに使用する変数を宣言する
今回使用する変数を宣言します。
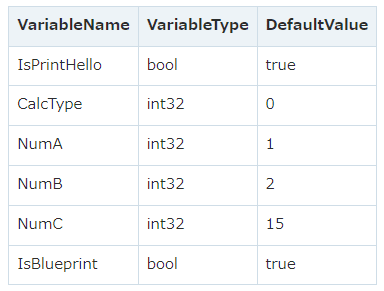
CPPFlowControlBranch.h
private:
	// Flow Control用の変数
	bool IsPrintHello = true;
	int32 CalcType = 1;
	int32 NumA = 1;
	int32 NumB = 2;
	int32 NumC = 15;
	bool IsPrintHello = true;
if/else文で処理を切り替える(Branchノード)
[Branch]ノード処理を切り替える処理をC++で再現します。
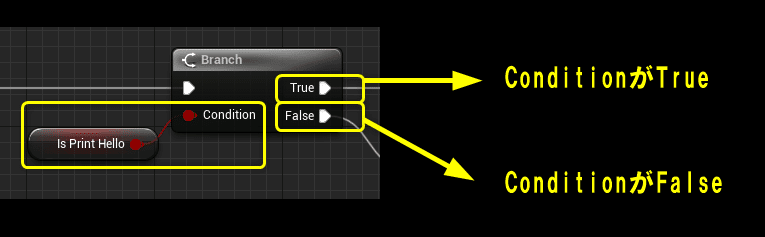
C++ではif文を使用します。
if文の書き方は以下になります。
if(条件)
{
    // 条件がtrueなら
    処理1
}
else
{
    // 条件がfalseなら
    処理2
}
CPPFlowControlBranch.cpp BeginPlay関数をif文で修正しましょう。
CPPFlowControlBranch.cpp BeginPlay()
void ACPPFlowControlBranch::BeginPlay()
{
	Super::BeginPlay();

	FString Message = "C++ Hello World!";

	if (IsPrintHello)
	{
		// PrintStringノードと同じ処理
		// UKismetSystemLibraryクラスのPrintString関数を呼び出す
		UKismetSystemLibrary::PrintString(this, Message, true, true, TextColor, Duration);
	}
	else
	{
		// Add(足し算)の処理
		int32 ResultAdd = CalcVarA + CalcVarB;
		FString StrResultAdd = FString::Printf(TEXT("%d"), ResultAdd);
		UKismetSystemLibrary::PrintString(this, StrResultAdd, true, true, FColor::Red, Duration);

		// Subtract(引き算)の処理
		int32 ResultSubtract = CalcVarA - CalcVarB;
		FString StrResultSubtract = FString::Printf(TEXT("%d"), ResultSubtract);
		UKismetSystemLibrary::PrintString(this, StrResultSubtract, true, true, FColor::Yellow
			, Duration);

		// Multiply(掛け算)の処理
		int32 ResultMultiply = CalcVarA * CalcVarB;
		FString StrResultMultiply = FString::Printf(TEXT("%d"), ResultMultiply);
		UKismetSystemLibrary::PrintString(this, StrResultMultiply, true, true, FColor::Green, Duration);

		// Divide(割り算)の処理(int > float)
		float ResultDivide = (float)CalcVarA / (float)CalcVarB;
		FString StrResultDivide = FString::Printf(TEXT("%f"), ResultDivide);
		UKismetSystemLibrary::PrintString(this, StrResultDivide, true, true, FColor::Blue, Duration);
	}
}
Ctrl + Sでファイルを保存し、Compileを行います。

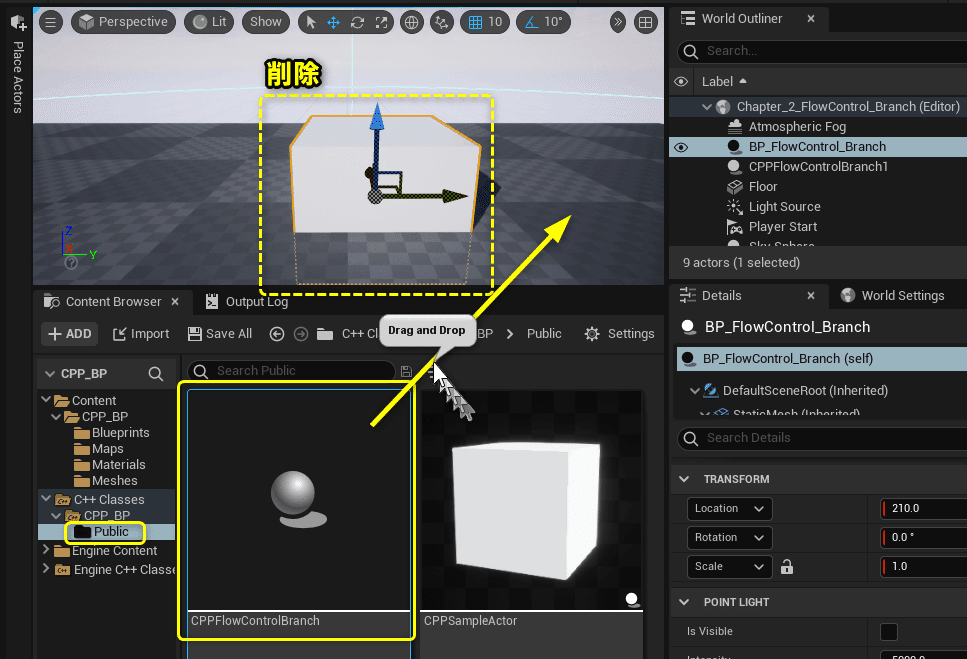
LevelEditorに戻り、「CPPFlowControlBranch」をViewportにDrag&Dropします。
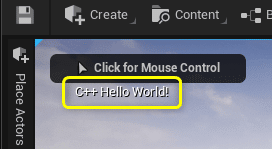
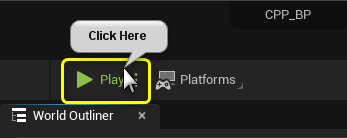
Level Editorの[Play]ボタンをクリックします。

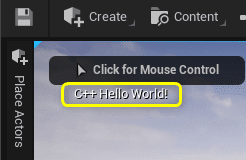
変数[IsPrintHello]の値がtrueなので、「Hello World!」を出力するPrintStringが実行されました。
論理演算子で条件を書く(論理演算子ノード)
比較演算子ノードでBranchノードの実行ピンを切り替える処理をC++で再現します。
Blueprint側では比較演算子を使用して「NumAとNumBは等しい」という条件を作りました。

比較演算子を使用したif文の書き方は以下になります。
if(変数A == 変数B)
{
    // 変数Aと変数Bの値が同じなら
    処理1
}
else
{
    // 変数Aと変数Bの値が違うなら
    処理2
}
BeginPlay関数のif文の条件を比較演算子を使用するように変更します。
(計算結果を出力する処理は変更が無いので省略して書いてあります。)
CPPFlowControlBranch.cpp BeginPlay()
	if (NumA == NumB)
	{
		// PrintStringノードと同じ処理
		// UKismetSystemLibraryクラスのPrintString関数を呼び出す
		UKismetSystemLibrary::PrintString(this, Message, true, true, TextColor, Duration);
	}
	else
	{
		(計算結果を出力する処理)
	}
Ctrl + Sでファイルを保存し、Compileを行います。

Level Editorの[Play]ボタンをクリックします。

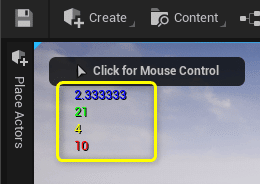
変数[NumA][NumB]の値は等しくないので、falseとなり、計算結果を出力する処理が実行されます。
比較演算子は「==」以外にも用意されています。
条件文の種類と同じ値の時にどのような結果になるかまとめました。
if(条件)
{
    // 条件がtrueなら
    処理1
}
else
{
    // 条件がfalseなら
    処理2
}

比較演算子を使用した条件文

A == B  :AとBが等しい
A < B   :AはBより小さい
A > B   :AはBより大きい
A <= B  :AはB以下
A >= B  :AはB以上
A != B  :AとBは等しくない

A=3,B=3で等しい時
A == B : true
A <  B :false
A <= B :true
A >  B :false
A >= B :true
A != B : false
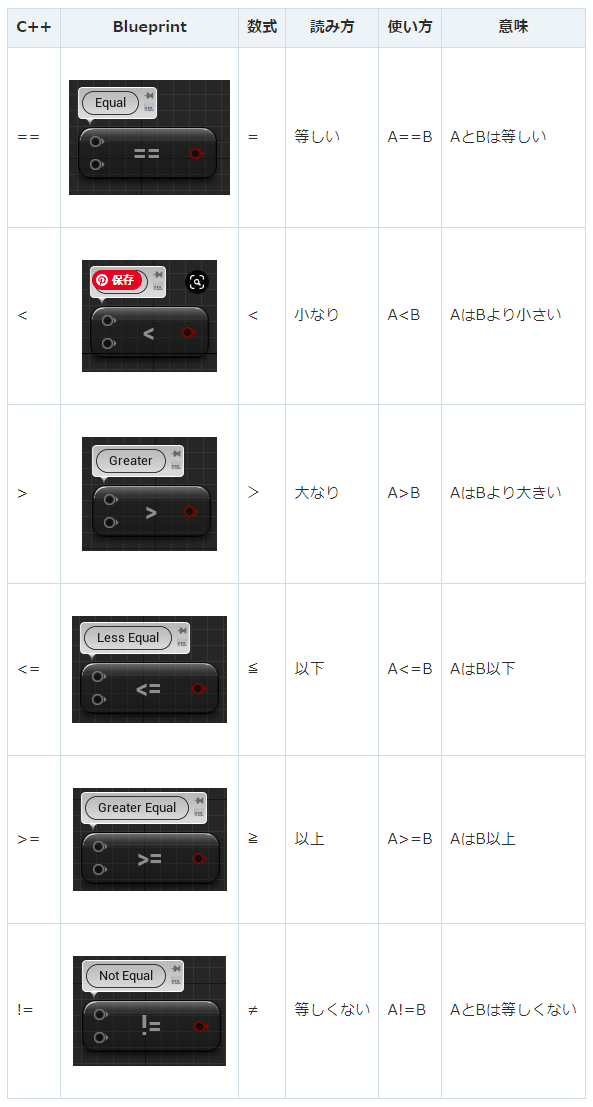
C++とBlueprintの比較演算子をまとめた一覧です。
論理演算子で複雑な条件を書く(論理演算子ノード)
論理演算子ノードでBranchノードの実行ピンを切り替える処理をC++で再現します。
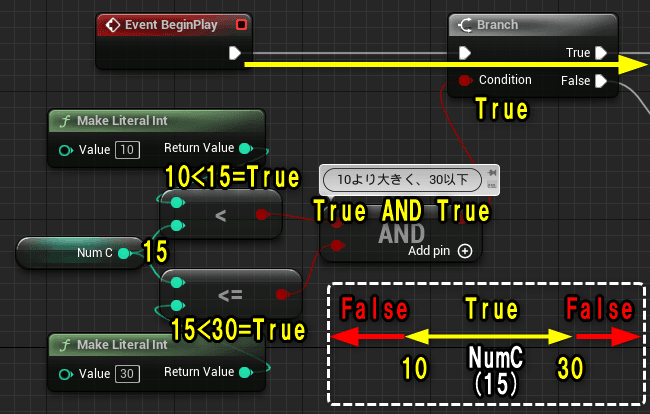
Blueprint側では論理演算子を使用して「NumCは10より大きく、30以下」という条件を作りました。

C++で論理演算子を使用する時の書き方です。
if(条件1 && 条件2)
{
    // 条件1かつ条件2がtrueなら
    処理1
}
else
{
    // 条件1,条件2がfalseなら
    処理2
}
BeginPlay関数のif文の条件を論理演算子を使用するように変更します。
.cpp
	if (10<NumC && NumC<=30)
	{
		// PrintStringノードと同じ処理
		// UKismetSystemLibraryクラスのPrintString関数を呼び出す
		UKismetSystemLibrary::PrintString(this, Message, true, true, TextColor, Duration);
	}
	else
	{
		(計算結果を出力する処理)
	}
Ctrl + Sでファイルを保存し、Compileを行います。

Level Editorの[Play]ボタンをクリックします。
変数[NumC]の値は[15]なので、「NumCは10より大きく、30以下」の結果は[true]になり、「Hello World!」を出力するPrintStringの処理が実行されました。
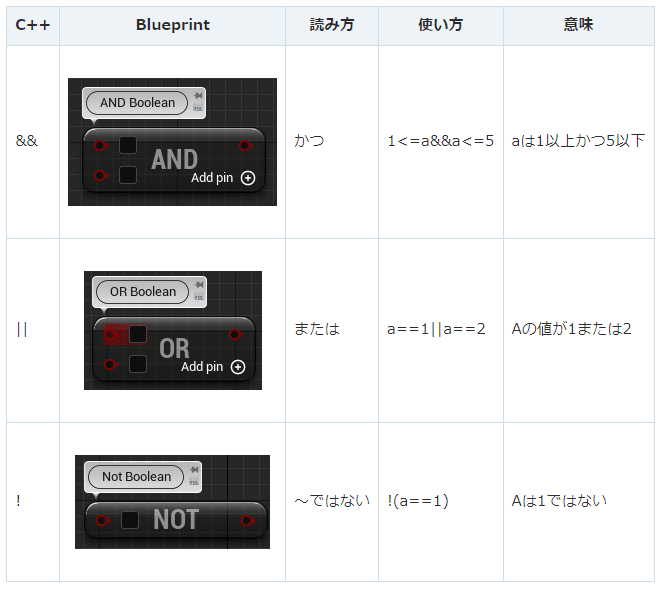
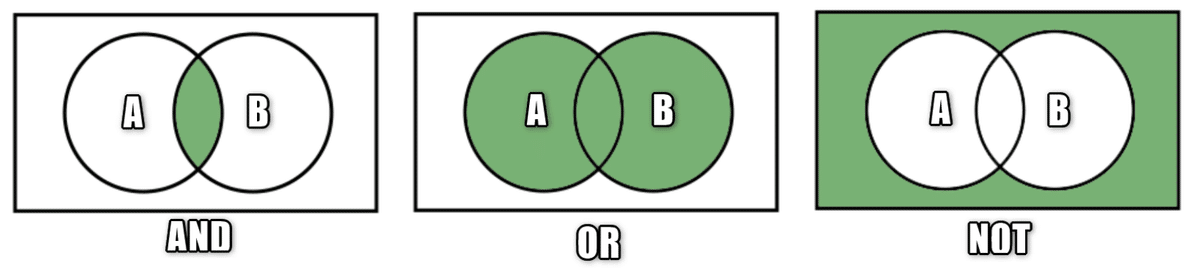
C++側の「AND Boolean」「OR Boolean」「Not Boolean」の書き方です。
// AND Boolean
if(条件1 && 条件2)
{
    // 条件1かつ条件2がtrueなら
    処理1
}
else
{
    // 条件1,条件2がfalseなら
    処理2
}

// OR Boolean
if(条件1 || 条件2)
{
    // 条件1か条件2がtrueなら
    処理1
}
else
{
    // 条件1と条件2の両方がfalseなら
    処理2
}

// Not Boolean
if(!条件)
{
    // 条件がfalseなら
    処理1
}
else
{
    // 条件がtrueなら
    処理2
}
C++とBlueprintの論理演算子をまとめた一覧です。
条件演算子で変数に代入する値を変える
C++側のみですが、条件演算子という書き方があります。
	FString Message = "C++ Hello World!";
          ↓
	FString Message = (IsBlueprint) ? "Blueprint Hello World!" : "C++ Hello World!";
Ctrl + Sでファイルを保存し、Compileを行います。

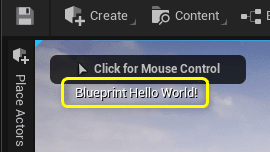
Level Editorの[Play]ボタンをクリックします。

変数[Message]の値が「Blueprint Hello World!」で出力されました。
条件演算子は変数の値を条件で2択で代入することが出来ます。
// 条件演算子
変数 = (条件) ? A : B;

条件がtrueの時:変数にはAの値が代入される
条件がfalseの時:変数にはBの値が代入される
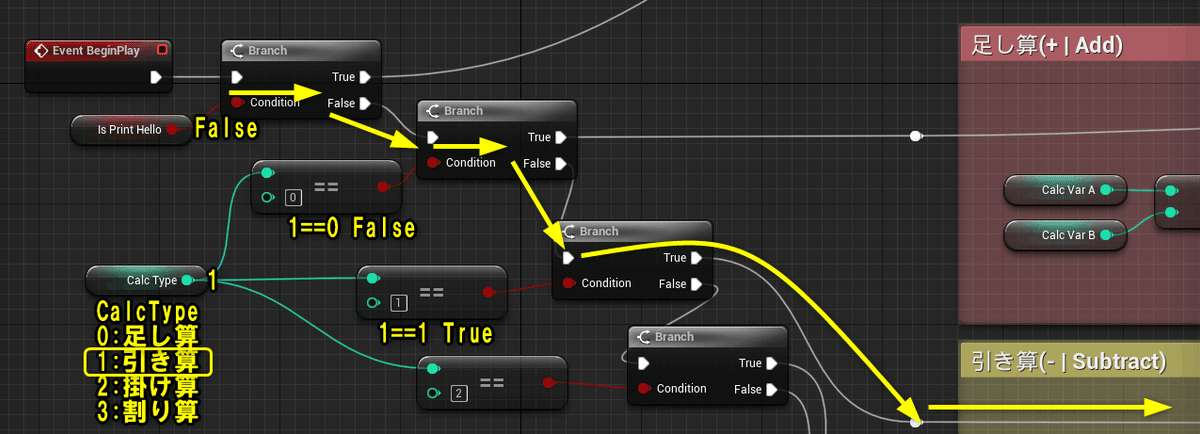
連続したif文で複数の選択肢(Branchノード複数で切り替える)
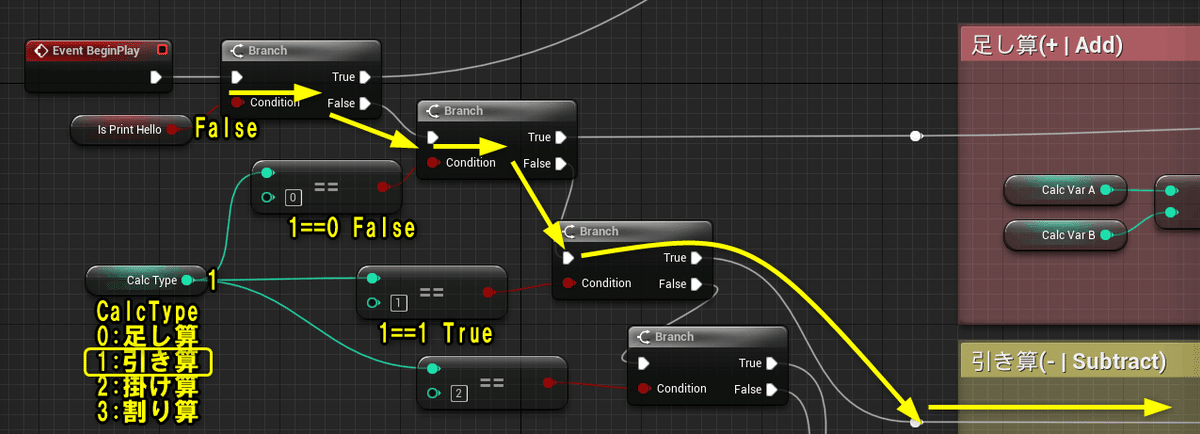
[Branch]ノードを複数呼び出して、複数の選択肢で分岐する処理をC++で再現します。
Blueprint側では変数[CalcType]の数値で引き算の計算結果を1つだけPrintStringで出力するように変更しました。
C++で複数の条件で分岐したいときは、[else if]を使用します。
if(条件1)
{
    // 条件1がtrueなら
    処理1
}
else if(条件2)
{
    // 条件2がtrueなら
    処理2
}
else if(条件3)
{
    // 条件3がtrueなら
    処理3
}
else
{
    // どの条件もfalseなら
    処理4
}
Blueprint側と同様に、変数[CalcType]の数値で引き算の計算結果を1つだけPrintStringで出力するように変数のDefaulValueを変更します。
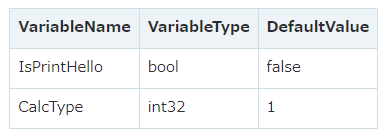
CPPFlowControlBranch.h
	// Flow Control用の変数
	bool IsPrintHello = true;
	int32 CalcType = 1;
	int32 NumA = 1;
	int32 NumB = 2;
	int32 NumC = 15;
	bool IsPrintHello = true;
計算結果を出力する処理を変数[CalcType]の値で分岐するように変更しましょう。
CPPFlowControlBranch.cpp BeginPlay()
void ACPPFlowControlBranch::BeginPlay()
{
	Super::BeginPlay();

	FString Message = "C++ Hello World!";

	if (IsPrintHello)
	{
		// PrintStringノードと同じ処理
		// UKismetSystemLibraryクラスのPrintString関数を呼び出す
		UKismetSystemLibrary::PrintString(this, Message, true, true, TextColor, Duration);
	}
	else
	{
		if (CalcType == 0)
		{
			// Add(足し算)の処理
			int32 ResultAdd = CalcVarA + CalcVarB;
			FString StrResultAdd = FString::Printf(TEXT("%d"), ResultAdd);
			UKismetSystemLibrary::PrintString(this, StrResultAdd, true, true, FColor::Red, Duration);
		}
		else if (CalcType == 1)
		{
			// Subtract(引き算)の処理
			int32 ResultSubtract = CalcVarA - CalcVarB;
			FString StrResultSubtract = FString::Printf(TEXT("%d"), ResultSubtract);
			UKismetSystemLibrary::PrintString(this, StrResultSubtract, true, true, FColor::Yellow, Duration);
		}
		else if (CalcType == 2)
		{
			// Multiply(掛け算)の処理
			int32 ResultMultiply = CalcVarA * CalcVarB;
			FString StrResultMultiply = FString::Printf(TEXT("%d"), ResultMultiply);
			UKismetSystemLibrary::PrintString(this, StrResultMultiply, true, true, FColor::Green, Duration);
		}
		else
		{
			// Divide(割り算)の処理(int > float)
			float ResultDivide = (float)CalcVarA / (float)CalcVarB;
			FString StrResultDivide = FString::Printf(TEXT("%f"), ResultDivide);
			UKismetSystemLibrary::PrintString(this, StrResultDivide, true, true, FColor::Blue, Duration);
		}
	}
}
Ctrl + Sでファイルを保存し、Compileを行います。

Level Editorの[Play]ボタンをクリックします。

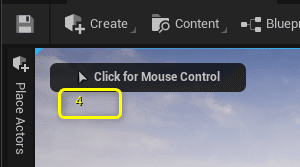
変数[CalcType]の値が[1]なので、引き算の計算結果のPrintStringが実行されました。
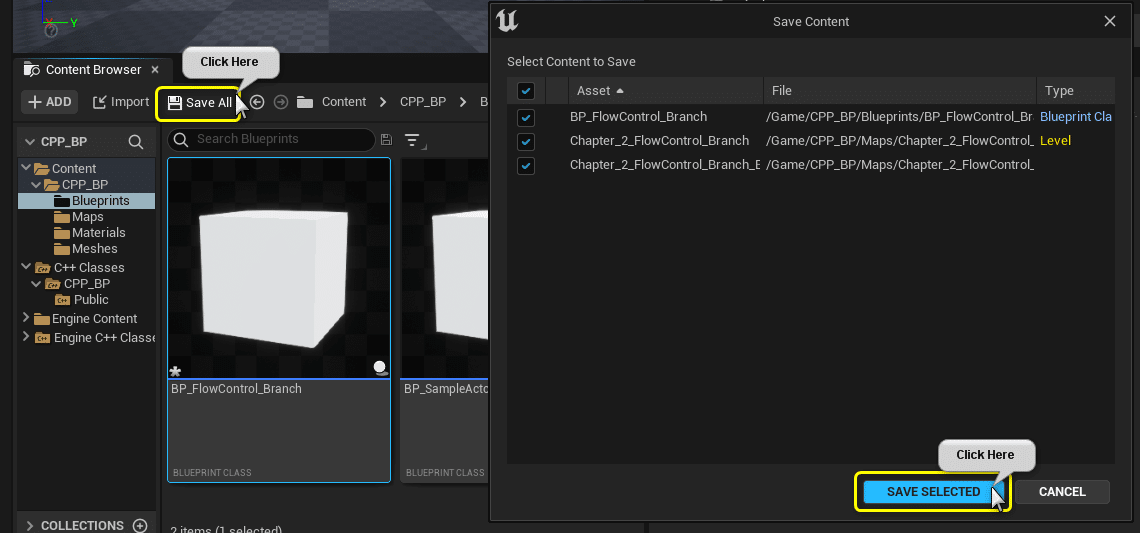
全て保存してC++側は終了です。
C++側の説明は以上になります。
プロジェクトを全て保存しましょう。
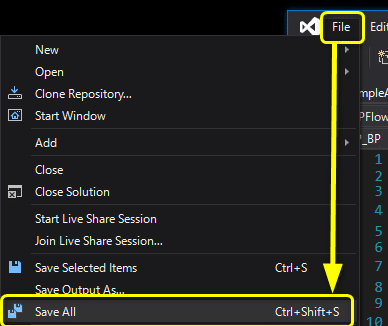
VisualStudioのSolutionも全て保存しましょう。
まとめ
if文を書いてみると、
今まで出版されている書籍の偉大さに気付く
書いてみて分かるのは、色々見てきた制御文の説明を書くのはすごく難しいです。
先人の皆様ありがとうございます。
簡単なものほど難しいですね。
もっと勉強しよう!
UE4から始めるC++&Blueprint 進捗とロードマップ
Zennで進捗報告を行い、GitHubでロードマップを公開中です。
よかったら覗いてみてください。