
UE5から始める C++ & BP 15 【Blueprint版】Structure(構造体)

ついに今回のStructure(構造体)で基本文法を1回fixします。
書かなくてはいけないことがまだまだあるのですが、深堀して全然先に進めなくなってしまう。
ゴールが近づくほど辞めたくなってしまう
ゴール直前より、スタート直前にしてしまう方があっさり書けてしまう
ここでfixしてしまう方が次に進めるような気がしました。
よく書いたなぁ
自分でも驚きなんですが、周りの反応も概ね好意的だったのでなんか書けてしまいました。
同じ悩みを抱えていた人が共感してくれたのが大きかったです。
noteにはこのコラム部分だけ書く気がします。
手順部分の2重管理が思いの外大変でした。
大変だと長続きしそうもないので、気楽に書けるようにしていきます。
続けるって大事ですね。
続けていると仲間と思える人たちと出会えるのでこれから会える仲間を楽しみに頑張ろう!
前回は「Flow Control(Loop)」方法について調査しました。
今回は「Structure(構造体)」方法について調査していきます。
【Blueprint】Structure(構造体)
今回できること
今までの処理をStructure(構造体)を使用した処理に変更します。
Structure(構造体)は異なるVariableTypeの変数を1つにまとめられます。
Array(配列)との違いは、Array(配列)は1つのVariableTypeしか持てませんが、Structure(構造体)は異なるVariableTypeの変数を持つことができます。

構造体の作り方について知ることができます。
構造体の設定について知ることができます。
PrintCalcResultのInputをStructer(構造体)に変更することでより処理が見やすくなります。

学習用の新規レベル「Chapter_2_Structure」を作成する
学習用の新規レベルを作成します。
[File]メニューから[New Level…]を選択します。

[Default]を選択します。

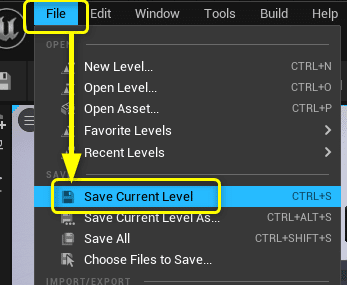
[File]メニューからCurrent Levelを保存します。
ショートカット「Ctrl + S」でも保存できます。
「Maps」フォルダを選択し、Nameに「Chapter_2_Structure」を入力し、[Save]ボタンをクリックします。

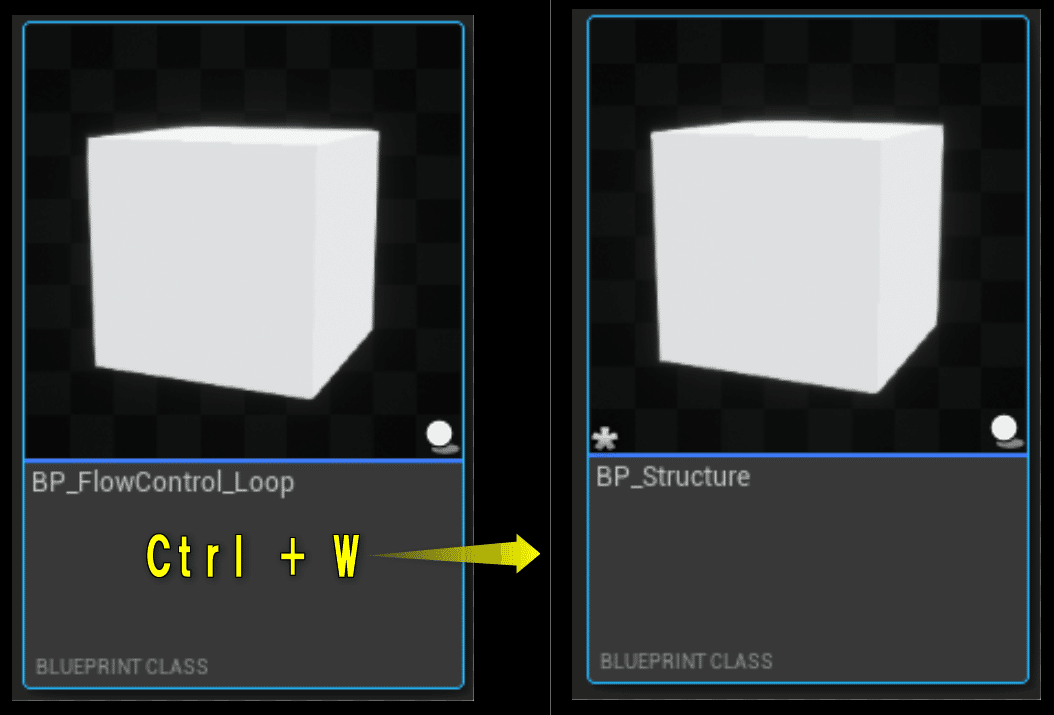
Blueprintを複製する
「BP_FlowControl_Loop」を複製(Ctrl + W)して、「BP_Structure」を作成します。
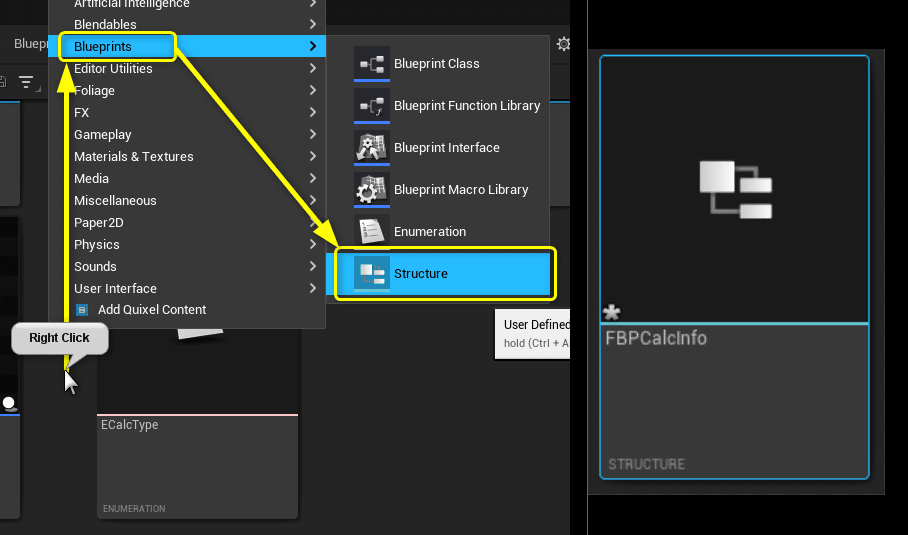
Structure(構造体)「FBPCalcInfo」を作成する
Structure(構造体)「FBPCalcInfo」を作成します。

名前を「FBPCalcInfo」に設定します。
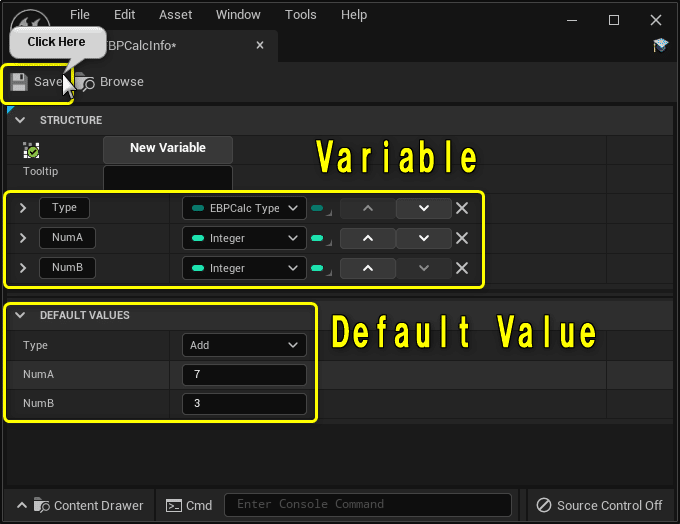
変数を追加する。
[New Variable]ボタンをクリックすると変数が追加されます。
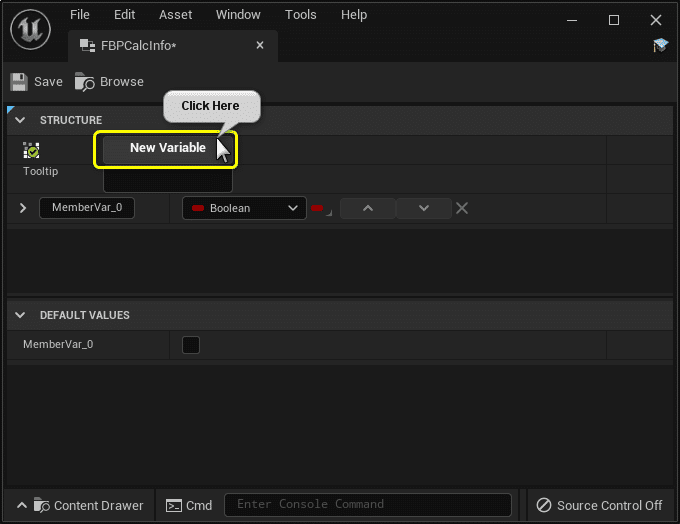
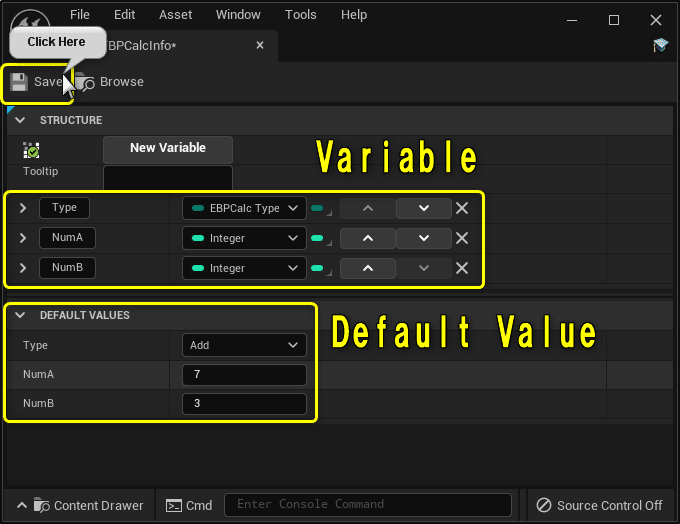
変数を一覧に書かれている内容で設定します。

設定できたら、[Save]ボタンをクリックします。
Function[PrintCalcResult]を複製してFunction[PrintCalcResultArgStructure]を作成する
「BP_Structure」を開きます。

Function「PrintCalcResult」のInput側を[FBPCalcInfo]に置き換えたFunction[PrintCalcResultArgStructure]を作成します。
Function「PrintCalcResult」を複製します。
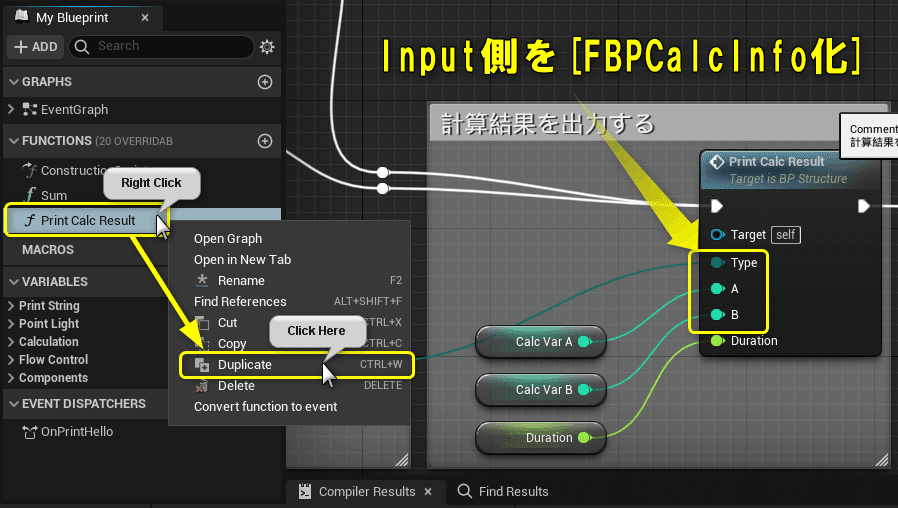
名前を[PrintCalcResultArgStructure]に設定します。

InputをStructure(構造体)「FBPCalcInfo」を使用するように変更します。

[Duration]を「FBPCalcInfo」に入れなかったのは、[Duration]は計算には使わず、PrintStringに使用するための変数だからです。
構造体は「何に使うか」のカテゴリー化ができるとメンバーが決まります。

Structure(構造体)を分解する
Inputを変更したので接続がおかしくなってしまいます。
おかしくなってしまった接続を切ります。

Structure(構造体)のメンバーから値を取得するにはStructure(構造体)を分解します。
Structure(構造体)の分解は2種類あります。
Structure(構造体)をピンをSplitする
Break(Structure Name)ノードを追加する
Structure(構造体)ピンをSplitする方法について紹介します。
Structure(構造体)ピンを右クリックして、[Split Struct Pin]を選択します。

「FBPCalcInfo」に設定した変数名のピンが表示され、Structure(構造体)のメンバーにアクセスできます。

もう1つの分解方法を説明するついでに、元に戻す方法を紹介します。
Structure(構造体)ピンを分解してできた変数ピンを右クリックして、[Recombine Struct Pin]を選択すると、元のStructure(構造体)ピンに戻せます。

もう1つの分解方法「Break(Structure Name)ノードを追加する」を紹介します。
Structure(構造体)ピンをDrag&Dropし、「Break (Structure Name)」を選択します。

Structure(構造体)のメンバーにアクセスできるBreakノードが追加されます。
処理を元通りになるように接続を修正します。

Structure(構造体)[FBPCalcInfo]を使用した処理は以下のようになります。

今回はStructure(構造体)のメンバーが少なかったので、どちらの分解方法を使用しても大丈夫でした。
Structure(構造体)のメンバーが大量にある場合は、Breakノードで構造体にアクセスした方が見やすいです。

Function[PrintCalcResultArgStructure]を使用した処理に編集する
Function[PrintCalcResultArgStructure]を使用した処理に編集します。
Function[PrintCalcResultArgStructure]をEventGraphに追加します。

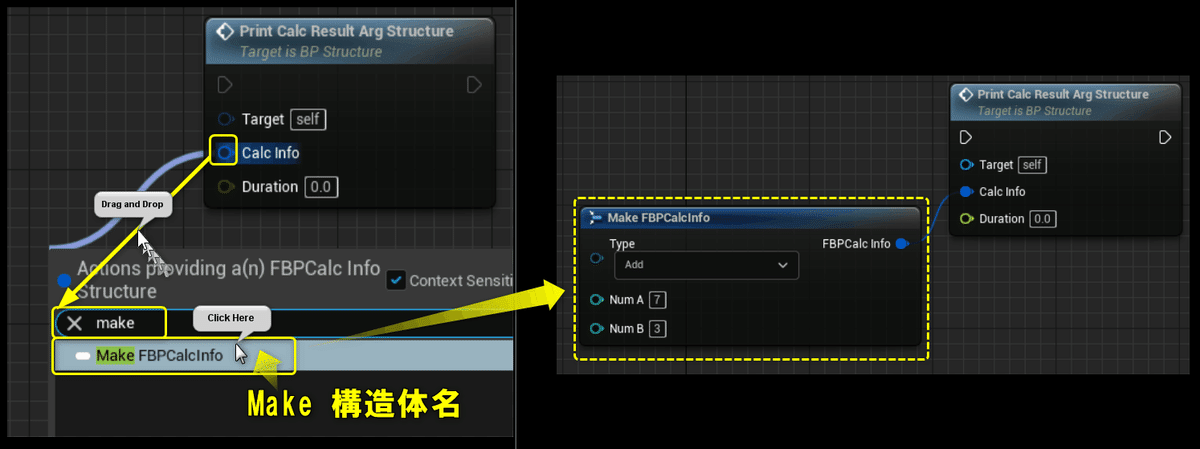
インプットのStructure(構造体)ピンへ変数を作成せずに値を設定する方法は分解する方法と同じで2種類あります。
Structure(構造体)ピンをSplitする
Make(Structure Name)ノードを追加する
「Structure(構造体)ピンをSplitする」方法については分解する手順と同じです。
Structure(構造体)ピンを右クリックし、[Split Struct Pin]を選択します。

元に戻すには、ピンを右クリックし、[Recombine Struct Pin]を選択します。

「Make(Structure Name)ノードを追加する」についてもBreakノードを追加した時と同じです。
Structure(構造体)ピンからDrag&Dropし、メニューから[Make (Structure Name)]を選択します。
Function[PrintCalcResultArgStructure]を使用した処理に接続を修正します。
Function[PrintCalcResult]は削除します。

Inputが整理されて構造体化されることで、ピンに設定する項目が分かりやすくなりました。

[Compile]ボタンをクリックします。

Level Editorに戻り、「BP_Structure」をViewportにDrag&Dropします。

Level Editorの[Play]ボタンをクリックします。

[C]キーをPressするとFunction[PrintCalcResultArgStructure]はFunction[PrintCalcResult]と同様の処理を行います。

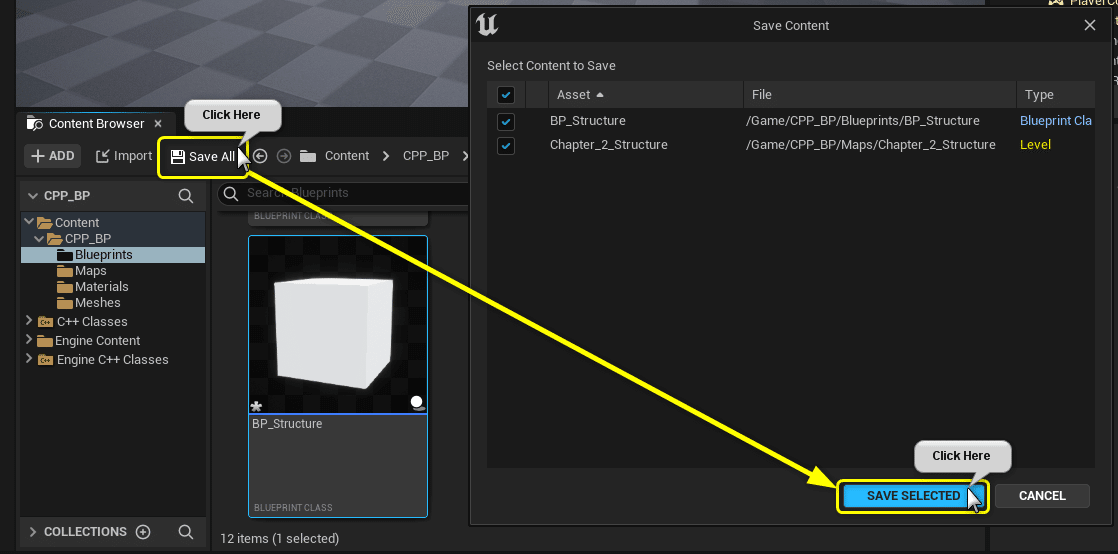
すべて保存
Blueprint側の説明はここまでになります。
[Content Browser]から[Save All]ボタンをクリックし、[Save Selected]ボタンをクリックしてプロジェクトの変更のあったアセットをすべて保存します。
まとめ
休日の方が意外と進まない。
時間がいくらあっても集中している時間が何時間取れたかが大事ですね。
休日なので休むための日だから休むことが大事。
勉強しなきゃ、休まなきゃ
日々葛藤中
参照URL
UE4から始めるC++&Blueprint 進捗とロードマップ
Zennで進捗報告を行い、GitHubでロードマップを公開中です。
よかったら覗いてみてください。