UE5から始める C++ & BP 11 【C++版】Input Event(入力イベント)

処理は間違っていないはずなのに何でエラーがでるの?
ソースコードを書いてからコンパイルするとしょっちゅうこの状態になります。
UnrealEngineはAnswerHubで探せば大抵のエラーが解決します。
「何でエラーが出るの?」
「それは、こうすると直るよ!」
「ありがとうございました。直りました!」
こういったやり取りが未来の同じエラーに行き当たった人の役に立ちます。
人に聞く、その証跡を残しておくのはみんなのため。
分からないことは恥ずかしくない。
何もやらずに最初から全部まで聞くと嫌われてしまうので、
「ある程度自分で考えて分からなくなったら」聞く
聞きかたは大事です。
それでは、Blueprintの内容をC++で再現します。
【C++】Input Event(入力イベント)
C++でBlueprintを再現すること
キーボードやゲームコントローラーの入力イベントからPrintStringを出力します。
Project Settingsに入力イベントを追加して、Blueprintで追加した入力イベント呼び出します。
編集するActorクラスを作成する
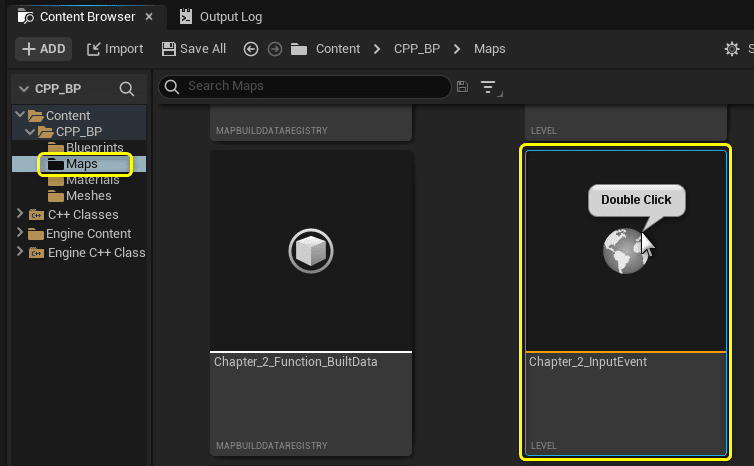
プロジェクトを閉じていたら、プロジェクトを開き、「Chapter_2_InputEvent」を開きます。
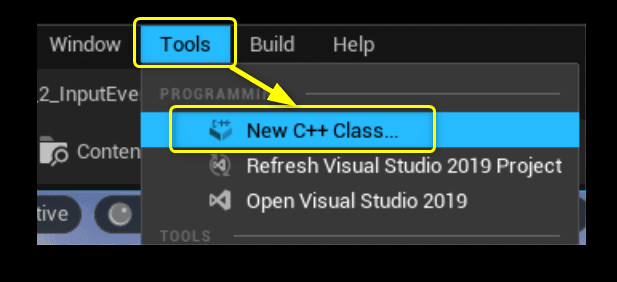
[Tools]メニューから[New C++ Class]を開きます。
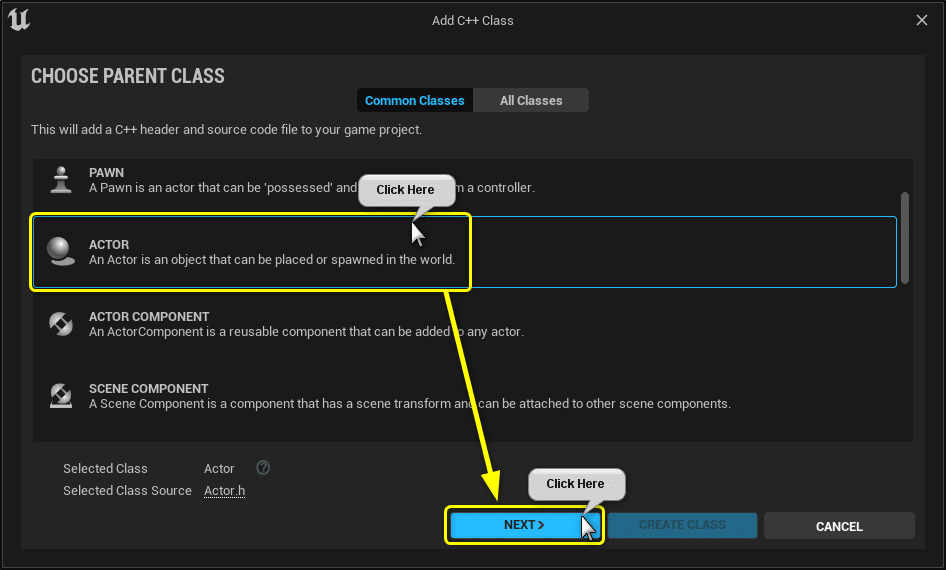
親クラスに[Actor]を選択します。
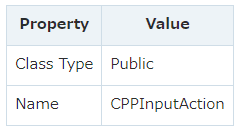
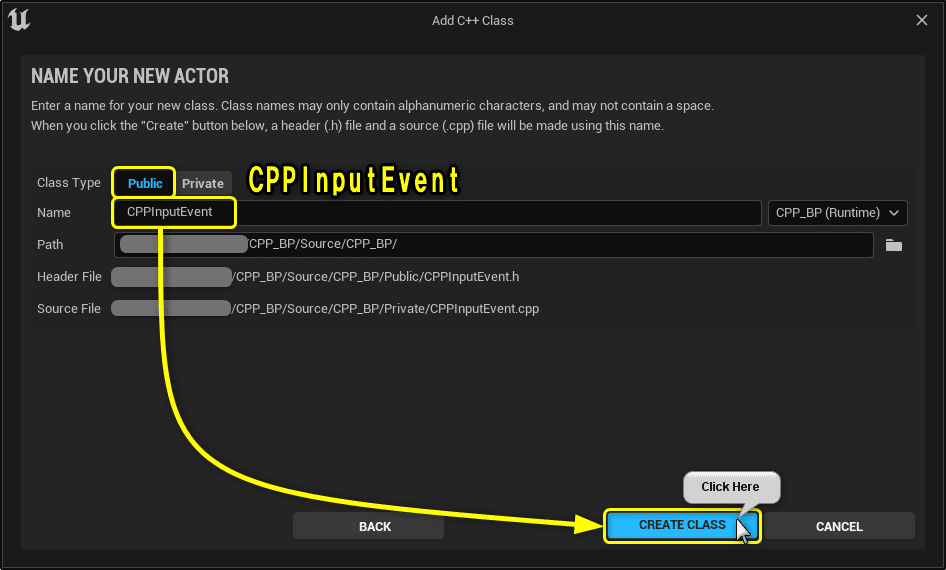
ClassTypeとClass名を設定します。
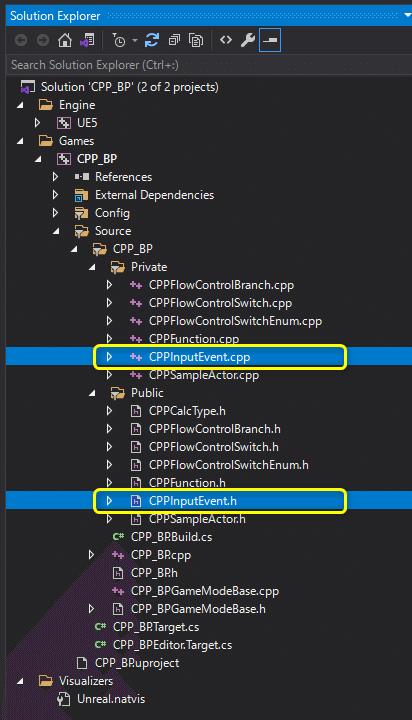
Solution Explorerから今回編集する2つのファイルを開きます。
CPPInputAction.h
CPPInputAction.cpp
開いたファイルを学習する初期状態に修正します。
CPPInputAction.h
// Fill out your copyright notice in the Description page of Project Settings.

#pragma once

#include "CoreMinimal.h"
#include "GameFramework/Actor.h"
#include "CPPCalcType.h"
#include "CPPInputEvent.generated.h"

UCLASS()
class CPP_BP_API ACPPInputEvent : public AActor
{
	GENERATED_BODY()

public:
	int32 Sum(int32 A, int32 B);

protected:
	// Called when the game starts or when spawned
	virtual void BeginPlay() override;

private:
	FString Message = "C++ Hello World!";

	// 計算結果を出力する関数
	void PrintCalcResult(const ECPPCalcType Type, const int32 A, const int32 B, const float PrintDuration);

	// PrintString関数のDurationに設定する変数
	const float Duration = 10.0f;

	// PrintString関数のTextColorに設定する変数
	const FLinearColor TextColor = FColor(255, 255, 255);

	// 計算用の変数
	int32 CalcVarA = 7;
	int32 CalcVarB = 3;

	// Flow Control用の変数
	bool IsPrintHello = false;
	ECPPCalcType CalcType = ECPPCalcType::Add;

};
CPPInputAction.cpp
// Fill out your copyright notice in the Description page of Project Settings.


#include "CPPInputEvent.h"
#include "Kismet/KismetSystemLibrary.h"

int32 ACPPInputEvent::Sum(int32 A, int32 B)
{
	return A + B;
}

// Called when the game starts or when spawned
void ACPPInputEvent::BeginPlay()
{
	Super::BeginPlay();

	if (IsPrintHello)
	{
		// PrintStringノードと同じ処理
		// UKismetSystemLibraryクラスのPrintString関数を呼び出す
		UKismetSystemLibrary::PrintString(this, Message, true, true, TextColor, Duration);
	}
	else
	{
		// 計算結果を出力する処理
		PrintCalcResult(CalcType, CalcVarA, CalcVarB, Duration);
	}
}

void ACPPInputEvent::PrintCalcResult(const ECPPCalcType Type, const int32 A, const int32 B, const float PrintDuration)
{
	switch (Type)
	{
		case ECPPCalcType::Add:
		{
			// Add(足し算)の処理
			// 値渡し
			int32 ResultAdd = Sum(A, B);
			FString StrResultAdd = FString::Printf(TEXT("%d"), ResultAdd);
			UKismetSystemLibrary::PrintString(this, StrResultAdd, true, true, FColor::Red, PrintDuration);
			break;
		}
		case ECPPCalcType::Subtract:
		{
			// Subtract(引き算)の処理
			int32 ResultSubtract = A - B;
			FString StrResultSubtract = FString::Printf(TEXT("%d"), ResultSubtract);
			UKismetSystemLibrary::PrintString(this, StrResultSubtract, true, true, FColor::Yellow, PrintDuration);
			break;
		}
		case ECPPCalcType::Multiply:
		{
			// Multiply(掛け算)の処理
			int32 ResultMultiply = A * B;
			FString StrResultMultiply = FString::Printf(TEXT("%d"), ResultMultiply);
			UKismetSystemLibrary::PrintString(this, StrResultMultiply, true, true, FColor::Green, PrintDuration);
			break;
		}
		case ECPPCalcType::Divide:
		{
			// Divide(割り算)の処理(int > float)
			float ResultDivide = (float)A / (float)B;
			FString StrResultDivide = FString::Printf(TEXT("%f"), ResultDivide);
			UKismetSystemLibrary::PrintString(this, StrResultDivide, true, true, FColor::Blue, PrintDuration);
		}
	}
}
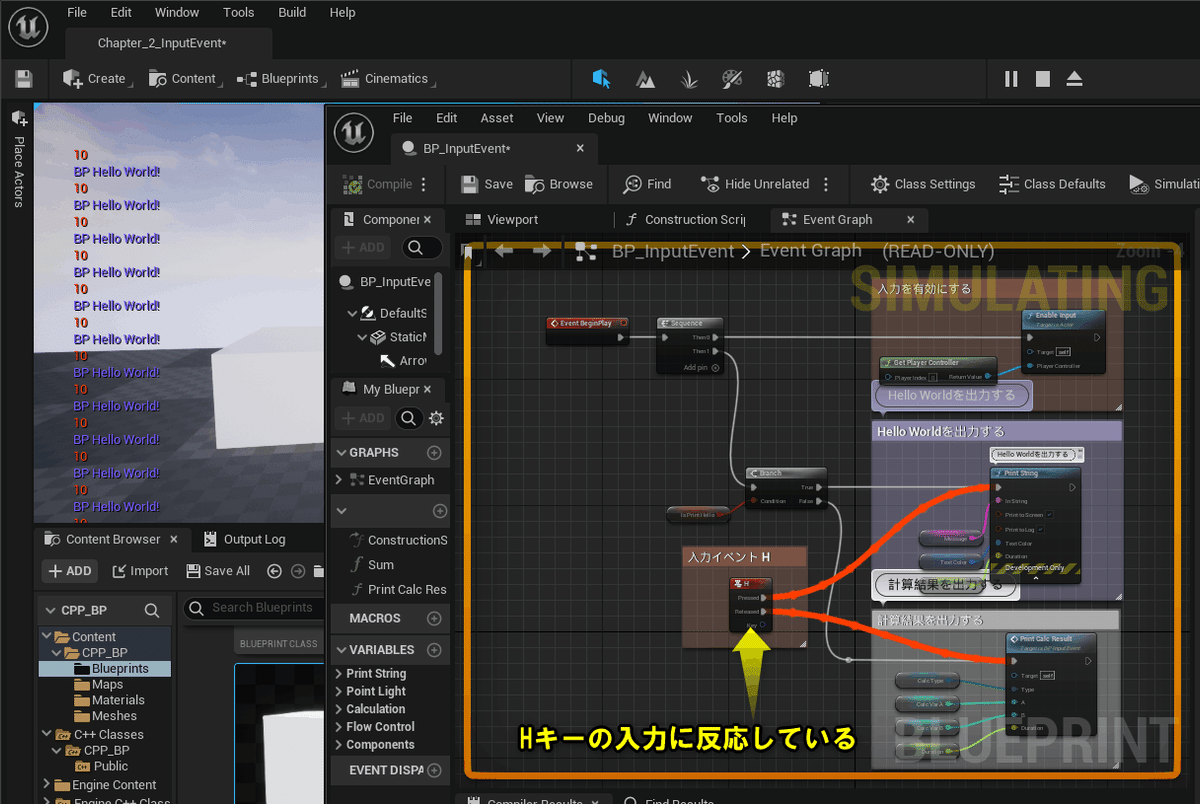
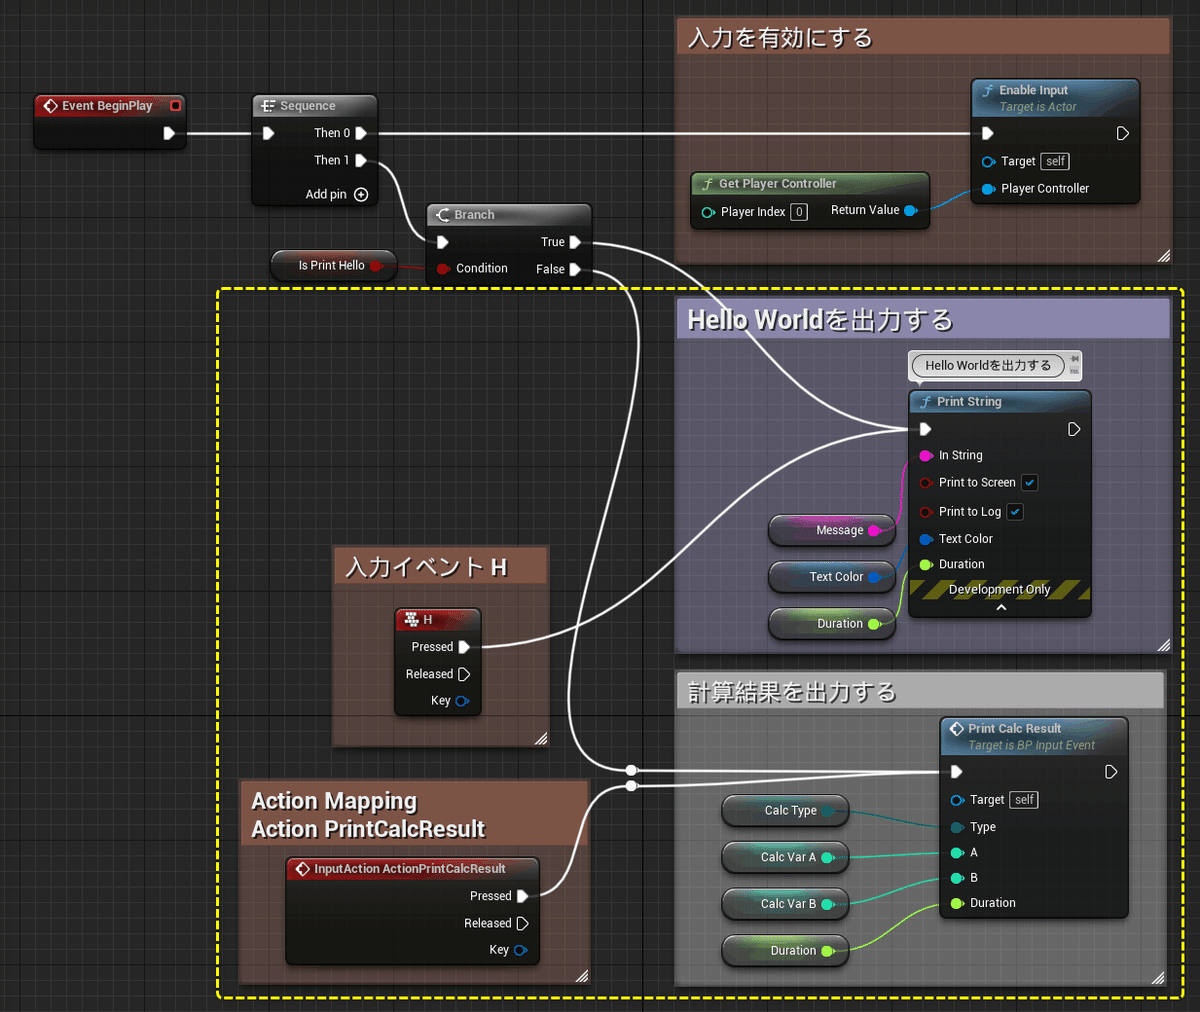
キーボード入力イベントノードを追加する
Blueprintの点線で囲んだ箇所をC++で再現します。
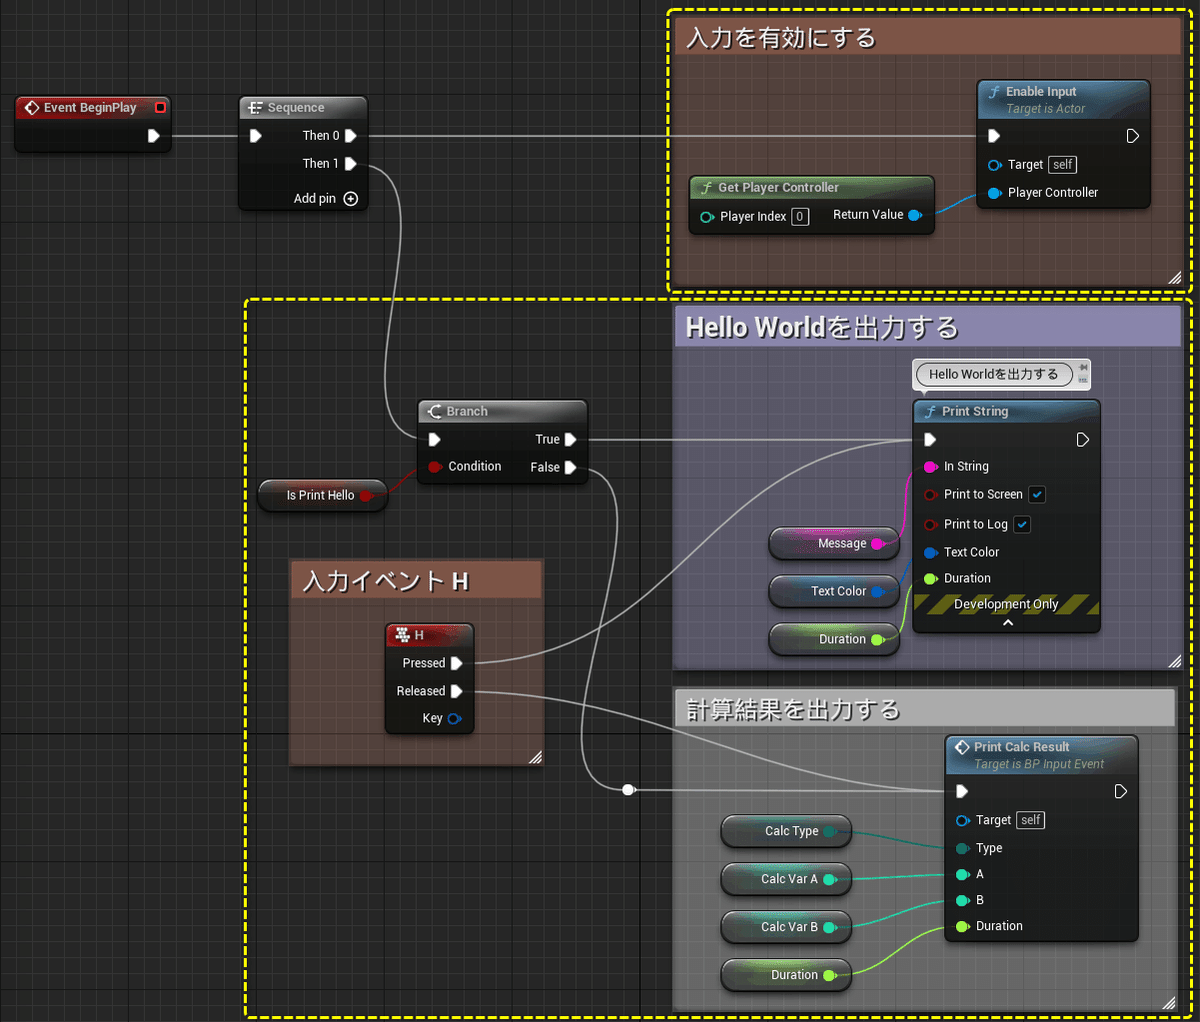
「CPPInputAction.h」に必要となるプロトタイプ宣言を記述します。
CPPInputAction.h
private:
	// Input設定
	void SetupInput();

	// Input Event イベントハンドラー関数
	void PressedH();
	void ReleasedH();
「CPPInputAction.cpp」に関数を定義します。
[UGameplayStatics::GetPlayerController]を使用するので、「GameplayStatics.h」のincludeを追加してください。
CPPInputAction.cpp
#include "Kismet/GameplayStatics.h" // 追加

void ACPPInputEvent::SetupInput()
{
	// 入力を有効にする
	EnableInput(UGameplayStatics::GetPlayerController(GetWorld(), 0));

	// HキーのPressedとReleasedをバインドする
	InputComponent->BindKey(EKeys::H, IE_Pressed, this, &ACPPInputEvent::PressedH);
	InputComponent->BindKey(EKeys::H, IE_Released, this, &ACPPInputEvent::ReleasedH);
}

void ACPPInputEvent::PressedH()
{
	// Hello World!を出力する処理
	UKismetSystemLibrary::PrintString(this, Message, true, true, TextColor, Duration);
}

void ACPPInputEvent::ReleasedH()
{
	// 計算結果を出力する処理
	PrintCalcResult(CalcType, CalcVarA, CalcVarB, Duration);
}
[Enable Input]ノードでBlueprintクラスの入力を有効にしました。
C++でも同様に、EnableInputで入力を有効にできます。
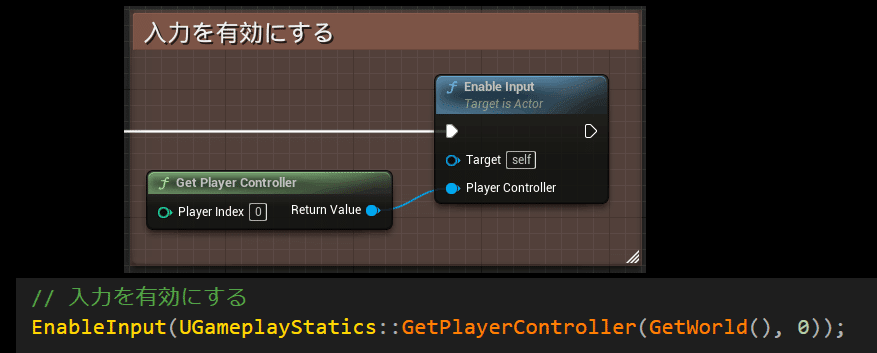
1プレイヤー用のゲームであれば、「GetWorld()->GetFirstPlayerController()」にしても入力を有効にできます。
	EnableInput(UGameplayStatics::GetPlayerController(GetWorld(), 0));

	EnableInput(GetWorld()->GetFirstPlayerController());
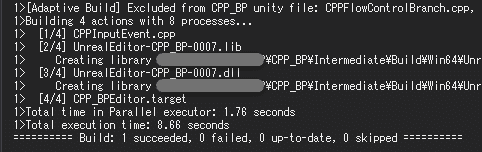
プロトタイプ宣言と関数の定義をしたので、Compileを行います。
しかし、Linkエラーが発生します。
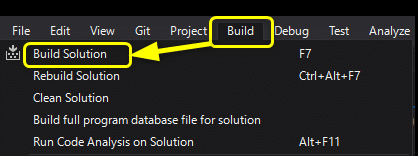

Build.csに必要となるモジュールを追加することで解決します。
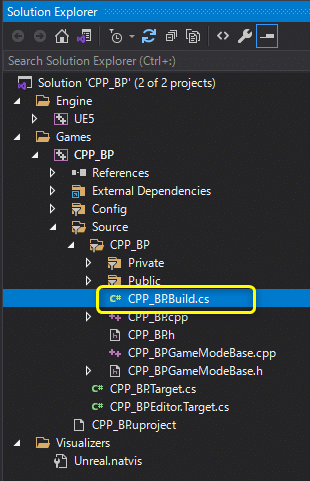
「PublicDependencyModuleNames.AddRange」に"SlateCore", "Slate"を追加します。
CPP_BP.Build.cs
PublicDependencyModuleNames.AddRange(new string[] { "Core", "CoreUObject", "Engine", "InputCore", });
↓
↓ "SlateCore", "Slate"を追加する
↓
PublicDependencyModuleNames.AddRange(new string[] { "Core", "CoreUObject", "Engine", "InputCore", "SlateCore", "Slate" });
PublicDependencyModuleNames (List<String>)
パブリックな依存関係モジュール名のリストです (パスは不要) (private/public が自動的にインクルードされます)。これらは、パブリック ソース ファイルに必要なモジュールです。
引用:モジュール(公式ドキュメント)
InputComponent->BindKeyに必要なライブラリが"SlateCore", "Slate"にあったのでライブラリが無くてエラーになっていました。

Build.csを修正したことでLinkエラーが解決しました。
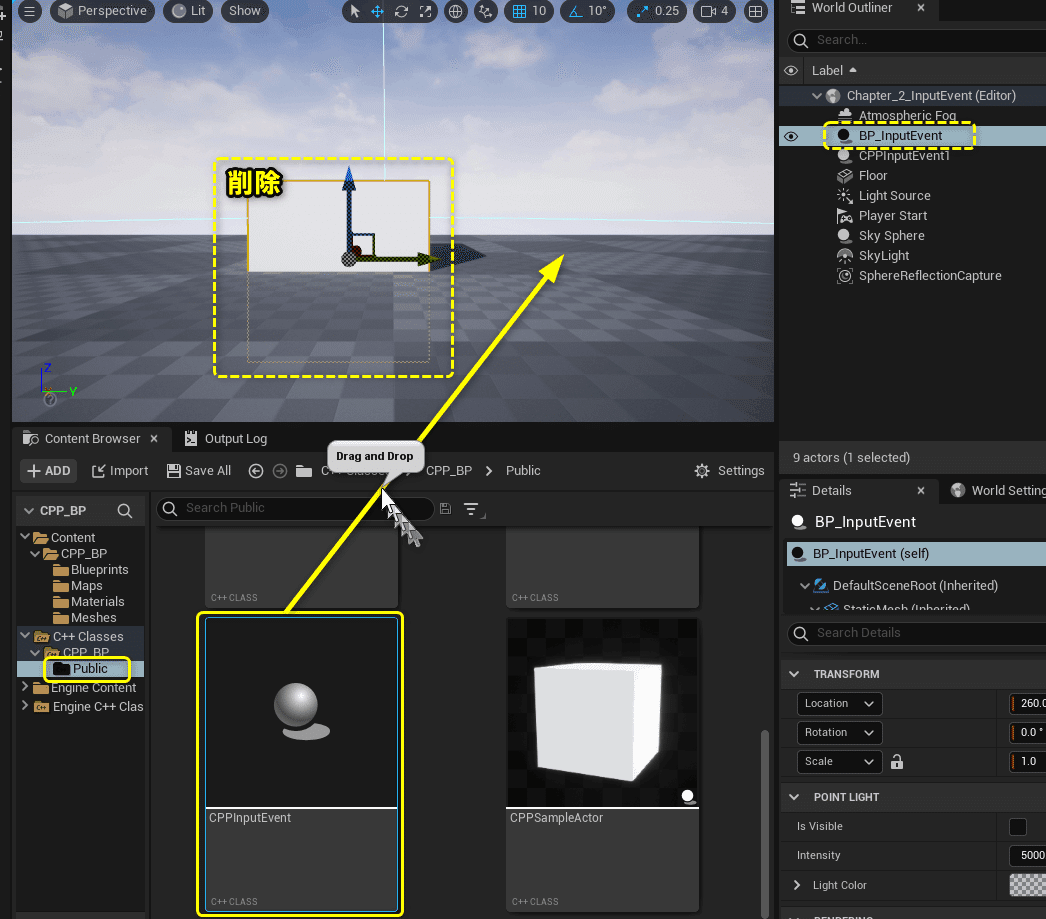
「CPPInputEvent」をViewportにDrag&Dropします。
PrintStringの出力結果が分かりづらくなるので、「BP_InputEvent」を削除します。
Level Editorの[Play]ボタンをクリックします。

[H]キーの入力するとPrintStringが出力されます。
Blueprintのキーボード入力イベントの処理を再現できました。

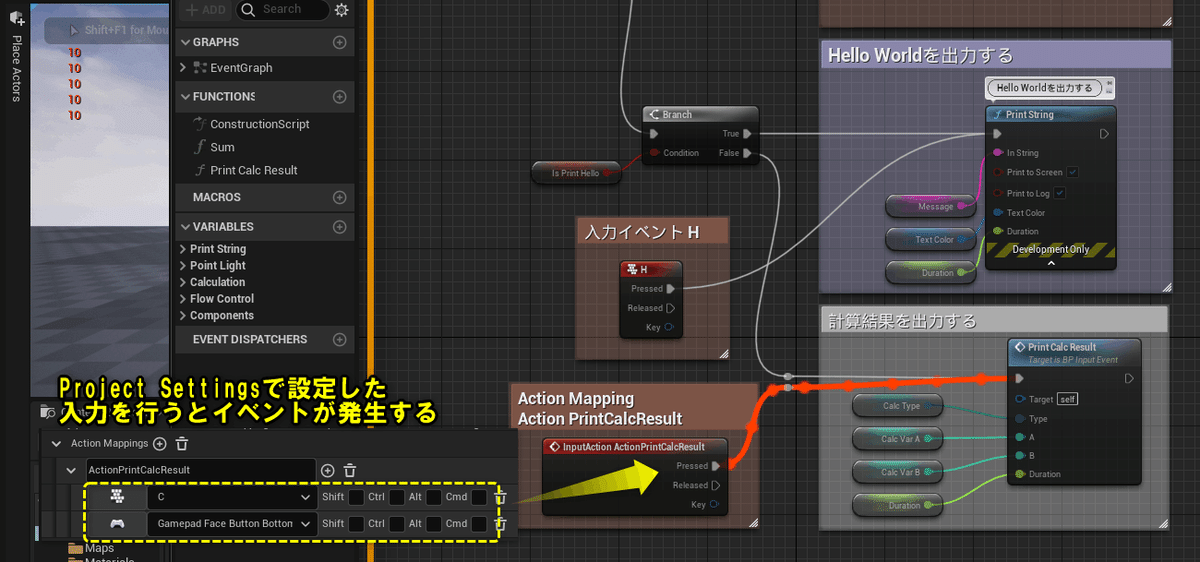
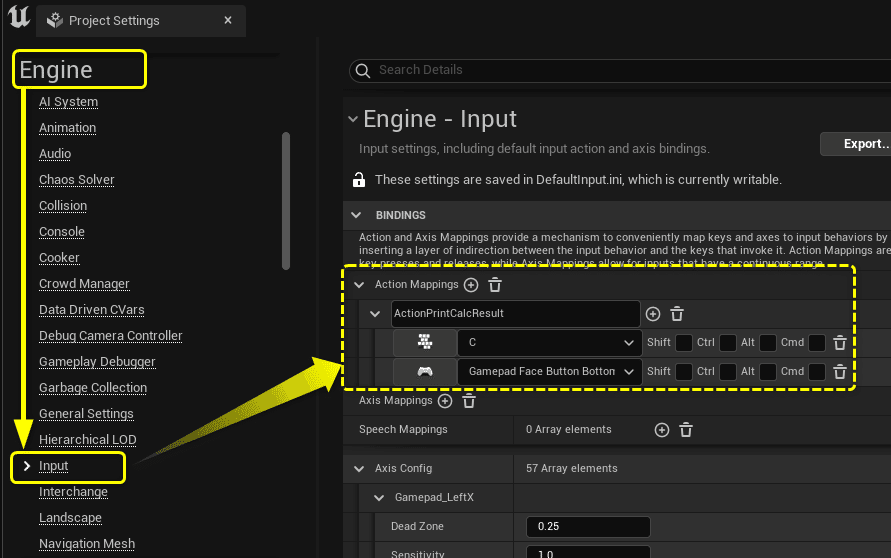
Project Settingsで追加したActionイベントを追加する
Project settingsでActionを追加しました。
BlueprintでActionEventを使用した処理をC++で再現します。
「CPPInputAction.h」にAction「PrintCalcResult」が発生した時に処理する関数のプロトタイプを宣言します。
CPPInputAction.h
private:
	void PressedActionPrintCalcResult();
「CPPInputAction.cpp」に[PressedActionPrintCalcResult]関数を定義し、[SetupInput]でAction[ActionPrintCalcResult]が発生した際に[PressedActionPrintCalcResult]を処理するように編集します。
CPPInputAction.cpp
void ACPPInputEvent::PressedActionPrintCalcResult()
{
	// 計算結果を出力する処理
	PrintCalcResult(CalcType, CalcVarA, CalcVarB, Duration);
}

void ACPPInputEvent::SetupInput()
{
	// 入力を有効にする
	EnableInput(UGameplayStatics::GetPlayerController(GetWorld(), 0));

	// HキーのPressedとReleasedをバインドする
	InputComponent->BindKey(EKeys::H, IE_Pressed, this, &ACPPInputEvent::PressedH);
	//InputComponent->BindKey(EKeys::H, IE_Released, this, &ACPPInputEvent::ReleasedH);

	// ActionMappingsに設定したActionをバインドする
	InputComponent->BindAction("ActionPrintCalcResult", IE_Pressed, this, &ACPPInputEvent::PressedActionPrintCalcResult);
}
Ctrl + Sでファイルを保存し、Compileを行います。

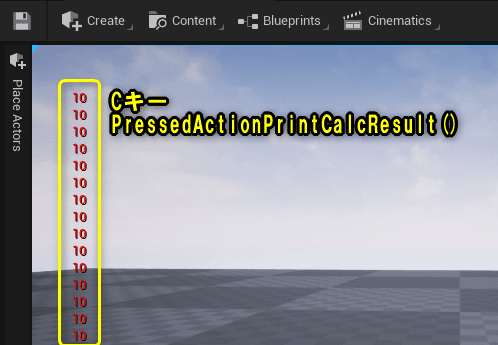
Level Editorの[Play]ボタンをクリックします。
Action[ActionPrintCalcResult]に設定した[C]キーを入力すると、[PressedActionPrintCalcResult]が処理されます。
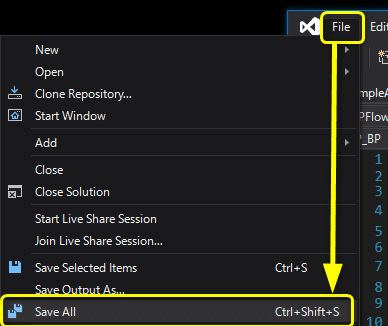
すべて保存
C++側の説明は以上になります。
プロジェクトをすべて保存しましょう。
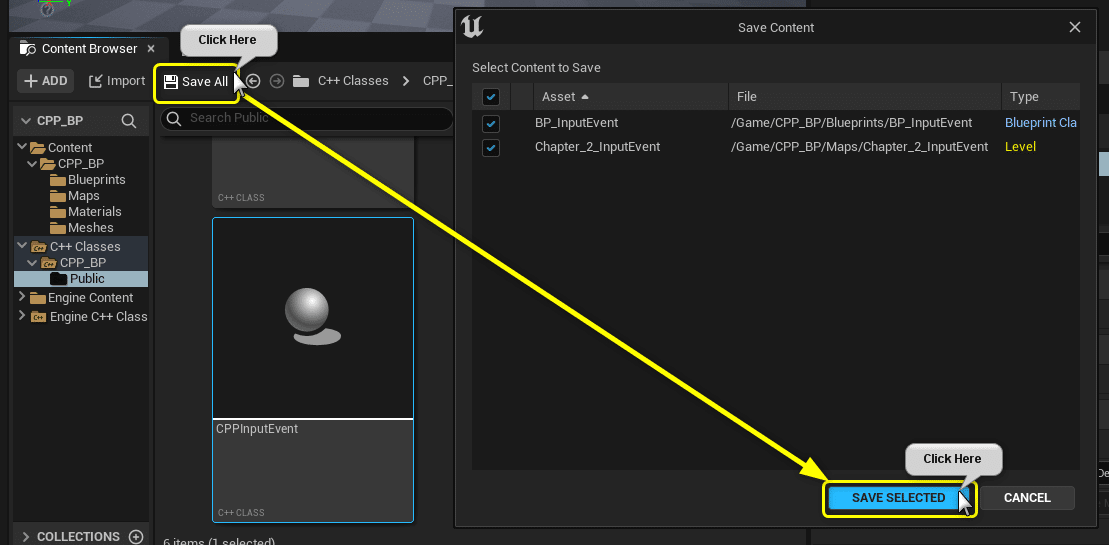
Visual StudioのSolutionもすべて保存しましょう。
まとめ
Build.csで必要のないModuleを読み込むようにしたらプロジェクトが立ち上がらなくなって焦りました。
分からないままソースコードをいじるとプロジェクトが壊れるので、サンプルプロジェクトで試してよかったです。
被害は自分だけで済むように実験する余裕を作ろう!
参照URL
UE4から始めるC++&Blueprint 進捗とロードマップ
Zennで進捗報告を行い、GitHubでロードマップを公開中です。
よかったら覗いてみてください。