
AzureのAI visionを使ってみる | 物体検出編

物体検出モデルにYOLOを使用して、GPTのAgentに設定する記事を書きましたが、
AzureのAI visionから物体検出ができるということなので、試しにつかってみました。
まず、Azure portalからcomputer visionで検索してリソースを作成します。
KEYとEnd pointが取得出来たら、早速pythonから使ってみましょう。
詳しくはこちらを参考にしてみてください。
まず、必要なライブラリーをインストールしましょう。
pip install azure-ai-vision-imageanalysisfrom dotenv import load_dotenv
import os
dotenv_path = ".env"
load_dotenv(dotenv_path)
VISION_ENDPOINT = os.getenv('VISION_ENDPOINT')
VISION_KEY = os.getenv('VISION_KEY')
from azure.ai.vision.imageanalysis import ImageAnalysisClient
from azure.ai.vision.imageanalysis.models import VisualFeatures
from azure.core.credentials import AzureKeyCredential
# Create an Image Analysis client
client = ImageAnalysisClient(
endpoint=VISION_ENDPOINT,
credential=AzureKeyCredential(VISION_KEY)
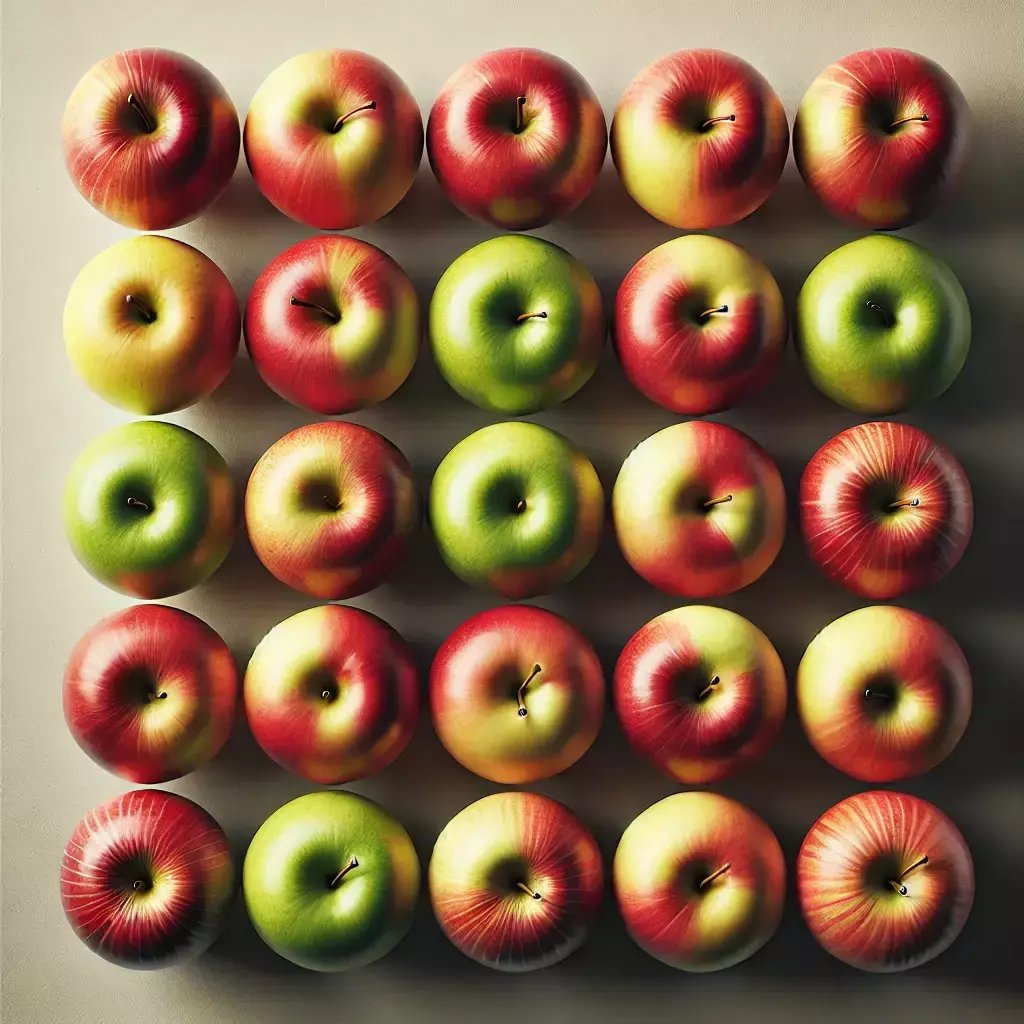
)以前も使用した、このリンゴの画像を使います。
image_path ="apple.jpg"

# Load image to analyze into a 'bytes' object
with open(image_path, "rb") as f:
    image_data = f.read()

visual_features =[
        #VisualFeatures.TAGS,
        VisualFeatures.OBJECTS,
        #VisualFeatures.CAPTION,
        #VisualFeatures.DENSE_CAPTIONS,
        #VisualFeatures.READ,
        #VisualFeatures.SMART_CROPS,
        #VisualFeatures.PEOPLE,
    ]

result = client.analyze(
    image_data=image_data,
    visual_features=visual_features,
    #smart_crops_aspect_ratios=[0.9, 1.33],
    #gender_neutral_caption=True,
    language="en"
)
結果を確認してみます。
import matplotlib.pyplot as plt
from PIL import Image, ImageDraw

image_filename = image_path
# Get objects in the image
if result.objects is not None:
    print("\nObjects in image:")

    # Prepare image for drawing
    image = Image.open(image_filename)
    fig = plt.figure(figsize=(image.width/100, image.height/100))
    plt.axis('off')
    draw = ImageDraw.Draw(image)
    color = 'cyan'

    for detected_object in result.objects.list:
        # Print object name
        print(" {} (confidence: {:.2f}%)".format(detected_object.tags[0].name, detected_object.tags[0].confidence * 100))

        # Draw object bounding box
        r = detected_object.bounding_box
        bounding_box = ((r.x, r.y), (r.x + r.width, r.y + r.height))
        draw.rectangle(bounding_box, outline=color, width=3)
        plt.annotate(detected_object.tags[0].name,(r.x, r.y), backgroundcolor=color)

    # Save annotated image
    plt.imshow(image)
    plt.tight_layout(pad=0)
    outputfile = 'objects.jpg'
    fig.savefig(outputfile)
    print('  Results saved in', outputfile)
Objects in image:
Apple (confidence: 69.40%)
Apple (confidence: 74.40%)
Apple (confidence: 75.10%)
Apple (confidence: 81.20%)
Apple (confidence: 75.30%)
Apple (confidence: 76.20%)
Apple (confidence: 66.20%)
Apple (confidence: 64.90%)
Apple (confidence: 79.90%)
Apple (confidence: 78.20%)
Apple (confidence: 72.30%)
Apple (confidence: 73.20%)
Apple (confidence: 69.80%)
Apple (confidence: 75.80%)
Apple (confidence: 64.20%)
Apple (confidence: 77.90%)
Apple (confidence: 78.50%)
Apple (confidence: 74.60%)
Apple (confidence: 78.70%)
Apple (confidence: 76.40%)
Apple (confidence: 57.40%)
Apple (confidence: 77.40%)
Apple (confidence: 67.60%)
Apple (confidence: 73.90%)
Apple (confidence: 66.50%)
Results saved in objects.jpg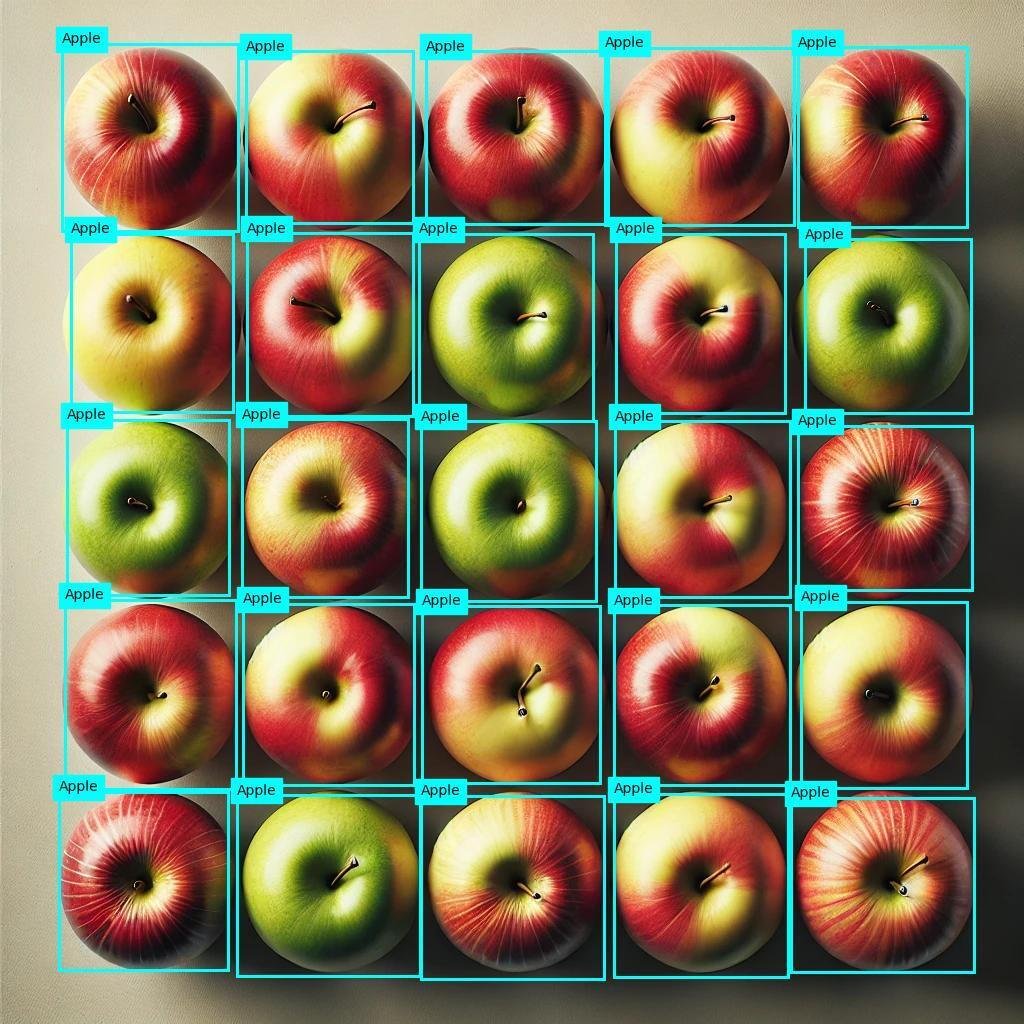
スピード気になりません。
一応、別の画像でも試してみます。
画像をURLから呼び出す場合には、以下のように呼び出します。
image_url = "https://learn.microsoft.com/azure/ai-services/computer-vision/media/quickstarts/presentation.png"

visual_features =[
        #VisualFeatures.TAGS,
        VisualFeatures.OBJECTS,
        #VisualFeatures.CAPTION,
        #VisualFeatures.DENSE_CAPTIONS,
        #VisualFeatures.READ,
        #VisualFeatures.SMART_CROPS,
        #VisualFeatures.PEOPLE,
    ]

result = client.analyze_from_url(
    image_url=image_url,
    visual_features=visual_features,
    #smart_crops_aspect_ratios=[0.9, 1.33],
    #gender_neutral_caption=True,
    language="en"
)
AzureのOCRは精度が良いらしいので、次はOCRを試してみようと思います。