Houdini /obj周りについてメモ

すぐ忘れるのでメモ
随時更新
最終更新履歴 : 2023/04/19
環境
mac os Catalina 10.15.7
Houdini FX(apprentice) version 19.5.303
Houdiniでの用語概念
Houdiniでは面のことをPrimitive
辺を Edge
点をPoint、面や辺を構成する頂点をVertexと呼んでいる。
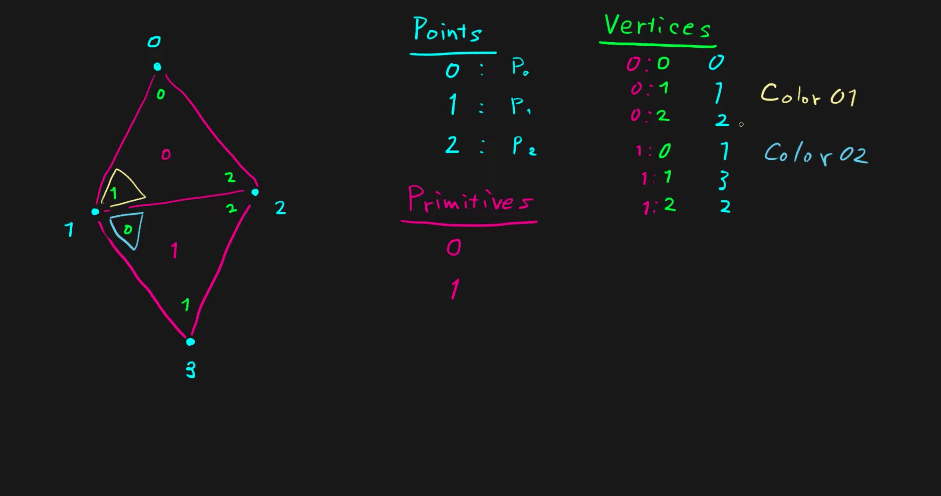
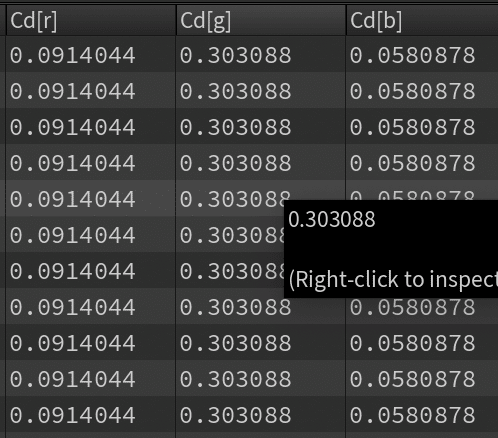
Geometry Spread Sheetで確認するとわかりやすい。
Vertexとpointの違いについてColorで説明
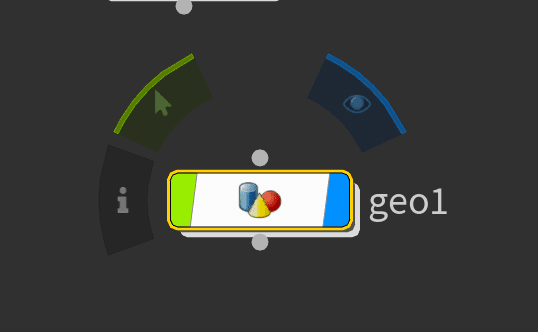
GeometryノードとPrimitiveノード(SOP)
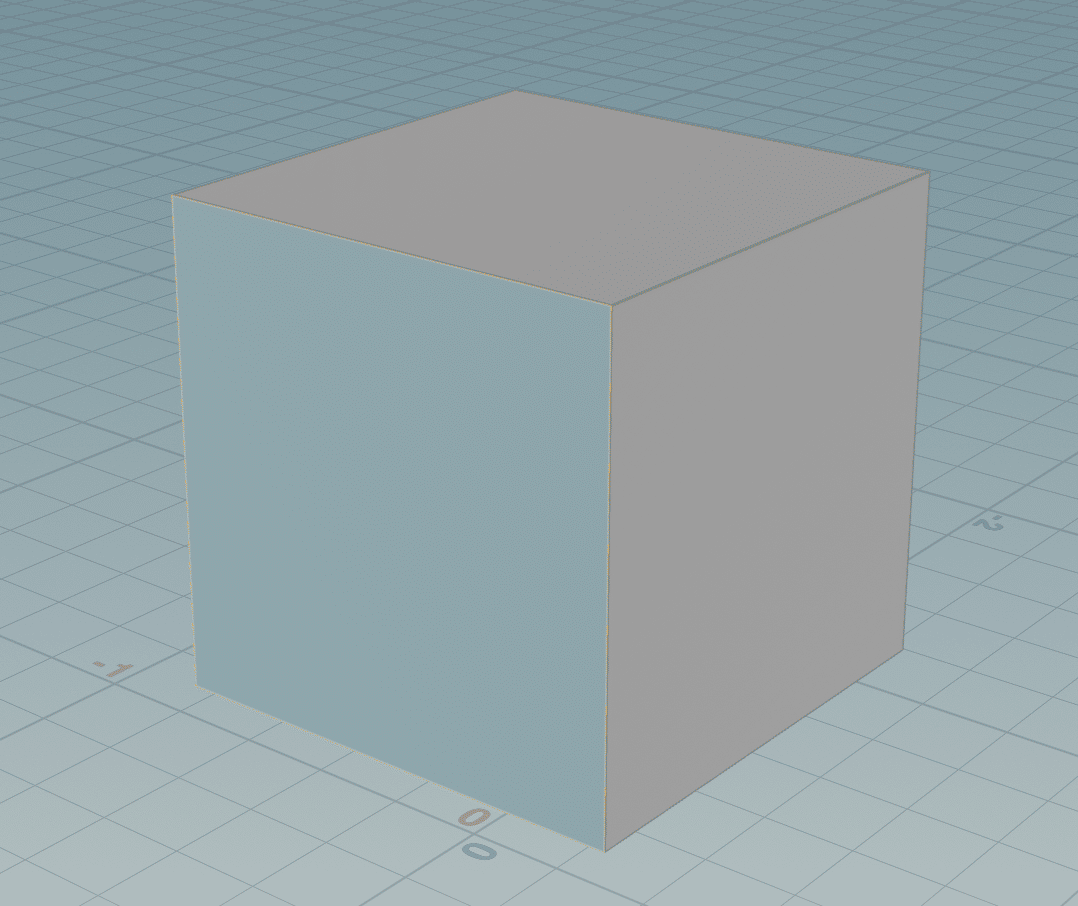
Houdiniのモデルは、シーンレベルのジオメトリオブジェクトで表現されます。ジオメトリコンテナオブジェクト内部でジオメトリノードがオブジェクトのジオメトリを定義します。ジオメトリコンテナオブジェクトでは、オブジェクト内部の個々のサーフェスとは別に、移動、回転、スケール、オブジェクト全体をシェーディングすることができます。
Geometry node(コンテナ)と呼ばれる、ノードの中に、具体的な頂点や辺、面を持ったPrimitive (Surface)nodeを入れさせられる。そうやってまとめるのがgeometry node。
他の3DCGソフト系でもよくある構造
このGemetry nodeではTranslateやRotateといった基本Transformをパラメータとしていじることができる。
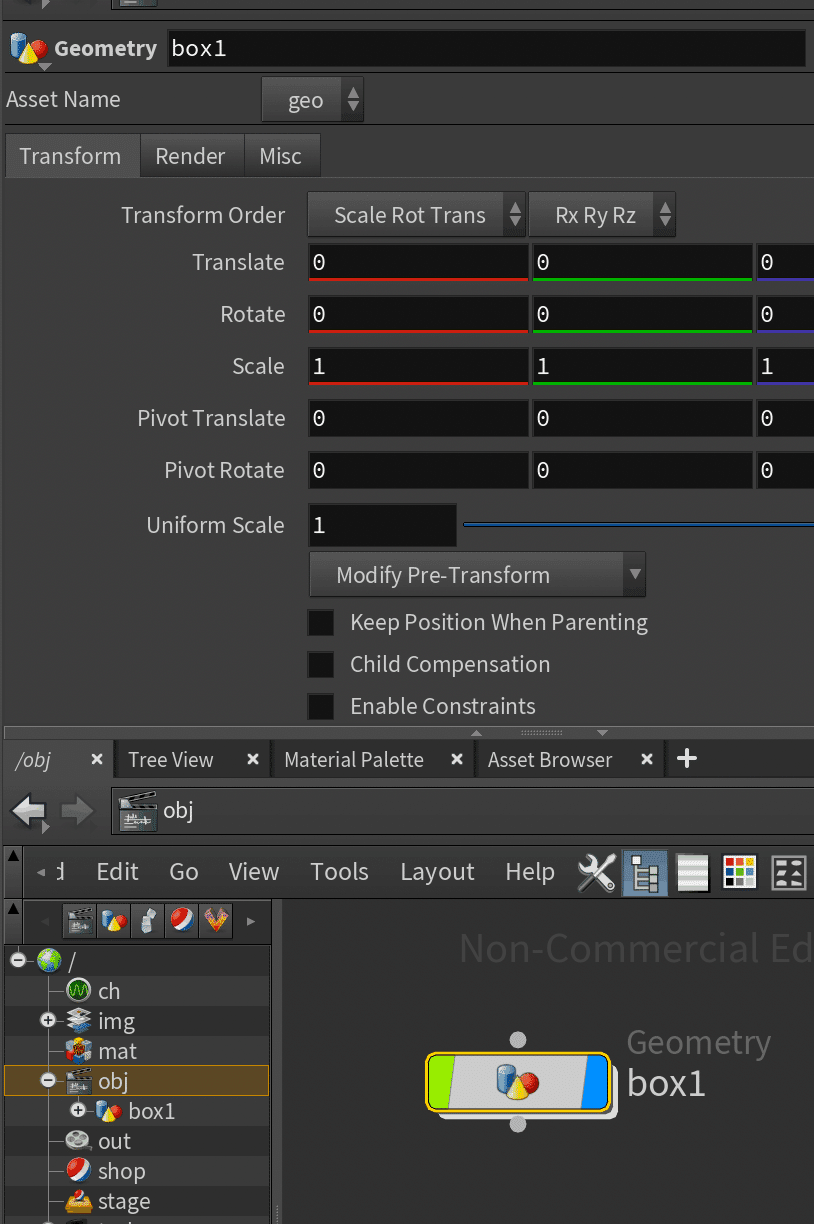
geometry node中に入っているのはPrimitiveな頂点情報や基本情報を持っているようなものが生成される。
SOPノードと呼ばれる。TouchDesignerなどと感覚は一緒。
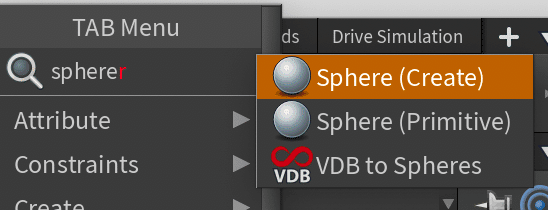
tabで検索して作られるnodeも/obj 直下と /obj/geometry 直下では出来上がるnodeが違う。
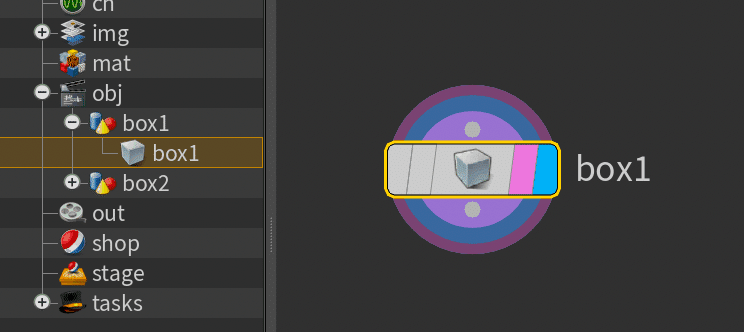

Spehereと検索した時も、Createだと、Geometryごと作成されて、PrimitiveだとGeometry nodeの中に作成されるnodeとなる。
Primitiveノード内階層でSelect toolを選ぶと、面や辺などを選択できる。
BlenderでいうEdit mode的なイメージ
Selectのときに頂点(2)・辺(3)・面(4)を変更できる。
Group
グループとは、ポイント/フェースの集合体に名前を付けたものです。
Group SOPはジオメトリのポイント/フェースを色々な基準に基づいて並べ替えてから、グループ化します。他のオペレータでも、副作用としてグループを作成します。
ポイントやプリミティブを操作するノードのほとんどには、ノードの効果を追加するオプションがあり、入力としてグループしか対応していないものがあります。そのため、ある特性に基づいてポイントのグループを認識して、それをノードに適用します。
ポイントが削除されても、Houdiniは自動的にそのポイントのグループからポイントを除去します。
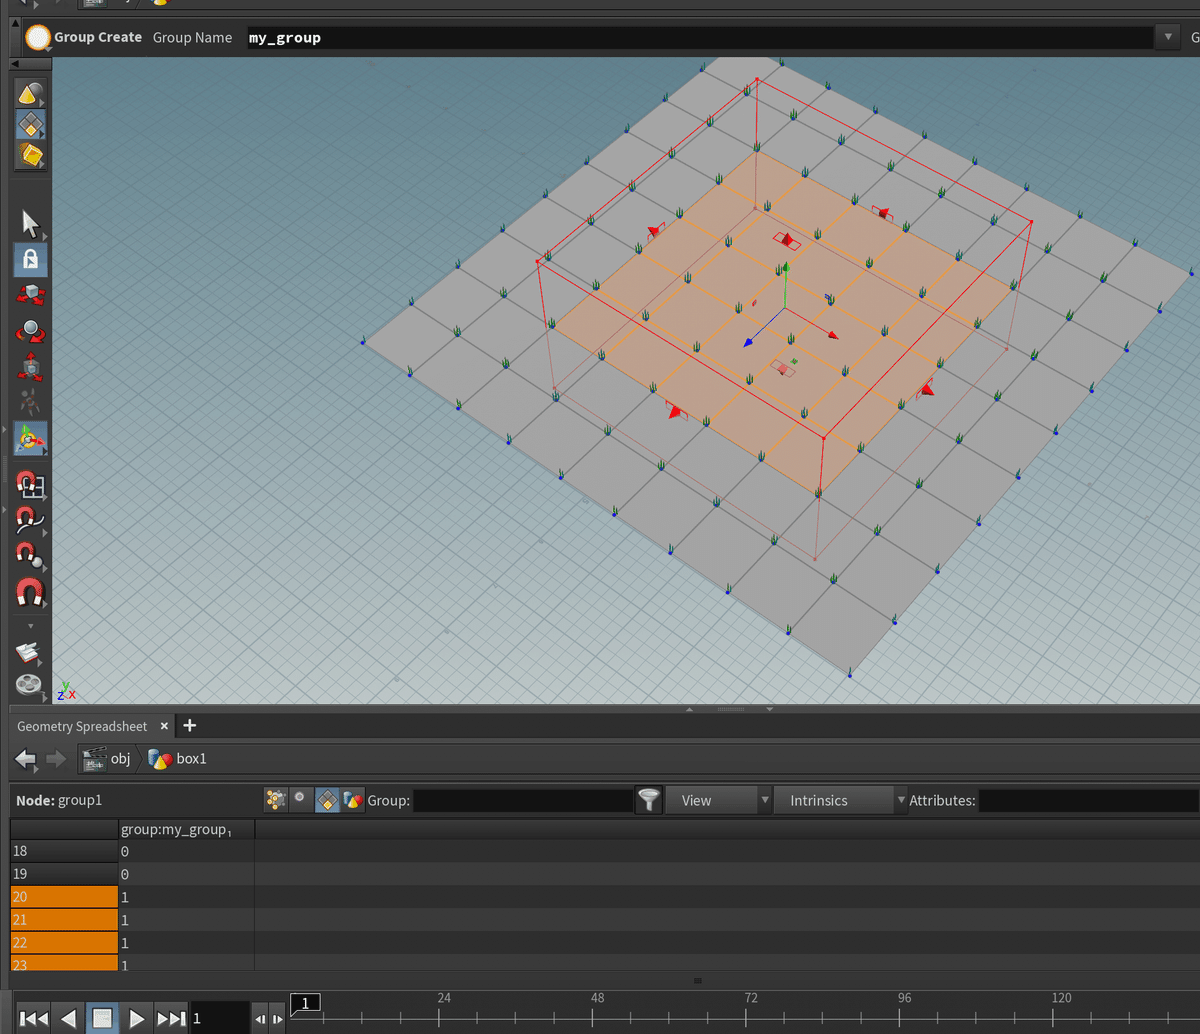
Attributeに近い感じで、group条件に入っているpointやPrimitiveは「1」入っていないところは「0」というattributeを追加しているような感じにもなる。
ex : gourp, my_group
1ってちっちゃくgeometry Spread Sheetに書いてあるのは1bitの情報だよってことを表している。
Groupが作成されていると、Groupが打ち込めるnodeのパラメーターに候補として出てくる。
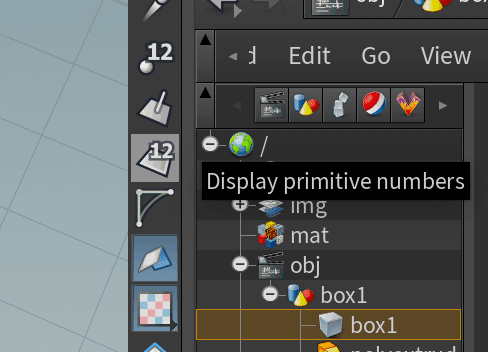
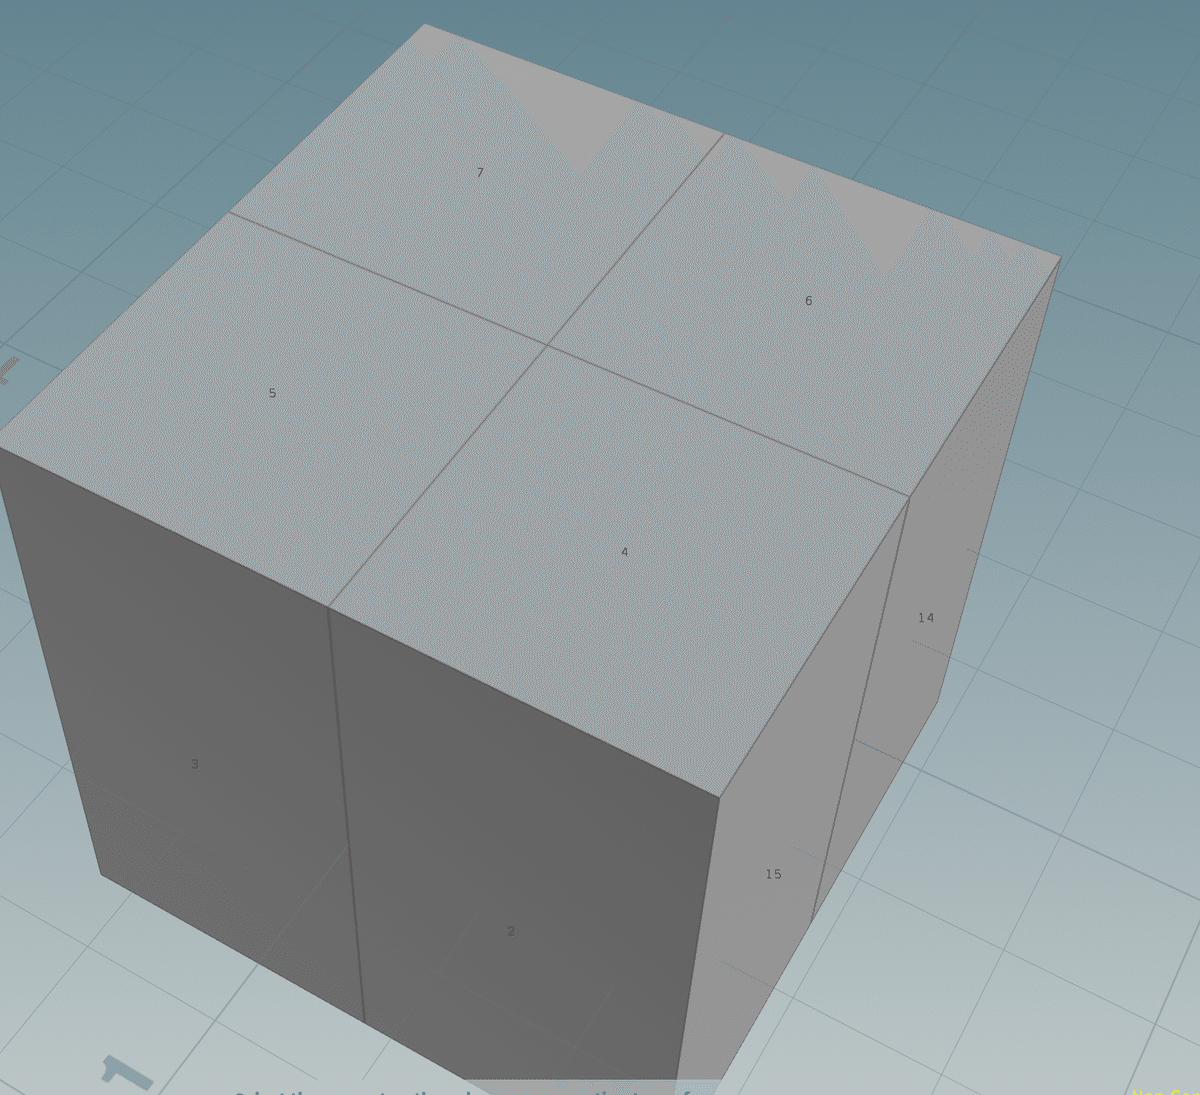
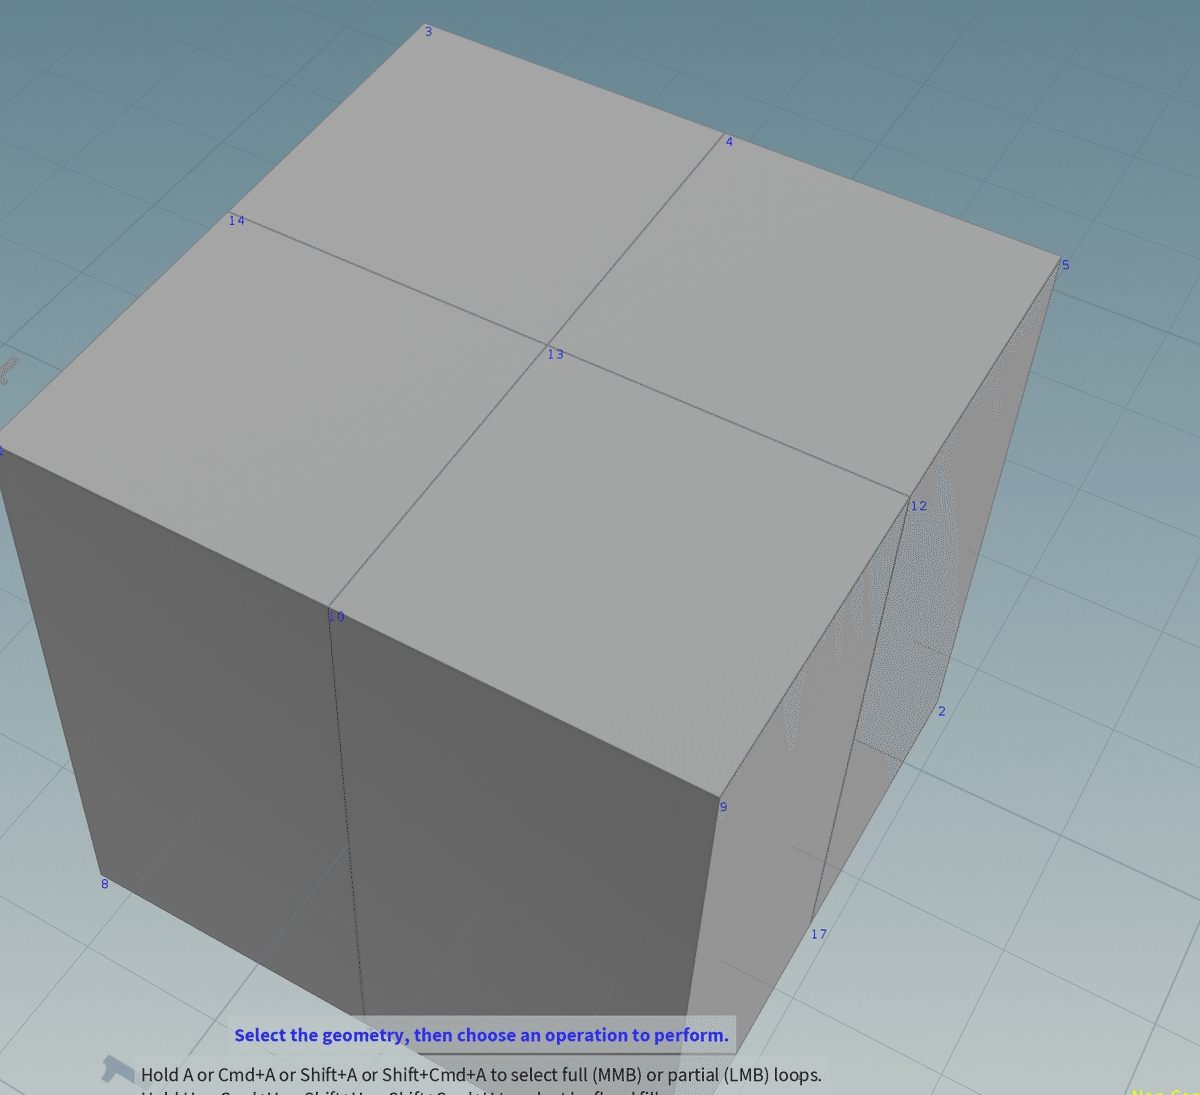
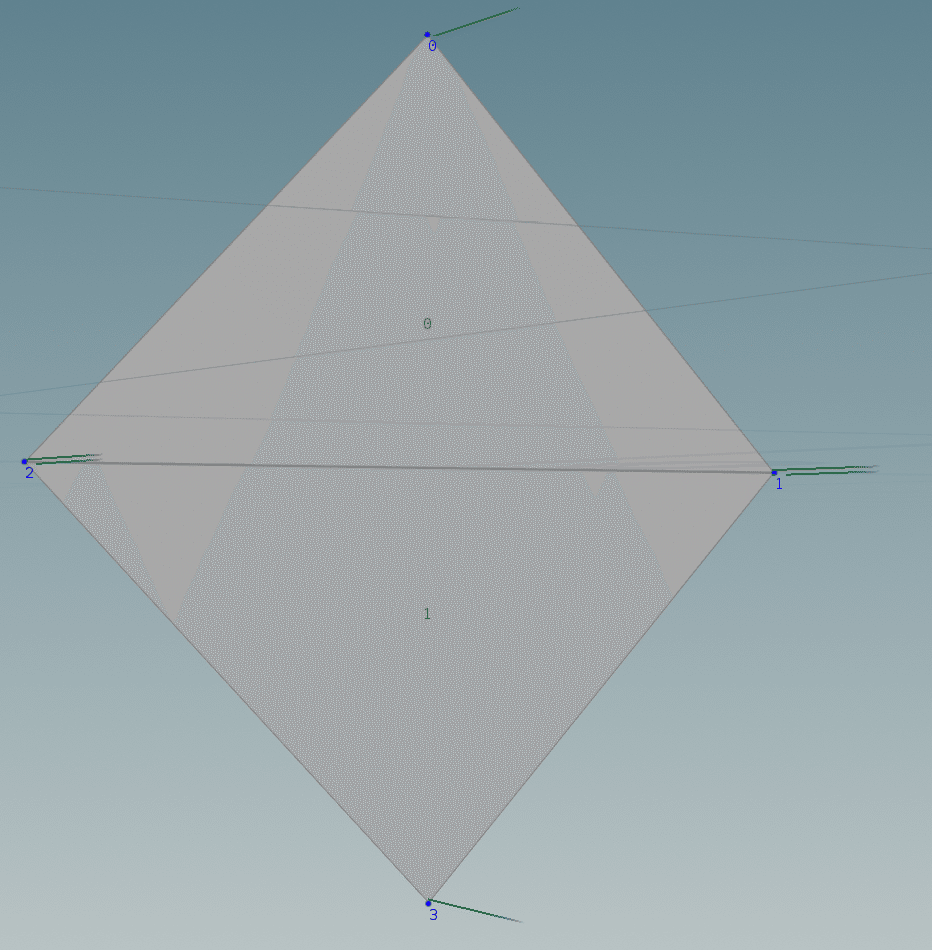
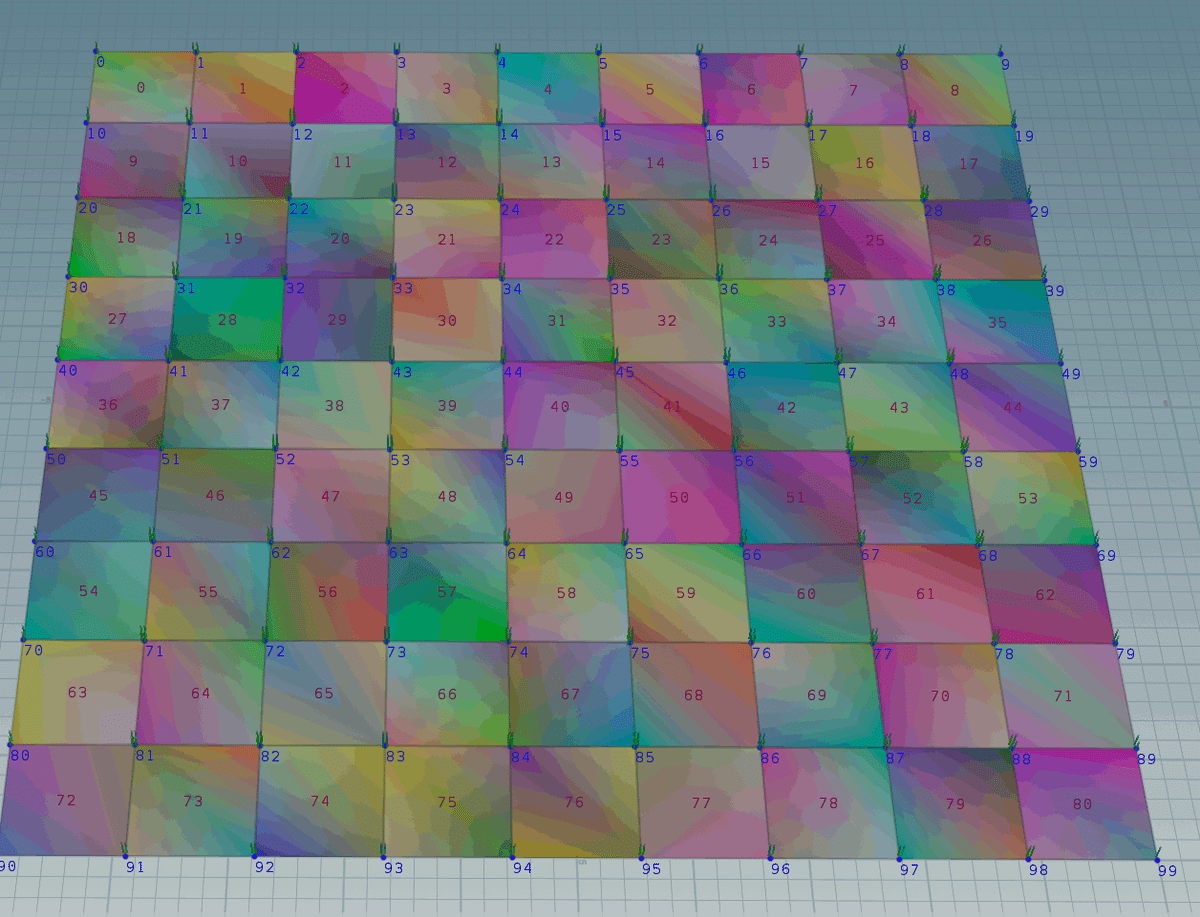
Primitive / Point Numberの確認
Scene View右側のアイコンより、PrimitiveとPoint Numberを確認することができる。
Group パターン
各SOP等で、Group(Pattern)などの名前で、効果を適用させるグループを指定できる。さらにグループでプリミティブやエッジ等々を選択する場合の指定の仕方が決まっている。正規表現的な感じで、詳細はここ。

基本的には、Primitive/Pointは半角スペースで分けて入力するとGroupに追加されていく。
4 3 5 8Primitive/Pointの範囲選択。連番で選択したい場合は、-(ハイフン)で分ける。
12-18EdgeのGroupのとき、PointNumberのpと数値とそれぞれを結ぶ-で構成される。
p10-7 p9-10-11 p13-10 p4-5 p12-13 p3-4-13-14
Edge時に-を使わずに数値のみにすると、そのPrimitive Numberに囲まれるEdgeが選択される。
4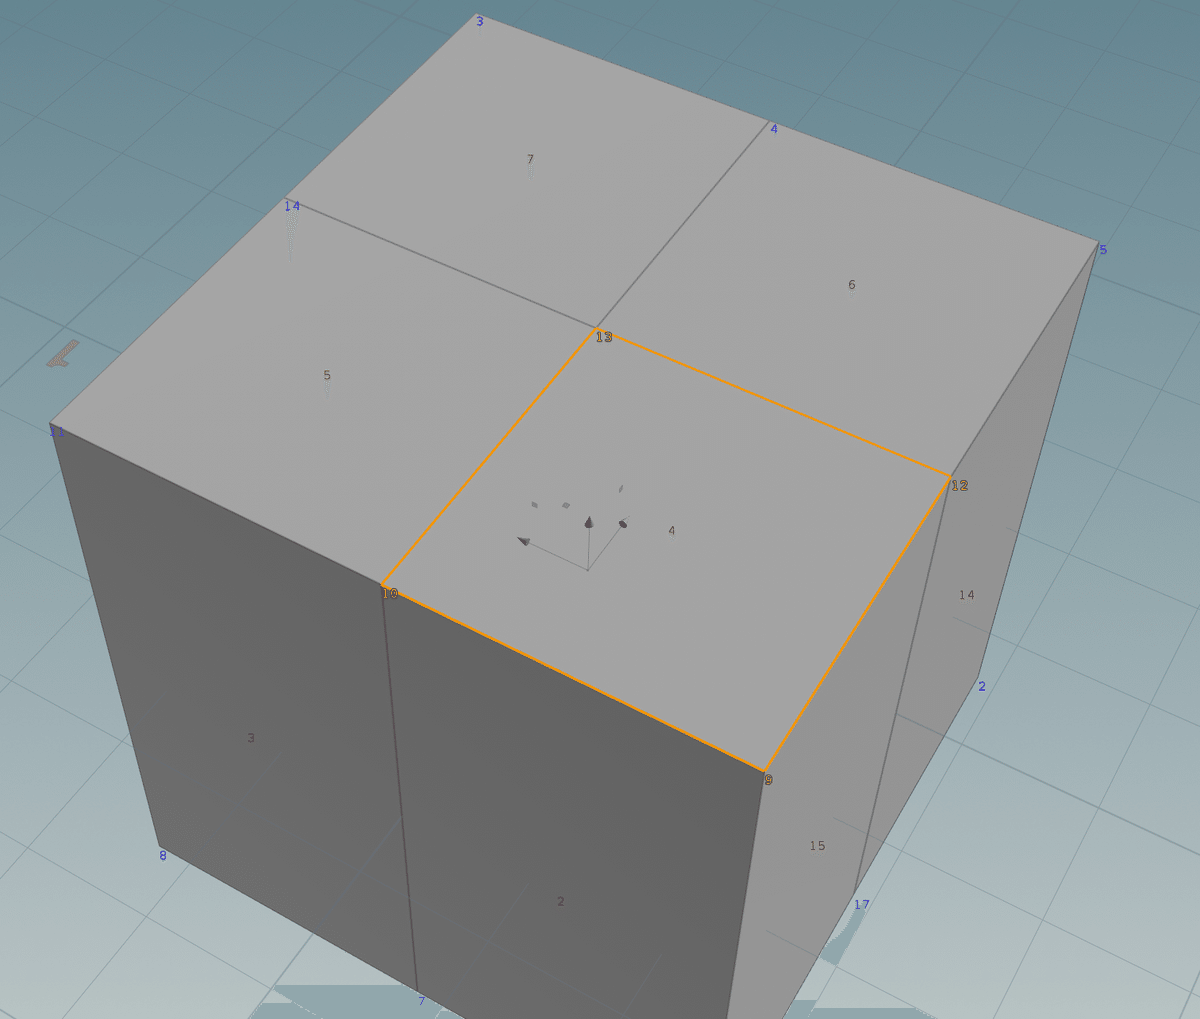
Edge時にPoint Numberで指定するとそのpoint numberに接続されているEdge全てが選択される。
p4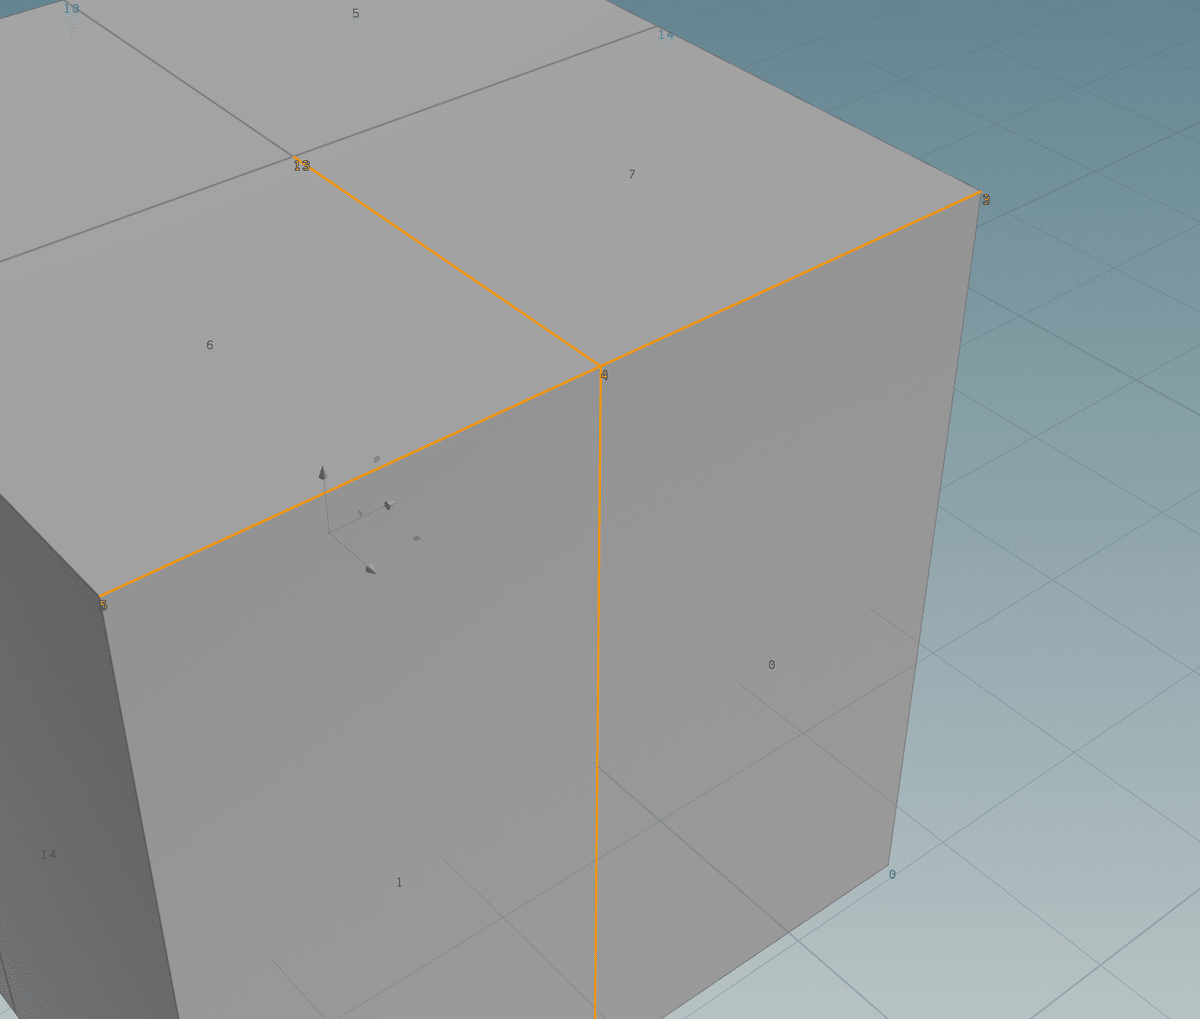
n-m:step
step毎にスキップされたコンポーネント番号nからmまで(nを含む)。例えば、1-100:2は、1から100までを1つ飛ばしすることを意味するので、1,3,5,7,9,11,13,15・・・93,95,97,99となります。
n-m:keep,step
コンポーネント番号nからmまでをステップ値stepで定義したもので、さらに、それに該当する番号から連番でkeepの分(該当番号を含めた個数)だけ番号を確保します。例えば、0-20:3,5は、0から20の数字から5ステップの0,5,10,15,20で、さらに、連番をとるので、0,1,2,5,6,7,10,11,12,15,16,17,20となります。
!pattern
パターンにマッチするもの以外のポイント/プリミティブ。例えば、!1-10は、ポイント/プリミティブ番号が1から10以外のものを意味します。
patternには、数値パターン、アトリビュートパターン、グループ名パターンを指定することができます。
^pattern
前のパターンの結果からそのパターンを引いたもの。例えば、0-100:2 ^10-20は、0から100の1つ飛ばしの番号で、10から20までの番号を除いたものです。
patternには、数値パターン、アトリビュートパターン、グループ名パターンを指定することができます。
@attributeopvalue
Attribute
GLSLをやったことがあると、なんとなくわかりやすい概念。
attribute変数的な
各Point / VertexやPrimitiveに対して情報を与えることができる。
例えば各頂点に、Color情報など。
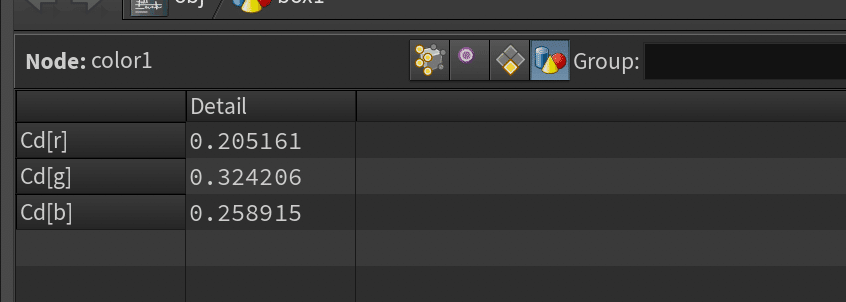
Detailはgeometry全体に対して与えるattributeのことで、
その他、Vertex , Point, Primitiveがある。
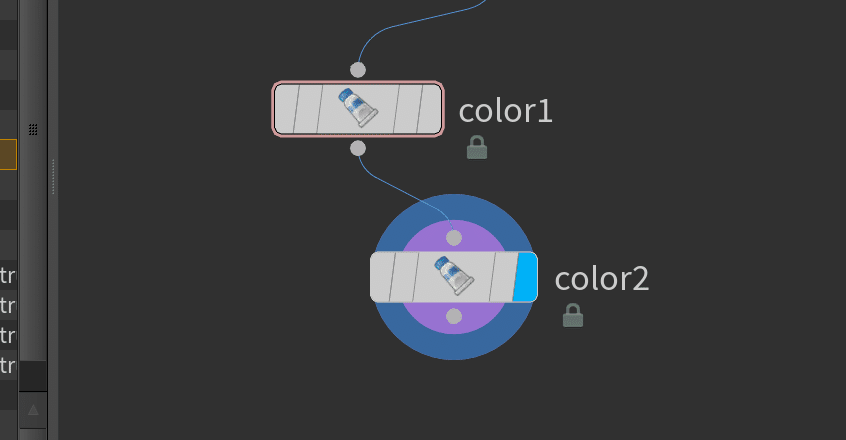
例えば、Color nodeを直列に二つつないで、一方はDetail、一方はPrimitiveにColor情報を与えるようにすると、優先されて使われる方は
(優先) Point or Vertex > Primitive > Detailとなっている
PointとVertexにおいては、後につないだ最新の方が優先される。
同じattribute名でPointやPrimitiveに情報をもたせてしまうと煩雑になって、優先とか色々考えなくてはいけなくなっちゃうので、できるだけ違うattribute名などにしておくと便利。
Attribute create nodeとかで新規でattributeを作ることができる。
Attributeの使い方
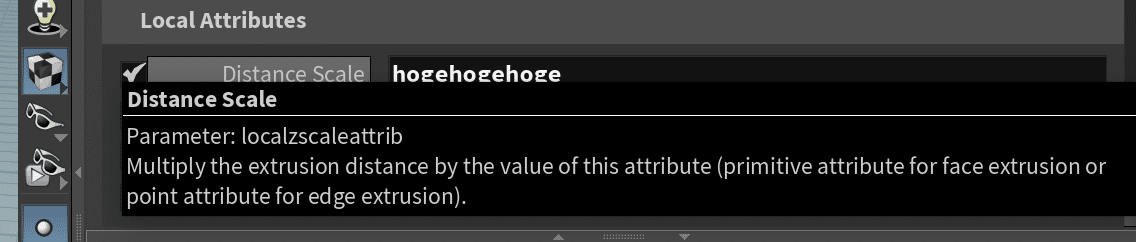
attributeを与えたら、各ノードなどでLocal Controlなどの名前で書くparameterをattributeの値で変化させることができて、自由にどのattributeを使いたいかもしていできる。

このときparameter上でmouse hoverしておくと、その使い方の説明がでてくるので、
たとえば、polyExtrude nodeのDistance Scaleは元のdistance scaleの値とのMultiplyにすると書いてあるので、1とかにしておかないと0ではいくらAttributeの数値を動かしても動かないので注意。
SOP(Geometry) node
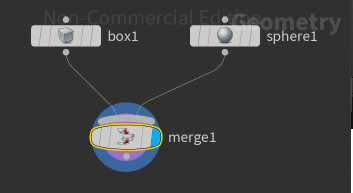
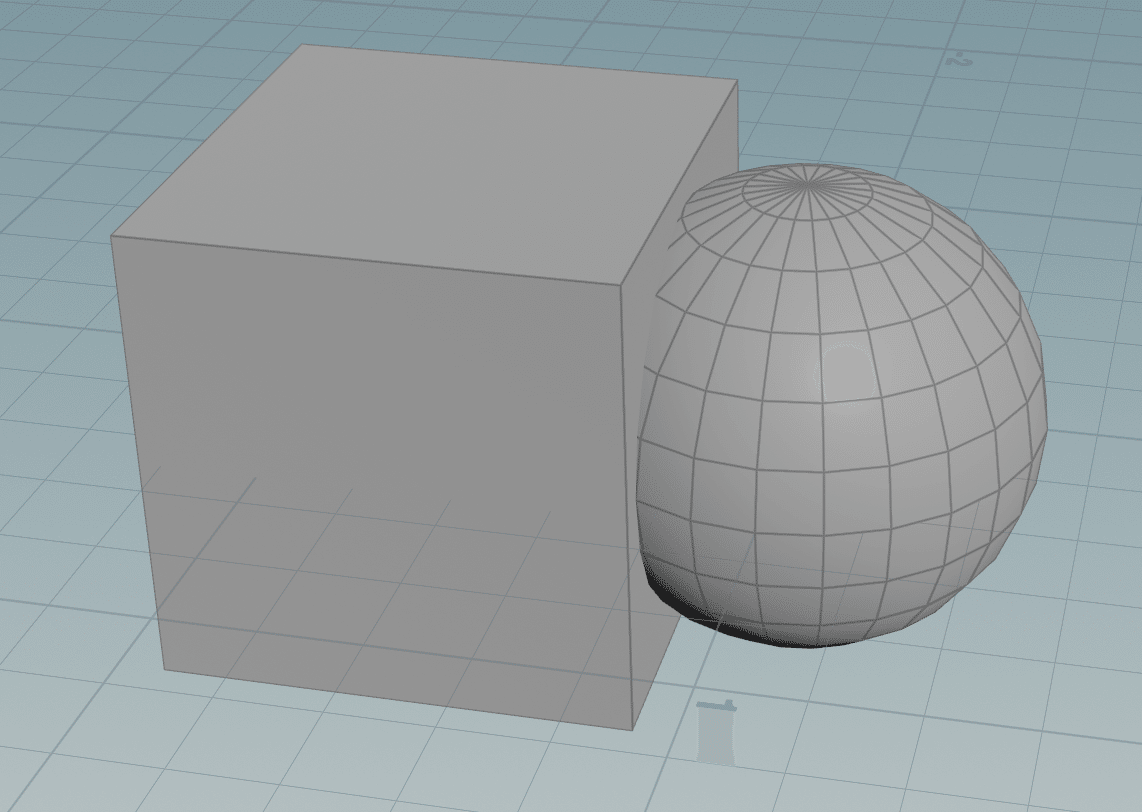
Merge
二つのオブジェクトを合成することができる。
ただこのとき、二つのオブジェクトはくっついて一つのオブジェクトになっているわけではなく、個別に存在する。
Transform
想像する感じのシンプルなTransform node
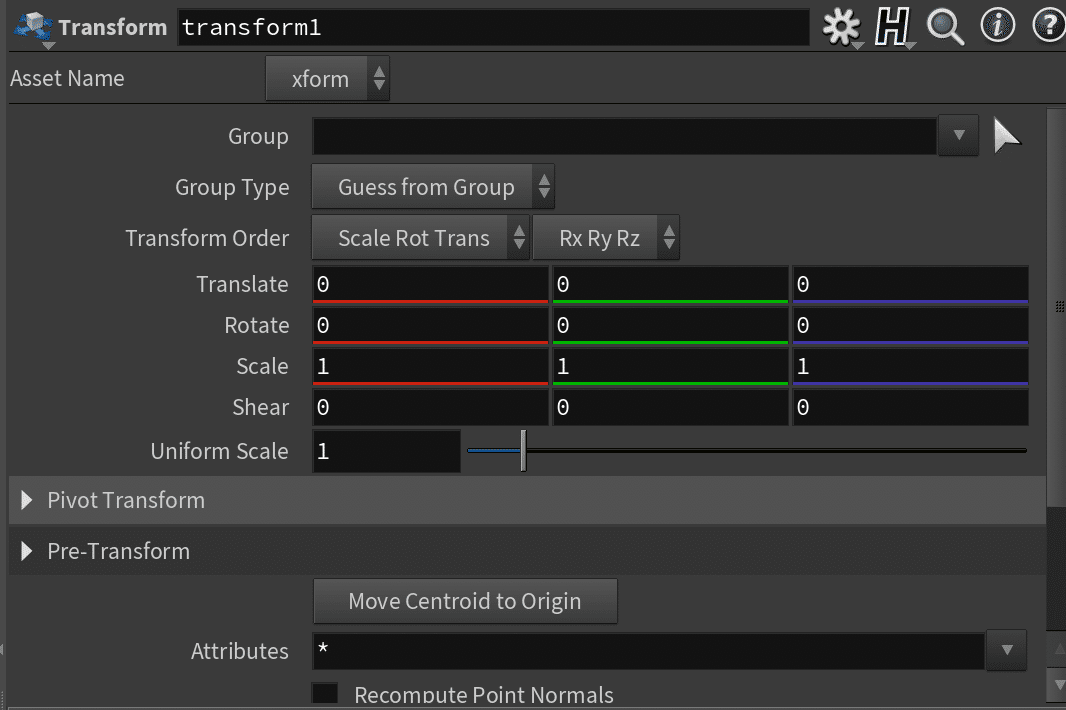
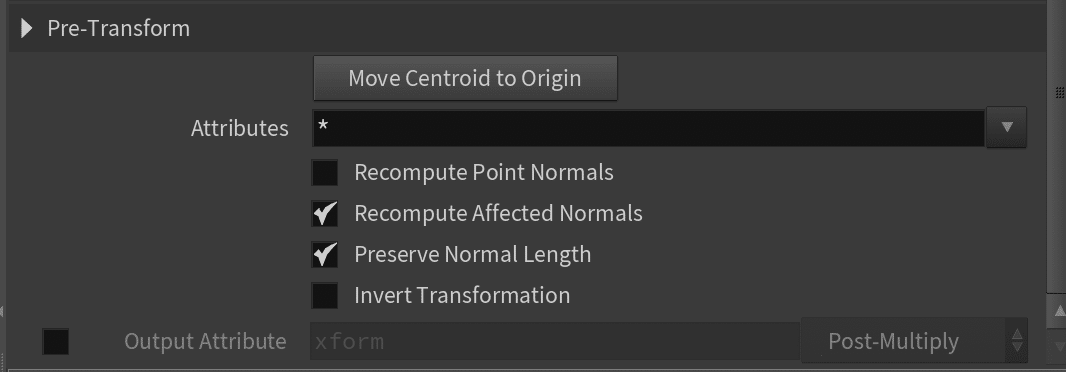
Pre-Transformの項目に
Point Normalの再計算などがある。
Add
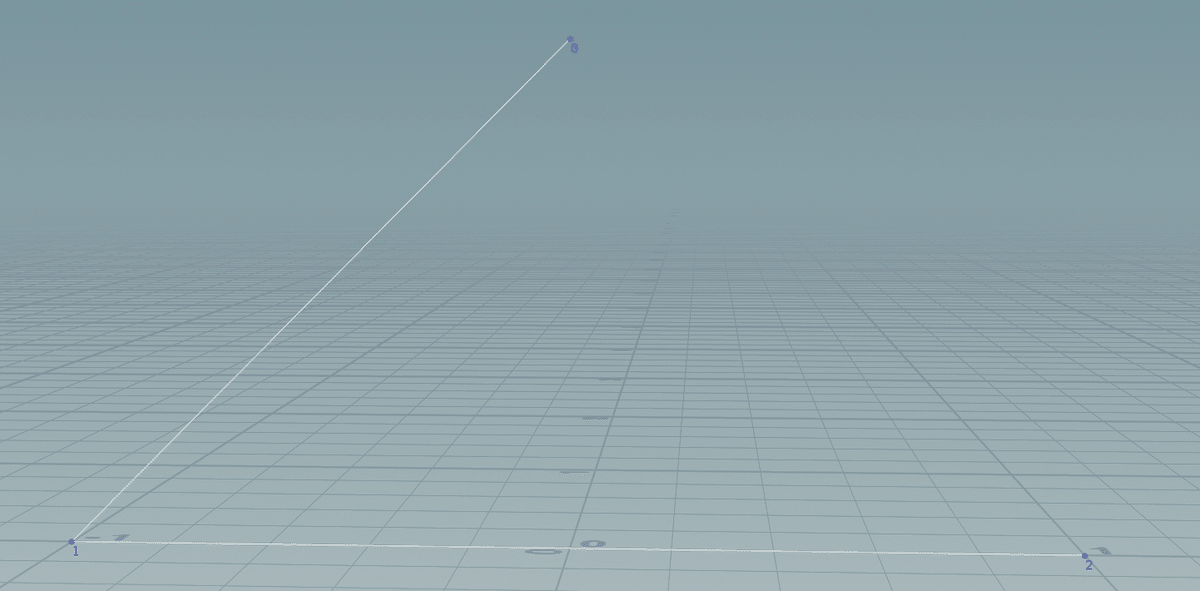
pointの単位でgeometreyを追加することができる。
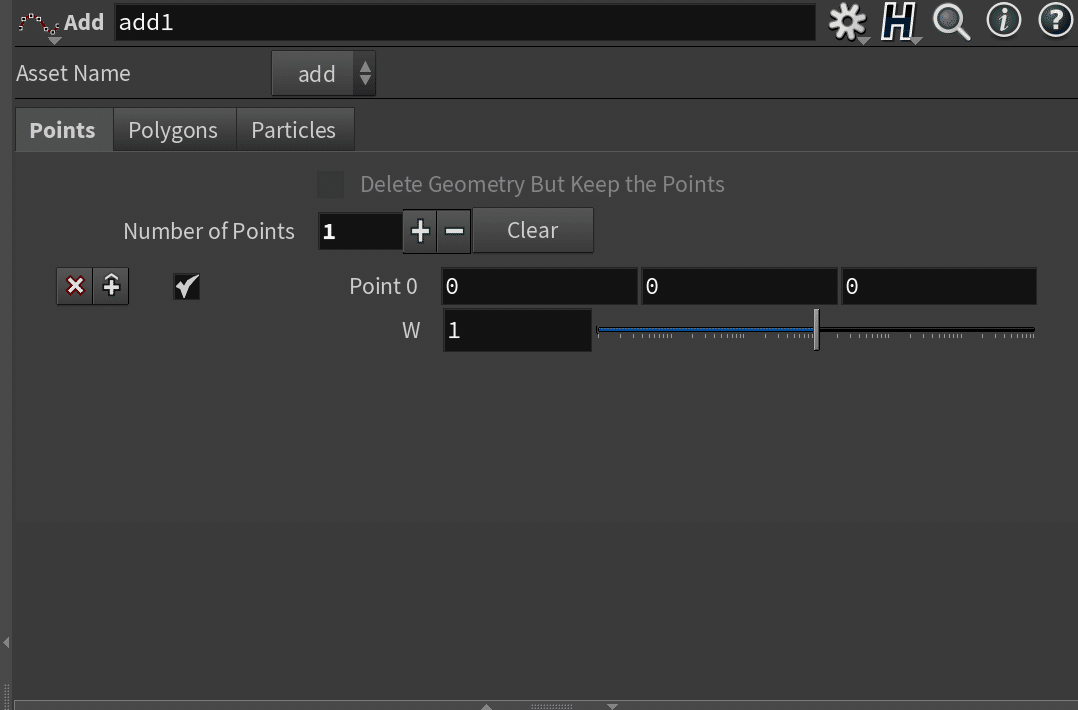
pointを複数追加したときに、Polygonsのタブで
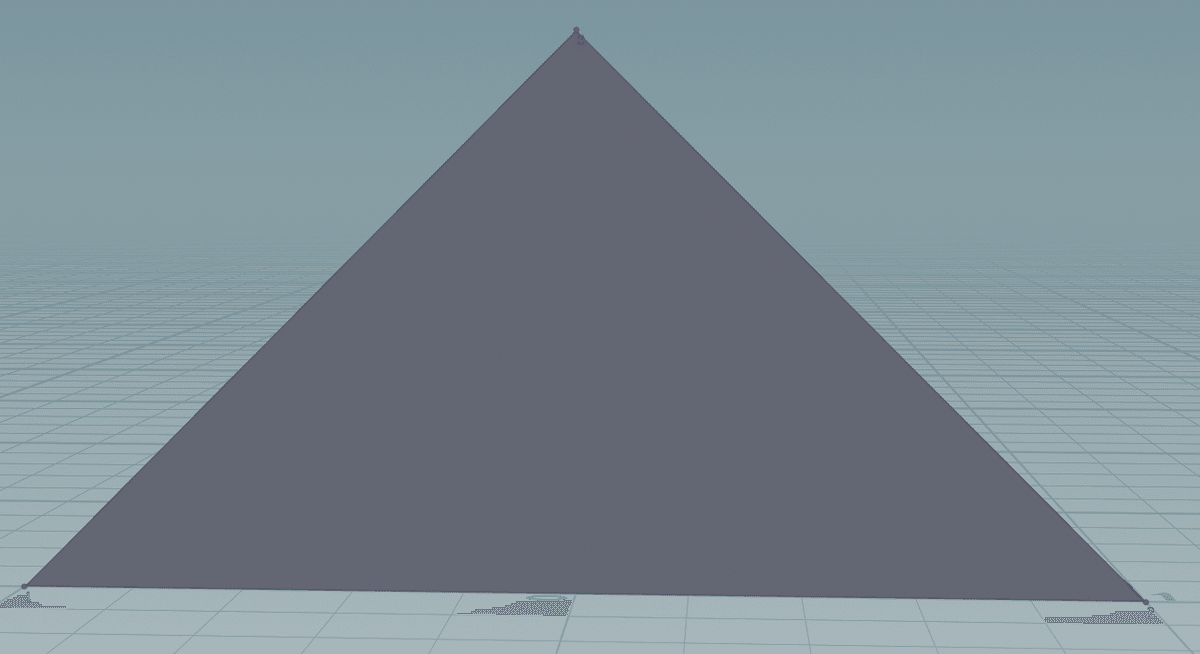
By Patternであれば、point番号を打ってあげることでそれらをpolygonとしてあげることができる。
Closedにチェックを入れれば閉じたポリゴンになる。

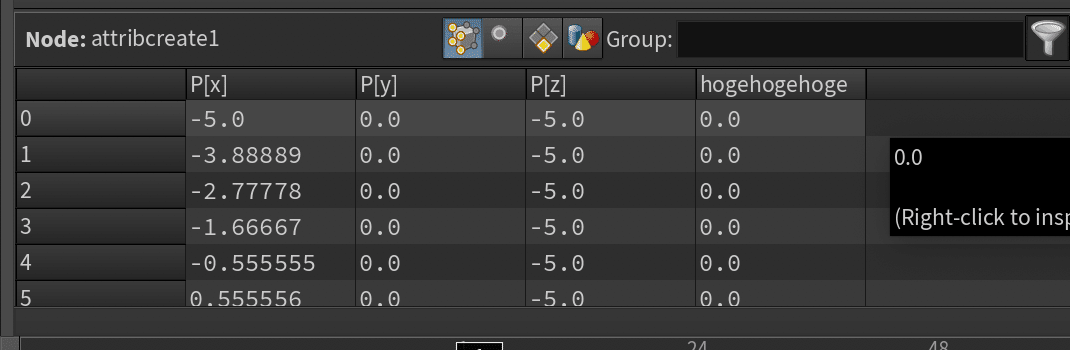
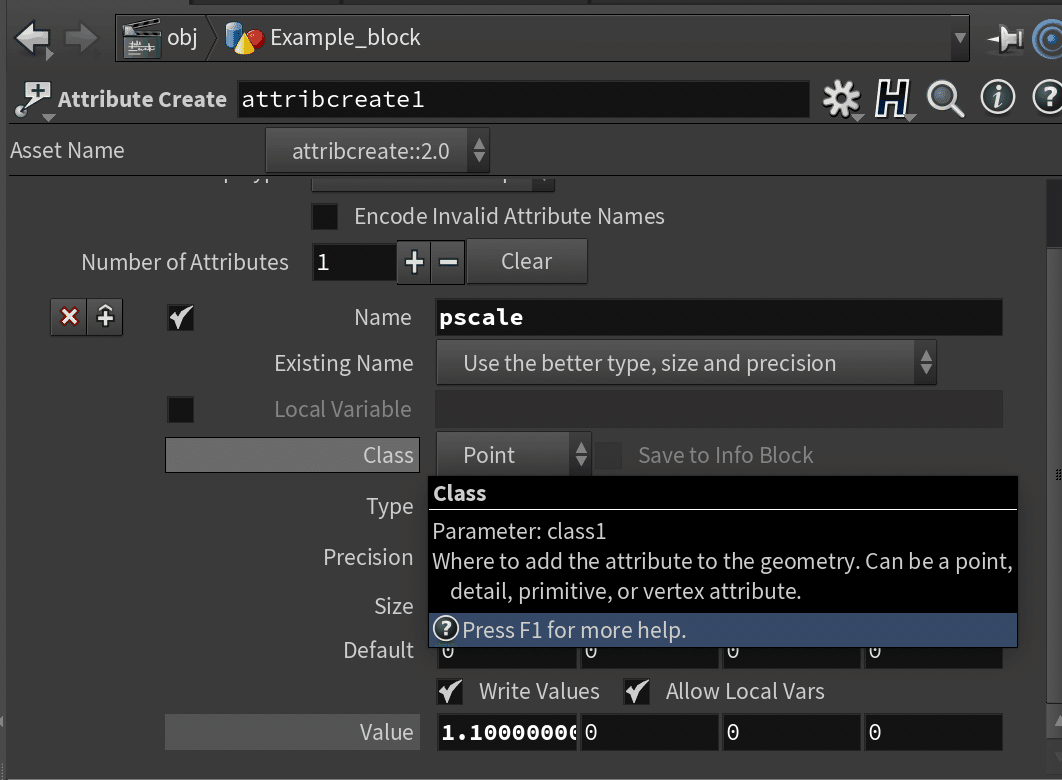
Attribute create
新規でオリジナルのattributeを追加することができる。
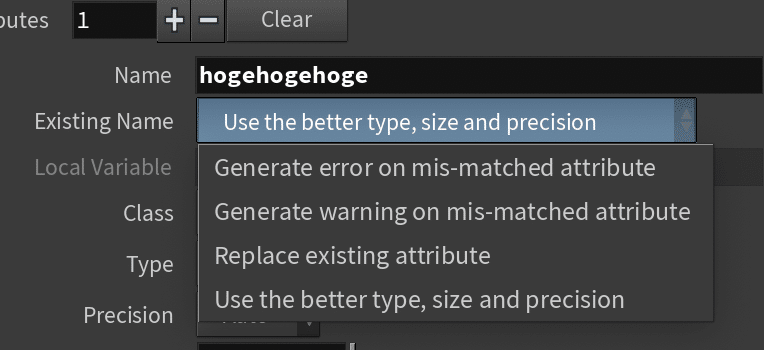
Nameでattribute名
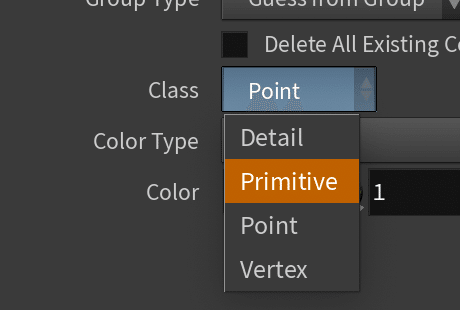
ClassでDetail / Primitive / Point / Vertexのどれに追加するかを選べる。
typeでどういう変数を扱うかを選べる。Float / Vector / Intager / String / Float Array….etc
Precisionで何bitの精度なのか選べる。auto / 8 / 16/32/64 bit
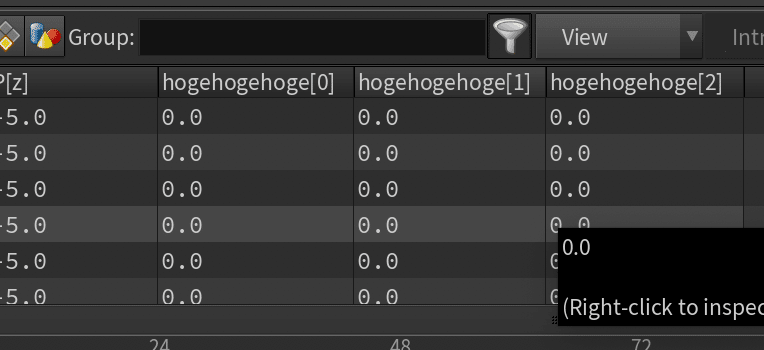
Size : Point座標とかColorRGBみたいな配列のように増やせる
Default : デフォルト値の設定
Write Valuesをonにすると、valuesが使えるようになって、その値で書き換えることができる。

Allow Local Vars
Turning this off will disable local variables in the Write Values field. This can provide some minor performance improvement when working with very small geometry.
Existing Nameは、もし同じ名前のAttributeが、既にあった場合の処理を変えれる。
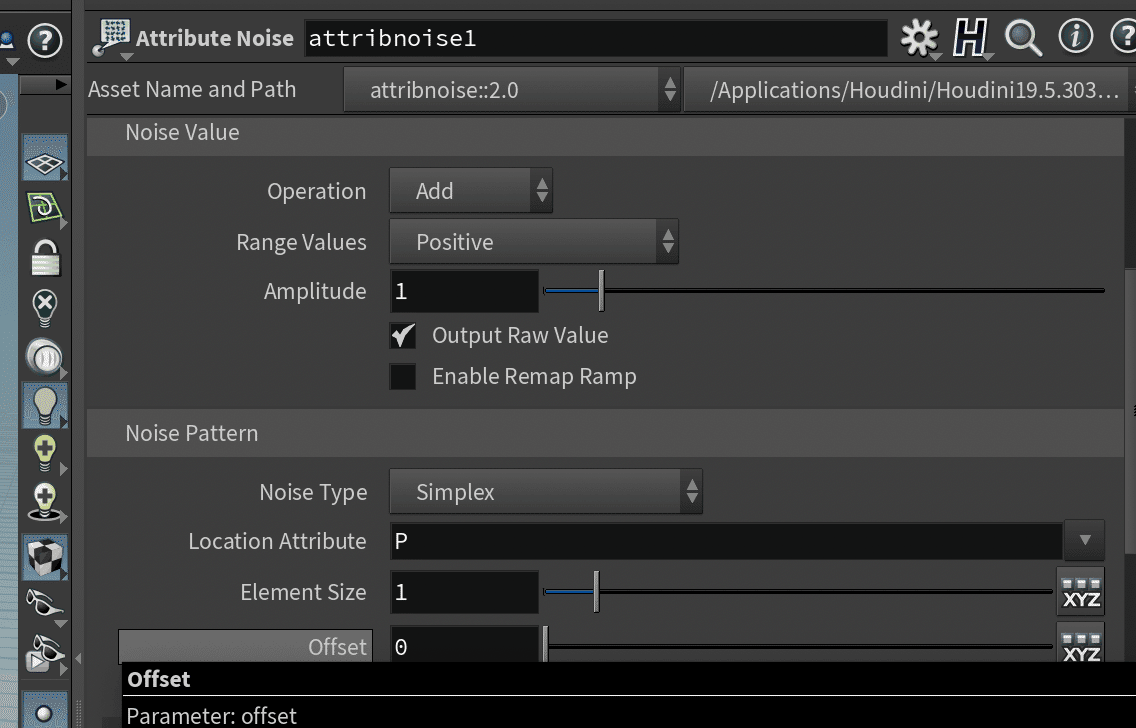
Attribute Noise
attributeの数値にnoiseを加えることができる。
Attribute Namesとclassを任意のものに指定して、
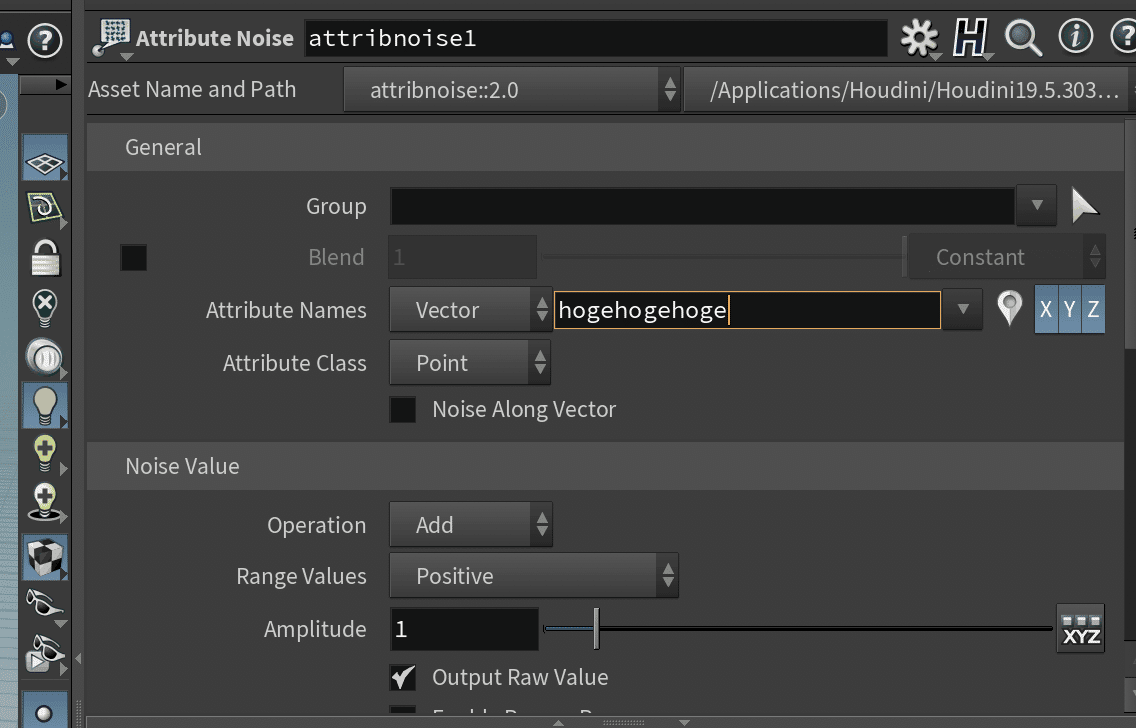
noise ValueとNoise patternを
Attribute Randomize
Attribute Noise的な感じで指定したattributeに対して、randomな数値を与える。
Global Scaleで全体の数値をコントロールできる。
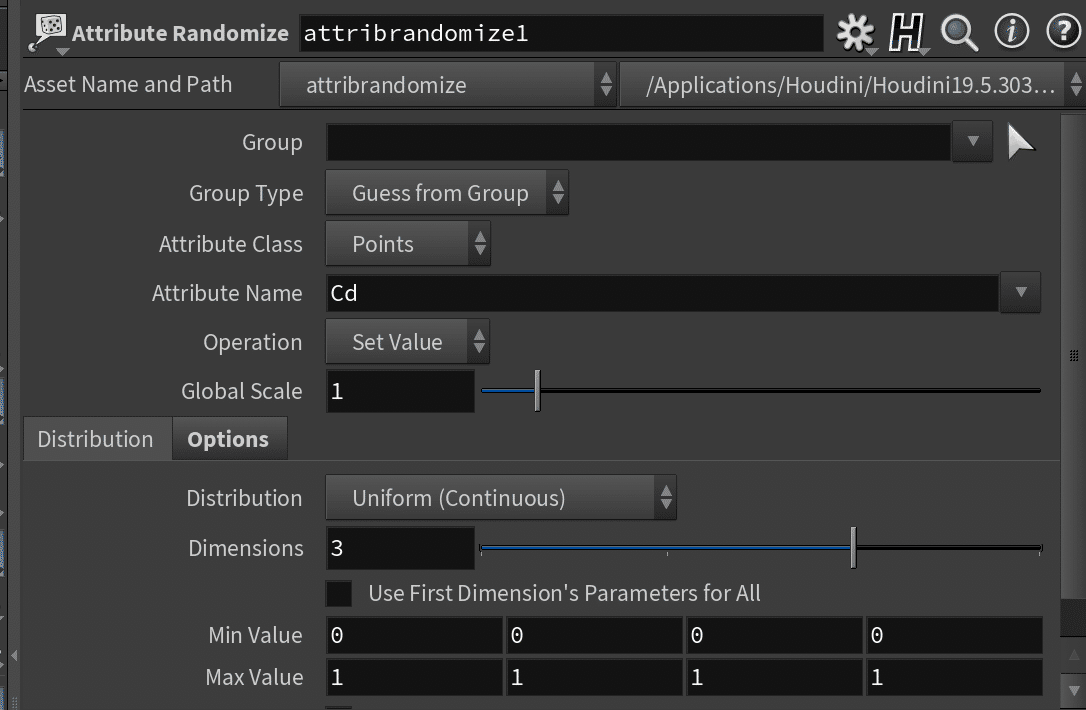
Operationで Set Valueならその値のattributeを上書きして、
Add Value / Minimum / Maximum / Multiplyを選べる。

Min Value / Max Valueで上限下限が決めれる。

Distributionの中を変更すると、与える数値の与え方を変えることができる。
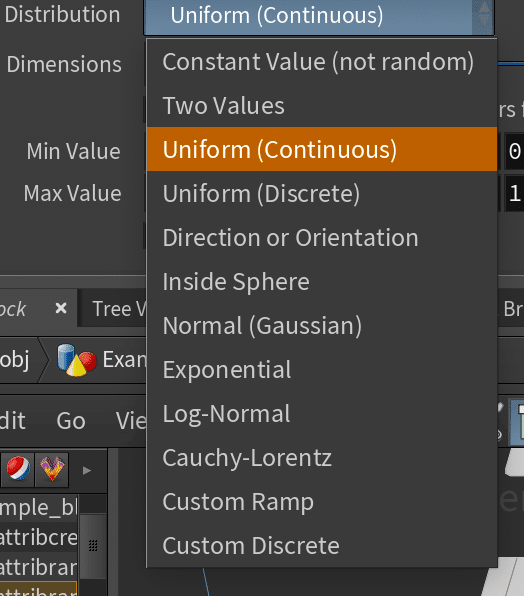
Direction or Orientationにすると、
角度を扱いたいときに便利なような数値設定になっている。
Dimentionsを4とかにすれば、クウォータニオンを設定したいときなどに便利。

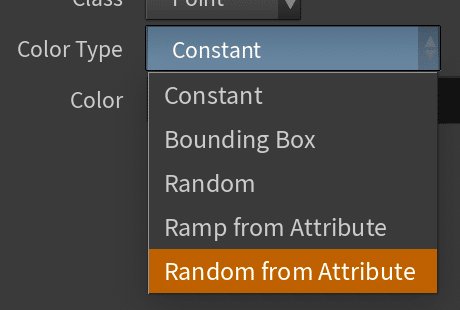
Color
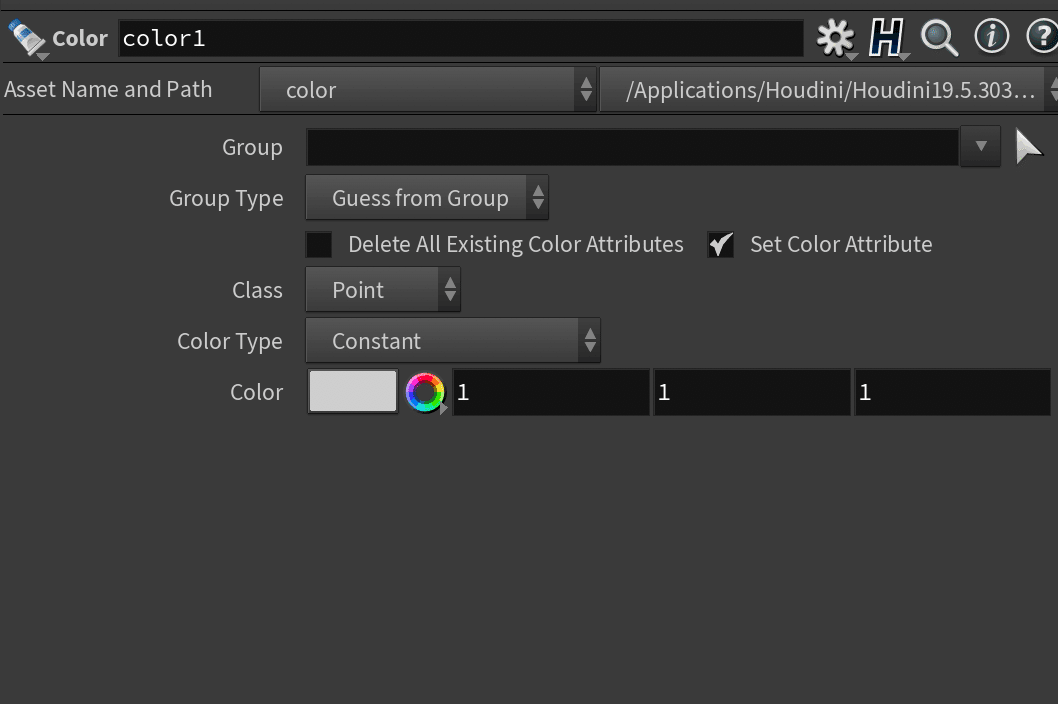
ColorのAttributeを追加することができる。
ClassでPointやVertex / PrimitiveなどどれにColorのAttirbuteを追加するかを選べる。
Detailを選ぶと、このGeometry全体に対してのColor情報を与えれる。
Delete All Exsiting Color Attributesですでに存在していたColorのAttributeを一度消される。
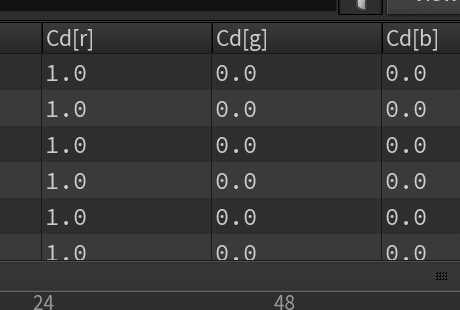
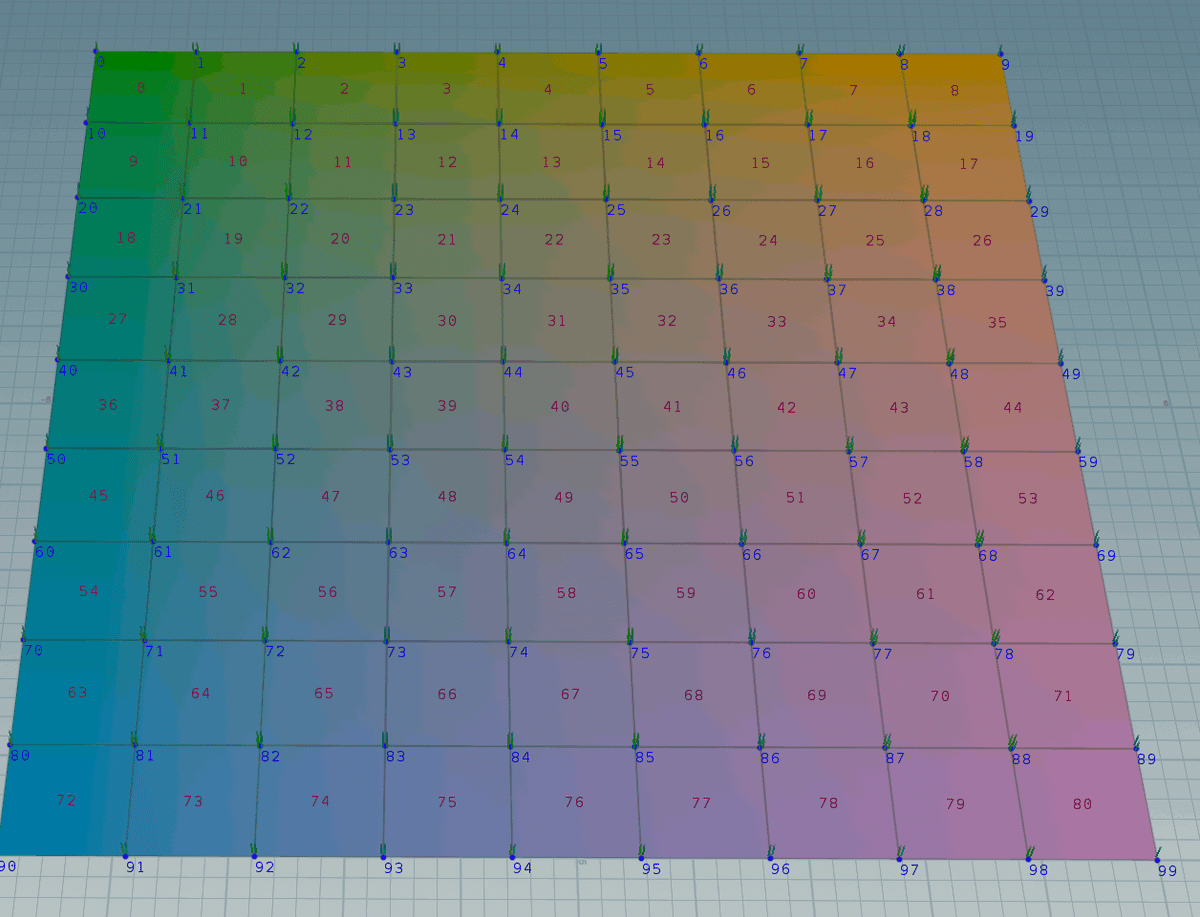
Color TypeをConstantだと一定の同じ色
Bounding BoxはGLSLでUV出す感じみたいな感じで、x軸がR
Y軸がBに対応していて、Gは固定で0.5
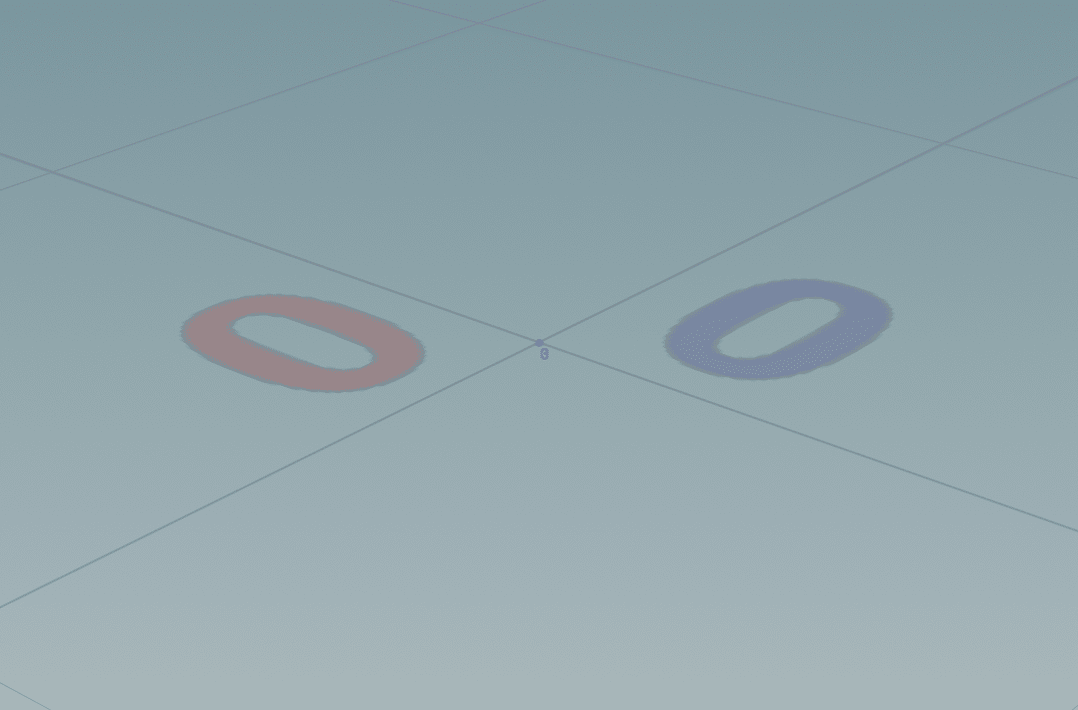
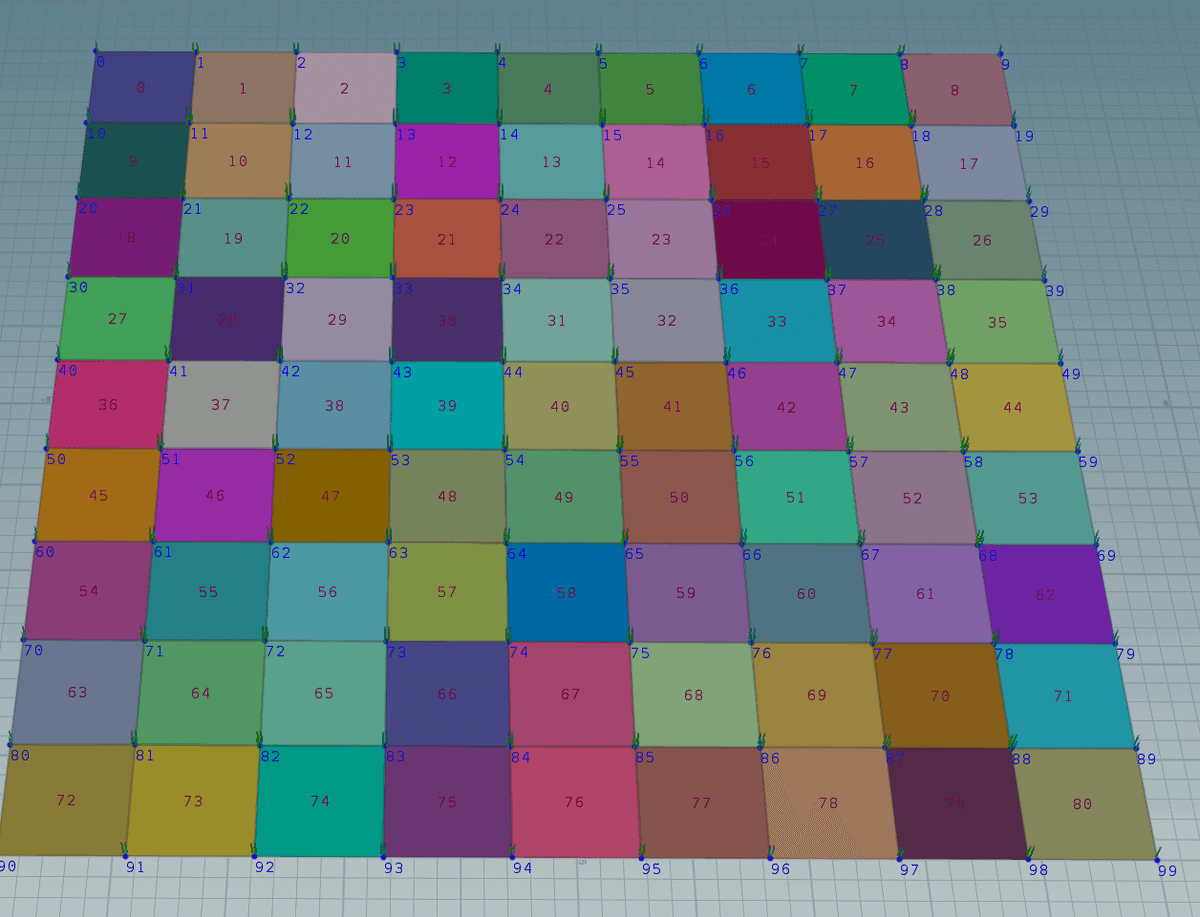
Random
Ramp from Attribute
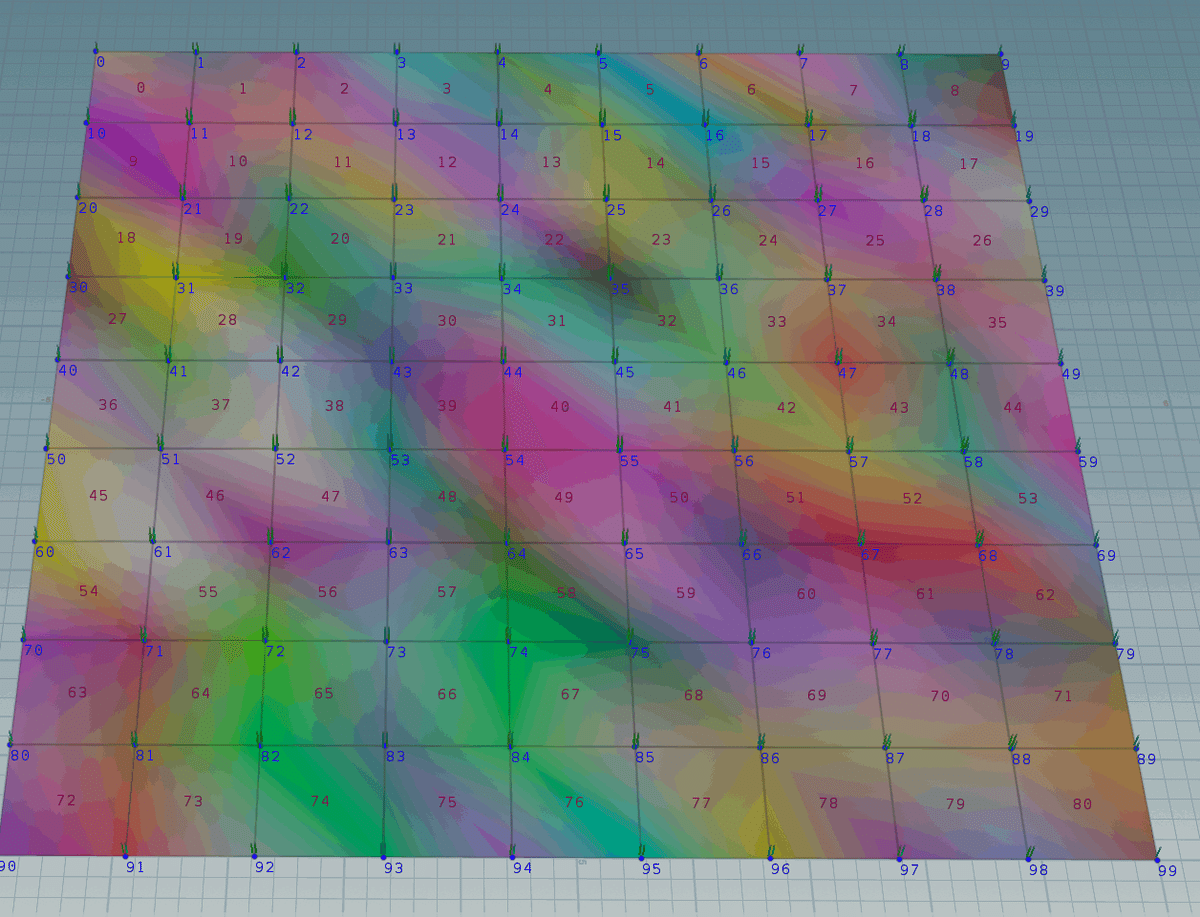
Random from Attirubte
Randomよりnoise感に見えるが、それは多分描画がpointとpointの間をマップしているだけで、値的にはpointのcolorの値はrandomな数値になっている。(Primitiveだとわかりやすい。)
※note側の問題で、画像のバンディングが起きているかもしれない。
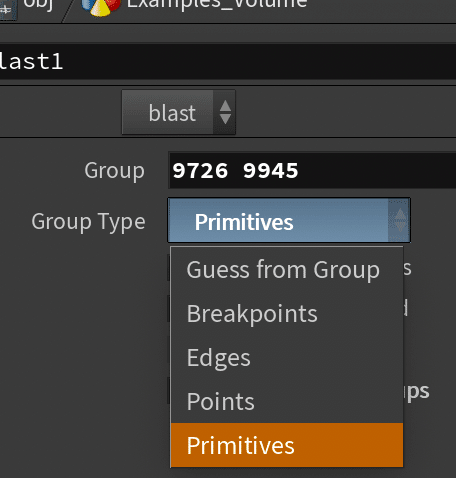
Group
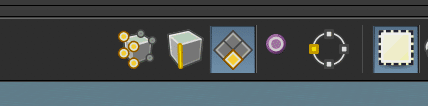
面やポイントなどを選択した状態でtab > Group nodeを選択するとGroupが取り込まれた状態で生成することができる。
グループノードは上部のシェルフからModel > Groupからも生成することができる。

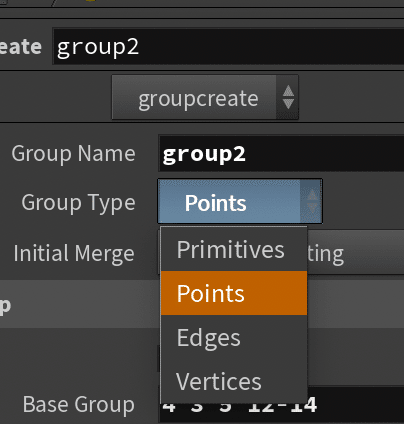
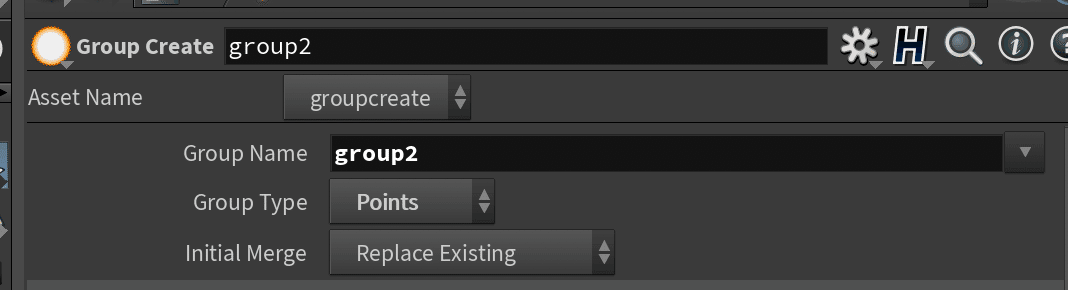
Group TypeでPrimitivesやPointsなど何をグループにしたいかを選べる。
initial Merge :
Replace Existing
新規作成グループが既存グループを置き換えます。
Union With Existing
新規作成グループと既存グループを結合した内容をグループ化します。
Intersect With Existing
新規作成グループと既存グループの共通内容をグループ化します。
Subtract From Existing
既存グループから新規作成グループを引いた内容をグループ化します。
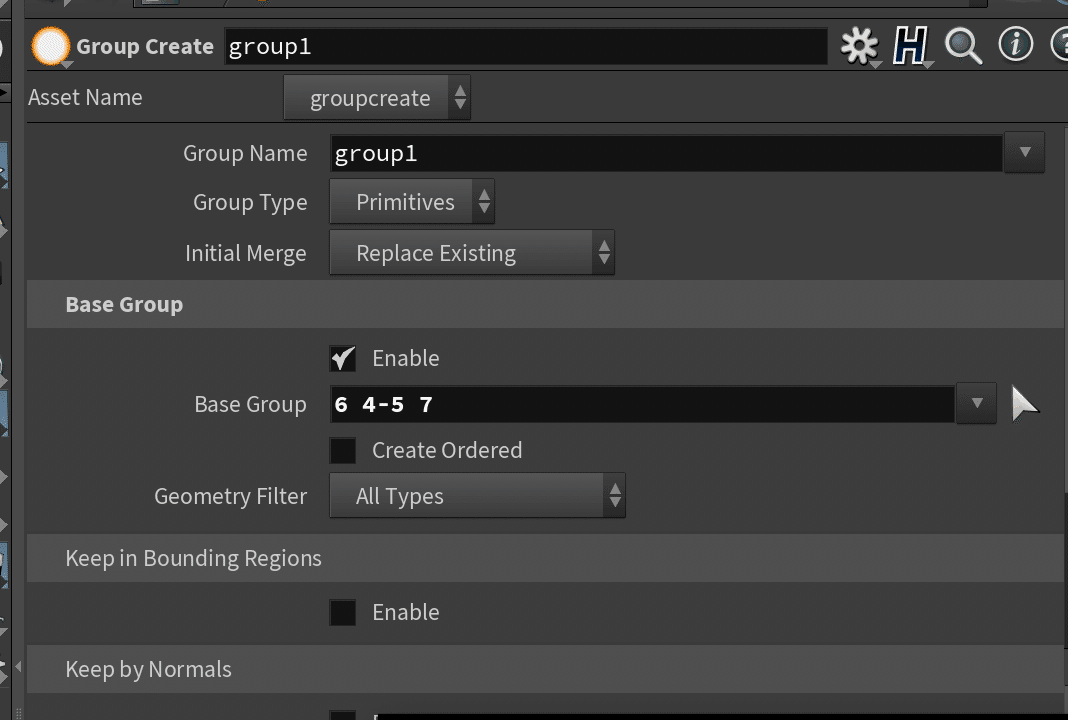
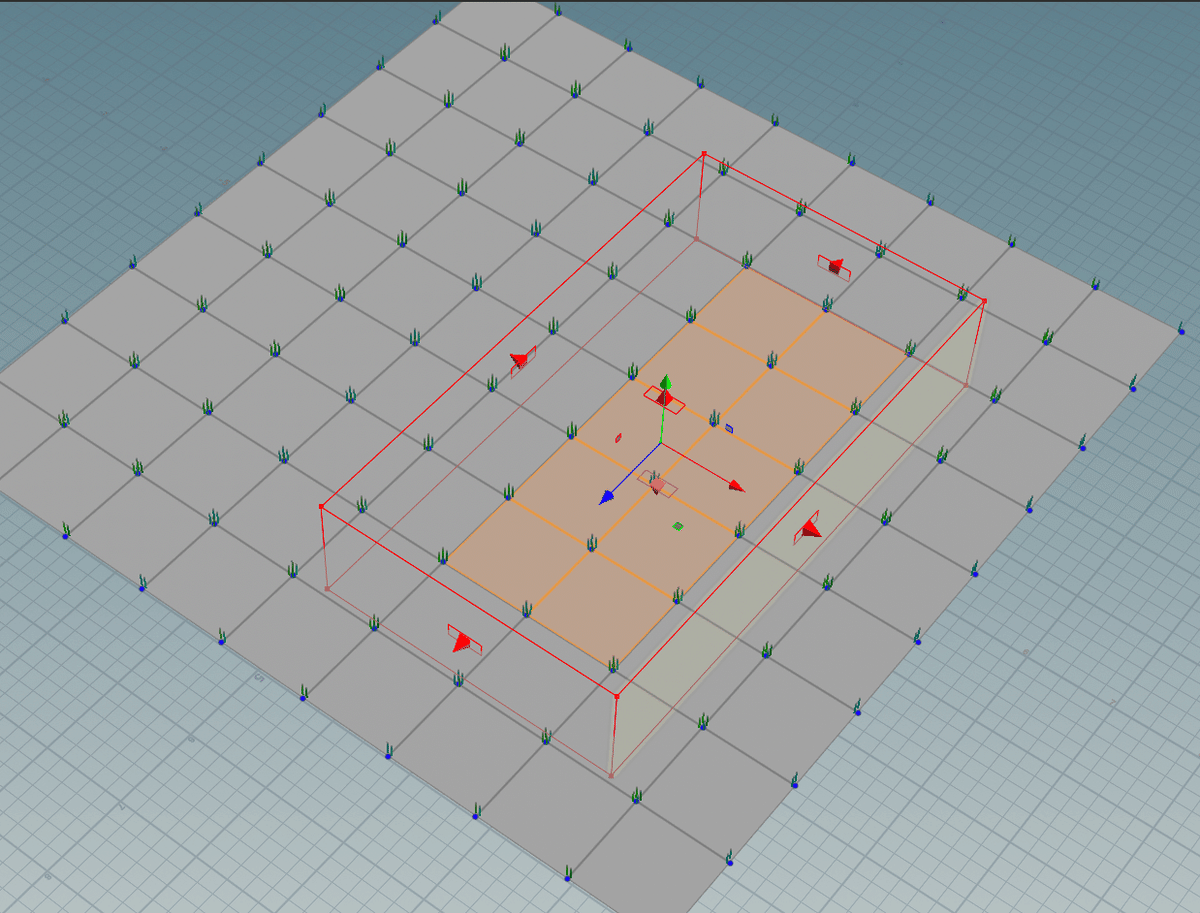
Keep in Bounding Regionsは
バウンディングボックスを指定してその中のPrimitive…etcをgroupにすることができる。
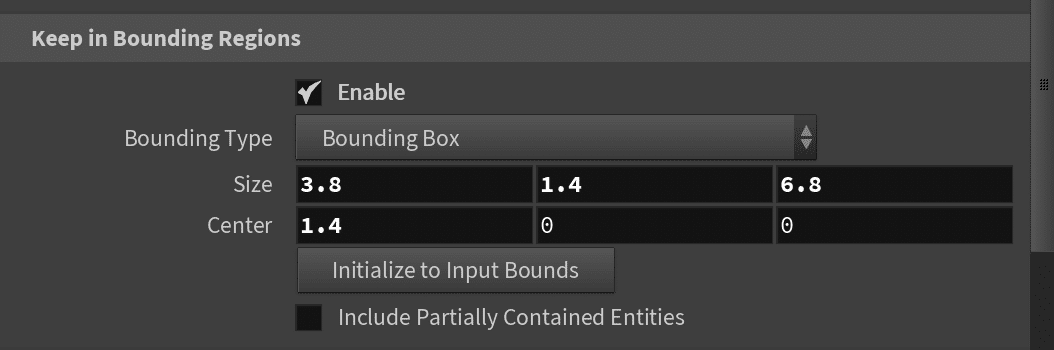
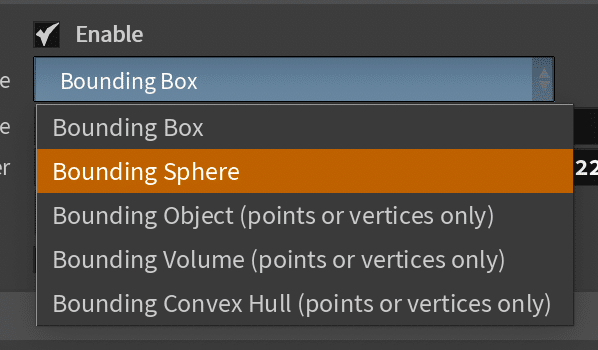
Bounding Typeで、エリアをBox/Sphere/Objectなどでしていできる。
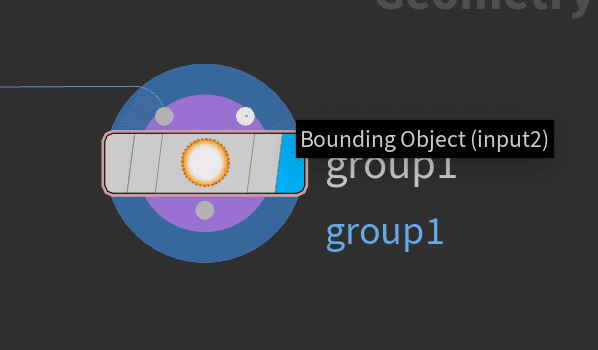
Bouding Objectとかにすると、input2にBouding Objectとなるpointsやverticesに指定する
ショートカット的なGroupの再選択の方法
案外知らない人が多いのでGroupSOPでの再選択の仕方を書いときます。 #Houdini pic.twitter.com/GBnbfqGbRy
— UnlimitedEffectWorks (@ijiVFX) March 25, 2023
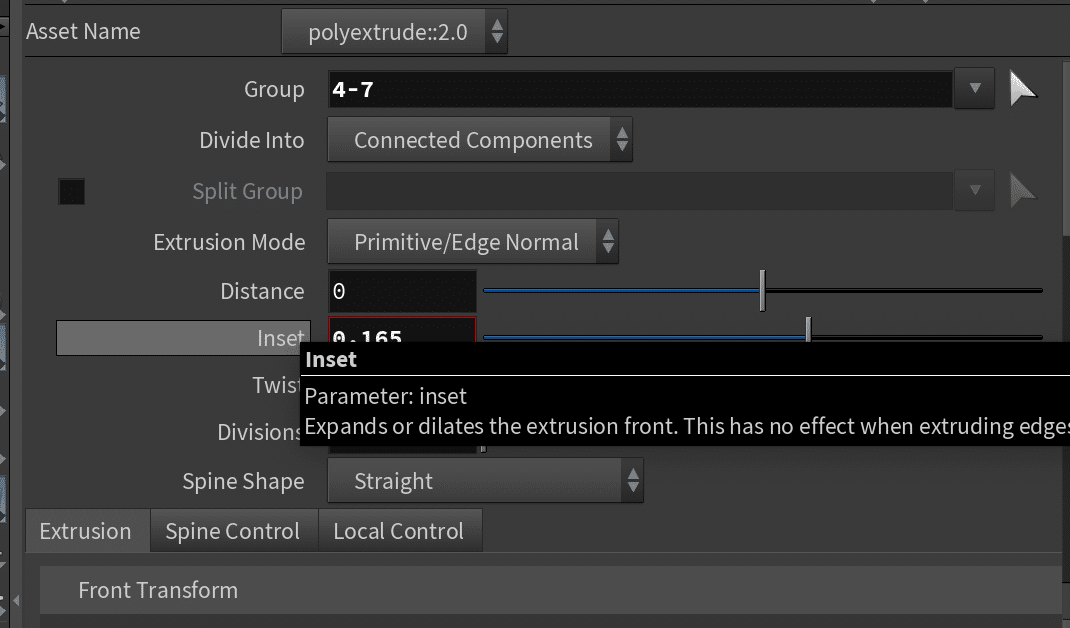
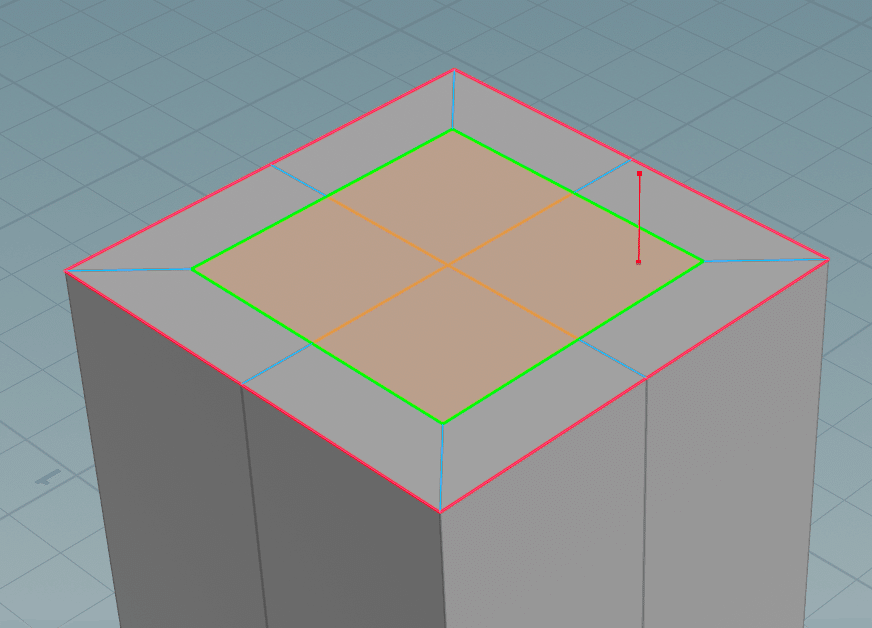
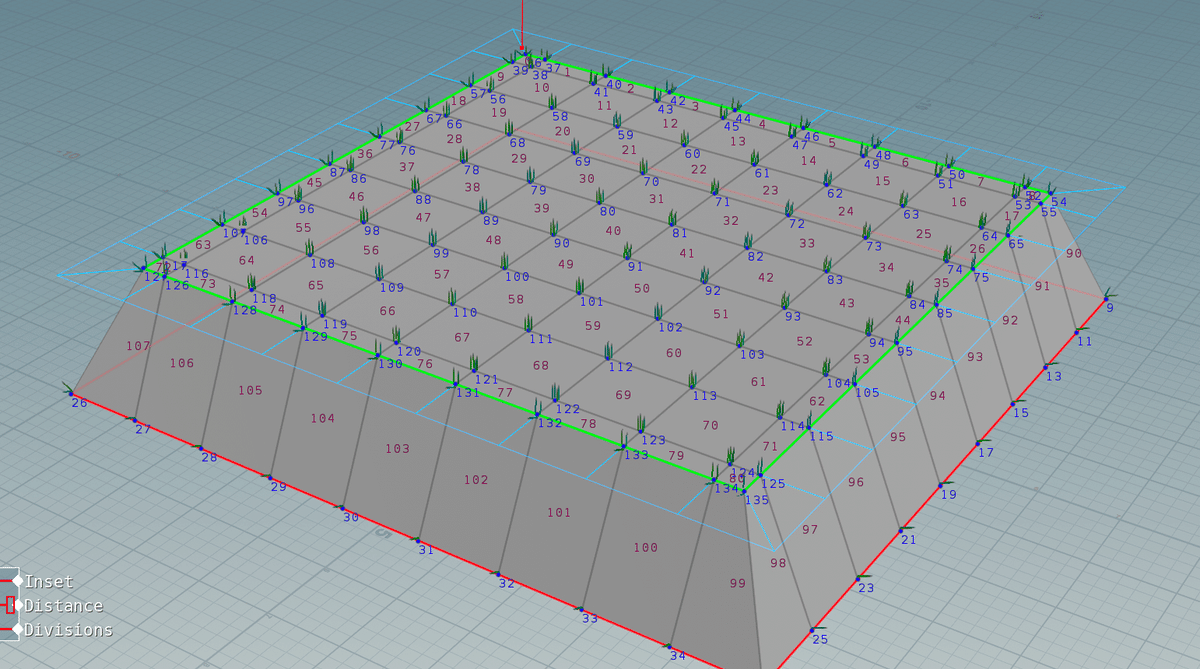
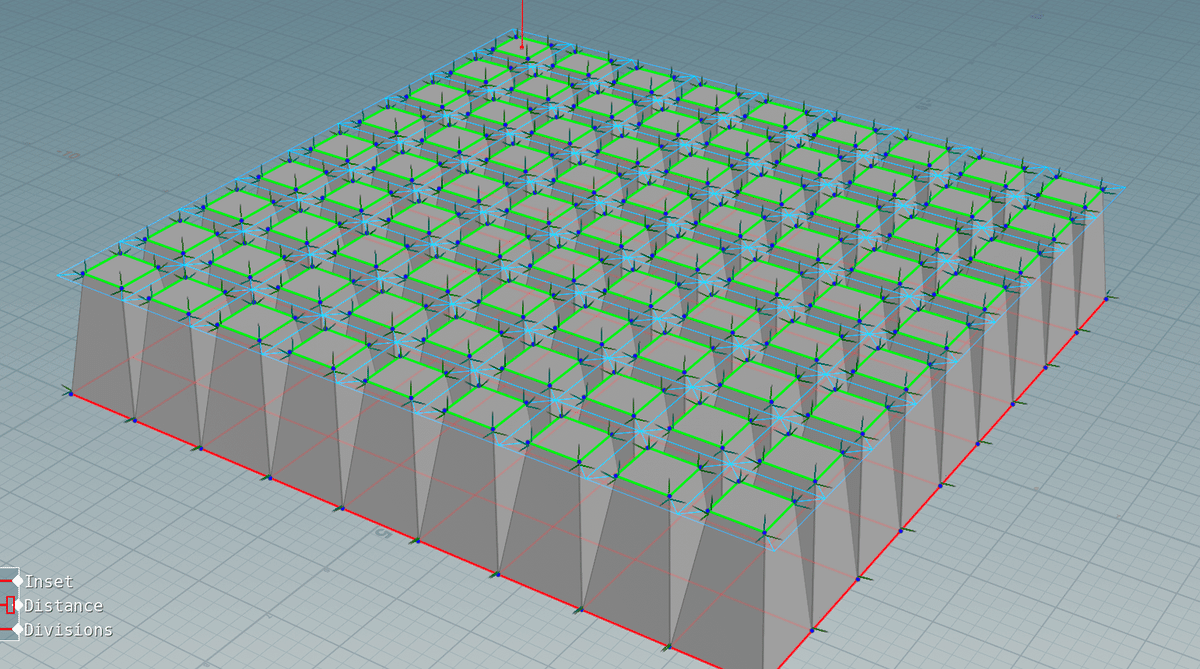
polyExtrude
押し出しとinset(面の差し込み)がセットになっているようなnode
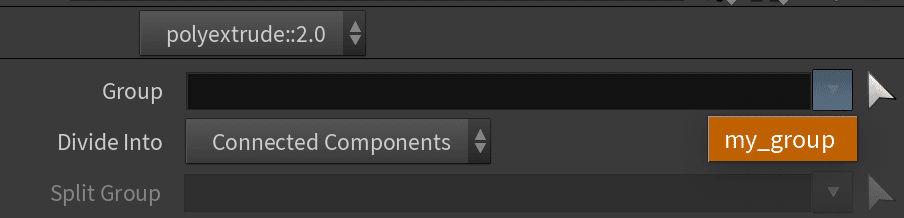
Groupでグループの選択
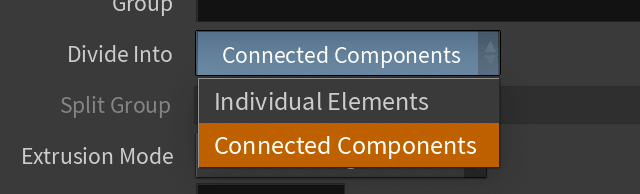
Divide intoは Connected Componentsにすると面で別れている物体でも同じ量で同様に適用されるが
Individual Elementsにすると、それぞれの面に対してExtrudeをが適用できる。
Extrusion Modeで Primitive / Edgeの法線方向に押しだすか、Pointの法線方向に押しだすかを選べる。
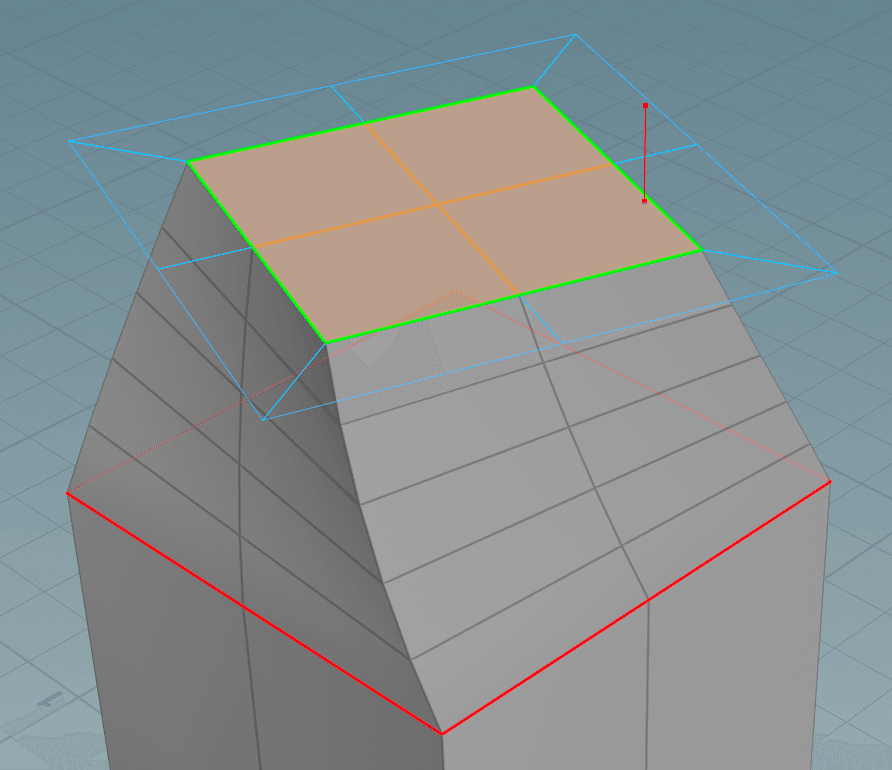
Distanceで押し出し距離
Insetで面の差し込み具合
Twistでねじり
Divisionsで押し出し時の面の分割具合
polyExtrude2D
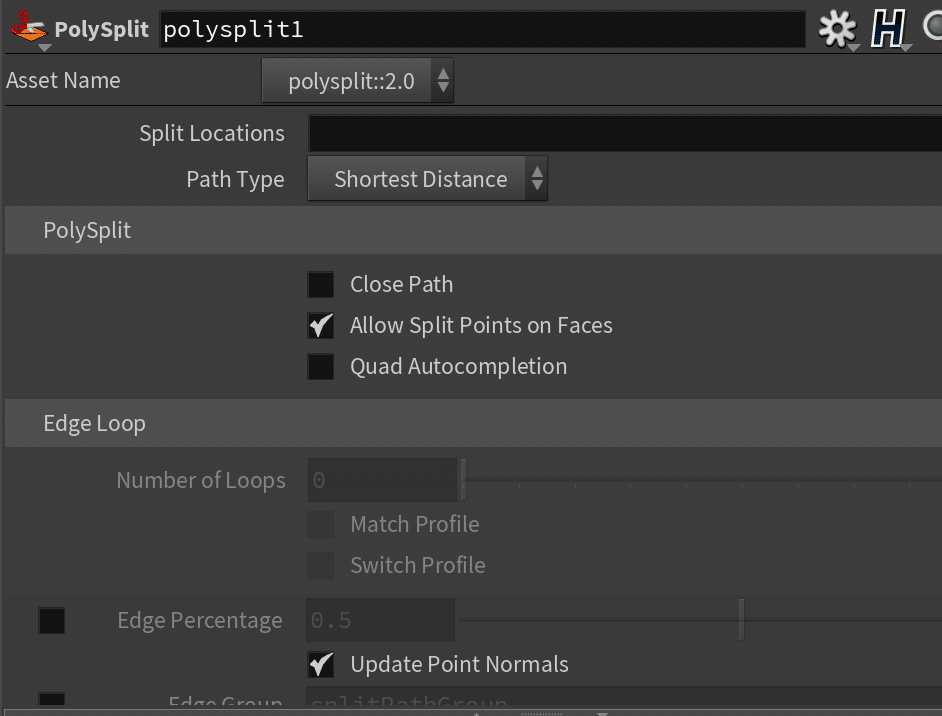
polySplit
分割することができる。
マウスでぽちぽち切りたいところを操作する方法と
Split Locationsにどうやって分割したいかを記入する方法。
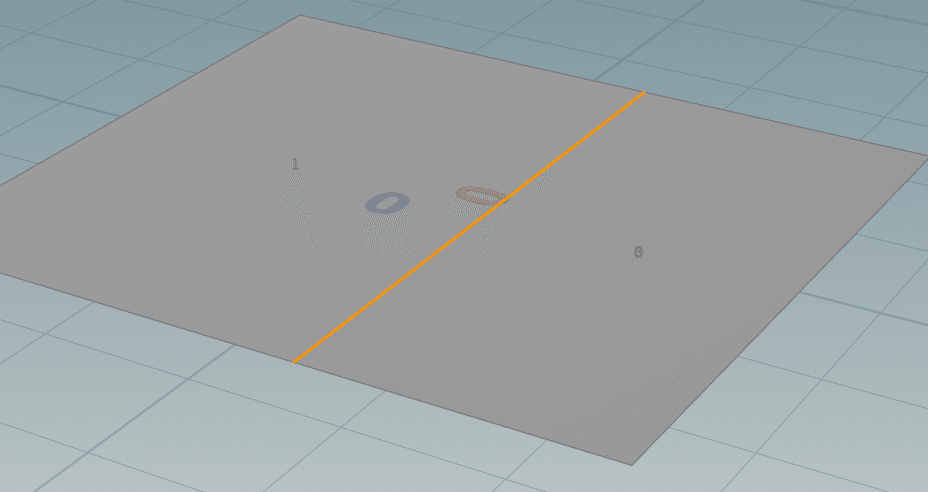
Radial Menuなどでpoly Splitを選ぶと、
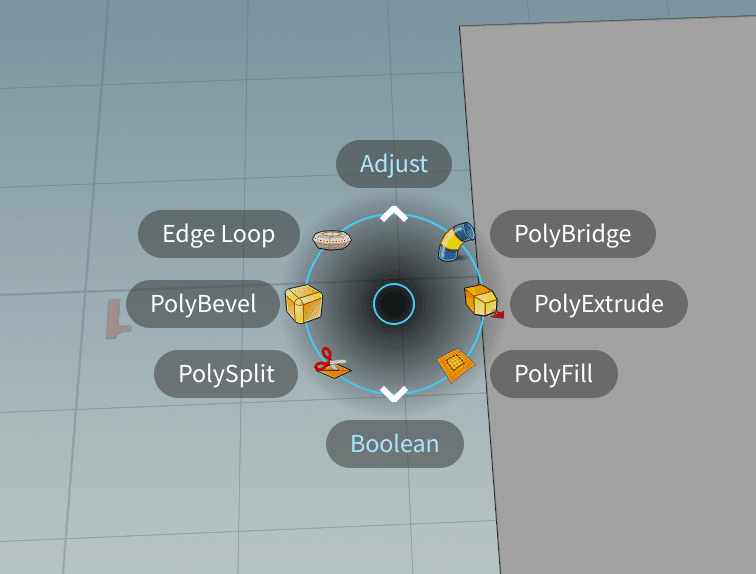
このような分割ラインが勝手に現れる。
適当にぽちぽちエッジをクリックすると、
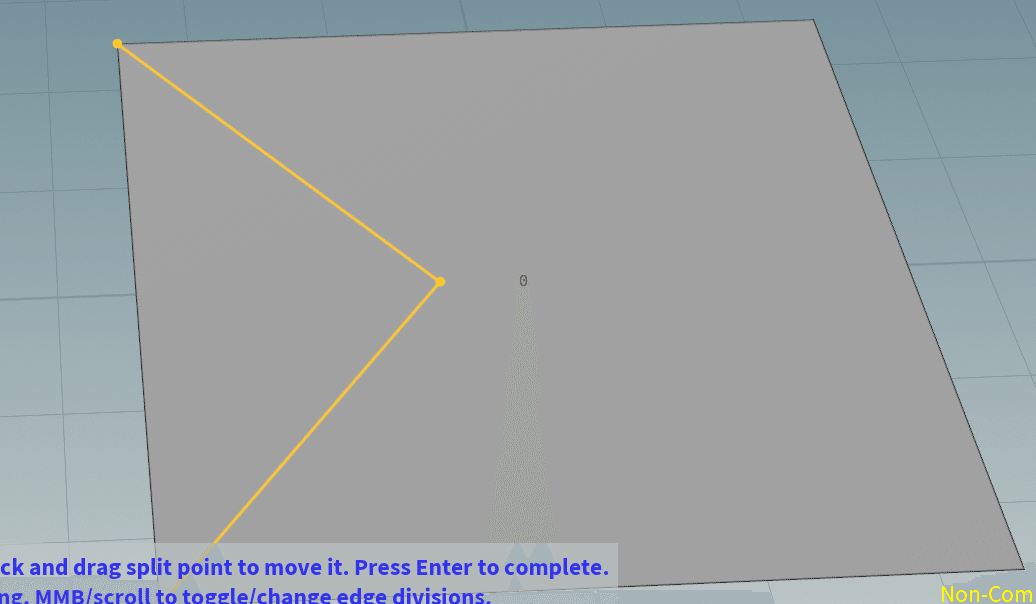
こんな感じで切れる。
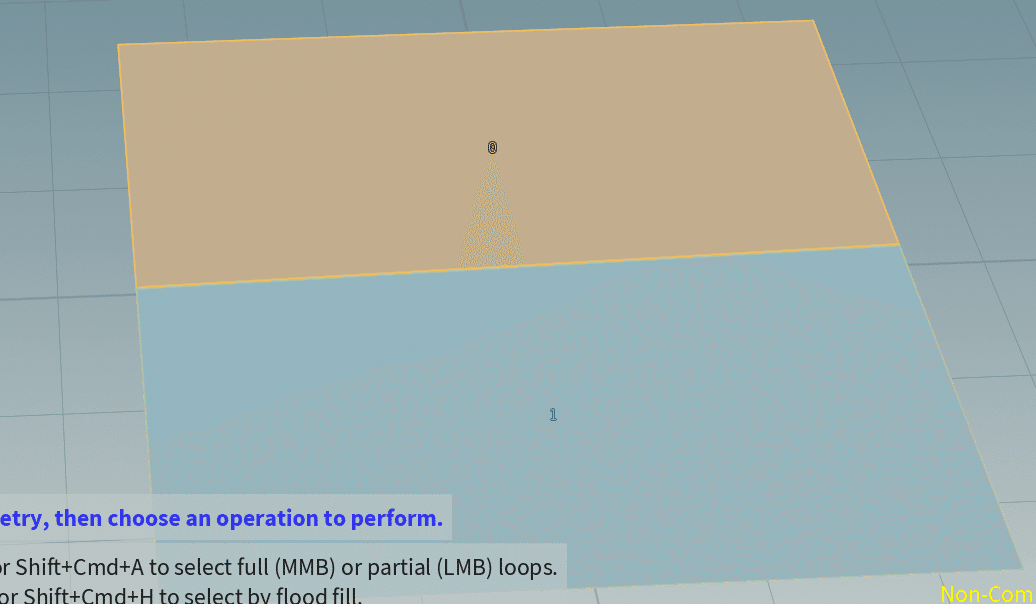
Path Typeは Shortest Distance / Edge Loopが選べて、
ぽちぽちマウスできる時はShortest Distance(最小距離)で点間に切れ込みが入る。
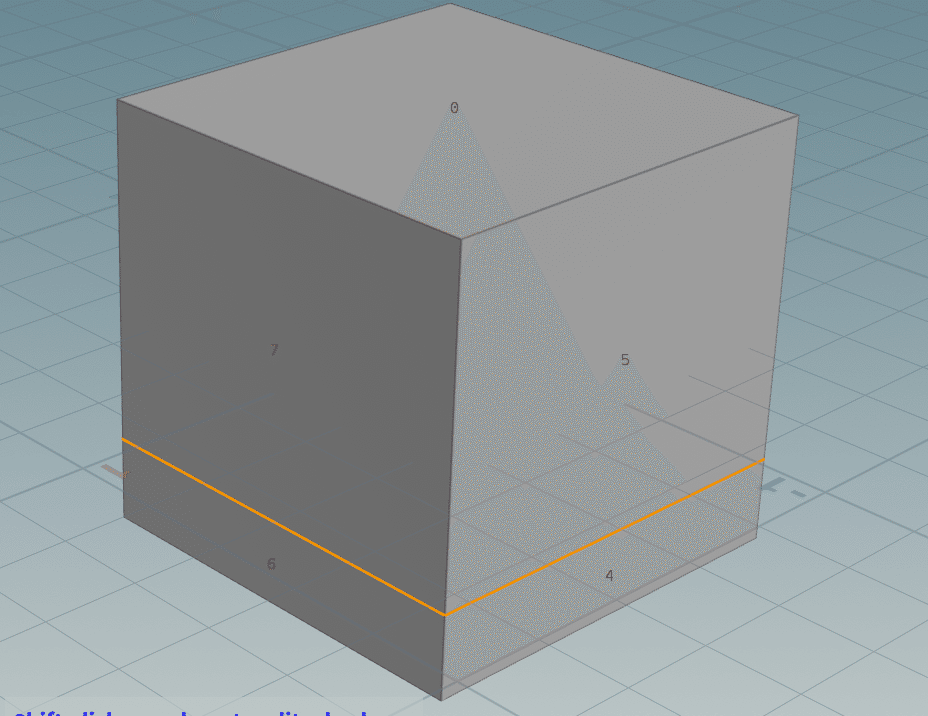
Edge Loopにして、Edgeをクリックすると、
ぐるっと回るように切れ込みがはいる。
Split Locationsの書き方
カットを作る一連の位置は、以下のコードを使用します。
avb
プリミティブaの頂点bでカットします。aとbは整数です。
aeb
プリミティブaのエッジbの中点でカットします。aとbは整数です。
aeb:t
プリミティブaのエッジbに沿ってtパーセントの位置でカットします。aとbは整数で、tは0.0から1.0の実数です。
af:u,v
プリミティブa上の指定した(u,v)位置でカットします。aは整数で、uとvは0.0から1.0の実数です。
pa-b
aとbのポイント間のエッジの中点でカットします。 aとbは整数です。
pa-b:t
aとbのポイント間のエッジに沿ってtパーセントの位置でカットします。aとbは整数で、tは0.0から1.0の実数です。
Edit
Edit SOPは、カーブ/サーフェスのフェース/エッジ/ポイントをインタラクティブにトランスフォームまたはスカルプトすることができます。
ほとんどのHoudiniノードとは違い、 編集を蓄積します 。つまり、1個のEditノードで(複数選択に対して)複数の編集操作をすることができます。 Editノードは、 そのノード内 で行なったすべての編集の 最終結果 を記憶します。
Editノードは、2つの主な作業方法をサポートしています: 編集 (マニピュレータを使用)と スカルプト (ブラシツールを使用)。
polyExtrudeなどのnodeを使ったとに、Tを押すことで、
Edit Nodeを追加することができる。
Make Circle
右クリックして、Make Circle (Shift+C)で適用できる。
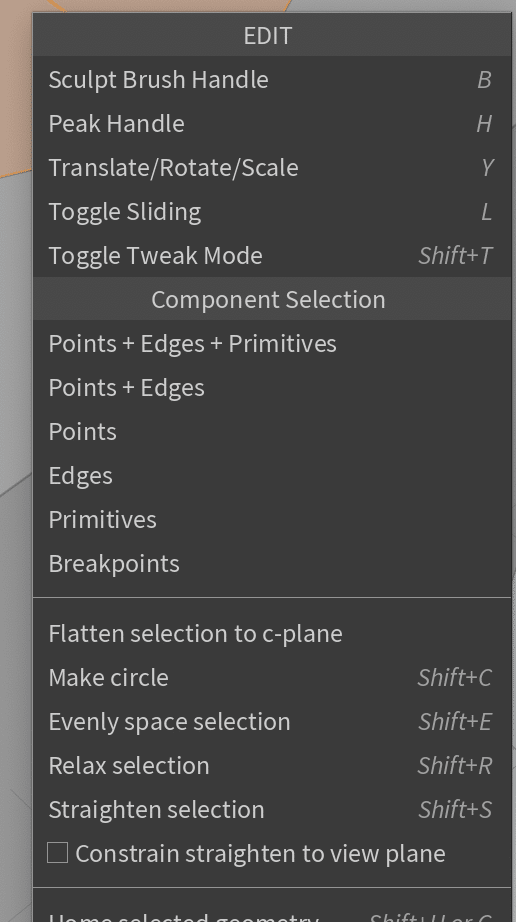
Edit SOP に選択した形状を等分した真円 (または選択ジオメトリから最も真円に近い形状) に変換する機能が追加されました。ポイント、エッジ、面のいずれかで選択し、T キーを押してRMB->"Make Circle" または SHIFT+C ホットキーで実行します。
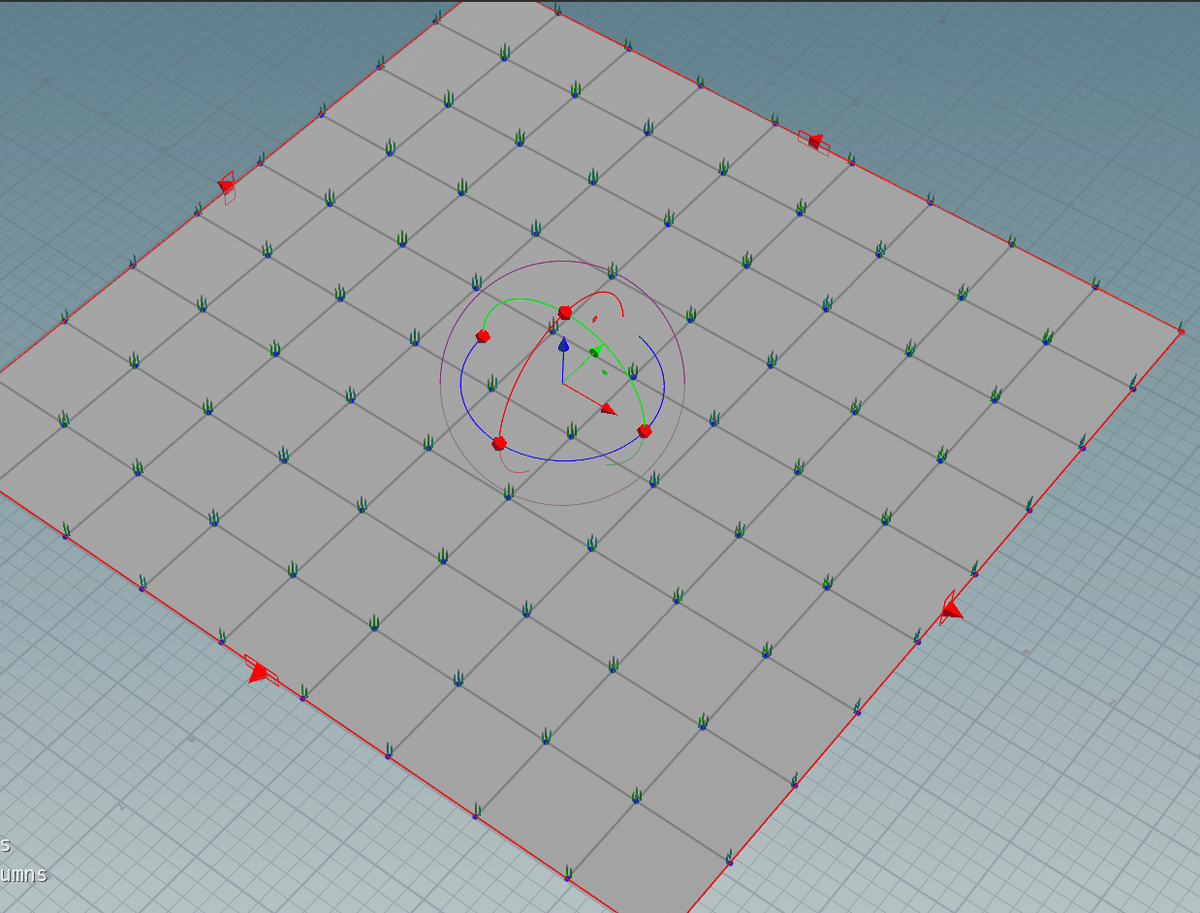
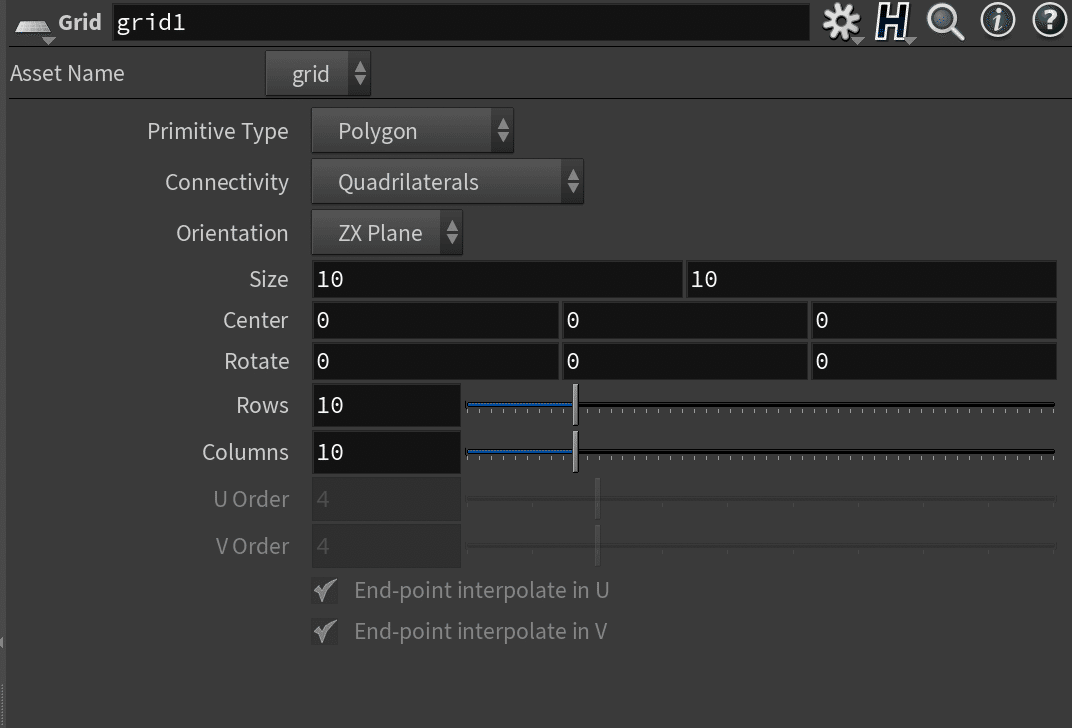
Grid
いわゆるグリッドをつくることができる。
parameterもシンプル
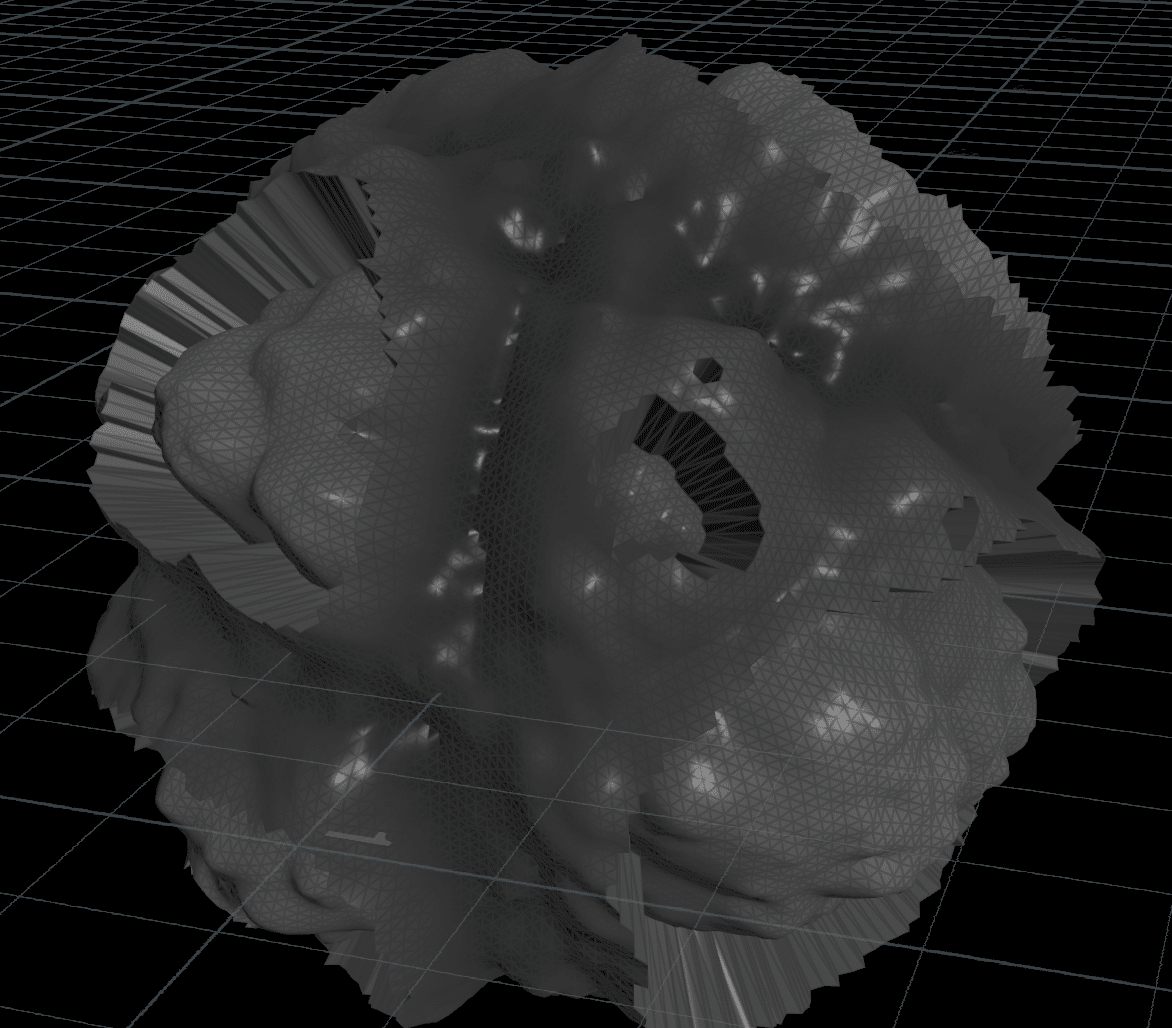
Volume
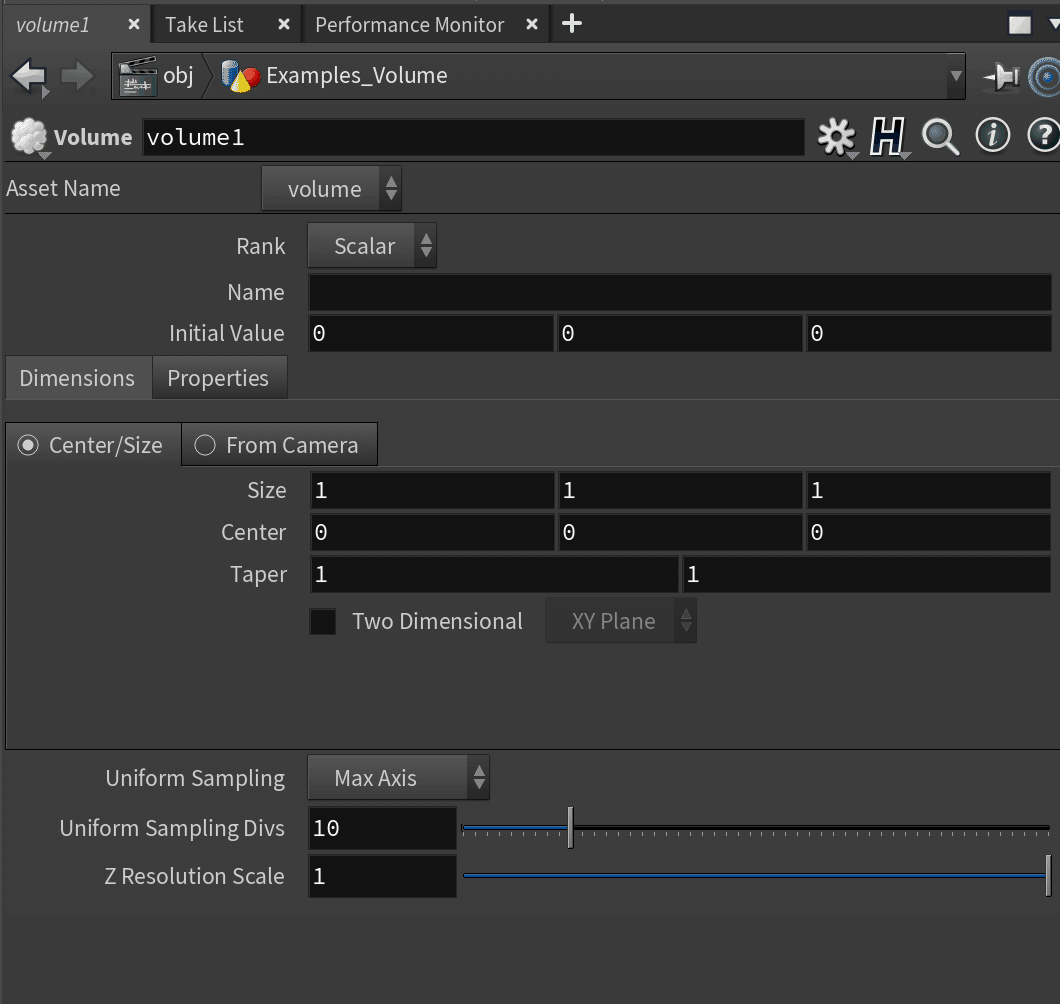
initial valueを増やすと、とりあえず、雲みたいな感じに見える。
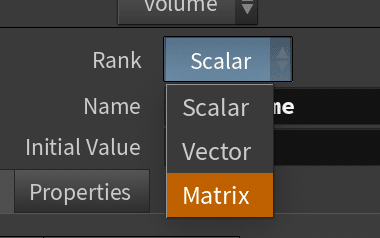
Rankは1つのボクセルにどういう値を入れるかというのを示している
Scalerはスカラー値が入って、VectorとMatrixが選べる。
Vectorを選ぶと初期で3次元ベクトルで入る。
そのままではGeometry Spread Sheatには何も表示されない。
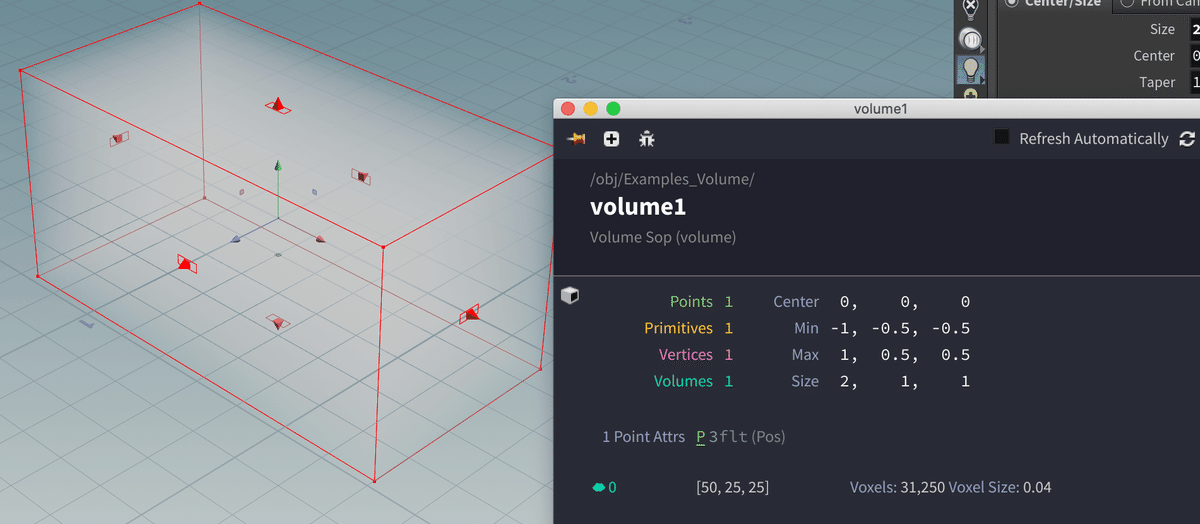
初期状態のVolumeのinfoを見るとVoxelsというのと、直方体の大きさをかくにんできる [10,10,10] Voxels : 1,000 Volxel Size : 0,1

uniform Sampling Divsという項目を増やすと、ボクセル数が増える。
いわゆる解像度的な分割数。

横長にSizeを2とかにすると、
長辺合わせで、比率を保って増えてくれる。
Volumeの時は、
Geometry Spread Sheetを見ても、pointは形式的に原点に一個あるがPrimitiveとかもない。
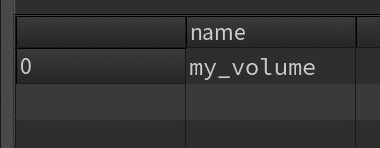
Nameに名前をつけると、Attributeとして名前が追加される。
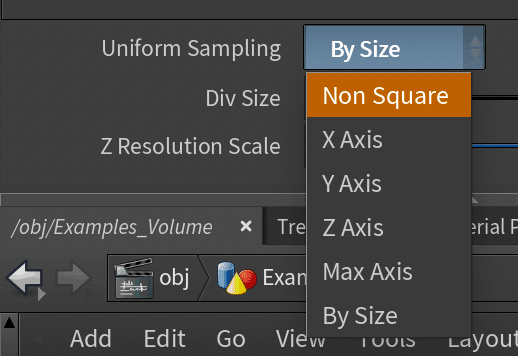
Uniform Samplingでどのようにdivするかを選べる
デフォルトはMax Axisで、一番長い軸をuniform Sampling Divsの数値にする。
By Sizeでは、Voxel一つ一つのsizeをその数値にするように分割する。
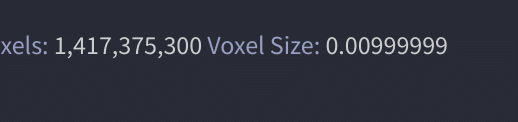
By Size で Div Sizeが0.01の時のVoxel Size
計算誤差を除けばほぼその数値。
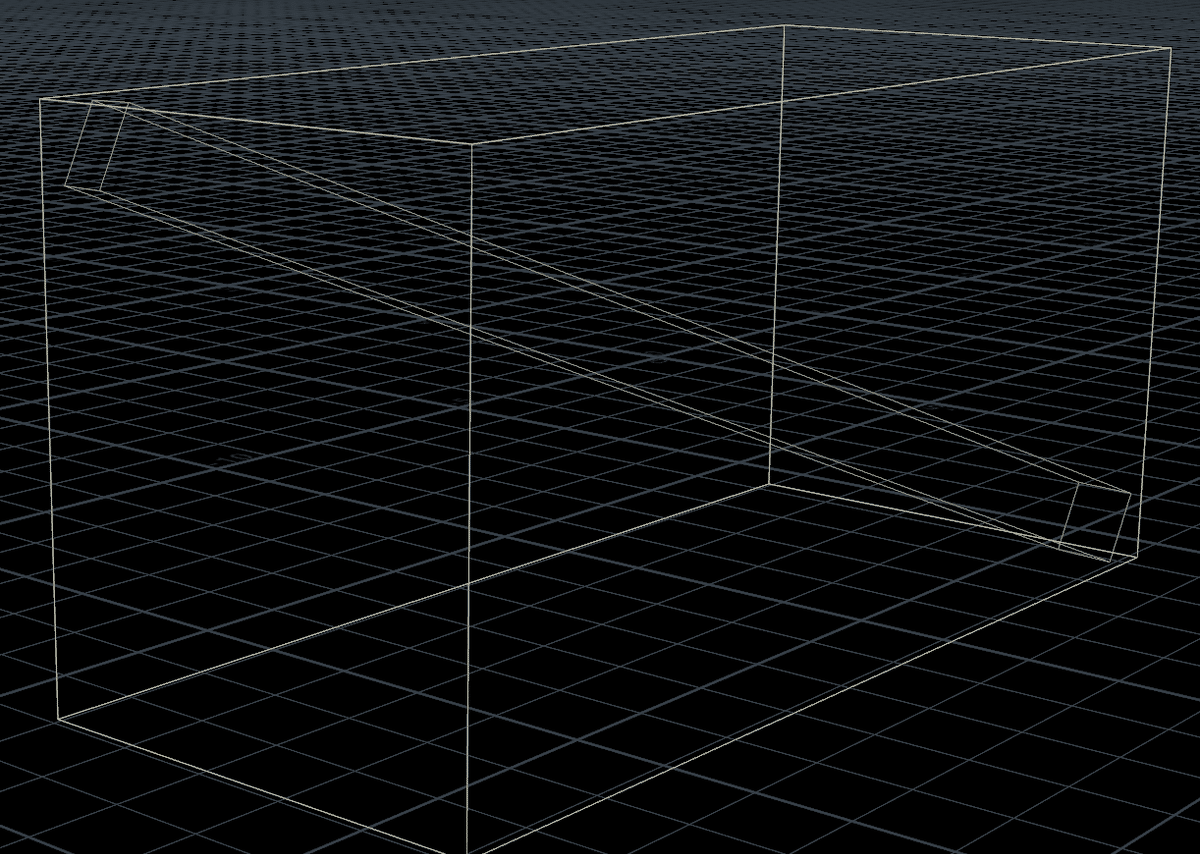
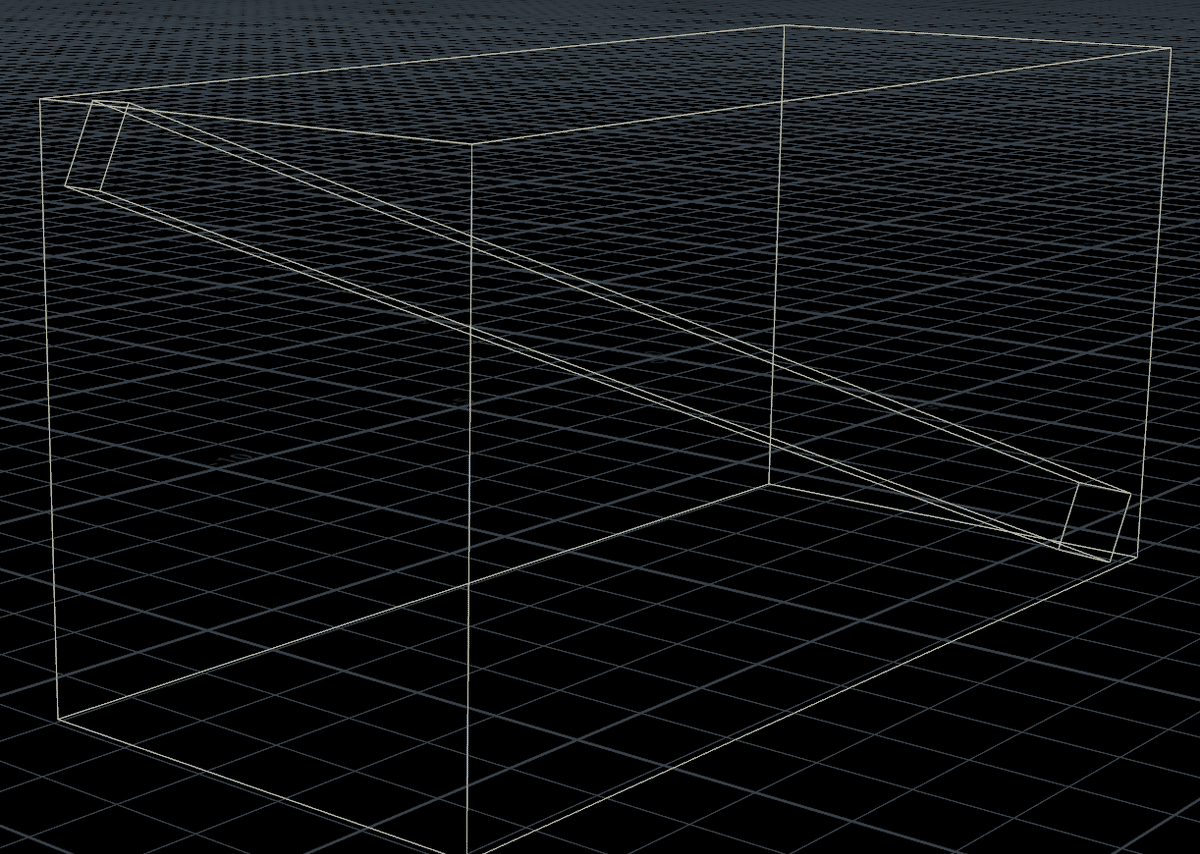
Volume nodeの前に、Geometryを入れると
それをもとにVolumeが作られる。

斜めに傾いているようなboxからvolumeを作ろうとすると、それをすっぽり覆うような直方体のvolumeを作ろうとしてしまう。
VDBの場合はネイティブのVolumeとは違う。
Volume Slice
VDBにも使える。
ベクトル場の値を作りたい時とかに便利。
Volumeにつなげることで、さっきまでVolumeの状態ではpointとかで存在しなかったものが、1Voxel単位で実際のgeometryとして描画される。
Voxelの中の値が実際描画する形でみることができる。
VectorとなっているVolumeで、uniform Sampling divsが10、sizeが2,1,1のとき、以下のようになっている
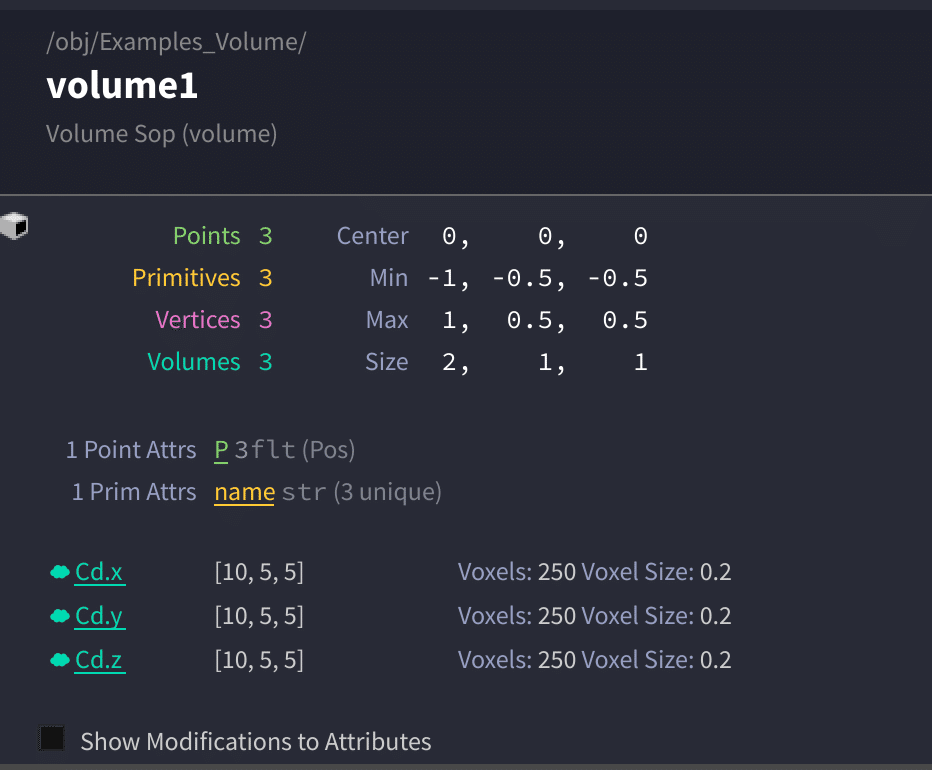
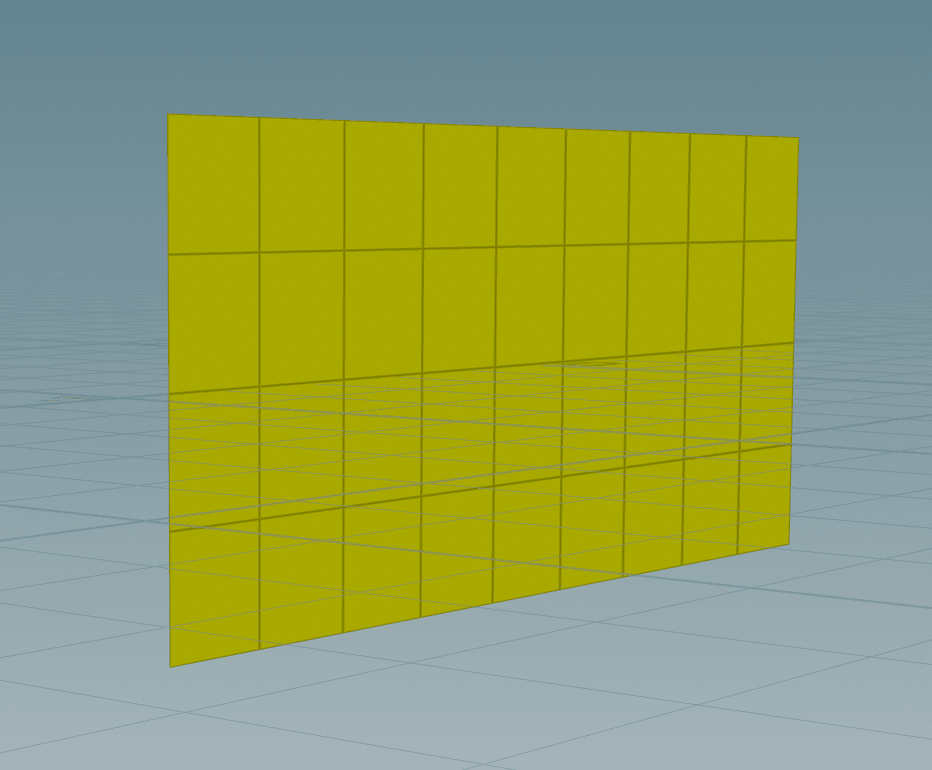
これをVolume Sliceノードと繋いで、描画すると、実際point数が横10,縦5のvoxelが出来上がっている。Voxel数が実際のpoint数などになっている。
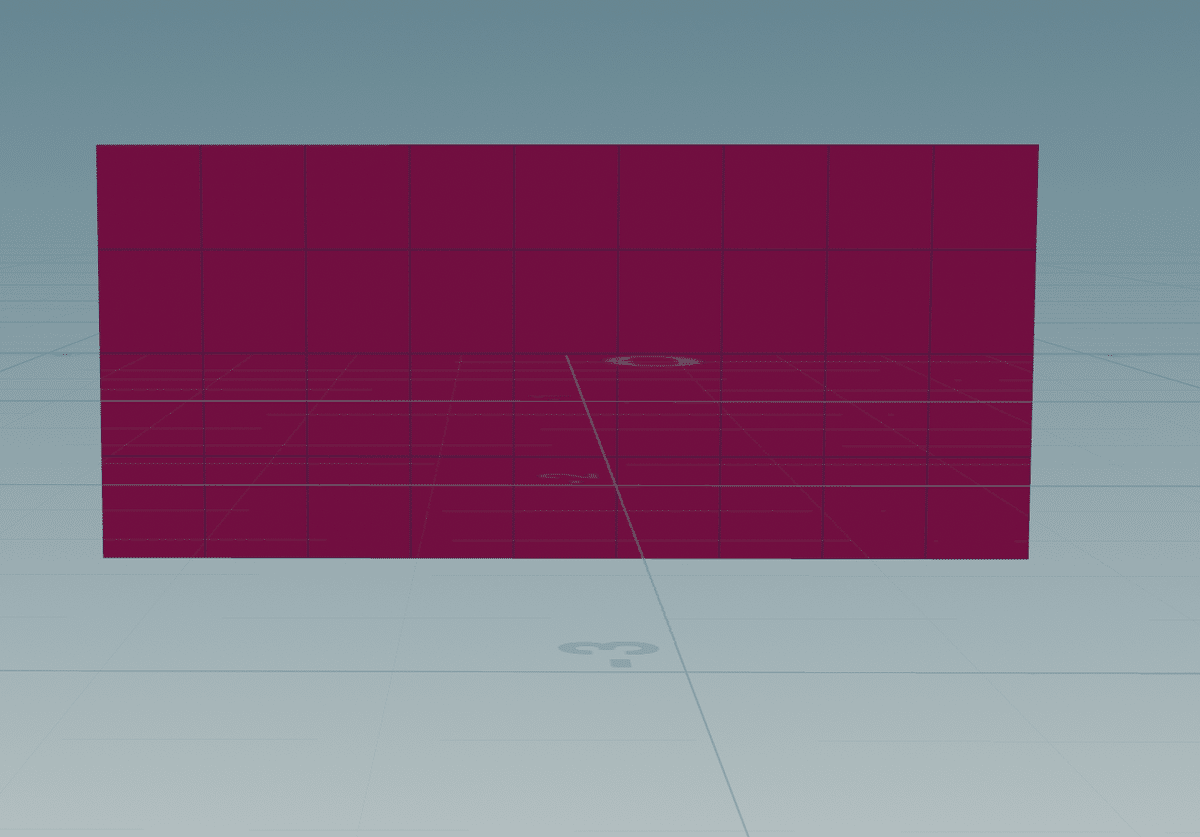
Volumeのinitial Valueを変更すると実際の色として、それぞれがrgbになって変化していることがわかる。

Sliceをつなげた後の、Geometry SpreadSheetを見ると、attributeにCdやDensityが追加されていることがわかる
CdはVolume nodeのinitialなどの値が埋め込まれている。

Offsetの下のAttributeを好きなattribute名にすることで、その名前のattributeが保存される。基本的にはCdと同じ値が保存されている。


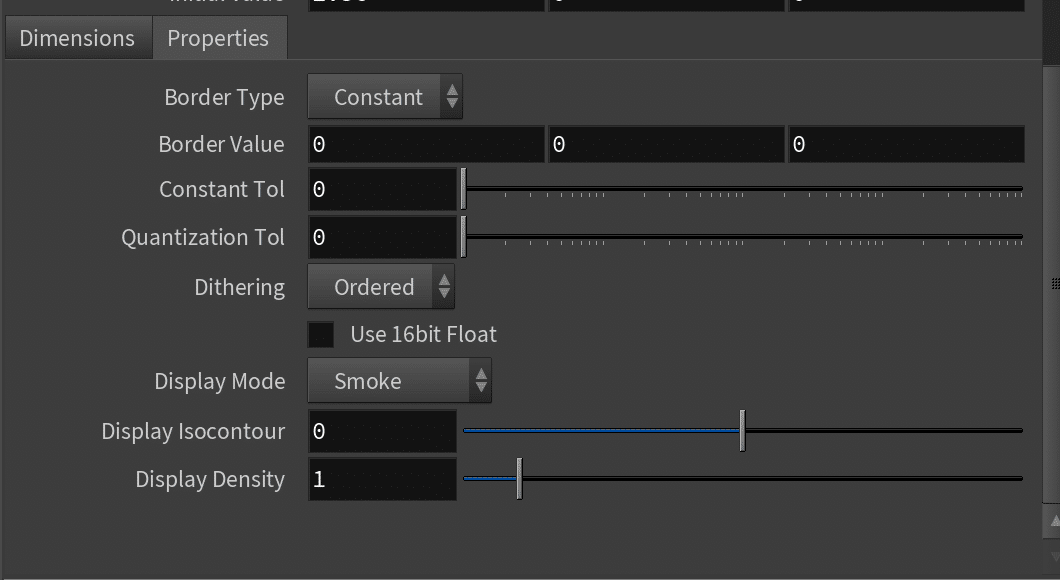
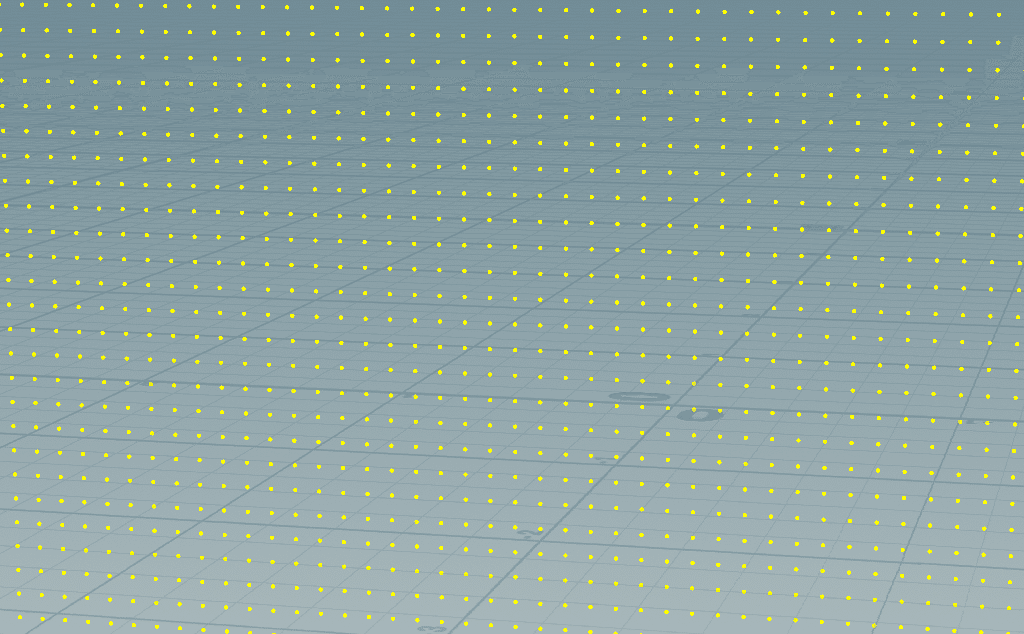
Methodを変更するとそのVolumeを何で描画するかを選べる。デフォでmeshになっていて、pointsにも変更できる。VolumeにするとVolumeとして描画される。
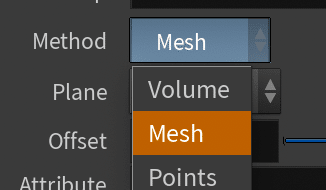
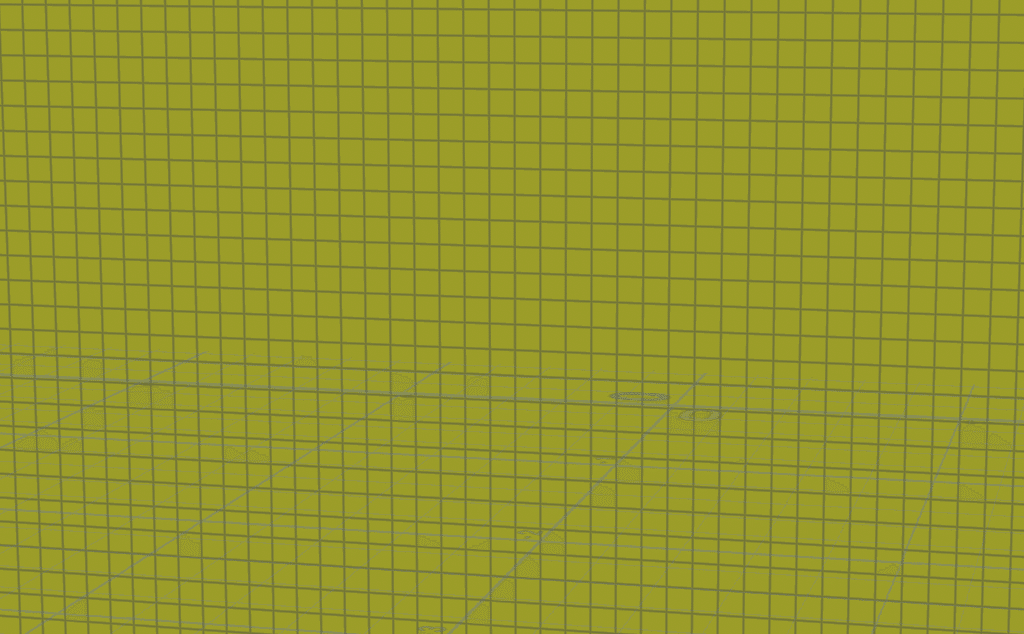
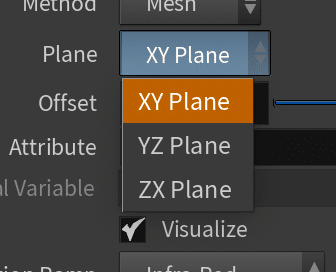
Planeでどの面を選ぶかを選択できて、
Offsetを動かすとその面がVolumeの範囲内に動くようになる。
Volume noise Vector
Volume の値にVectorを持っているようなときに、
Volumeの値にベクトル方向を持った、noiseを与えることができる。
Vector Volume Nameに
Volumeのnameを指定する
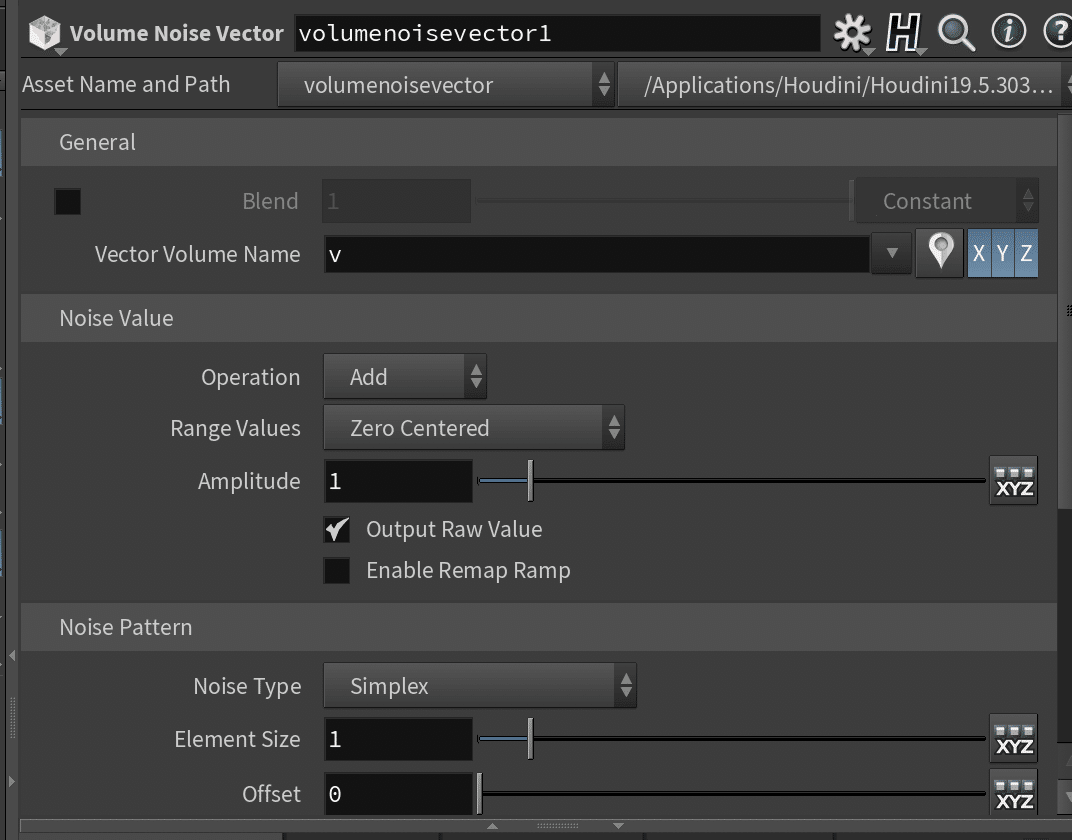
Operationを変えると、値に対してどういう演算するかを選べる。
Setは上書き

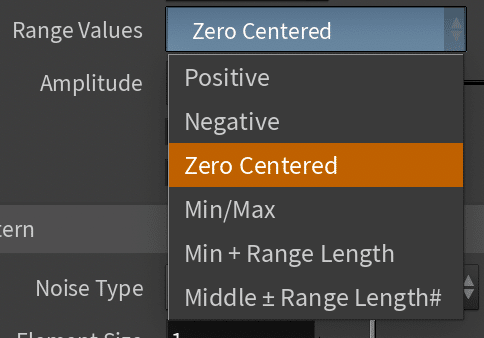
Range Valuesは、このnoiseの範囲を指定できる。Zero Centeredは0中心周りでnoiseを生成する。
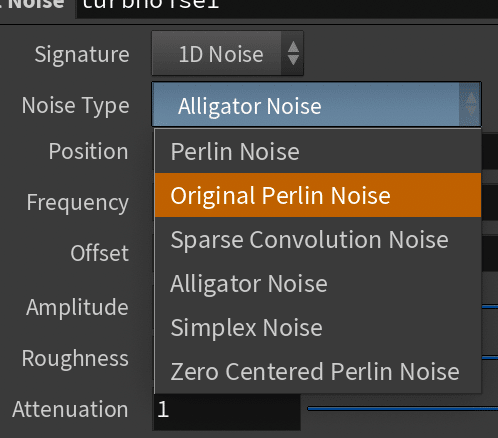
Noise Patternより、Noise Typeを変更すると、Simplex noiseやPerlin noiseとかノイズアルゴリズムを変更することができる。
Element Sizeを変更すると、大きなnoiseの脈を変更することができる。

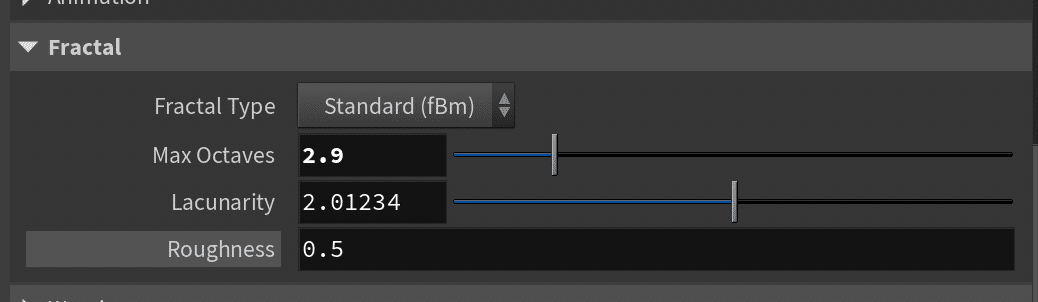
Fractalからもnoiseパターンのあれこれを変更することができる。
Volume noise SDF
SDF Volume 用の Noise node
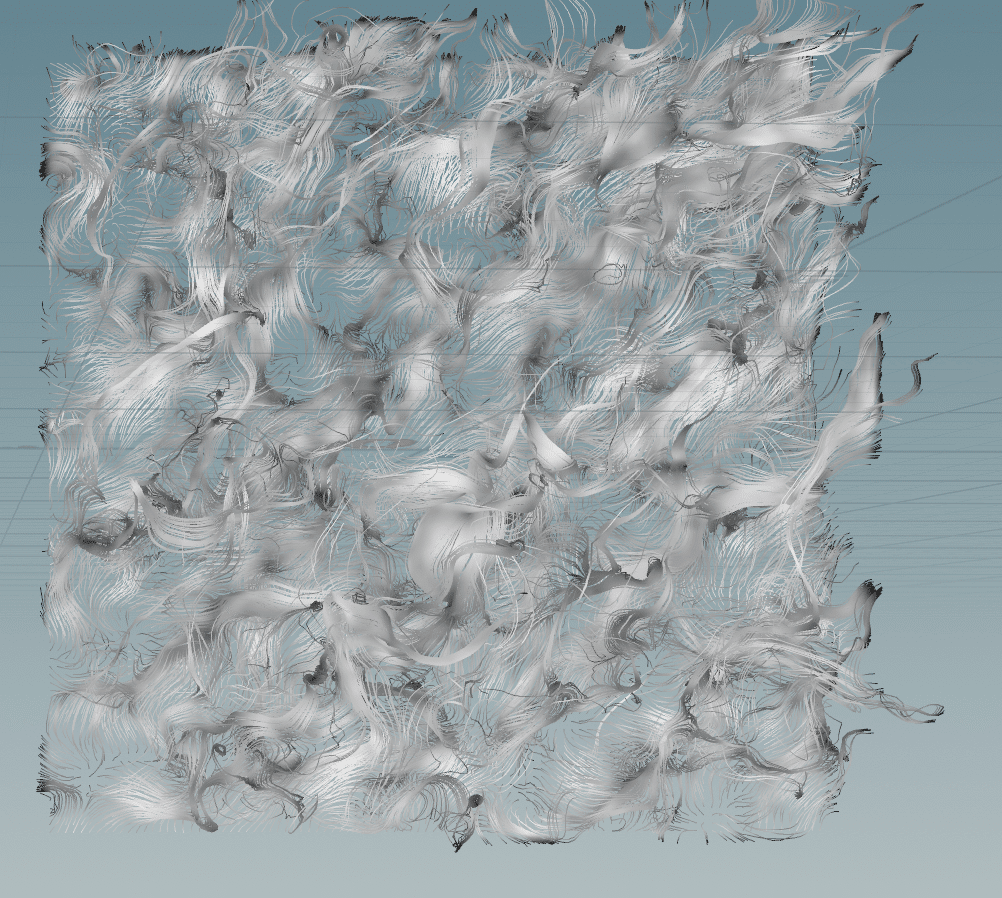
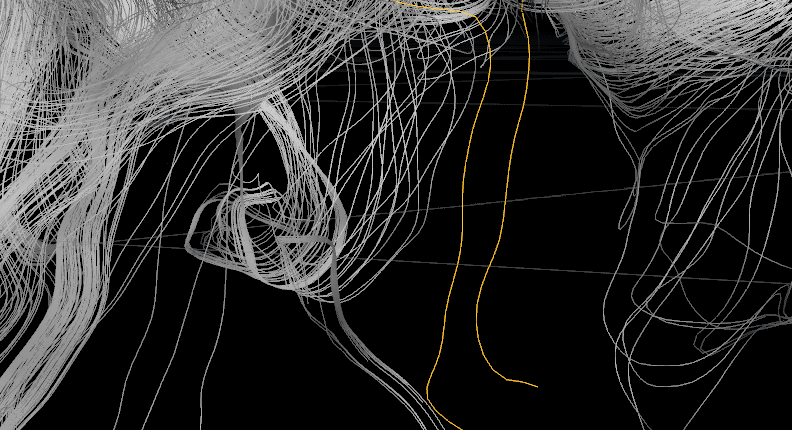
Volume Trail
node1には Points to Trail, pointを持っているgeometryを選択、これが起点となって作られる。
node2には Velocity Volumes、速度場となりうる、Volumeを選ぶ。

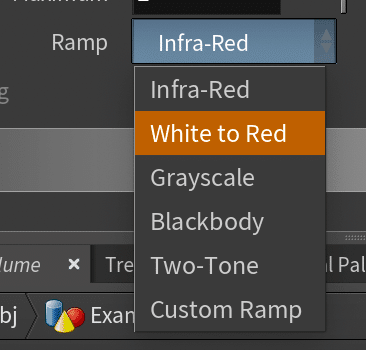
Rampで描画の色を変更することができる。
Custom Rampを選べば自分でrampの内容を変更することができる。
Selectツールからいらない部分とかを選択してbackspaceなどで消すと、
blast nodeが出来上がって、描画から消える。


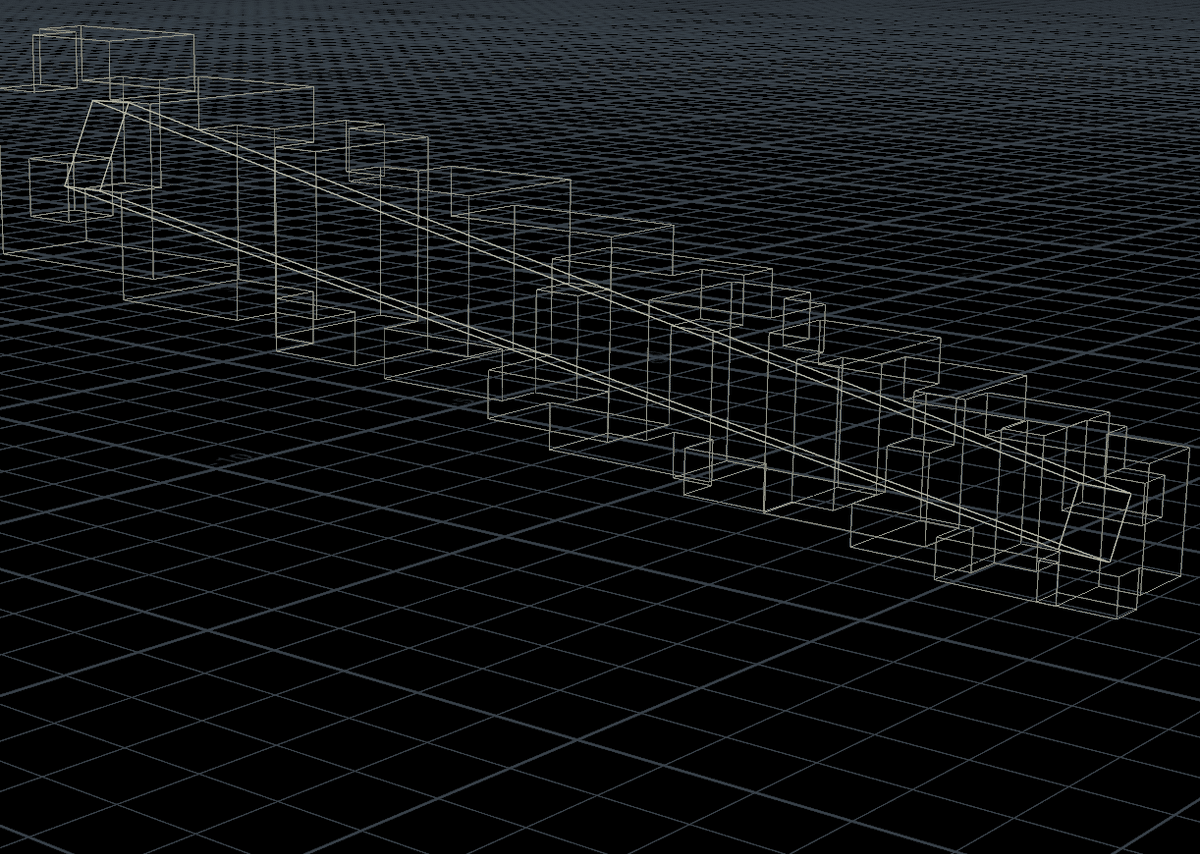
VDB from Polygon
polygonからVDBを作ることができる。
boxなどからVolumeを作るように作ることができるが、内部のアルゴリズムと構造が違う。
Volumeの場合は対象を覆うようにVolumeを作るが、VDBでは最小のvoxelで埋めるように作る。
そのため、データ量が少なくて済むから軽い。
Voxel Sizeで VDBとしてのVolumeのvoxel sizeを指定できる。
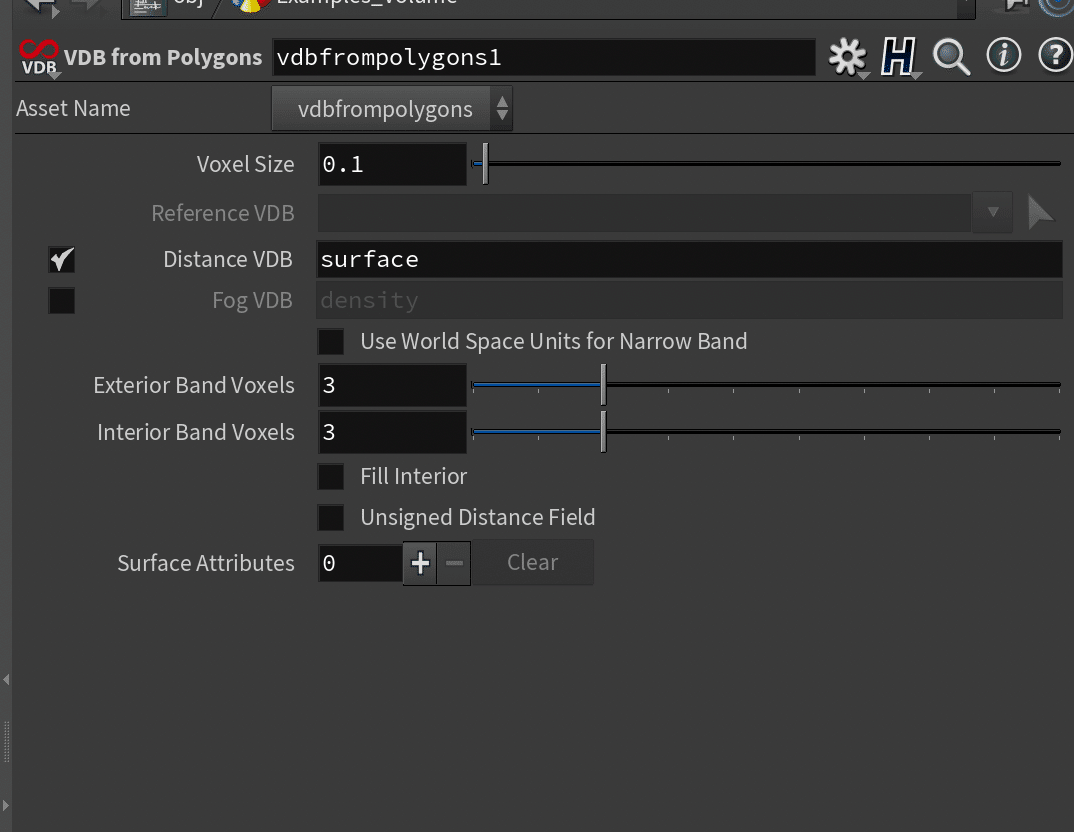
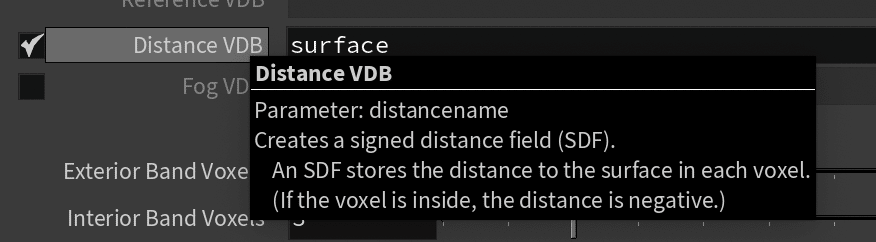
Distance VDBにチェックが入っていると、これはSDF(Signed Distance Field)として生成される。
SDFはvoxelの各値をもとのオブジェクトの表面からの距離を格納するようになる。voxelの内側(inside)はネガティブバリューとして保存される。
※衝突判定とかに使いやすい。
Volume Sliceを使うと状況が分かりやすい。
Convert VDB
VDBを逆にpolygonに戻したりできる。
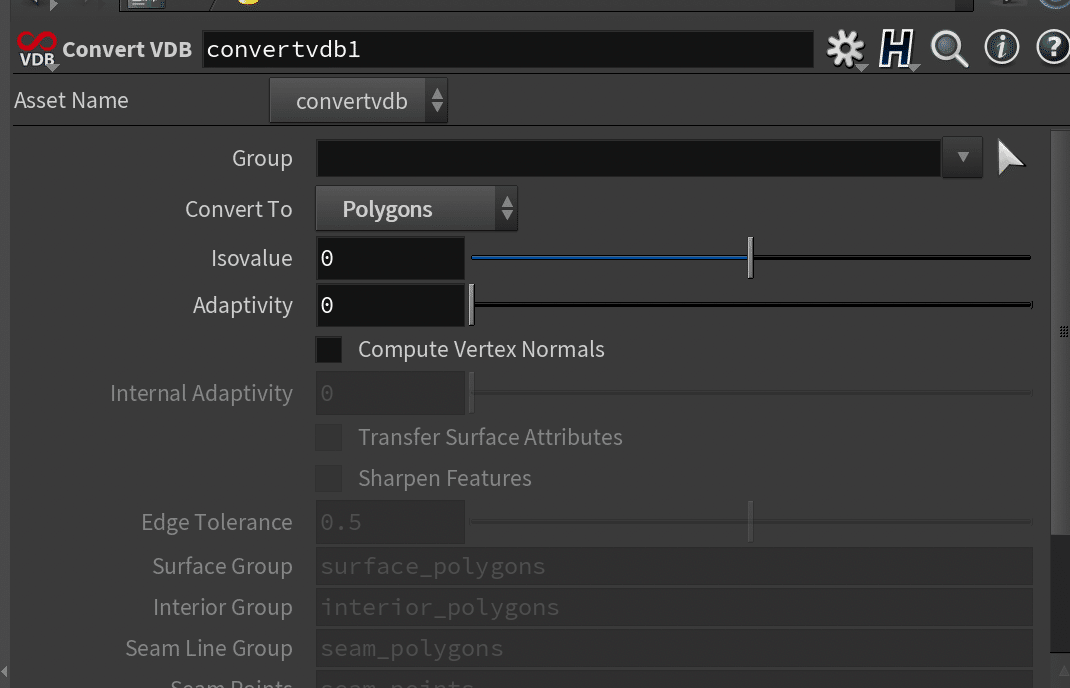
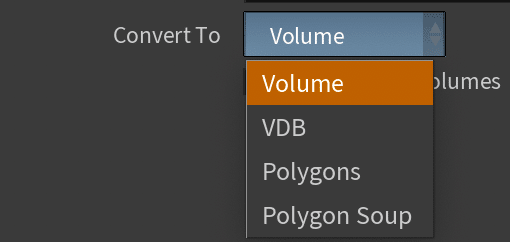
Converte toはVolume / VDB, Polygons Polygon soupで選べる
Adaptivityを挙げると
直線部は、そのまま少ないpolygon数で処理される。
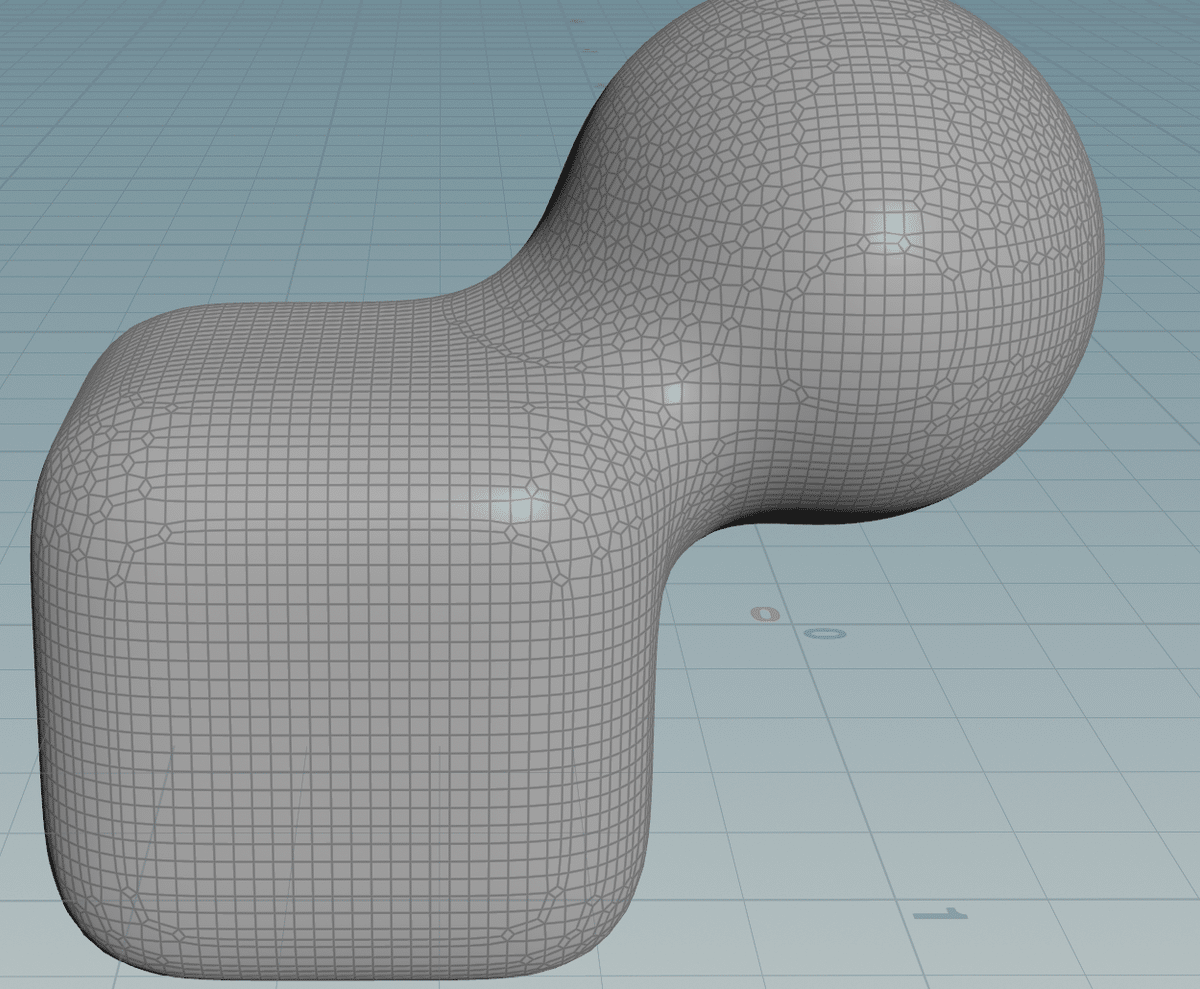
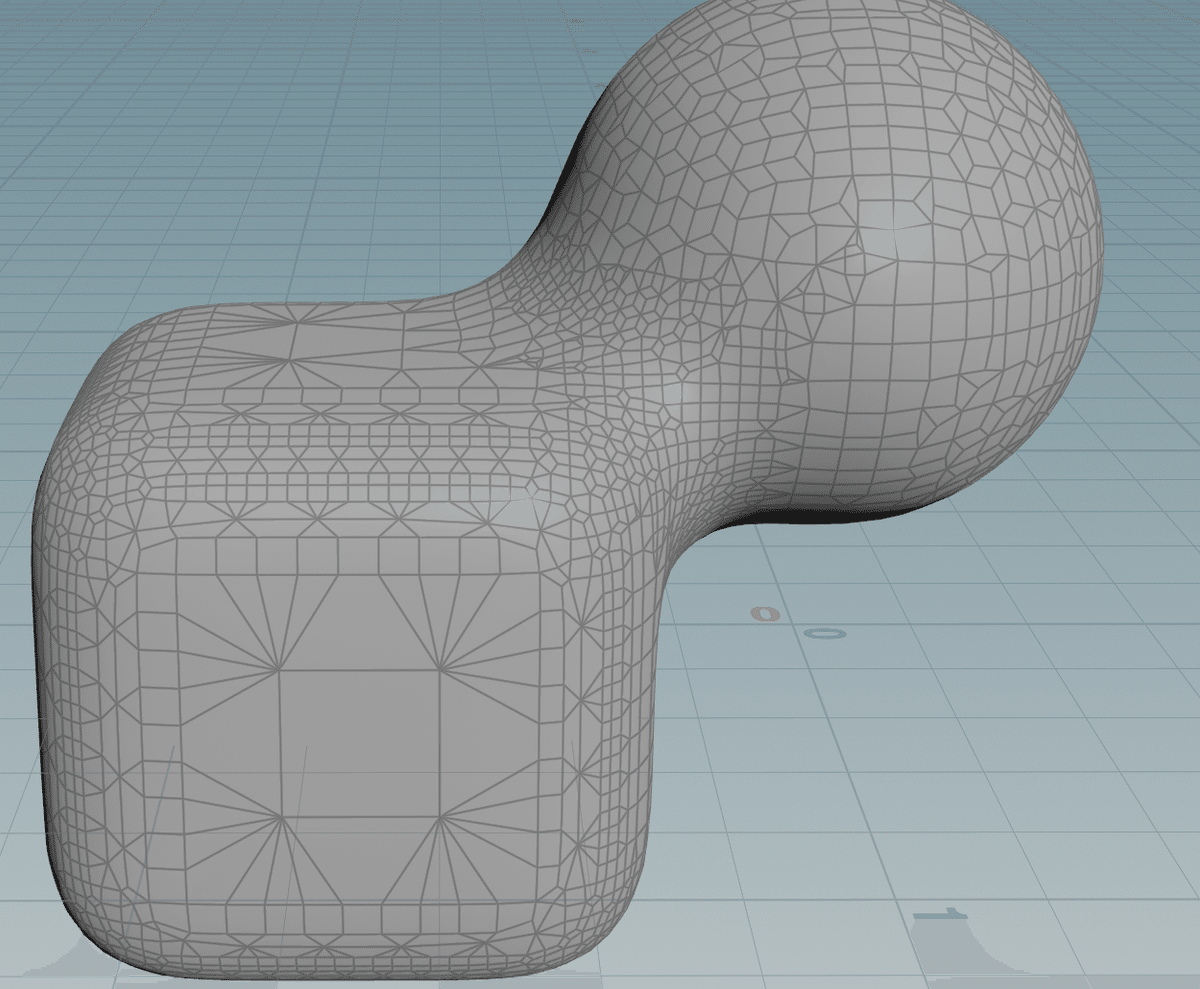
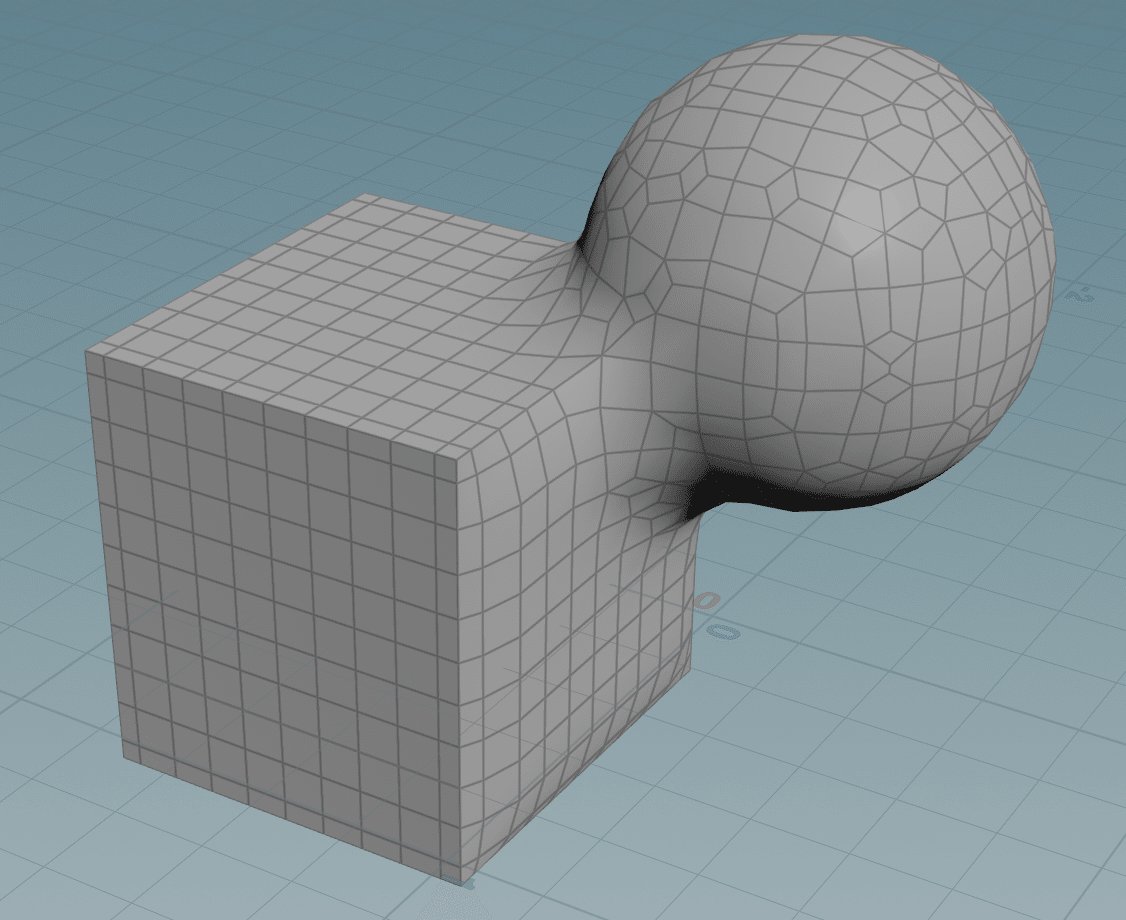
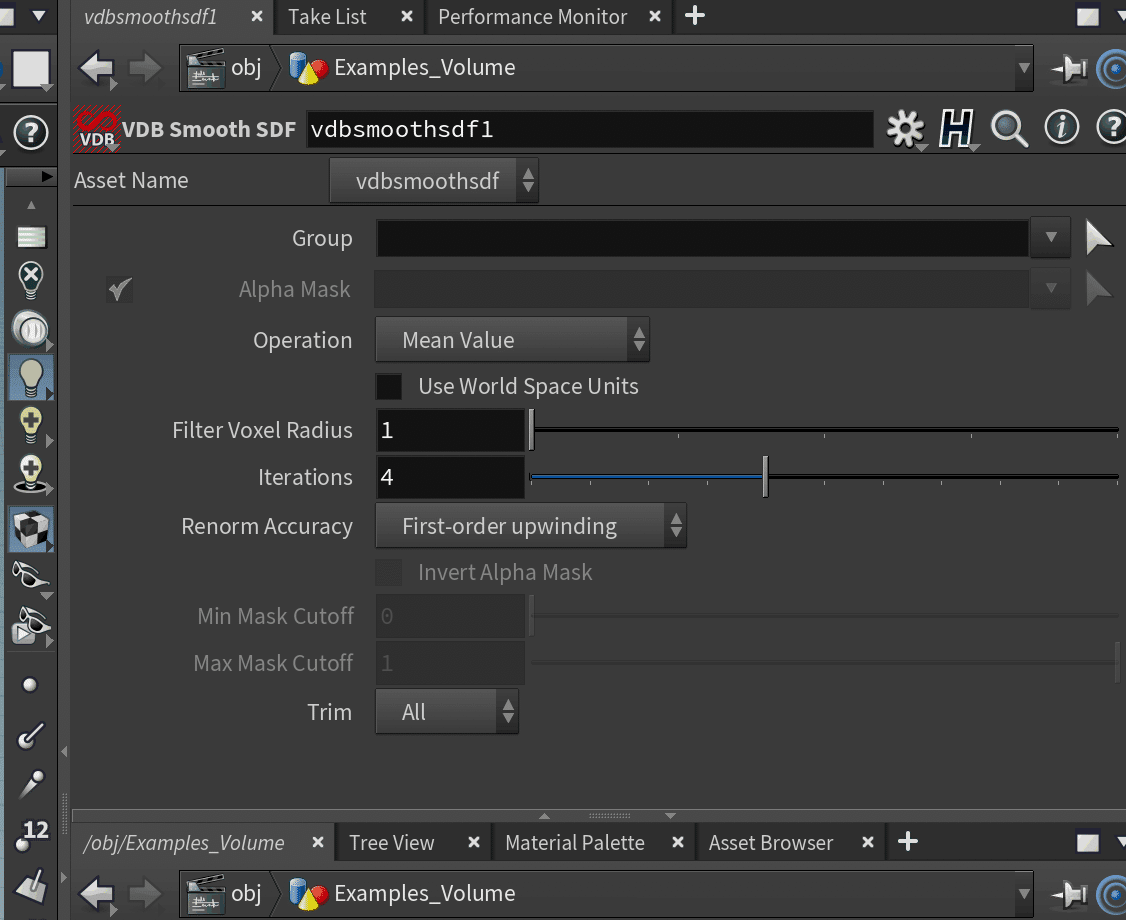
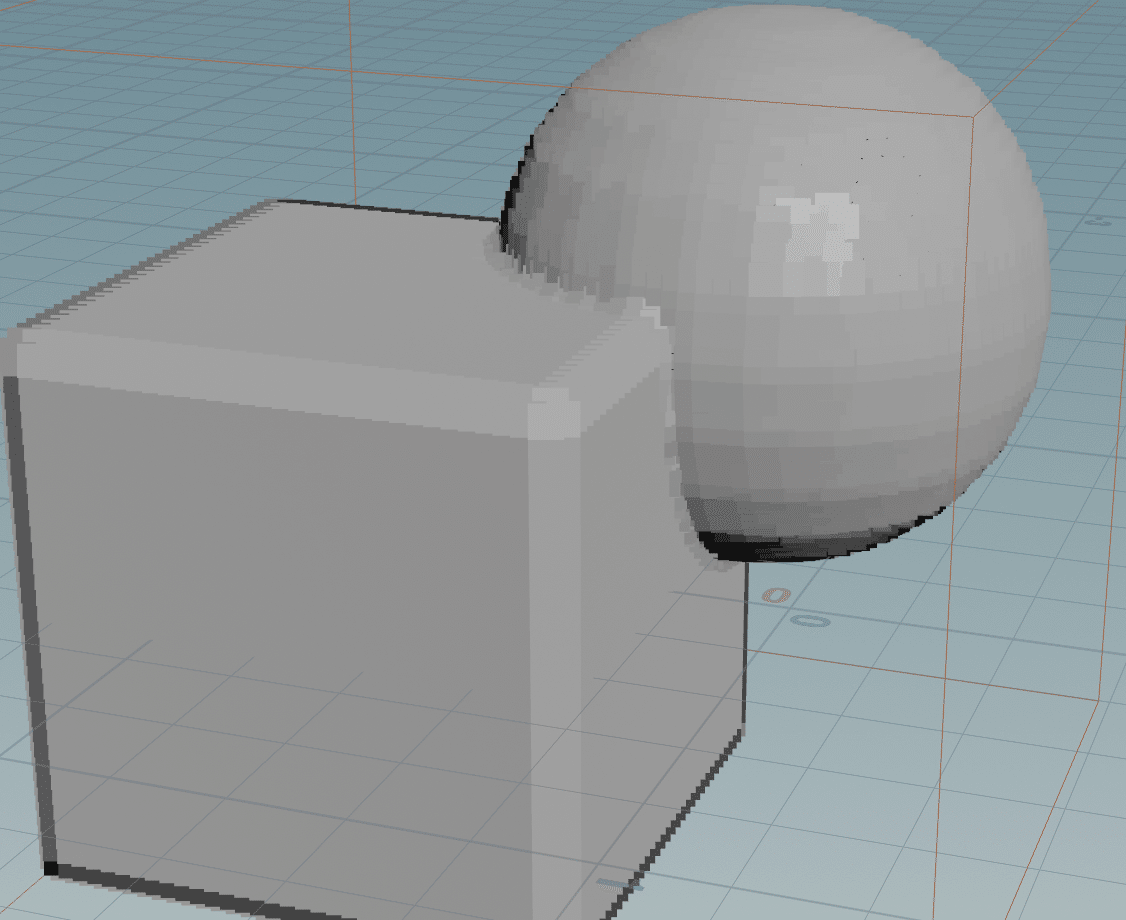
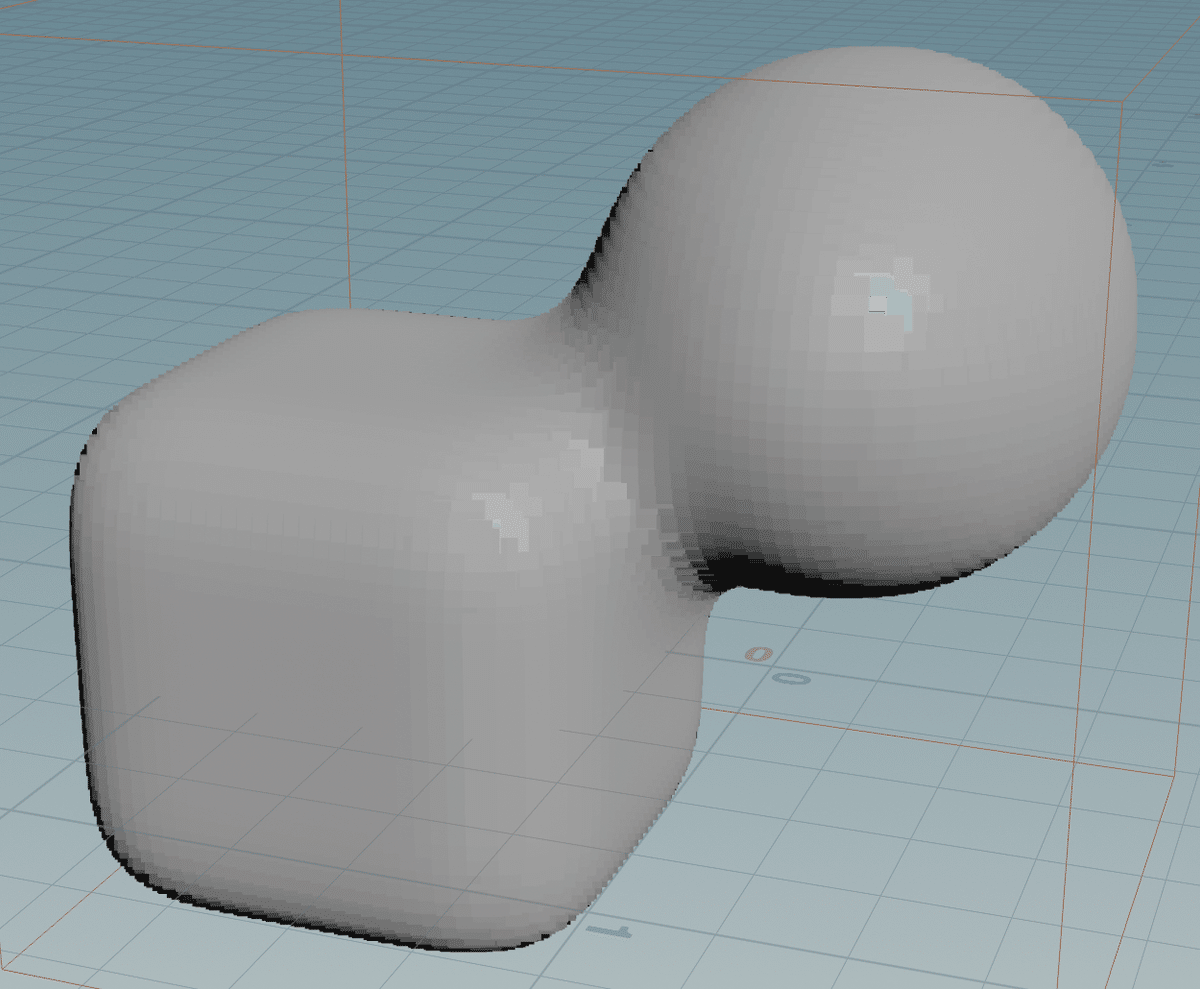
VDB Smooth SDF
SDFの状態でスムーズにできる。
別なオブジェクト同士をつなげて、接合部が怪しいときのSDF Volumeを作れる。
ブラーっぽい感じで
Filter Voxel Radius で一回の処理のVoxel半径を決めて、
Iterationsで繰り返し度合いを決める
ブラーってきな感じ。
Blast
Groupとして、Primitiveやpointが選択されているときにBlastを繋ぐと描画からデリートするとことができる。
ショートカットとして、pointやprimitiveを選択した状態で、backspaceなどで消すと、blast nodeがプロシージャル的に追加される。
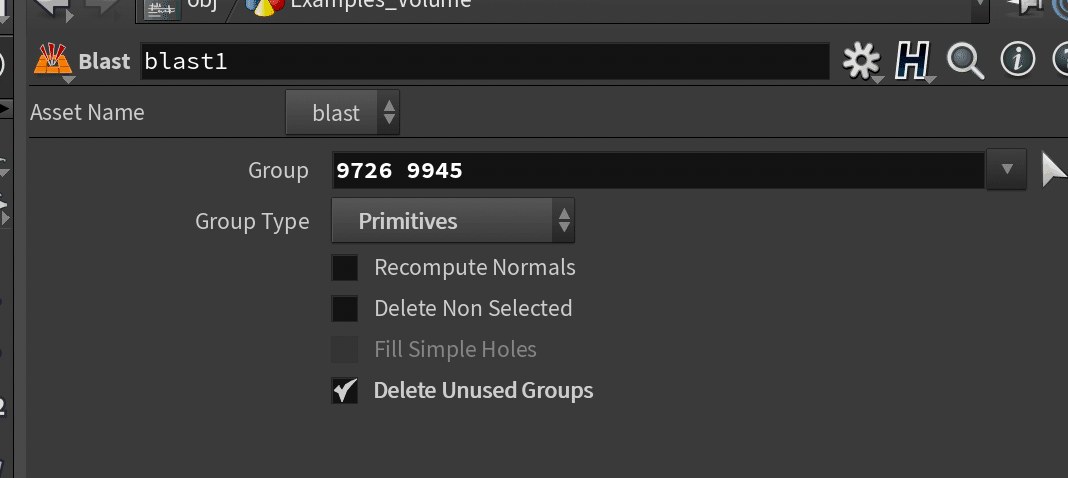
Delete Non Selectedを押すと、反転して、group外が消える。
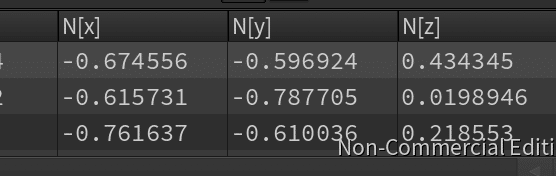
Recompute Normalsにチェック入れると、
Pointなどに、各ポイントの法線が再計算される。
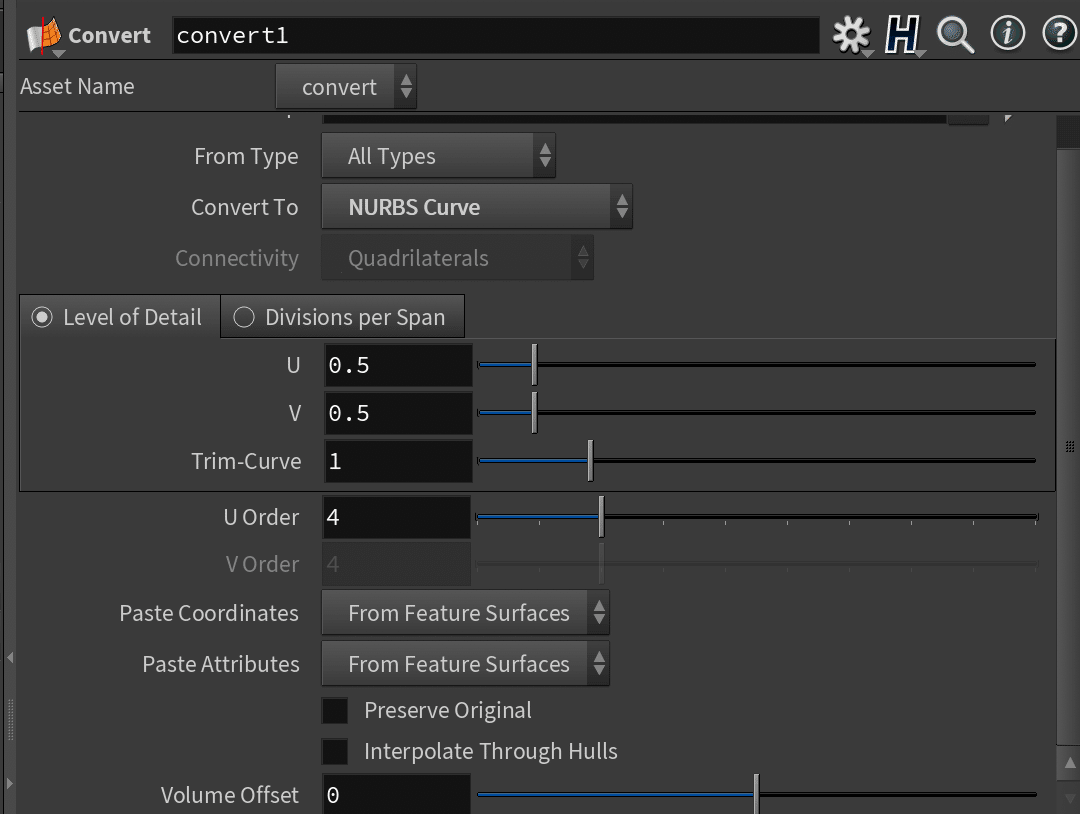
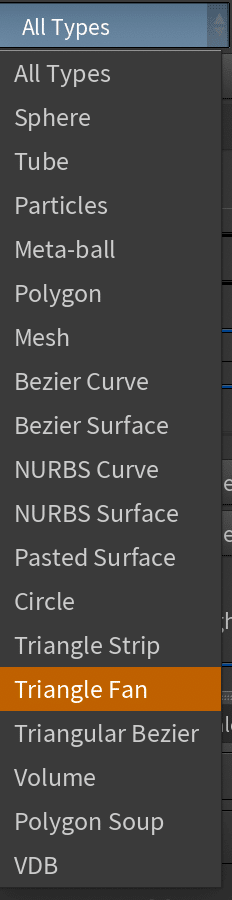
Convert
node前後で、polygon, Mesh Bezier Curveなどを変換することができる。
From Typeに前提条件とConvert Toに変換後のものを選択する。
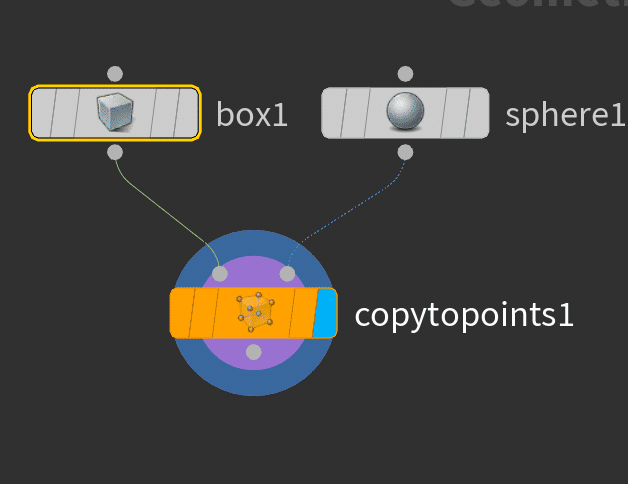
Copy To Points
input1 : copyもととなるgeometry
input2 : copy先となるpointを持ったもの。
input2のpointのある場所に対して、input1がcopyされる。
TouchDesignerでいうinstanceみたいな感じ。
内部ではattributeに反応しているため、copy先のpointを持ったオブジェクトのattributeを変更することでコピー先の位置や大きさを変更することができる。

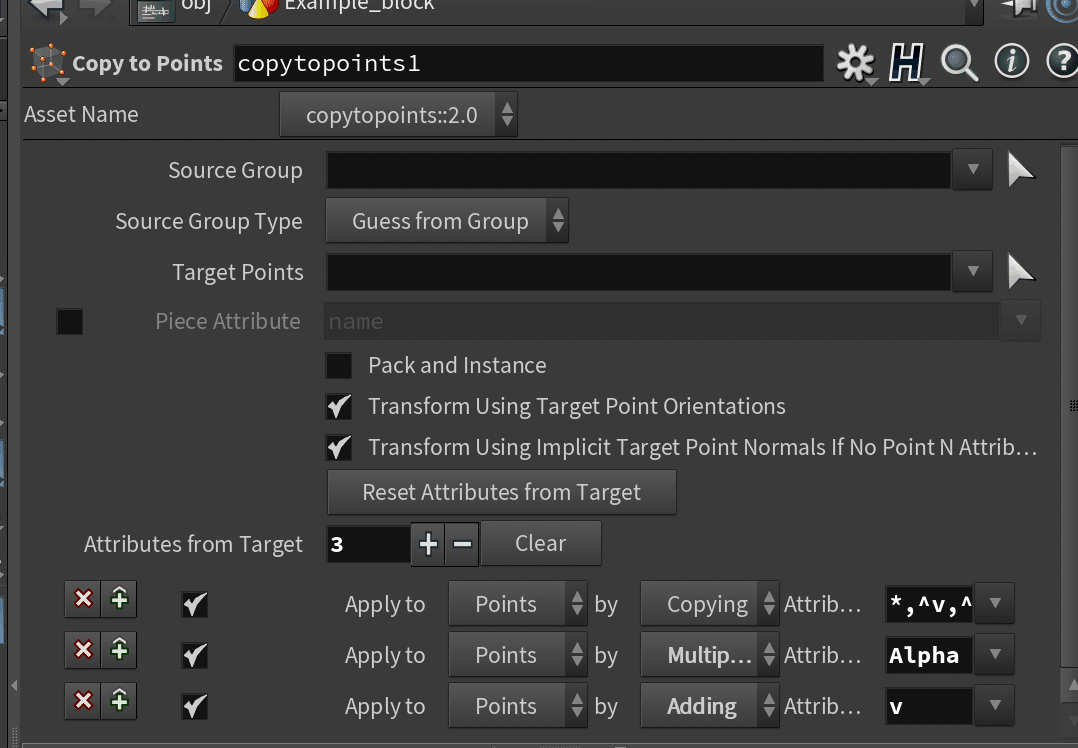
ジオメトリをポイント上にコピーまたはインスタンス化する時、Houdiniは目的のポイントから特定のアトリビュートを探し出して、コピー/インスタンス毎にカスタマイズを施します。例えば、コピー先のポイント上にpscaleアトリビュートを作成することで、各コピーのスケールを変更することができます。インスタンスのPointアトリビュートを参照してください。
別のソースジオメトリを別のポイントにコピーしたい場合、コピーしたいすべてのジオメトリが(1番目の入力の)ソースジオメトリ内にあれば、 Piece Attribute オプションでそれが可能です。
コピーをもっと制御したいのであれば、For-Eachループを使用することで、各コピーを個々に処理することができます。
input2側に以下のattributeを持たせると、各種変更ができる。
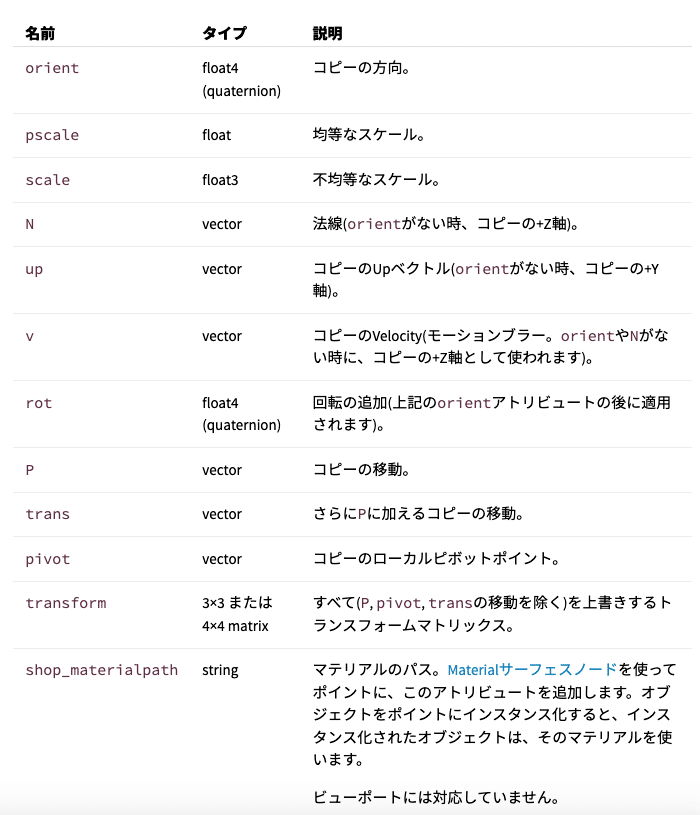
https://www.sidefx.com/ja/docs/houdini/copy/instanceattrs.html
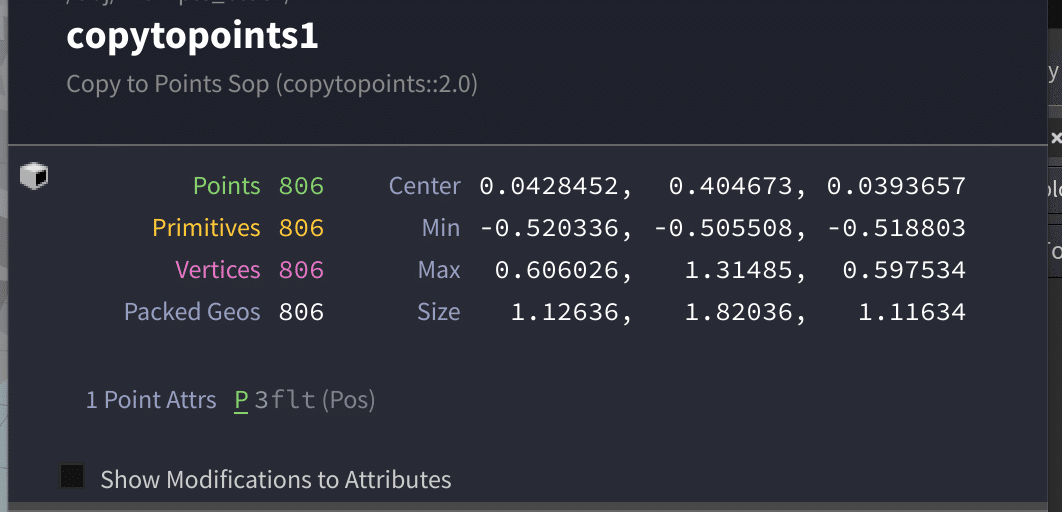
copyをしすぎると、やはりpolygonの数とかが増えてメモリを割いてしまうので、
Pack and Instanceを押すと、Copy元のpolygonやpointをコピーするように考えて処理させるのではなくて、geometry全体をcopyして計算させるように処理を始める。
instanceを作って処理させるようになる。

その際のinfoをみてみるとpolygonから Packed Geosという項目に変わっていることがわかる。
points from Volume
geometryやSDFなどから作られる体積を充満するようにpointをちりばめることができる。

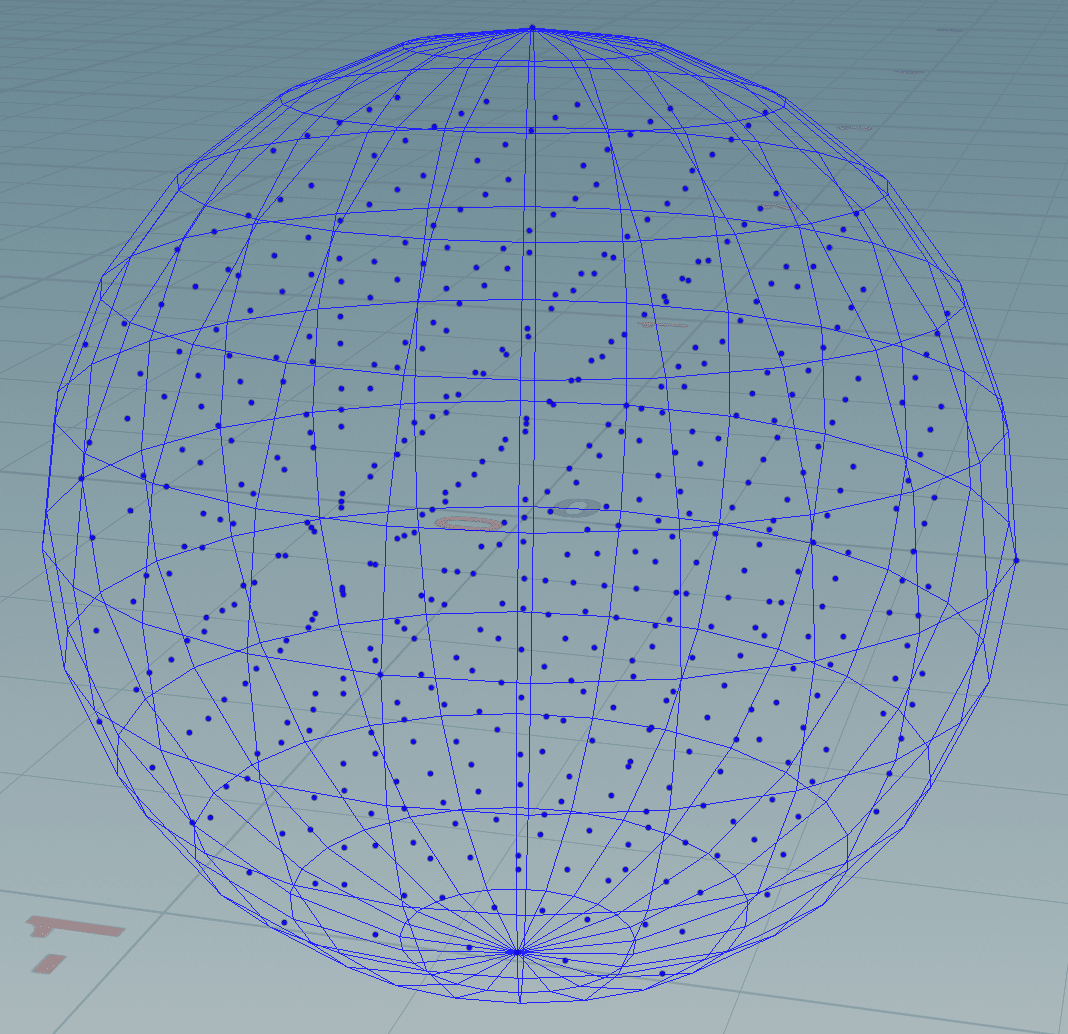
Source TYpe は Auto Detect / Geometry / Fog / Signed Distance Field(SDF)から選べる。
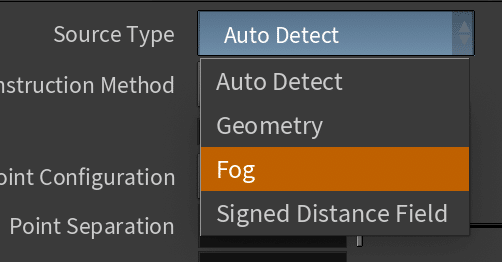
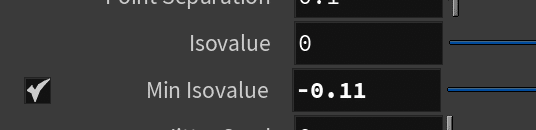
point separatioinはpointの間隔。
isovalueが面に対して外側領域に
min isovalueで内側から面に対して、
領域を決めることができる。
min isovalueを上げると内側が巣抜けの状態にすることもできる。

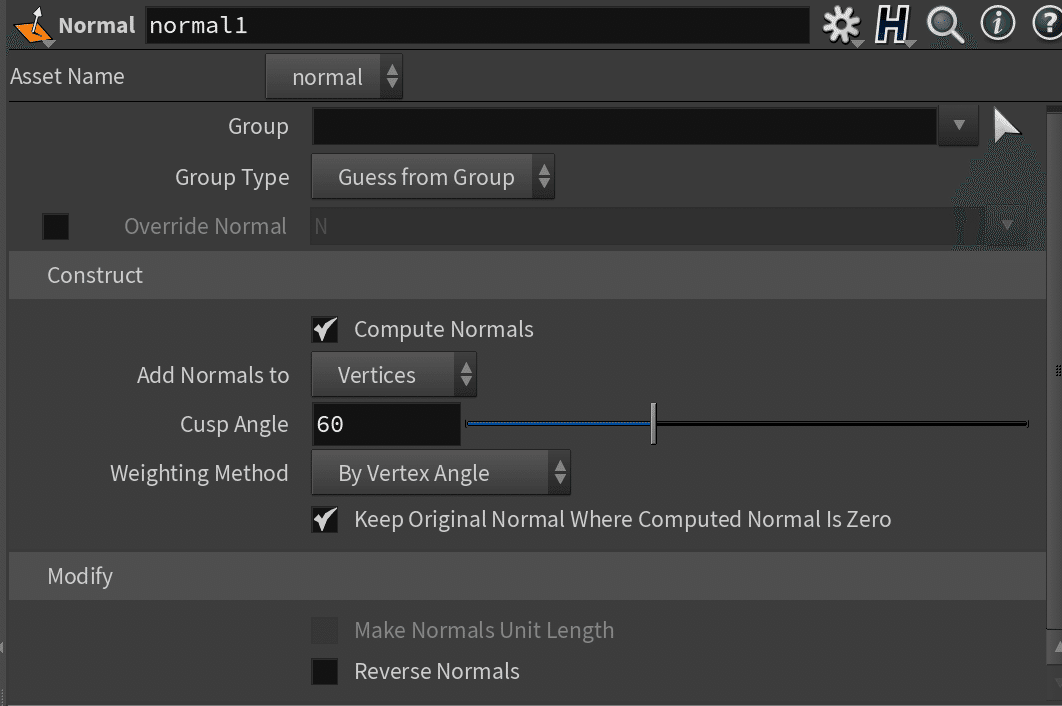
Normal
法線がおかしくなっていて、マテリアルがごちゃごちゃになっているときなどの法線の再計算を行いたいときに使える。
Block Begin / End
loop処理させるためのnode
Block beginとblock endの間に挟むことでloop処理がされる。
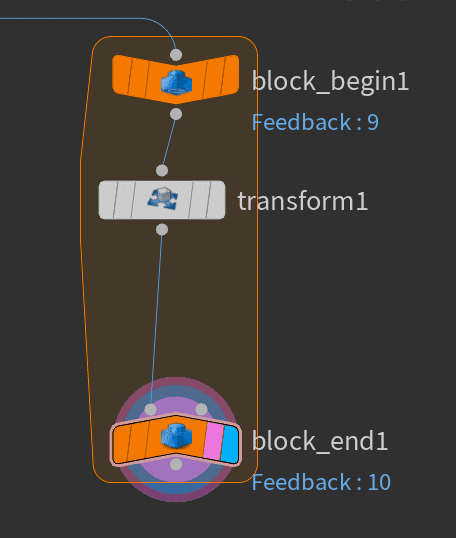
Block BeginにはどのBlock Endと対になっているかを示すために、
Block Pathにendのノードを指定してあげる。path or Drag and Dropで勝手にpathを打ち込んでくれる。
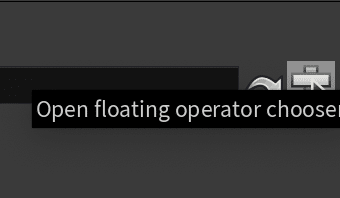
もしくは一番右側のopen floating operator choseを押すと、treeが現れて指定することもできる。
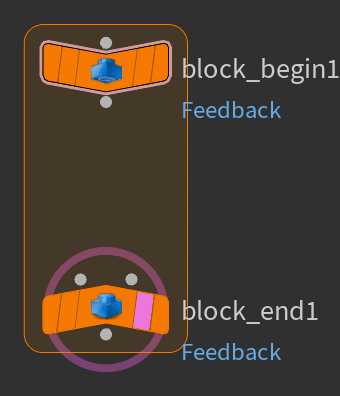
対になるとblock nodeに枠が発生する。
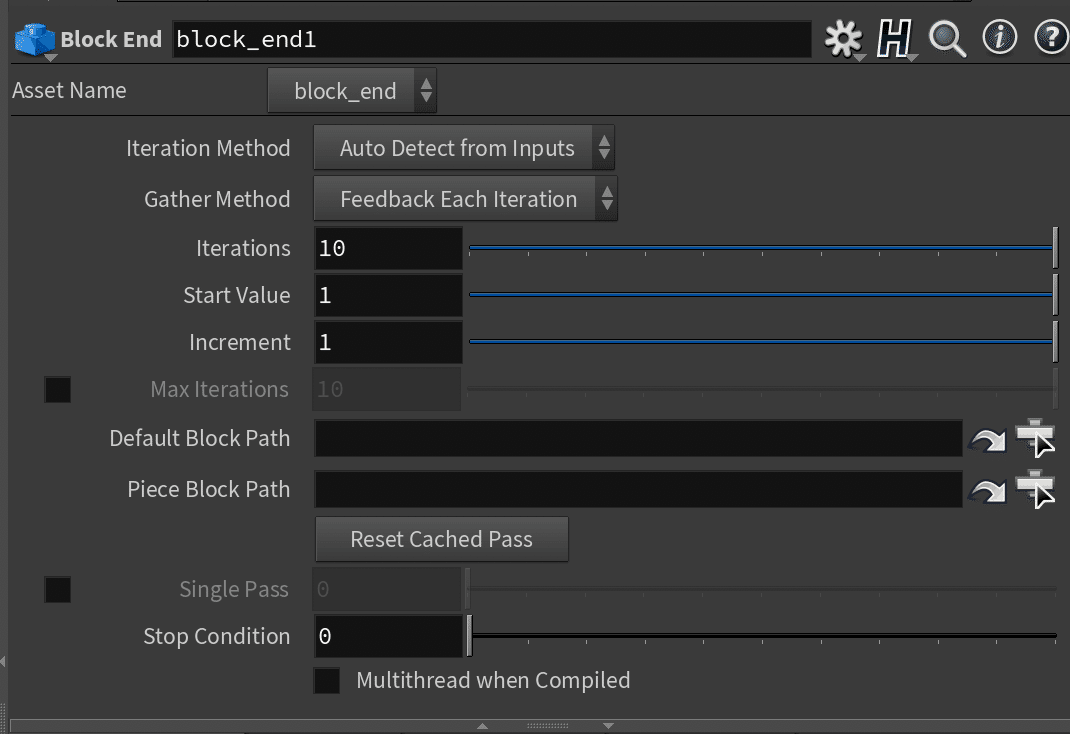
Block endの方でloopの細かい設定を決めることができて
iterations が繰り返しの数になる。
for文的な感じで start Valueと incrementを決めることもできる。詳しい使い方は下。
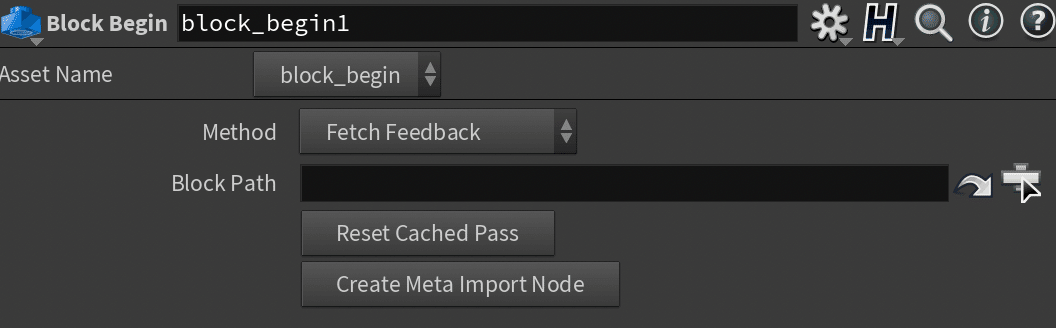
block beginの方で、
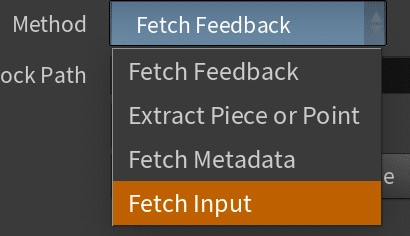
methodを選択することでどういうloop処理にするかを選べる。
デフォルトでの Fetch Feedbackはblock endまでいった処理が引き継がれるが、
Fetch Inputにすると、並列に毎度inputを参照しての処理が数回繰り返される。
Block endの方の Gather Methodも変更しなくてはいけない。
defaultでは Feedback Each Iteration, それぞれの繰り返しをフィードバックs流方法になっている。
merge Each iterationにすると、繰り返しそれぞれがマージされたoutを得られる。

incrementを使う方法
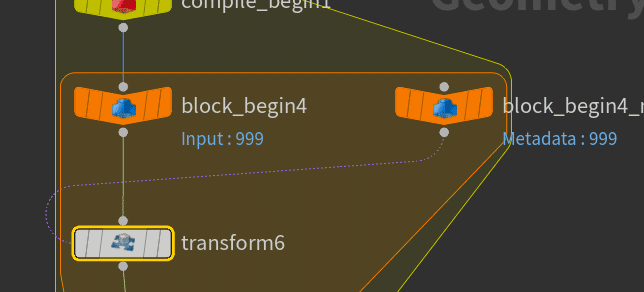
block beginを2つ作って、どちらも同じendに設定する
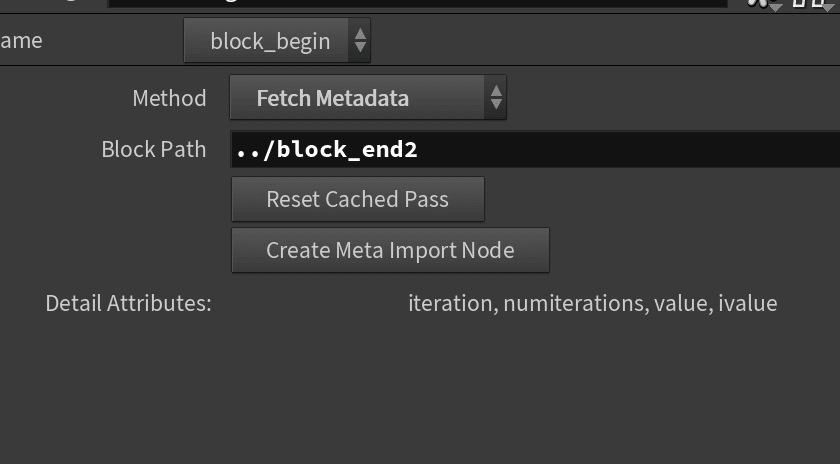
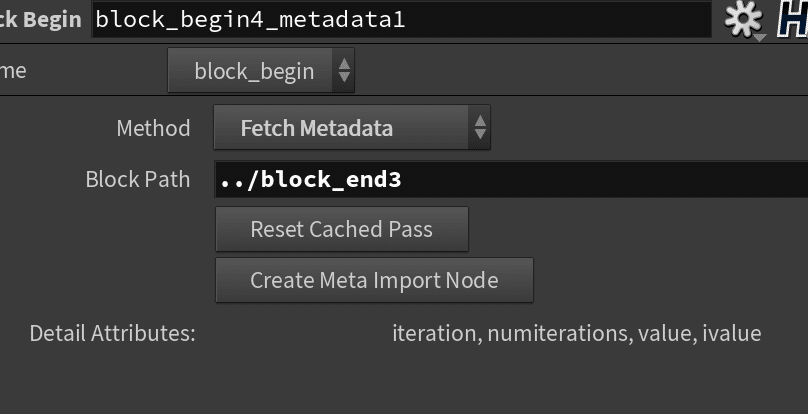
二個目のbeginの方には、Methodを Fetch Metadataに設定する。

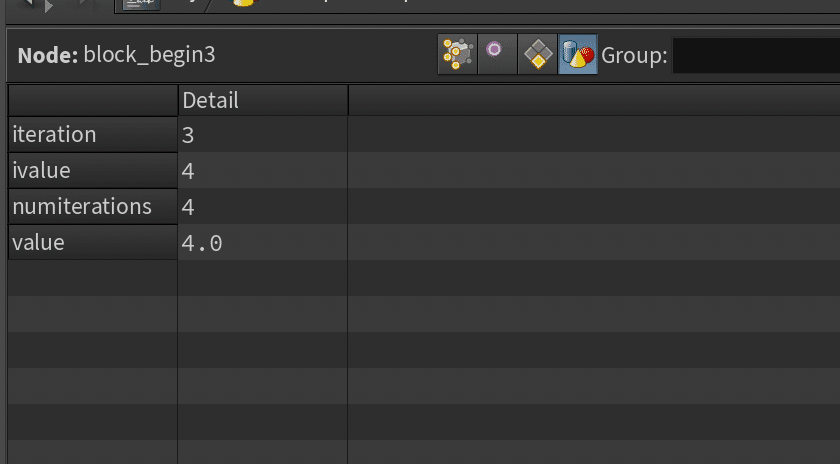
そうすると、Detail Attributes : iteration, numiterations , value , ivalueというDetailのattributeがbeginの方に追加されていることがわかる。
numiterationsがblock endで設定したiterationsの数となっている。繰り返し数。
iterationが今何回目の繰り返し処理中なのかを示している。
iterationは0スタートで numiterations-1までになっている。
valueは block endで与えた条件の Start Valueとincrementが足された状態となっている。for文的な。
ivalueは Valueを四捨五入した値が入っている。
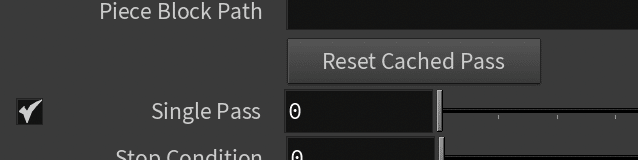
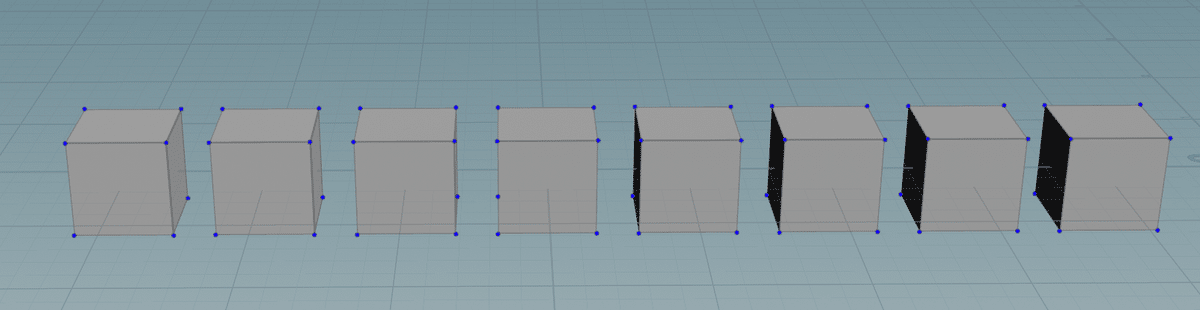
Single passをonにしてい、数値を動かすと途中段階のiteration、繰り返しのところを確認することができる。
debug用途に使える。
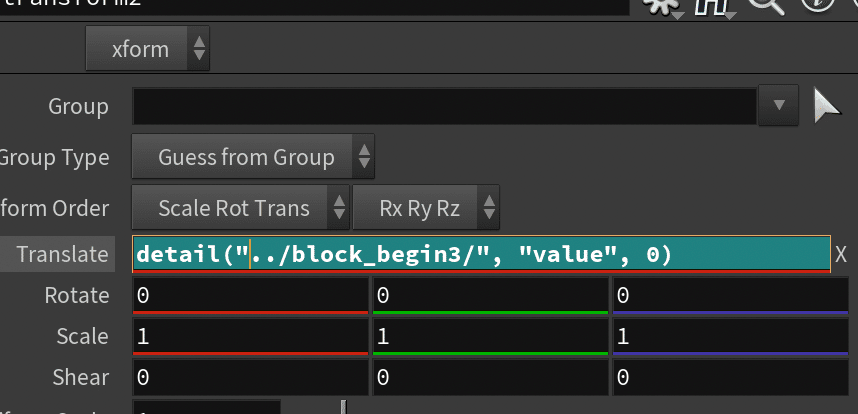
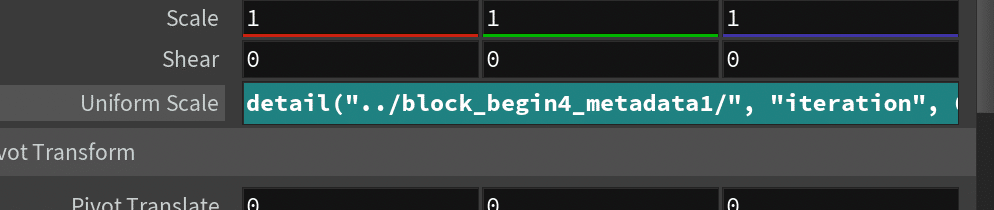
Transformとかの値にエクスプレッション でattributeを参照するように書いてあげれば、一定のアルゴリズムで複製的なこともできる。
Block Begin にてCreate Meta Import Nodeというものを押すと、
自動でFetch Metadataとblockendのパス指定を行ったblock beginを生成することができる。便利。
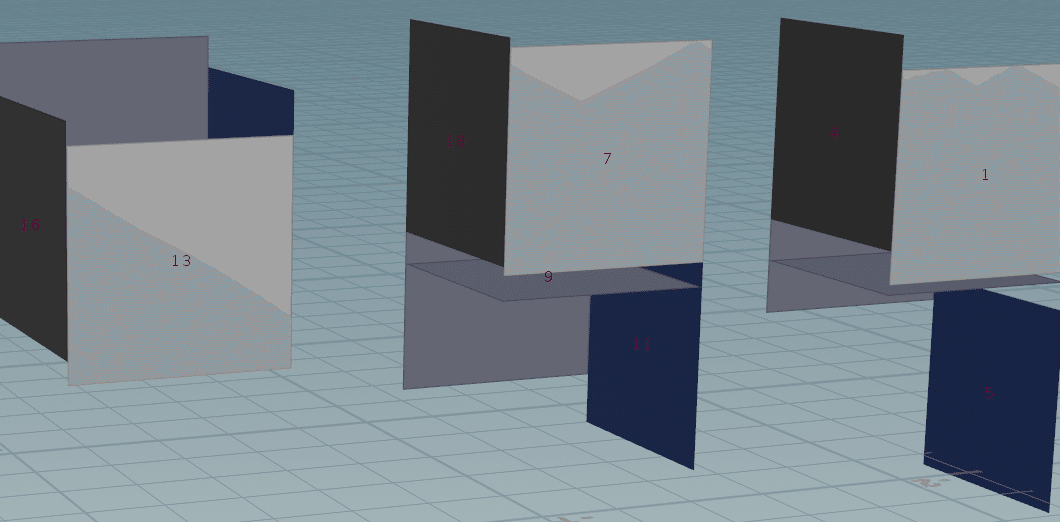
BeginのMethodのExtract Piece or Pointは
Piece or Pointで抽出するということで、PrimitiveやPoint単位においての繰り返し処理をしたいときに使える。

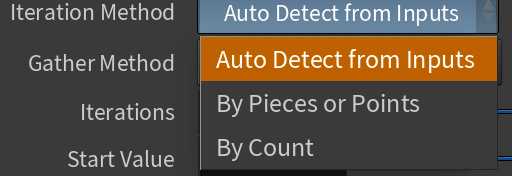
Endの iteration Methodを
デフォルトで Auto Detect from Inputs これは、自動で検出してくれる
ByCountが今まで見てきたやつ。
By Pieces or Pointsにすると、UIが少し変わり
By Pieces or Pointにすると、
Piecce Elementsを point / Primitiveにすればそれぞれ単位での繰り返し処理を行ってくれる。
iteration一回目が1つ目のPrimitive(面)など….etc
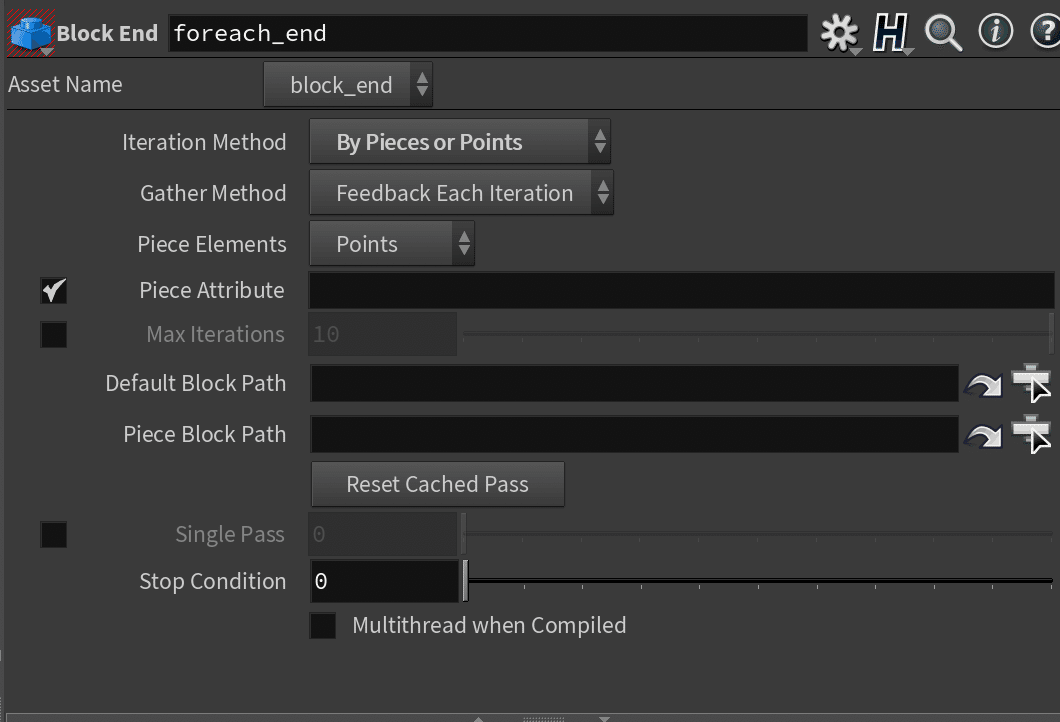
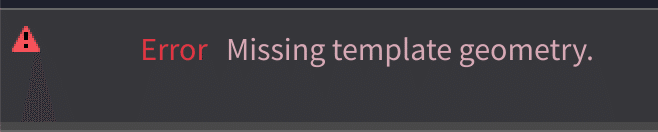
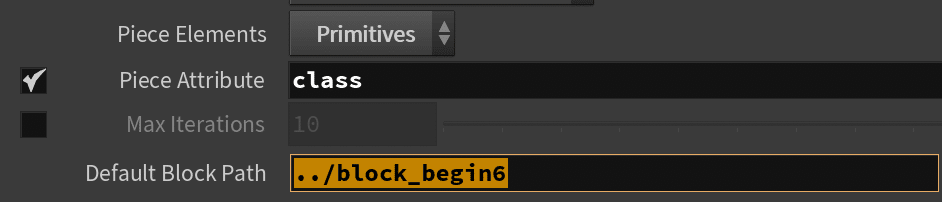
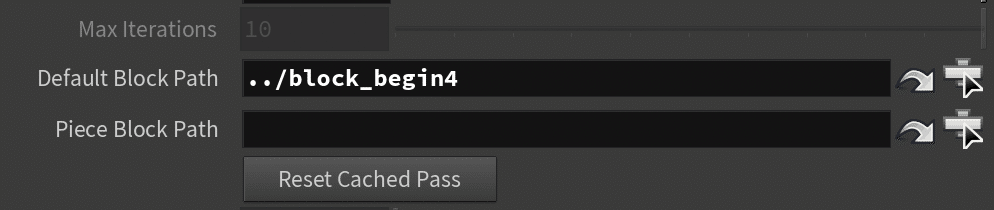
Missing Template Geometryというエラーが出る場合は、
Default Block Path / Piece Block Pathを Block Beginに選択してあげるとうまくいく。

Piece Attributeでattributeを指定すると、そのattributeが同じものを一塊のPirimitive / Pointとして認識して繰り返し処理をするようになる。
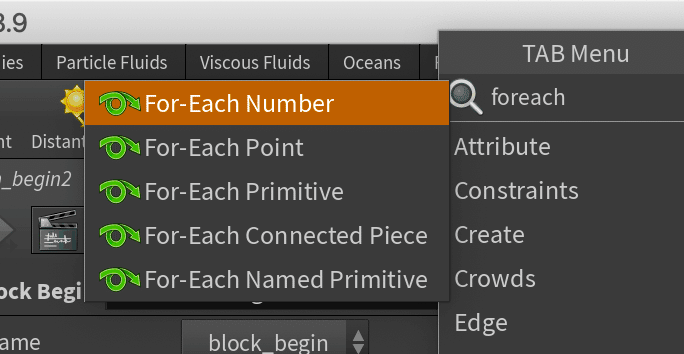
node検索で、foreachと検索すると、似たようなことをデフォルトで設定してくれているblock begin/endを出してくれるやつがある。便利。
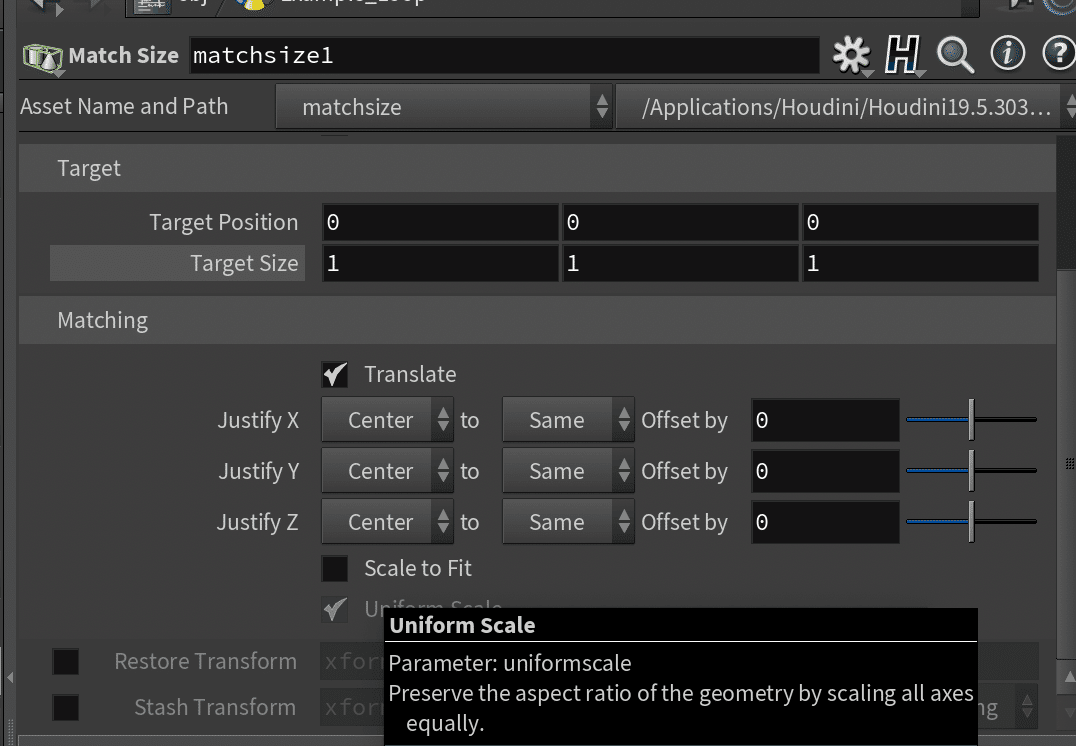
Match Size
オブジェクトの大きさを指定したサイズに自動調整してくれる。
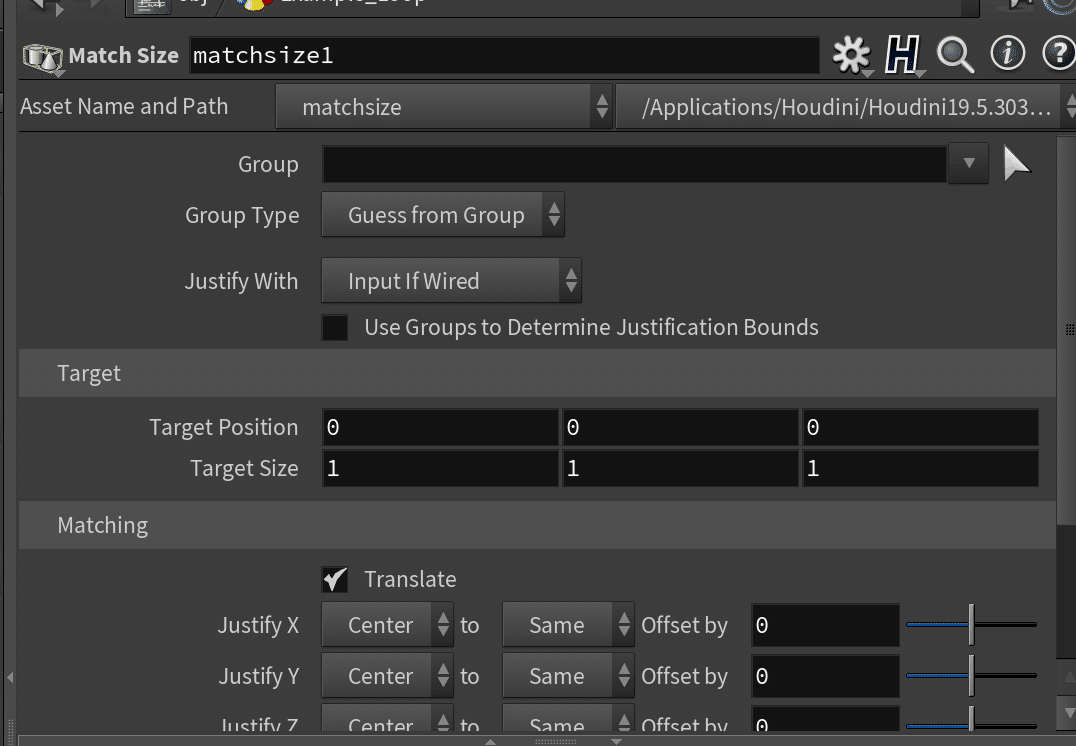
Matching内の Scale to Fitを押すと、Target Size / Positionに設定したようにmatchしてくれる。
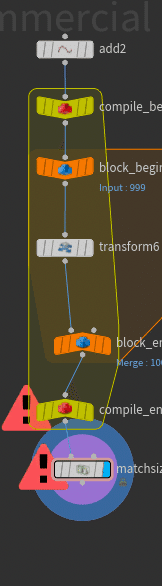
Compile Begin / End
Compileをすると、ある程度のノードの処理群を一度計算済みにすることができる。
コンパイルしたい処理群をcompileのbeginとendで囲んであげることで基本はおk
ただしblock begin/endのような処理をコンパイルする際に具体的なinputここでいうadd2みたいなものが想定されないといけないが、compileの中には含まれないのでinputを定義できてない的なエラーが発生する。
その場合は、block endの中にある default block pathにbeginをせってしてあげるとエラーが止まる。
ESCキーで一旦コンパイル処理を停止することができる。
コンパイルノードの中でコンパイルブロックに入っていないノードからの参照がある場合(以下のような)、コンパイル処理がうまくいかない。
参照しているノードにおいて parameter windowから 歯車マーク > Add Spare InputでSpare inputという項目を出現させる。
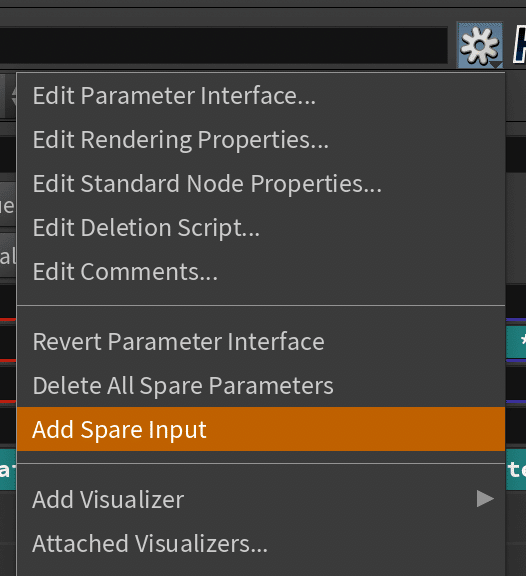

ここに参照元のノードpathを指定してあげると

Compile Blockの一部として認識されて処理されるようになる。
ただこれでもエラーが消えずに、expressionとして参照している場合は、
ノードパスを-1と指定してあげるとspare inputが指定されて処理がうまくいくようになる。

Block endに存在する、 Multithread when Compiledにチェックを入れると、
並列化処理が行える時は、compileで早く処理してくれるようになる。
block beginのmethod が Fetch Feedbackになっているときは意味をなさない。

コンパイルブロックは、制限事項がたくさんあります。
その中でもよく困るのが、「名前によるジオメトリの参照の不可」と「ノードの直接入力の不可」です。
「名前によるジオメトリの参照の不可」は例えば、npoints(“/obj/sphere1”)のように、ノードパスを指定しジオメトリ情報を取得するヤツです。
「ノードの直接入力の不可」は例えば、npoints(0)って書いて一番目の入力からジオメトリ情報を取得するヤツです。
これを封じられたら、エクスプレッションでのノードの参照はほぼ不可能と言っても過言ではないかと。
このままでは出来ないことが多すぎるってんで、対策として用意されたのが”Spare Input”だとか、・・・そうでないとか。
Spare Inputを使うことで、無事、他のノードからジオメトリ情報を読み込め、それをエクスプレッションでも利用できるようになったと。
めでたしめでたし。
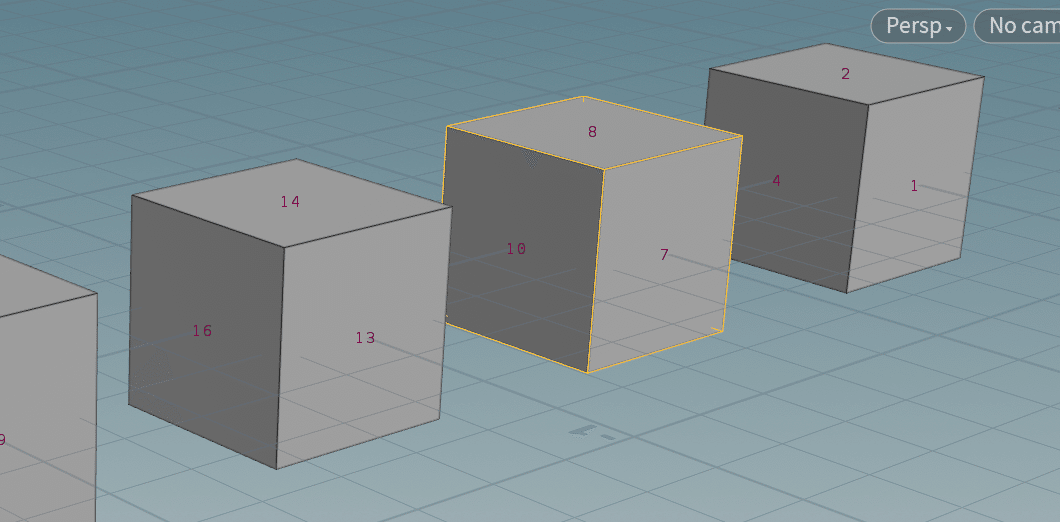
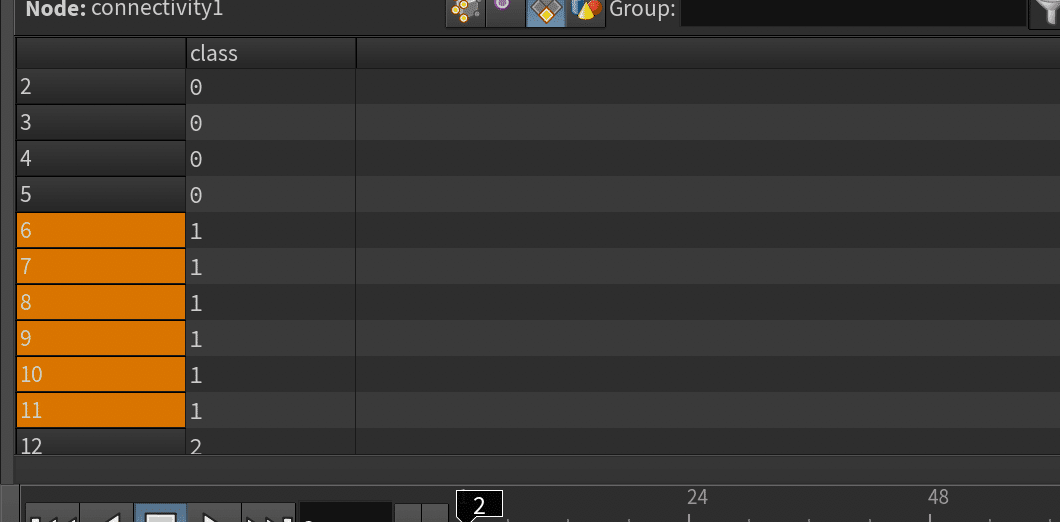
Connectivity
トポロジーとして繋がっているPrimitive / Pointに対して同じ値のattributeを付与するnode
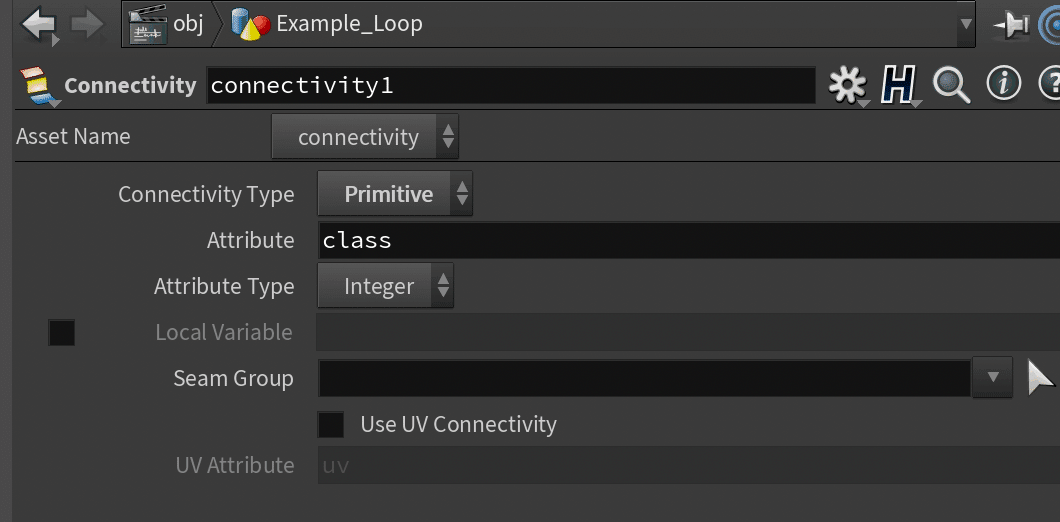
Connectivity Typeには Point / Primitiveが選べる。
Attributeにはそのこれから与えたいattributeの名前 defaultでclassになっている。
Attributeが integer / stringか選べる。
同じ物体として繋がっていると判定されると,
そのもの同士を区別できるようにclassのattributeが与えられる。
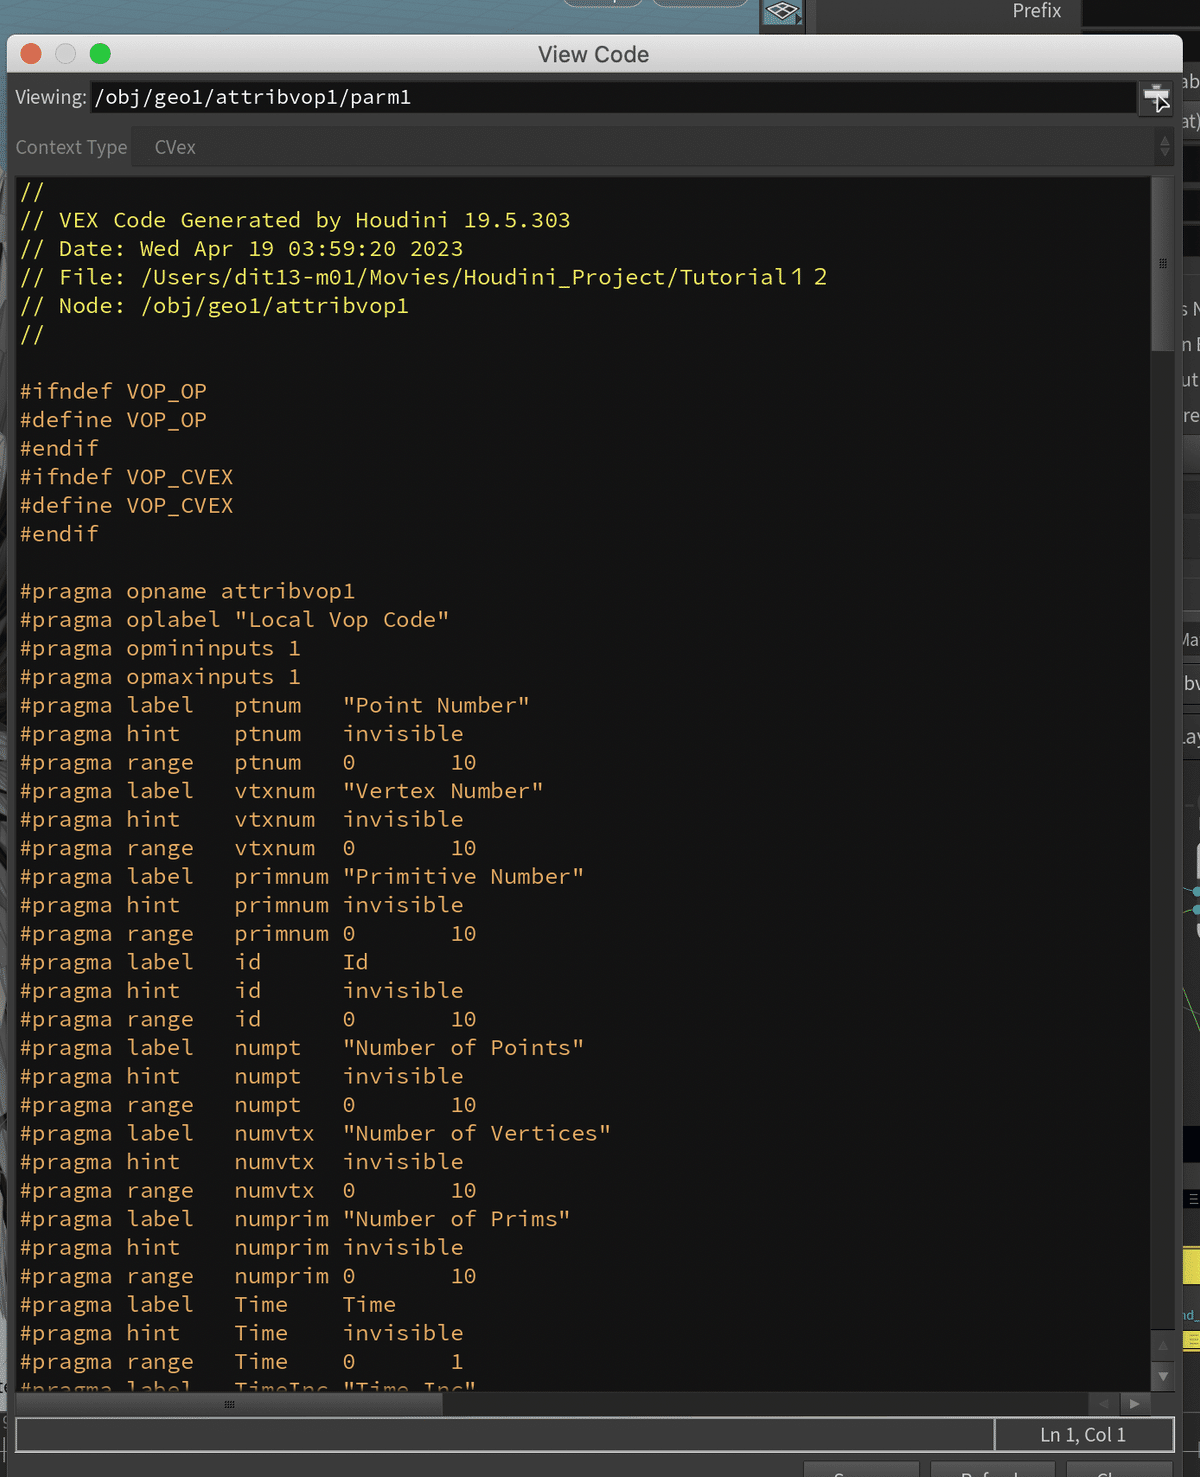
VEX / VOP
VOP = VEX Operatorの略
VEX = Vector Expressionの略
VOPの中ではVEX Edit内にて、nodeベースでnodeをカスタマイズすることができる。
イメージとしてはカスタムノードを作れるような機能。
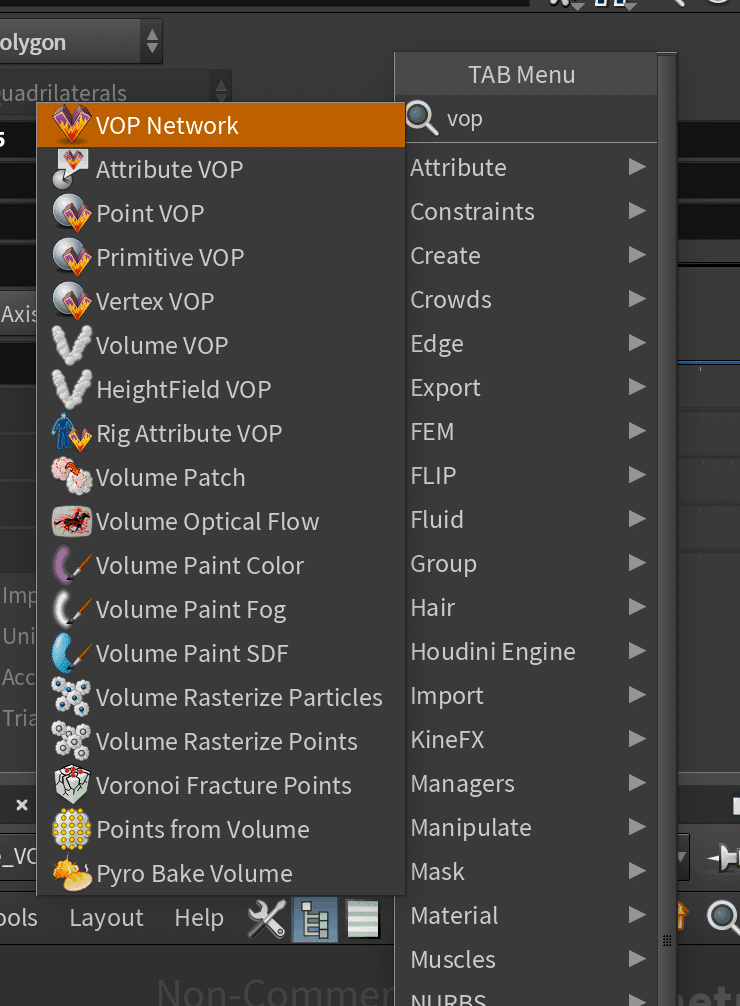
これらは内部て的にVEXというコードで動いている。
VOP内で繋いだノードたちはVEXで記述することと同じことを意味して相互に影響しあっている。
Attribute VOP
attributeをnodeベースで処理して、計算することができる。
一番左のinputにSphereなどのGeometry系を繋ぐ
attribute VOPをダブルクリックすると内部構造に入ることができる。
tabキーを押すとVEXに対応したノードが色々追加されている。
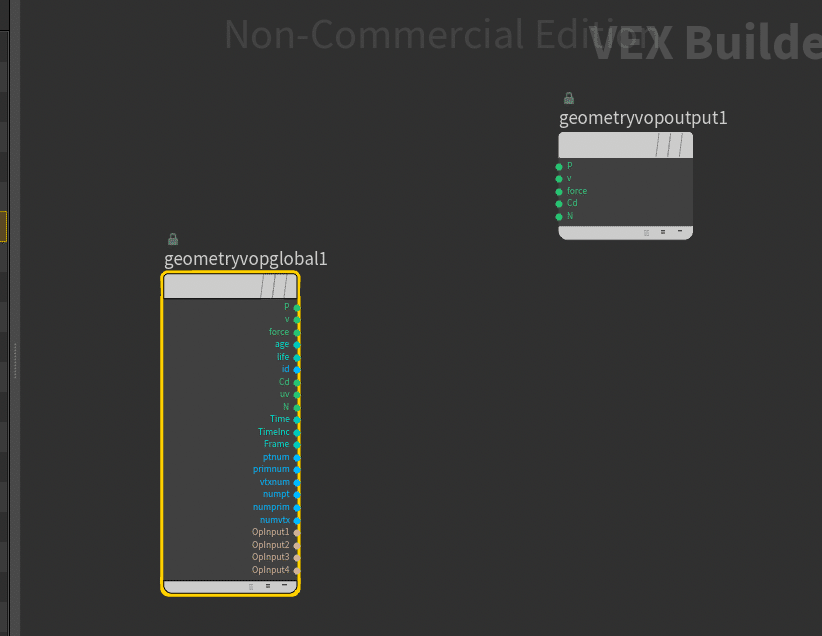
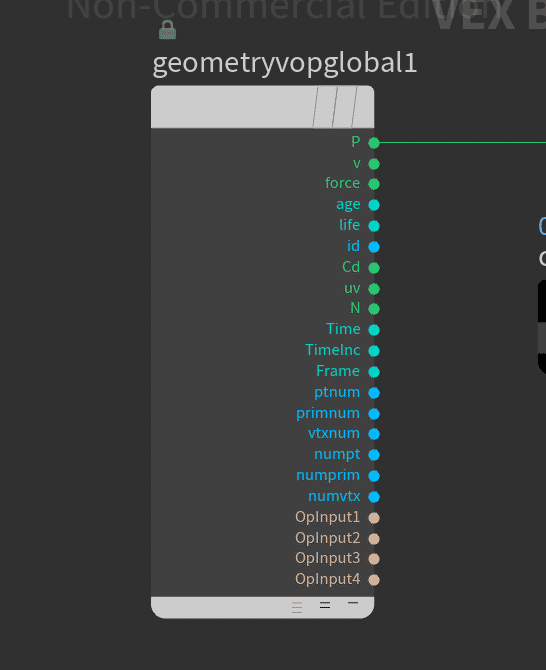
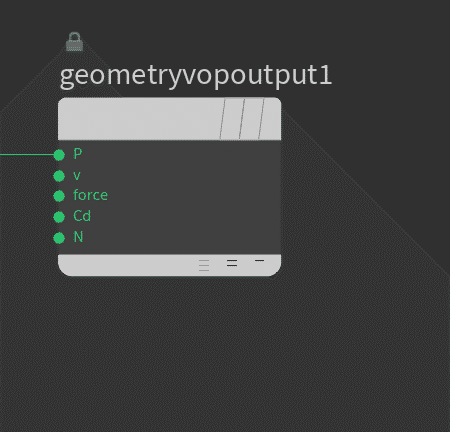
geometryvopglobalという名前でinputされたもののattributeを持っているものが先頭にできる。
geometryvopoutputにつなげることでそのattributeに反映させることができる。
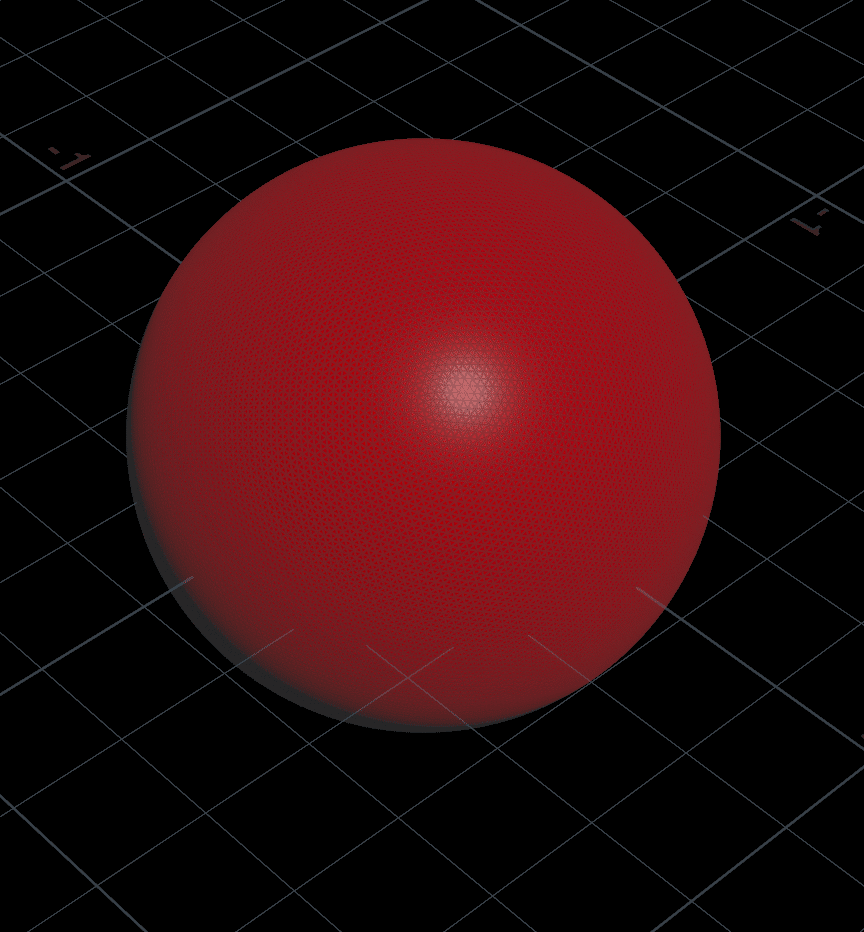
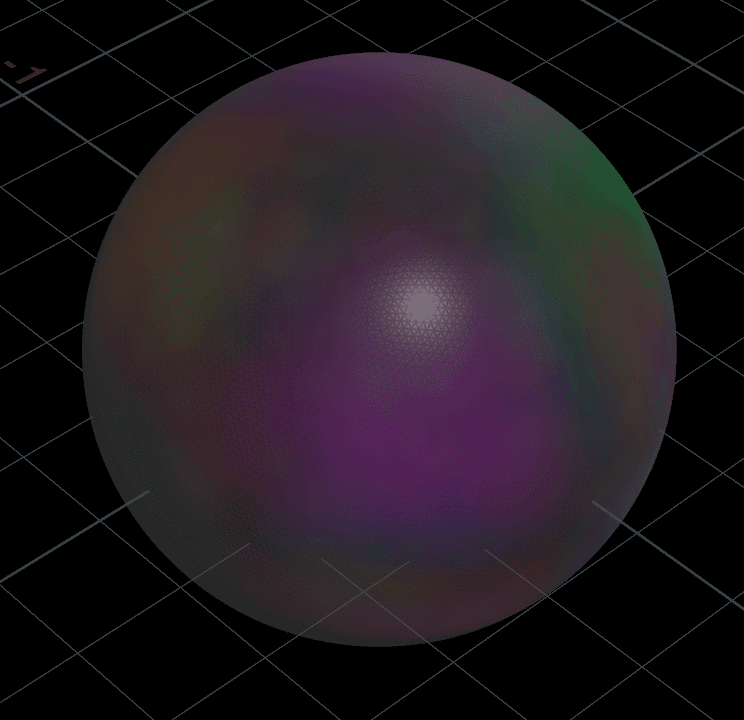
Pに繋げば例えば、移動されるし、Cdに三次元配列を入れれば色を変更することができる。
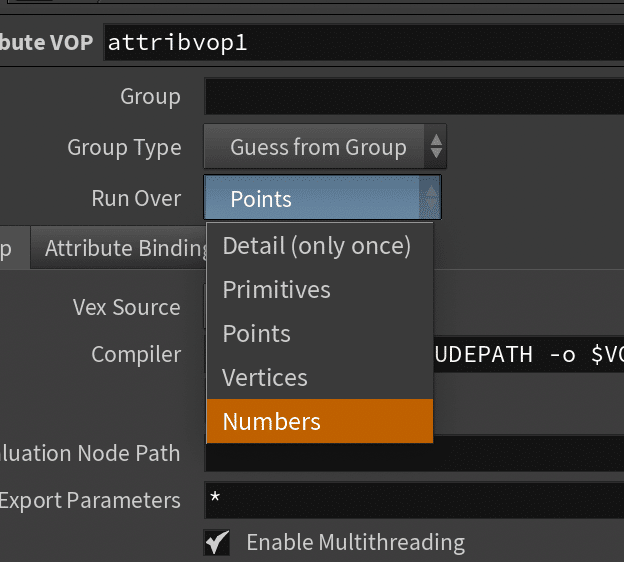
Attribute VOPのRun OverがPointsになっていれば、Point単位のattribute、Premitive単位のattributeなど切り替えることができる。

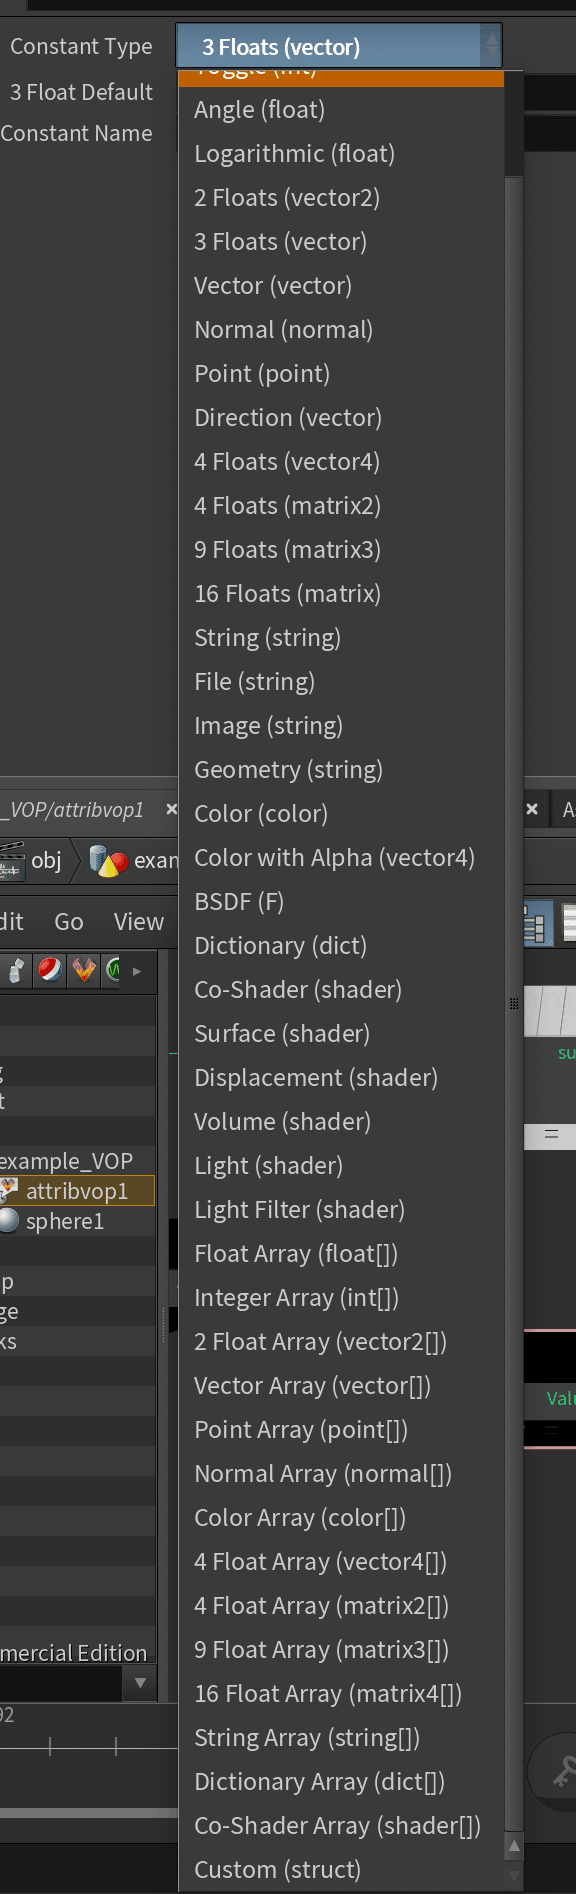
Constant
定数生成
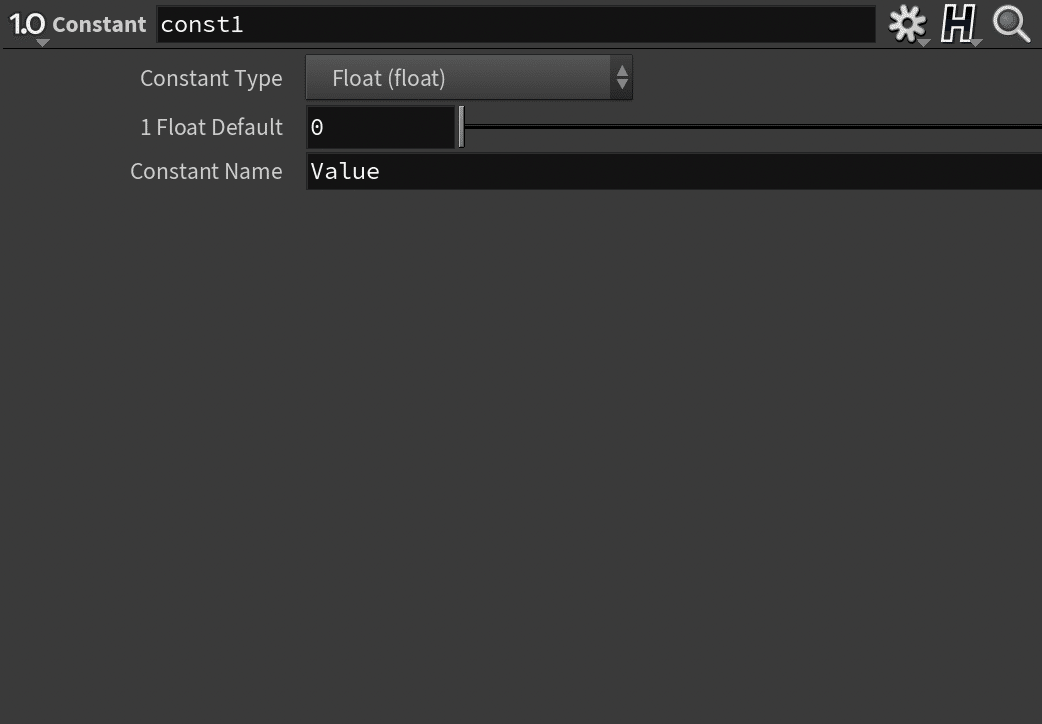
Constant Typeは色々選べる。
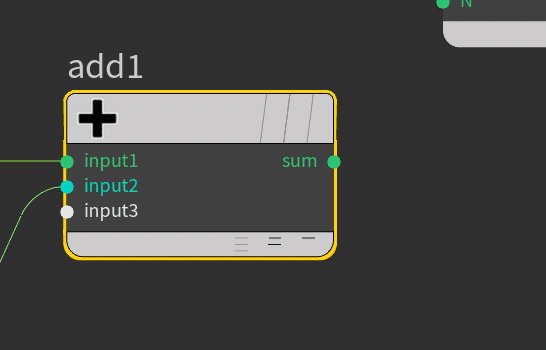
add
inputに挿したやつの合計を出力
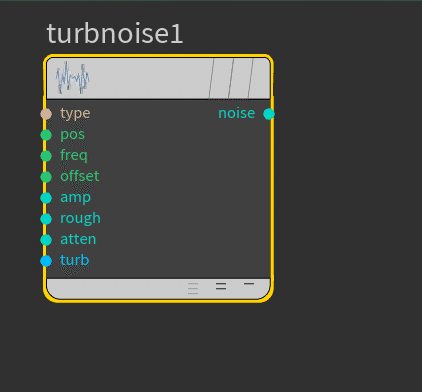
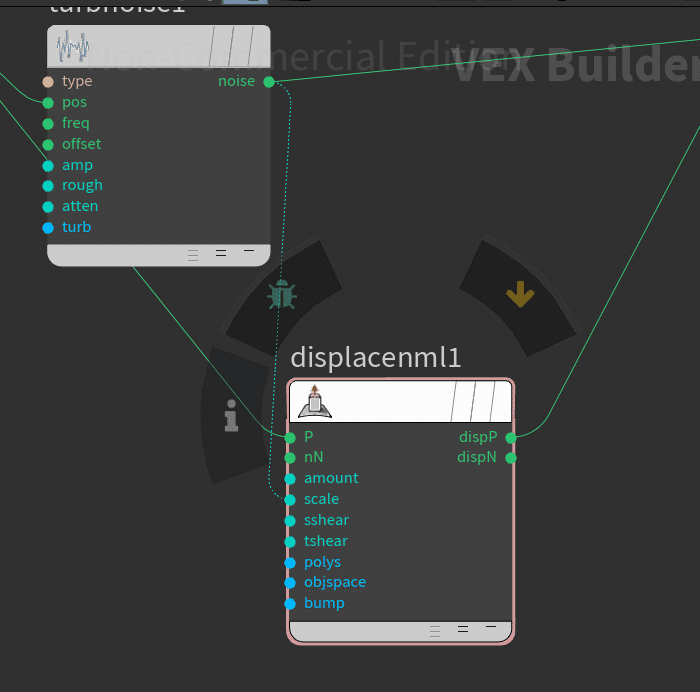
Turbulent Noise
Noise関数を構成するパラメーターを設定できる。
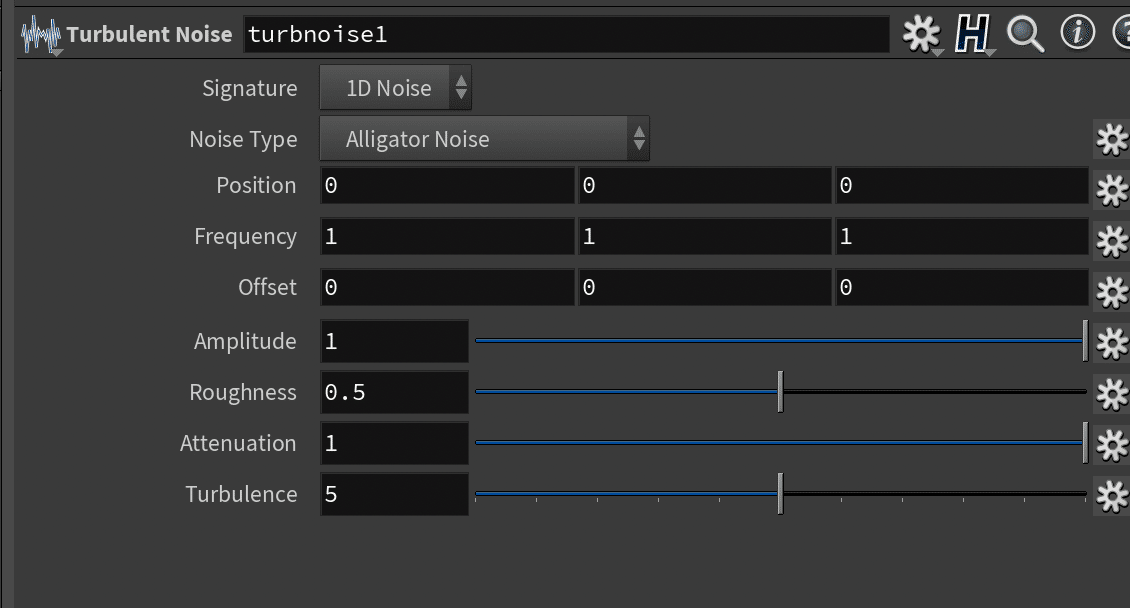
Signatureからは1D Noise、3D Noiseから選べる。
Noise typeは以下から選べる
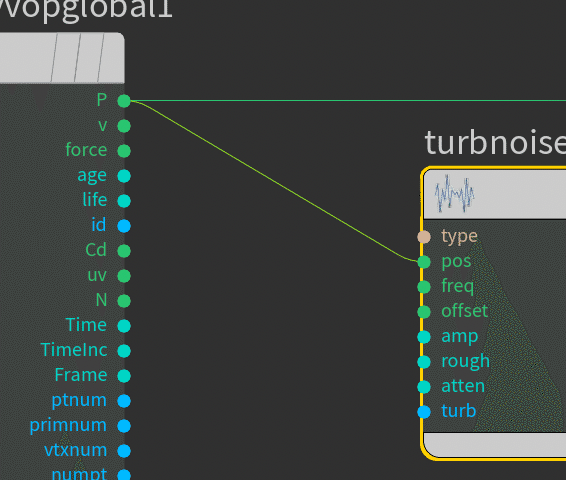
Point単位の Pをturbulent Noiseのposに入れるとpoint単位にNoise関数のpositionに反映されて、出力される
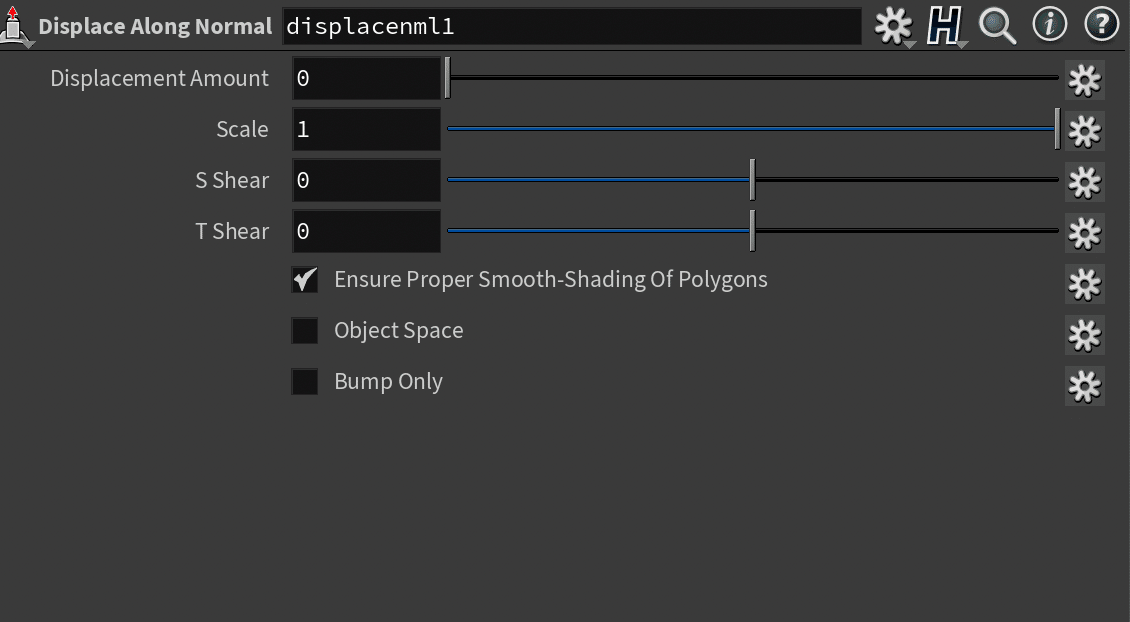
Displace Along Normal
法線方向に沿って、displaceしてくれる。
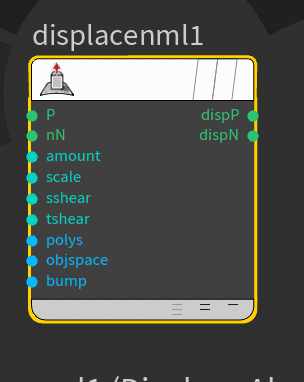
Pを入れると、Pの法線方向にディスプレイしてくれる。
dispPは動かされたpositionを返してくれる。
Displacement Amountを動かすとdisplaceされていく。
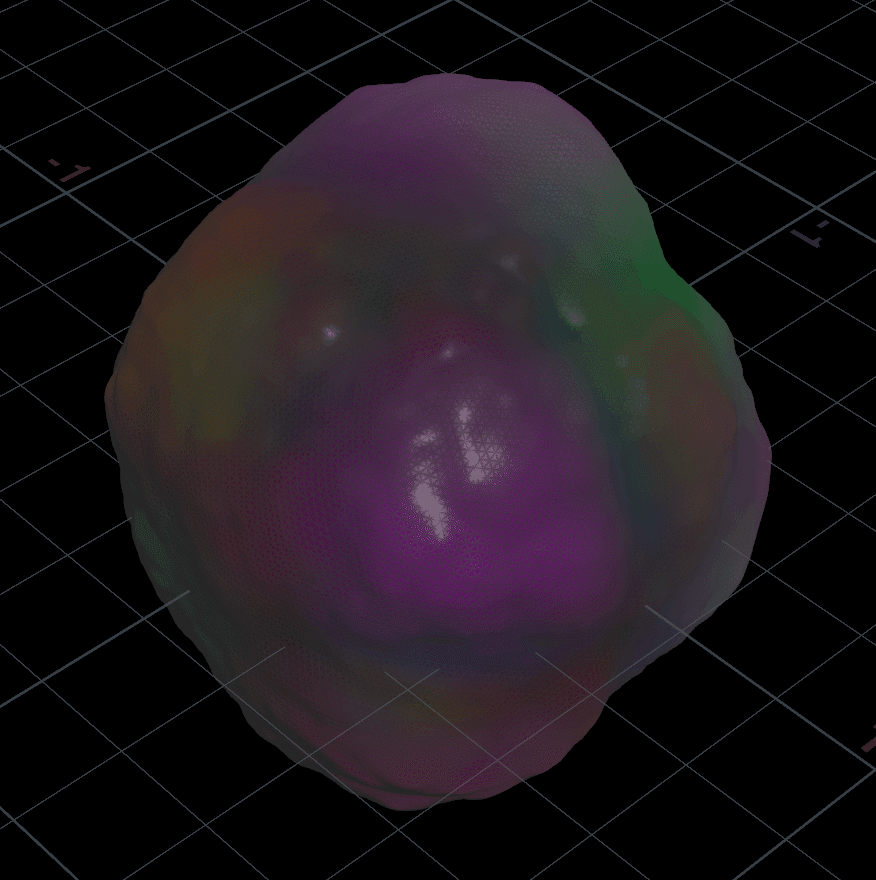
NoiseなどをScaleなどに入れてdispPをPに入れると
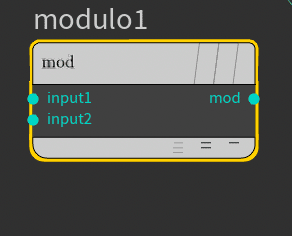
Modulo
モジュロ演算(%)ができる。
input2がパラメーターのdivisorにあたる。
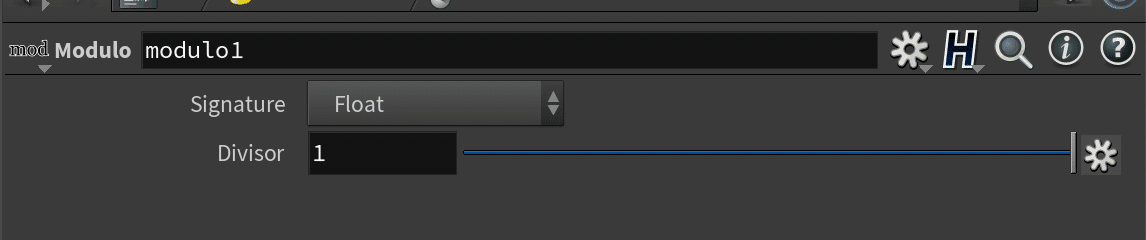
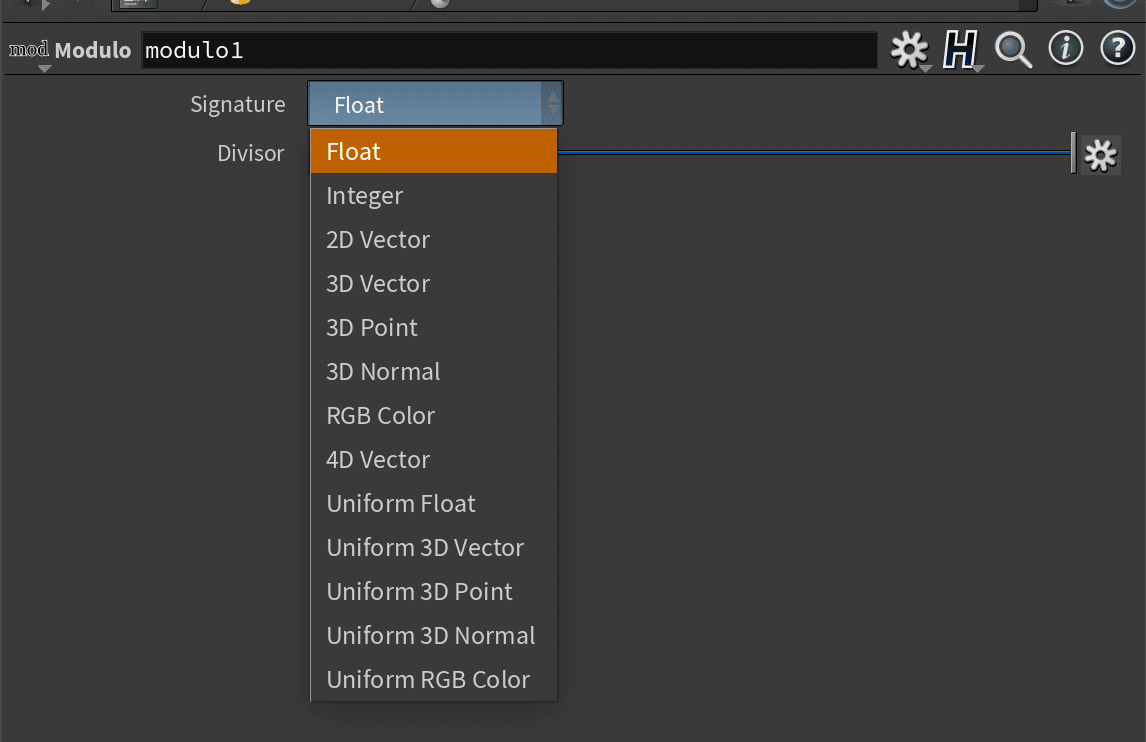
Signatureで型を選べる。
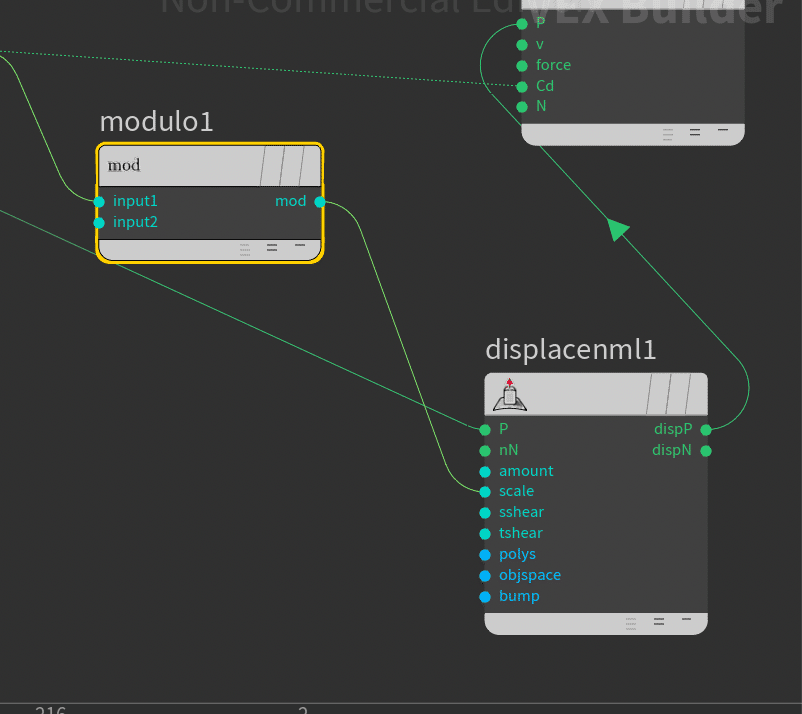
Noiseからきた値をmoduloして、displaceのscaleとかに入れると繰り返しが起きて、ノコギリ系になる。
divide
単純に割り算。
Parameter
Parameter系列を追加すると、それを内包しているVOPのparameterに出現してそっちで調整することができる。
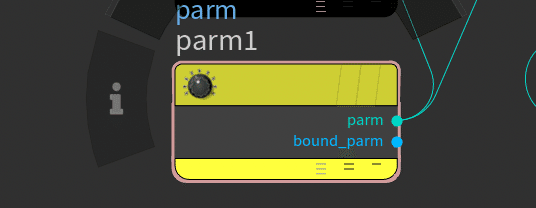
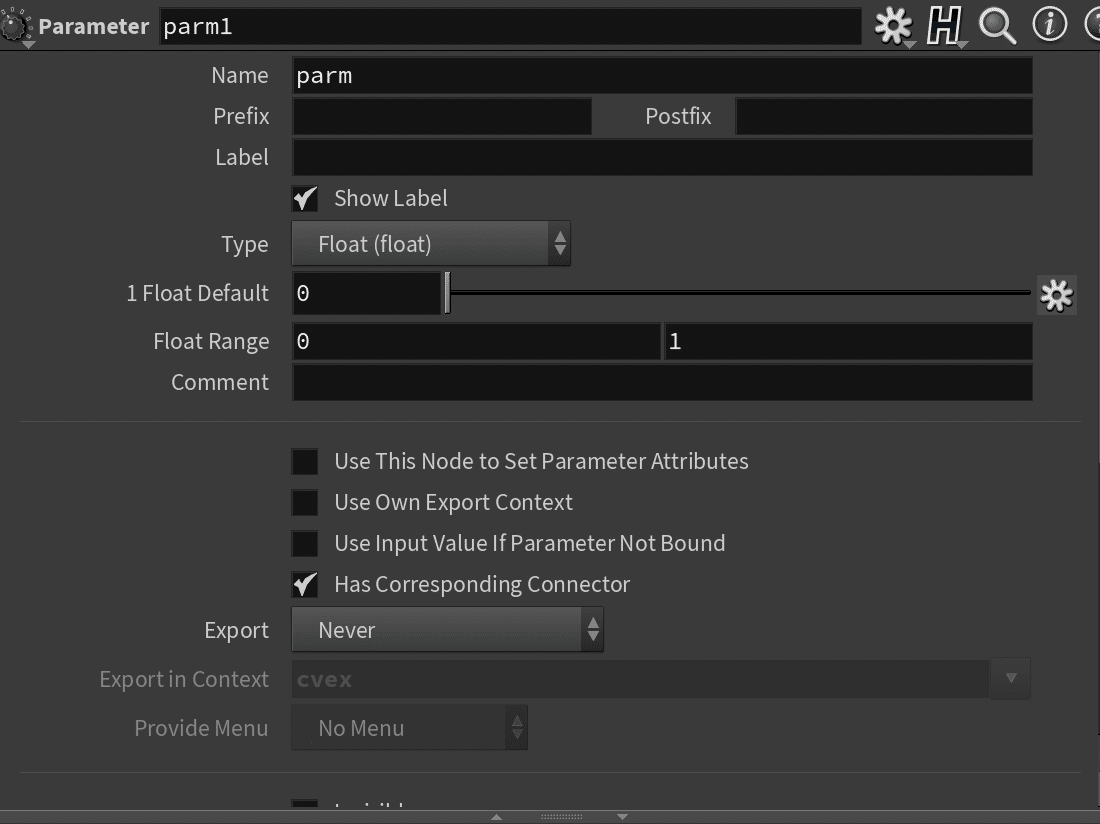
VOP内のparameterにparmとして追加される。

デフォルトでnameがparmになっているが、任意の名前に帰ることで親VOPのところに出現するparameterの名前を変更することができる。
ここは内部的なVEXの中の変数名としても使われるため、一部の文字制限のルールを守らないといけない。スペースを開けてはいけないなど。


LabelにはVEXの中では変数名として使われずにVOPのparameterの名前だけのインターフェースの名前として使われる。

そのため、ある程度好きな名前をつけれる。

Promote Paramter
parameterをたくさん手動で作ってもいいが、各ノードにある右側の歯車マークより
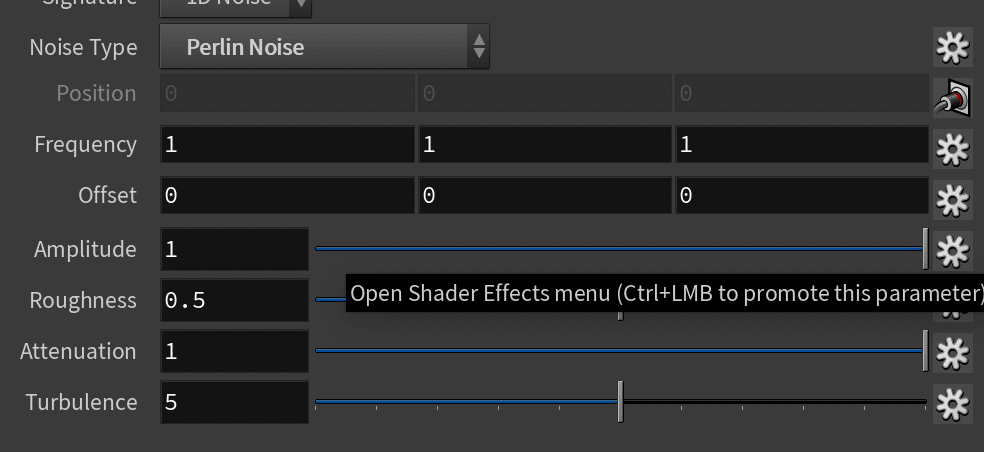
Promote Parmaterを押すと、
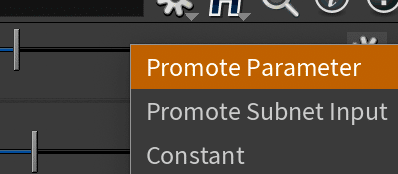
nodeのinputにぴょこってUIがでる。
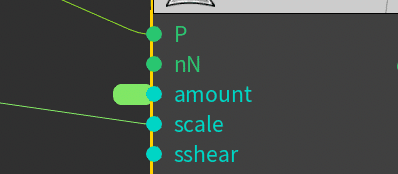
ダブルクリックすると、parmeter nodeが出現する。
つまり、勝手にparameter nodeを作ってくれる便利機能
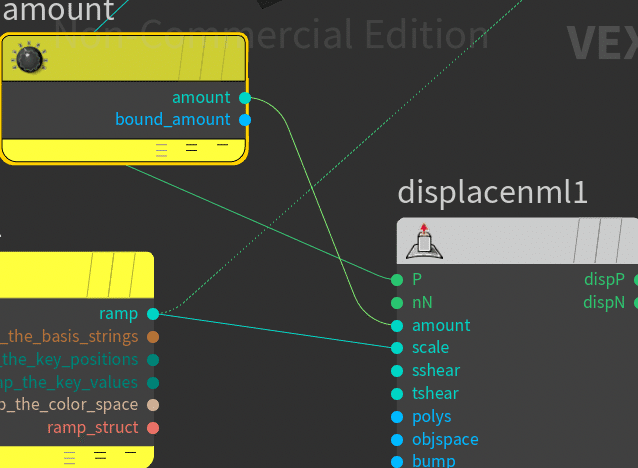
Ramp parameter
inputに0~1の値を受けて、remapする。
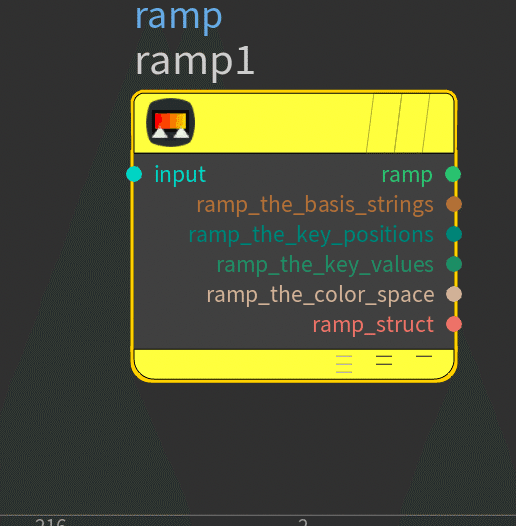
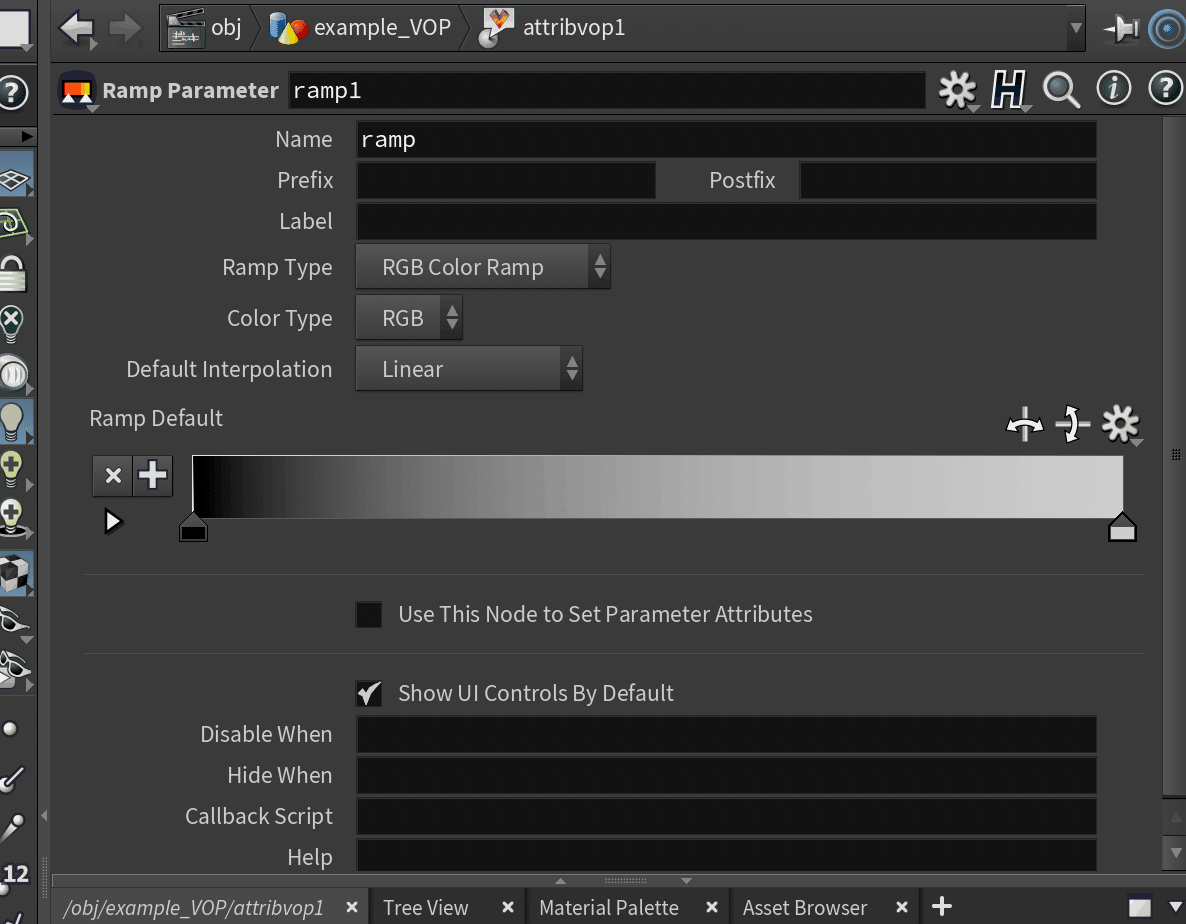
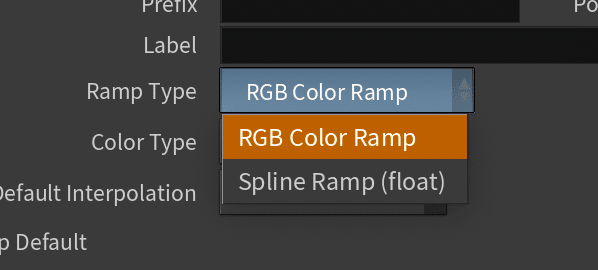
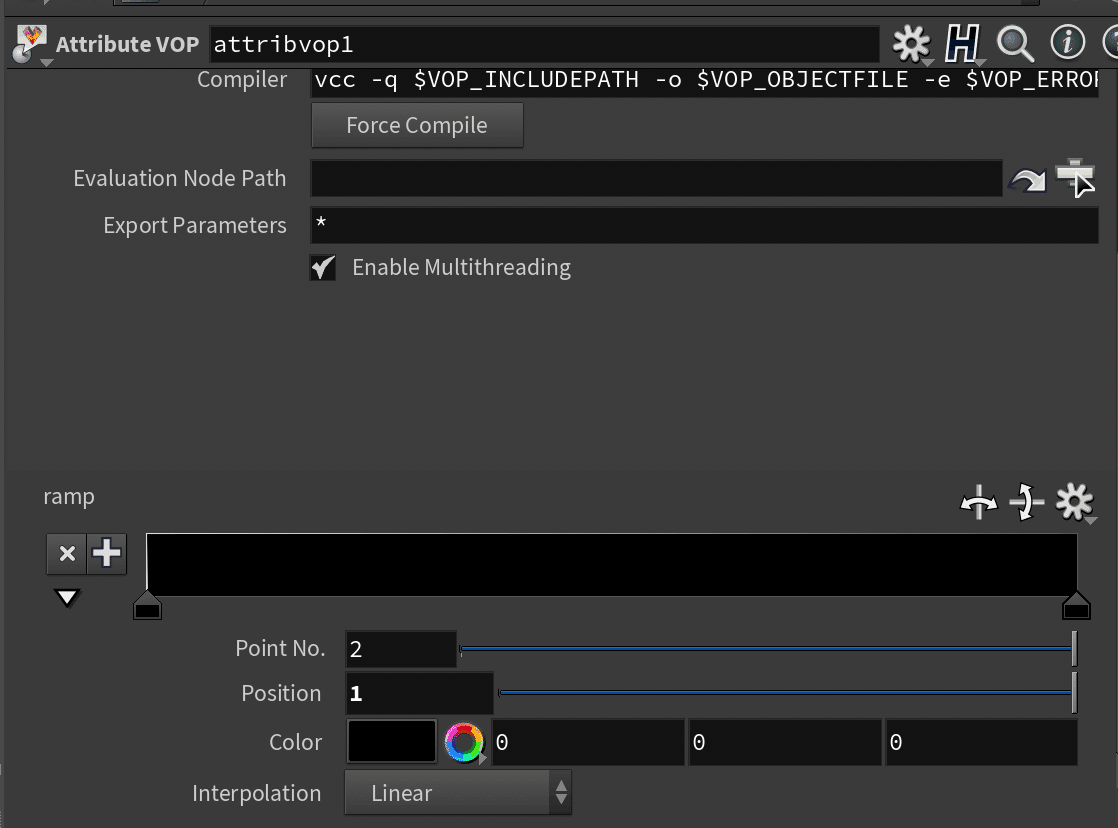
Ramp Typeyり、RGB Color Ramp or Spline Ramp(float)が選べる。
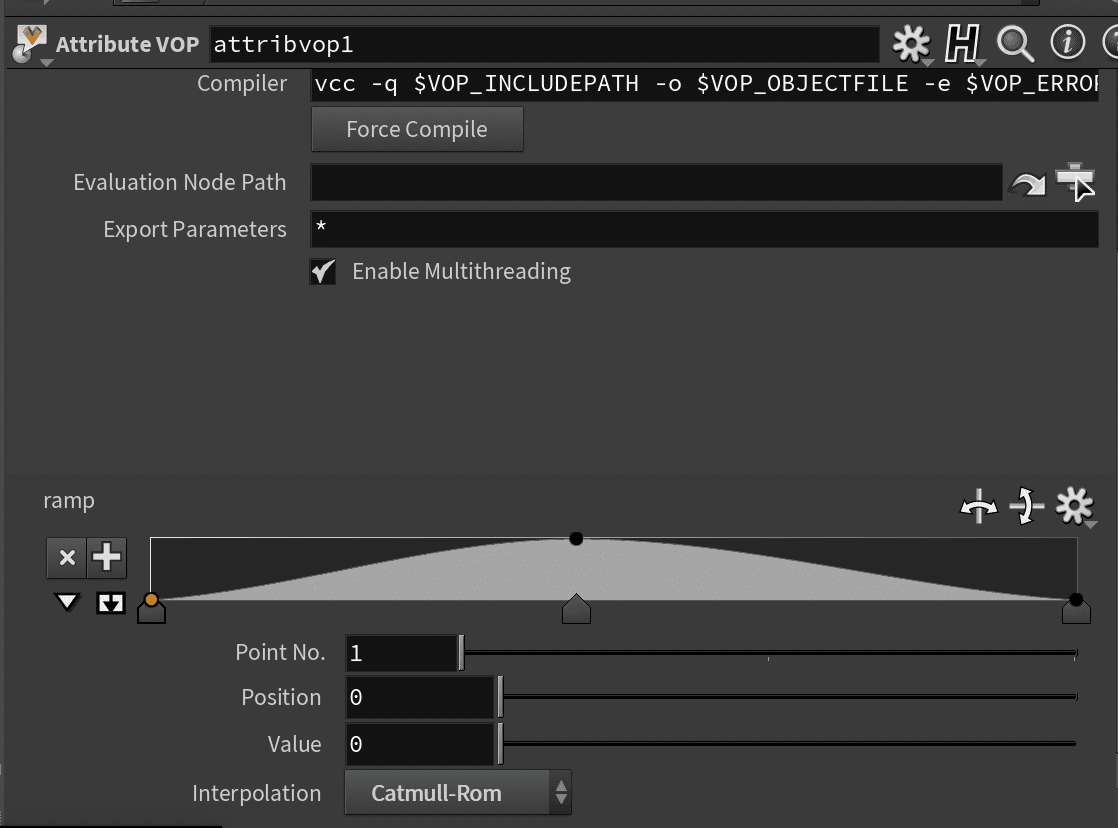
Spline Ramp(float)を選ぶとkeyframe interpolationみたいに
Interplationから選ぶとeasingつけれる
ramp parameter nodeを内包しているVOP nodeのparameterにrampが出現するようになってそこから調整するようになる。
float
Reference
HOUDINI ヘルプ19.0.657