
簡単に Jupyter で Coconut ( python ) を試す

Binder を使用して、pip または conda パッケージ ライブラリがプリインストールされた一時的な Jupyter Notebook サーバーをクラウドで起動できます。
ブラウザだけで、関数型プログラミング言語 Coconut を クラウドの Jupyter notebook で使える環境を作ります。
1. Github Gist
https://gist.github.com/ にアクセスします。
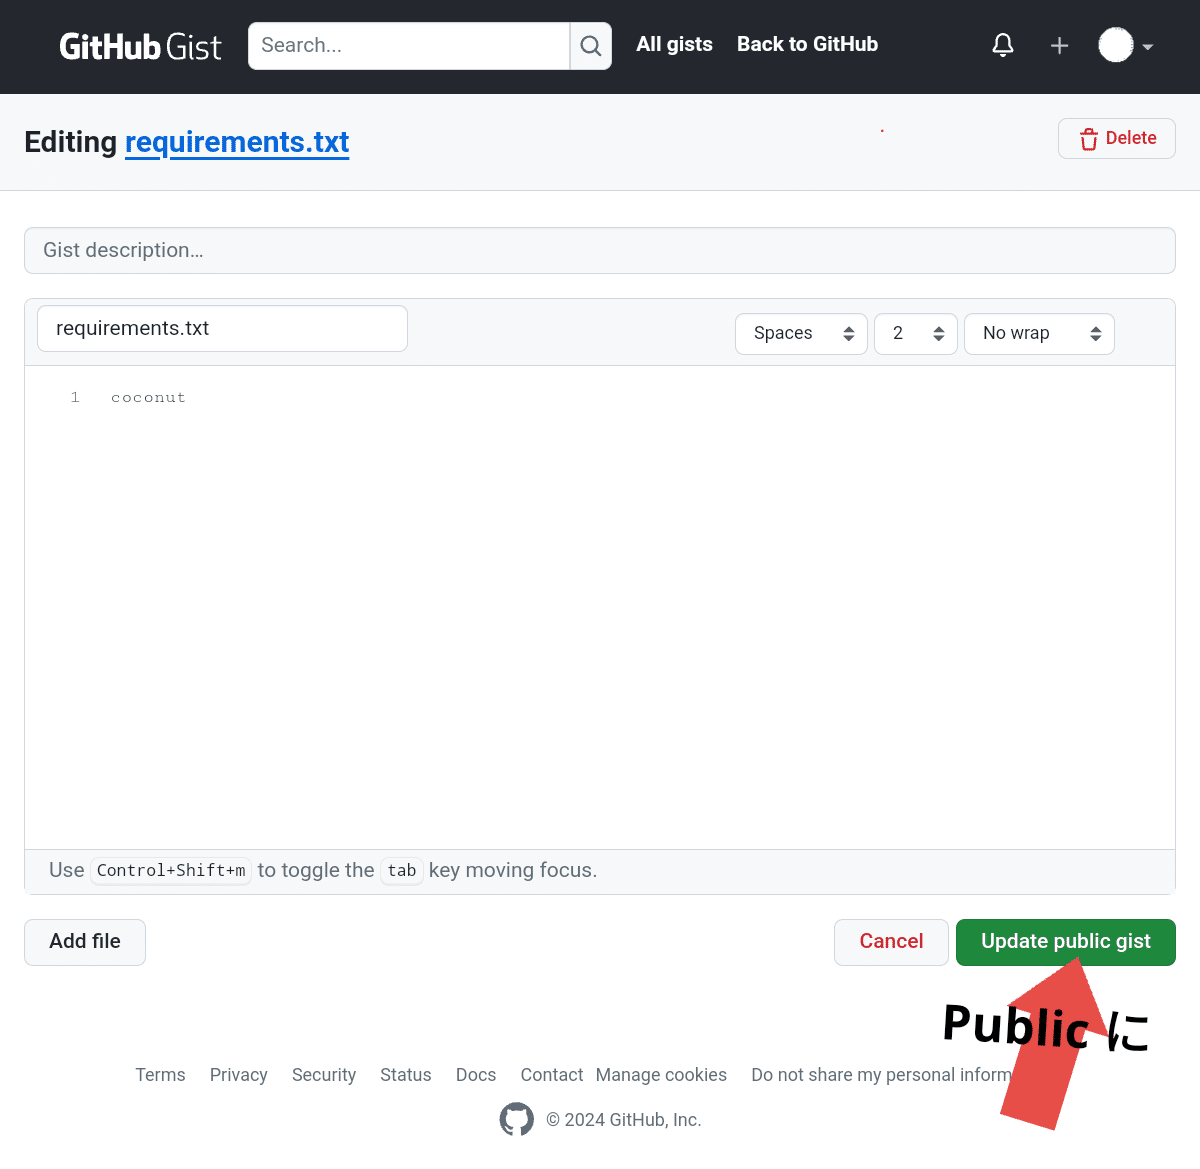
右上の New Gist をクリックします。
ファイル名として requirements.txt を入力します
(conda を使用する場合は environment.yaml を使用します)。
ノートブックで使用するライブラリを追加します。
requirements.txt の内容は、
coconutcoconut とだけ書きます。
Create Public Gist をクリックします。
この Gist のページの URL をコピーします。
2. Binder
https://mybinder.org/ にアクセスします。
ドロップダウンから Gist を選択します。
で用意した public gist の URL をペーストもしくは、 gist のユーザー名/gistid を入力します。
Launch をクリックします。

デプロイが始まります。
Coconut の Jupyter notebook カーネルが使用できる状態のサーバーが起動します。

Coconut カーネル ノートブック

余談としては、 Google colab を使ってもやや変則的に Coconut のコードの実行ができるようです。
その方法は、こちら。
example notebook
というリンクをクリックすると、Google colab のノートが開きます。
いったんドライブか、Gist に保存してから使うといいかもしれません。
!pip install coconut[jupyter]の実行でインストールが始まりますが、cPyparsing のインストールになかなか時間がかかるようです。
もしインストールが完了せずに、セッションがクラッシュするようなら、
ランタイムを接続解除して削除 をしてから、
!pip install coconut
と変更してからセルを実行してみるといいかもしれません。
次のセル
%load_ext coconutExtension
If Coconut is used as an extension, a special magic command will send snippets of code to be evaluated using Coconut instead of IPython, but IPython will still be used as the default.
The line magic %load_ext coconut will load Coconut as an extension, providing the %coconut and %%coconut magics and adding Coconut built-ins. The %coconut line magic will run a line of Coconut with default parameters, and the %%coconut block magic will take command-line arguments on the first line, and run any Coconut code provided in the rest of the cell with those parameters.
Note: Unlike the normal Coconut command-line, %%coconut defaults to the sys target rather than the universal target.
拡張機能
Coconut を拡張機能として使用する場合、特別なマジック コマンドによって、IPython ではなく Coconut を使用して評価されるコード スニペットが送信されますが、IPython が引き続きデフォルトとして使用されます。
行マジック %load_ext coconut は、Coconut を拡張機能としてロードし、%coconut マジックと %%coconut マジックを提供し、Coconut built-ins を追加します。%coconut 行マジックは、デフォルトのパラメータを使用して Coconut の行を実行し、%%coconut ブロック マジックは最初の行でコマンド ライン引数を受け取り、セルの残りの部分で提供される Coconut コードをそれらのパラメータを使用して実行します。
注: 通常の Coconut コマンド ラインとは異なり、%%coconut はユニバーサル ターゲットではなく sys ターゲットをデフォルトとします。
%%coconut
とセルの中の先頭行頭に書いて始まるコードは、Coconut のコードとして実行されるようです。
なお、2. で示した mybinder にデプロイされた普通の Jupyter notebook クラウドの方では %%coconut というマジックコマンドは必要ありません。
テストのコードは、見慣れない構文ですが、
%%coconut
sums = map( x -> x + 1, range(0, 10))
sums |> list |> print
だとシンプルに |> のパイプが効いていることが分かりやすいかもしれません。
このセルを実行すると、出力は
[1, 2, 3, 4, 5, 6, 7, 8, 9, 10]
になりました。

元のノートをコピーして、変更を加えたファイルを参考までにあげておきます。
ipynb ファイル
この記事が気に入ったらサポートをしてみませんか?