【Adobe Express ベータ版】自分のコンテンツから開始

Adobe Express ベータ版をご紹介しています。
今回は、『自分のコンテンツから開始』で、YouTubeのサムネイルをつくっていきます。
ホーム画面
Adobe Express ベータ版のホーム画面です。
[おすすめ]の左端、[自分のコンテンツから開始]をクリックします。

自分のパソコンから画像を選択します。

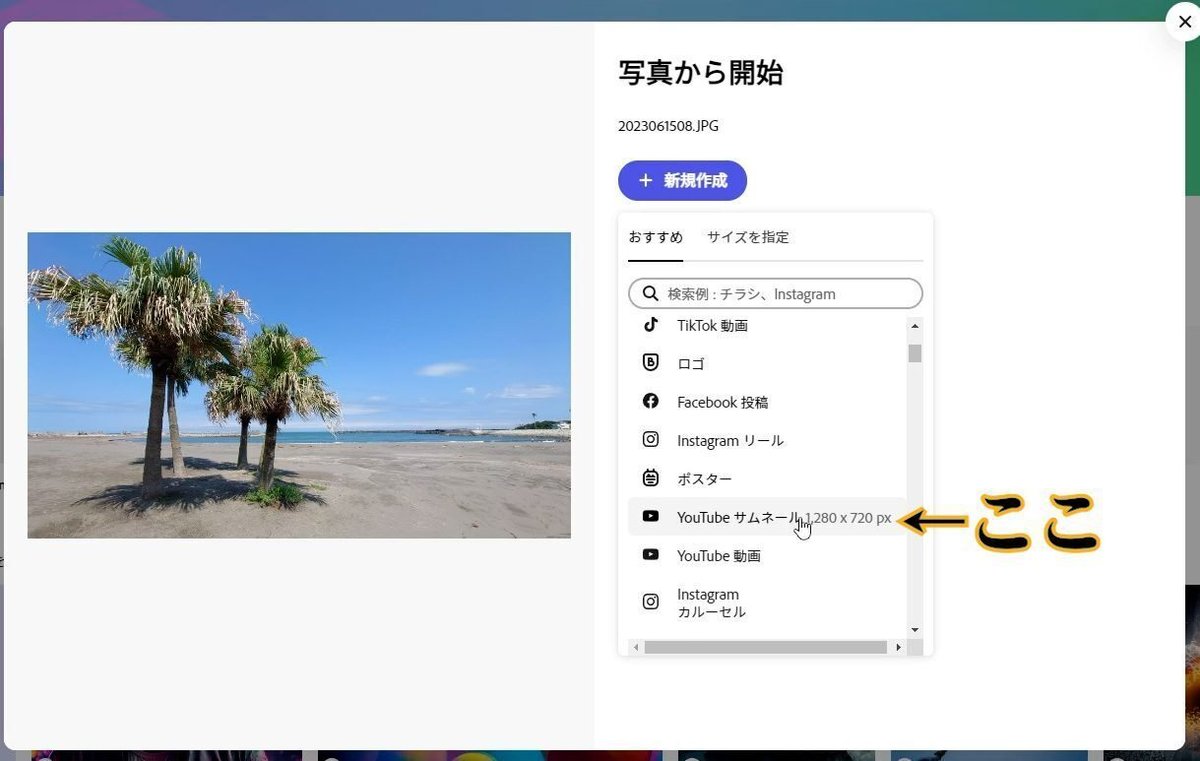
[新規作成]をクリックします。

[YouTubeサムネール 1280×720px]をクリックします。
編集画面
編集画面が表示されます。
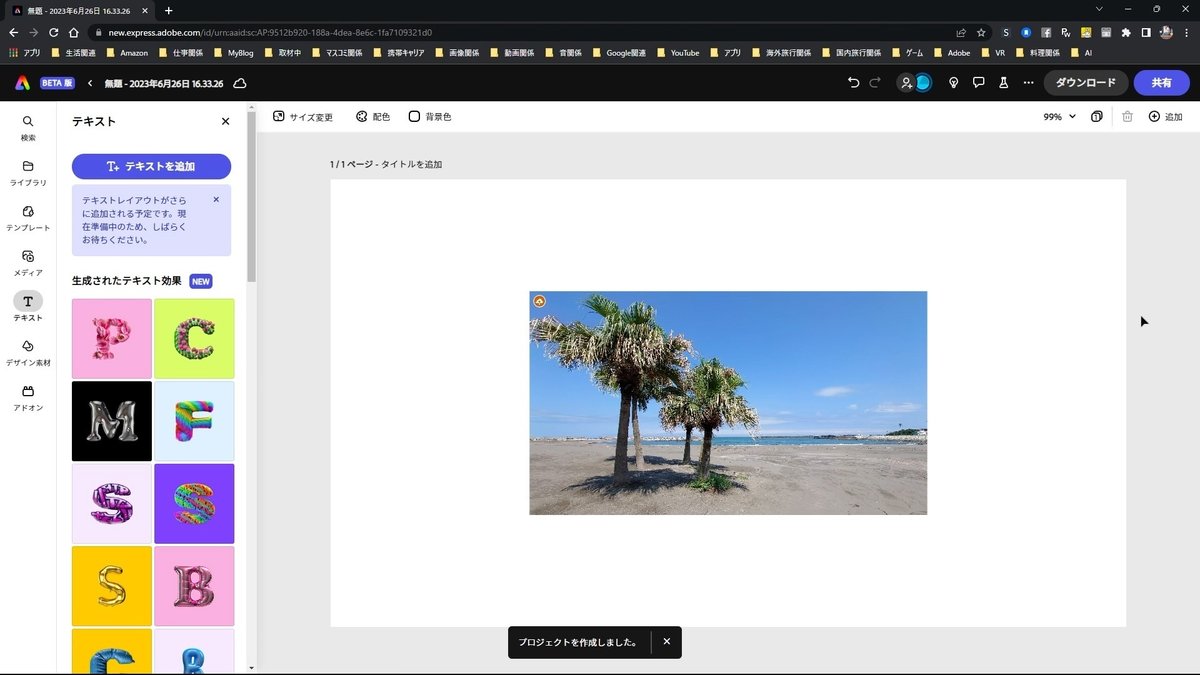
挿入された画像を画面の大きさに合わせて拡大します。

デザイン素材
左側のメニューの[デザイン素材]をクリックします。

[素材]のタブが表示されます。
今回はブラシを選びます。
ブラシの右側にある[すべて表示]をクリックします。

一覧から[ペイント]の[すべて表示]をクリックします。

いろいろなカテゴリがありますね。今回は「水彩画」を選びます。
[すべて表示]をクリックします。

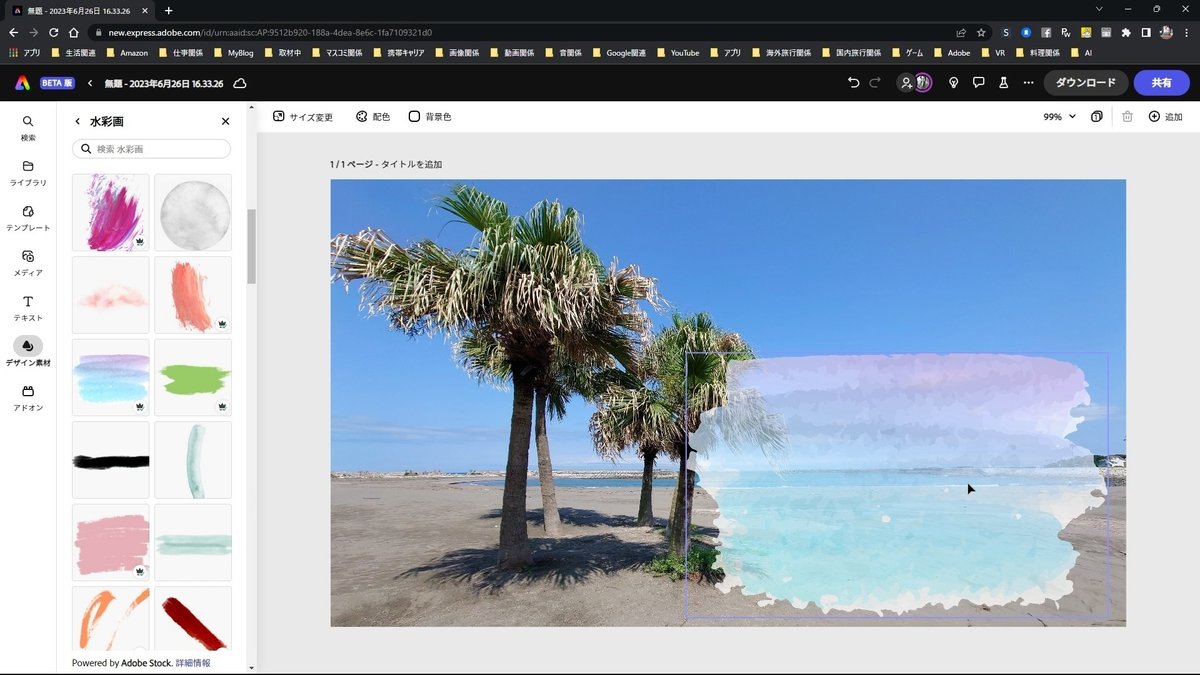
「水彩画」の一覧から気に入った素材を選択します。

画像に水彩画の素材が追加されました。
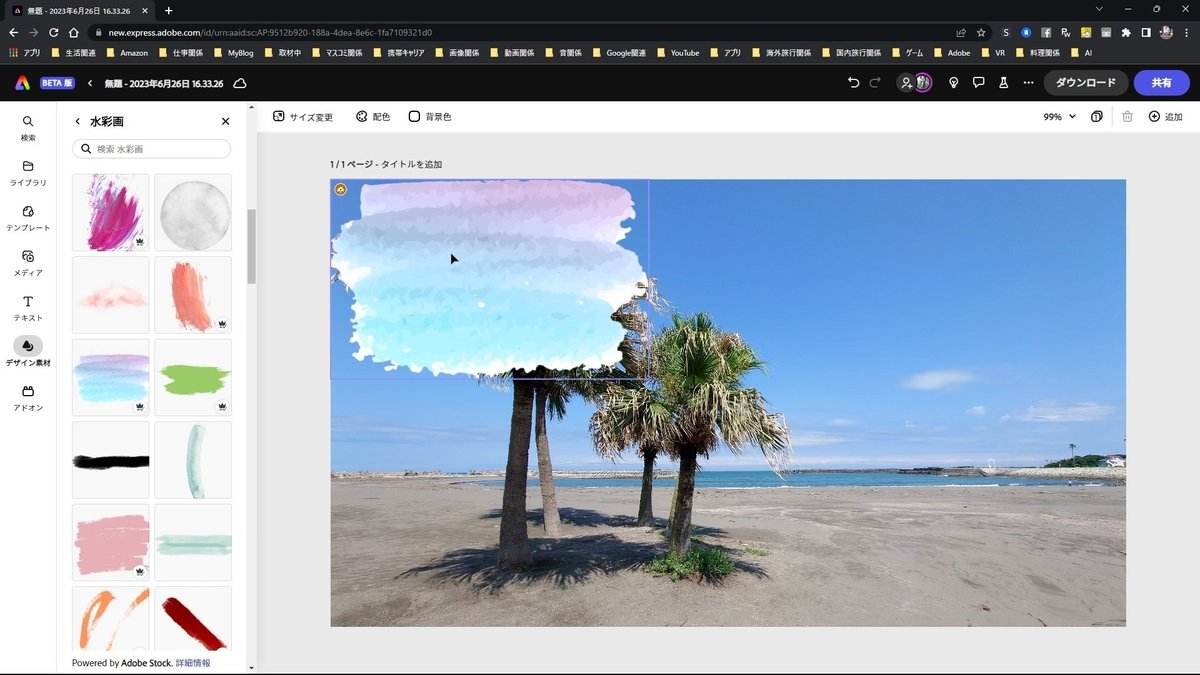
移動させたり、大きさを調整したりします。

画面にべたっと水彩画の素材が載っている感が強いので、背景の画像が少し透き通って見えるように「水彩画」の不透明度を調整します。

はい、ちょっと透き通って見えますね。
テキスト
左側のメニュー[テキスト]をクリックします。

[テキストを追加]をクリックします。

テキストボックスを水彩画の上に移動させます。

テキストを入力します。

左側のメニューの[おすすめ]でフォントを変更することができます。

または、その下にある[フォント]からでも変更できます。
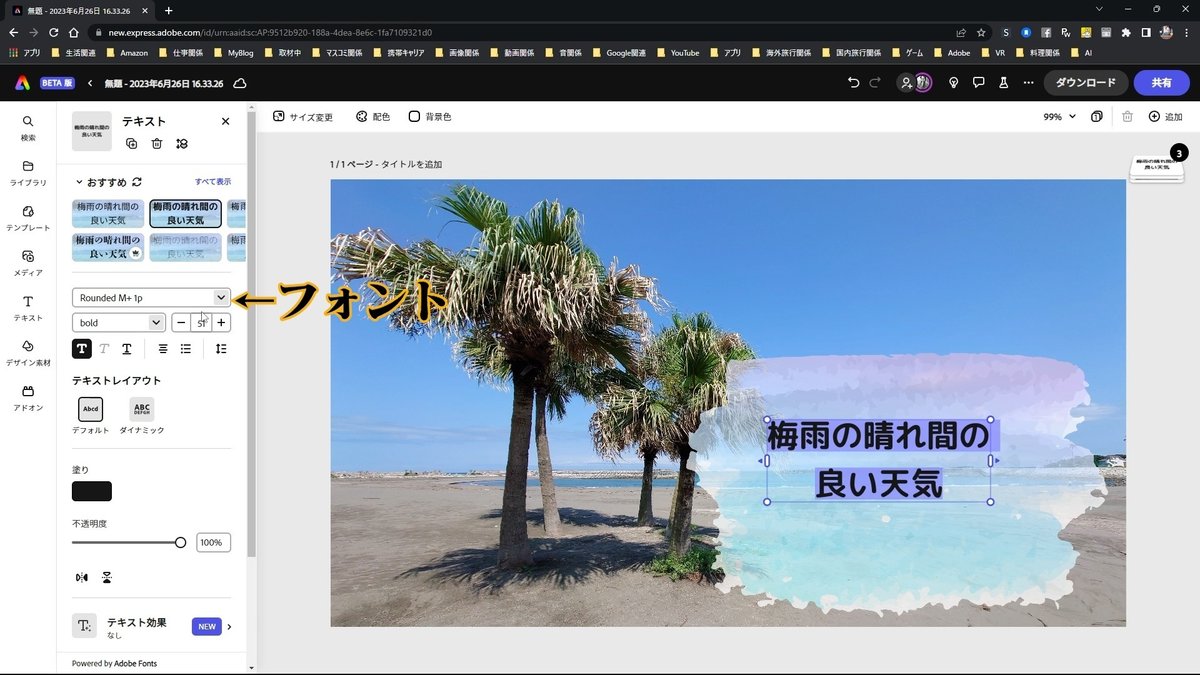
テキストの大きさを調整します。
テキストボックスの右下の角にマウスをもっていき、ドラッグさせます。


フォントの色は、左側のメニュー[塗り]で変更できます。

カスタムで、様々な色を適用させることができます。

また、テキストの装飾もできます。
今回は、テキストにシャドウを適用させます。
左側のメニュー[シャドウ]をクリックします。


ダウンロード
これで今回は完成です。
右上の[ダウンロード]をクリックします。

ファイル形式は、お勧め通り、[PNG(画像向け]でOKです。

ダウンロードをクリックします。

ダウンロードが完了したら、ファイルを確認します。

OKですね。

まとめ
今回は、用意されているテンプレートを使わずに、自分のコンテンツからつくる方法で、YouTubeのサムネイルをつくってみました。
『デザイン素材』には、様々な素材があるので、それらを組み合わせるだけでもかっこいいコンテンツをつくることができるかと思います。
ぜひ、試してみてください。
下記の解説動画もご覧ください。
解説動画
Adobe Expressについて
無料プラン
・数千ものユニークなテンプレート、デザインアセット、Adobe Fonts
・豊富な種類の中からメッセージに合わせて選べるAdobe Fonts
・Adobe Stockのロイヤリティフリー無料写真コレクションの一部
・基本編集機能と背景の削除やアニメーション化などの写真効果
・Webとモバイルの両方で作成可能
・2GBのストレージ
プレミアムプラン
1,078円(月々プラン)
10,978円(年間プラン)
・無料アプリの全機能に加えて、以下をご利用いただけます。
・すべてのプレミアムテンプレートとデザインアセット
・Adobe Fontsの2万種類を超えるライセンスフォント、曲線やグリッドを使ったものや2つのフォントを組み合わせたものなど
・Adobe Stockの1億6,000万点を超えるロイヤリティフリー写真の全コレクション
・カットアウトの調整、サイズ変更、グラフィックのグループなどのプレミアム機能
・作成したSNS用の画像や動画の自動公開スケジュールを設定
・タップ1回でブランディング、ロゴ、カラー、フォントを追加
・PDFと他の形式の双方向変換、書き出し
・Creative Cloudライブラリを使用して、テンプレートとアセットを共有
・Webとモバイルの両方で作成可能
・100GBのストレージ
いいなと思ったら応援しよう!