【bubble】Custom stateを用いた検索の絞り込み(複数選択,or)方法を解説

まつです。
今回はCustom stateを用いた検索の絞り込みについて解説していきます。
準備するもの
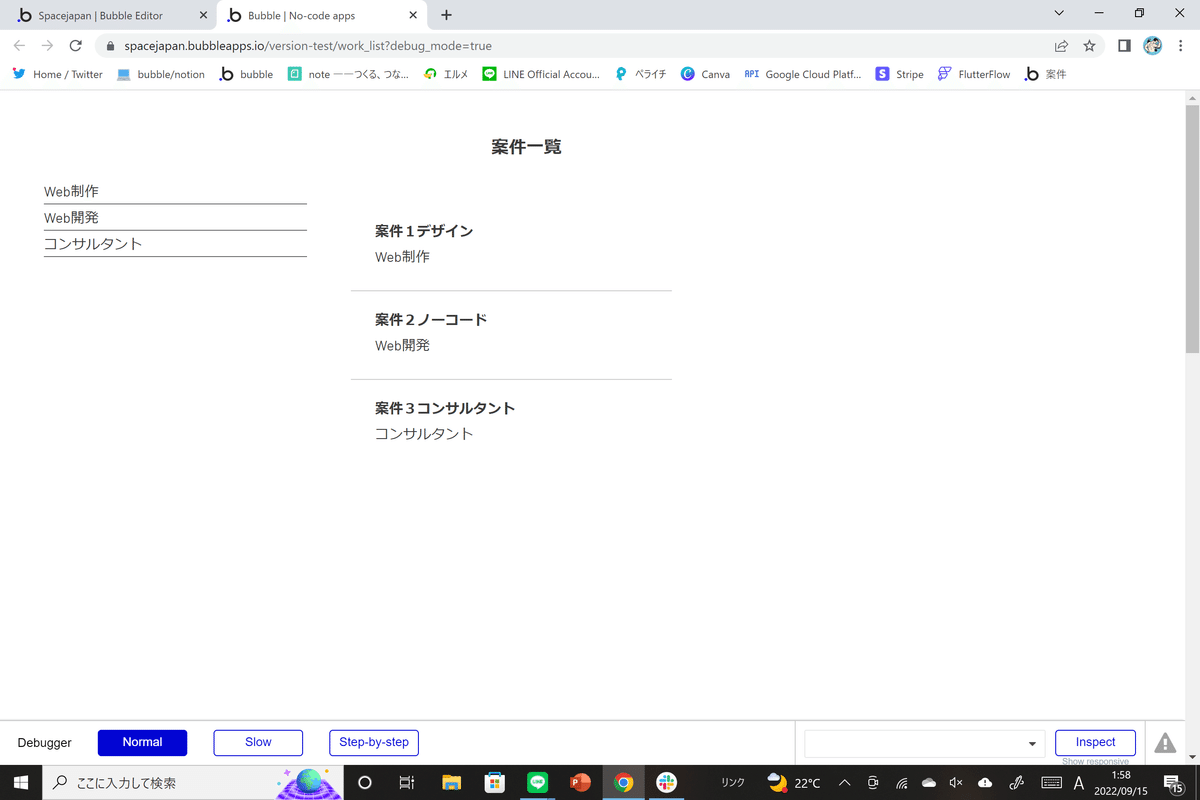
用意する画面はこちら

右側に案件一覧を表示するRepeating groupを配置し、
左側に絞り込むためのgroup、textを配置しました。
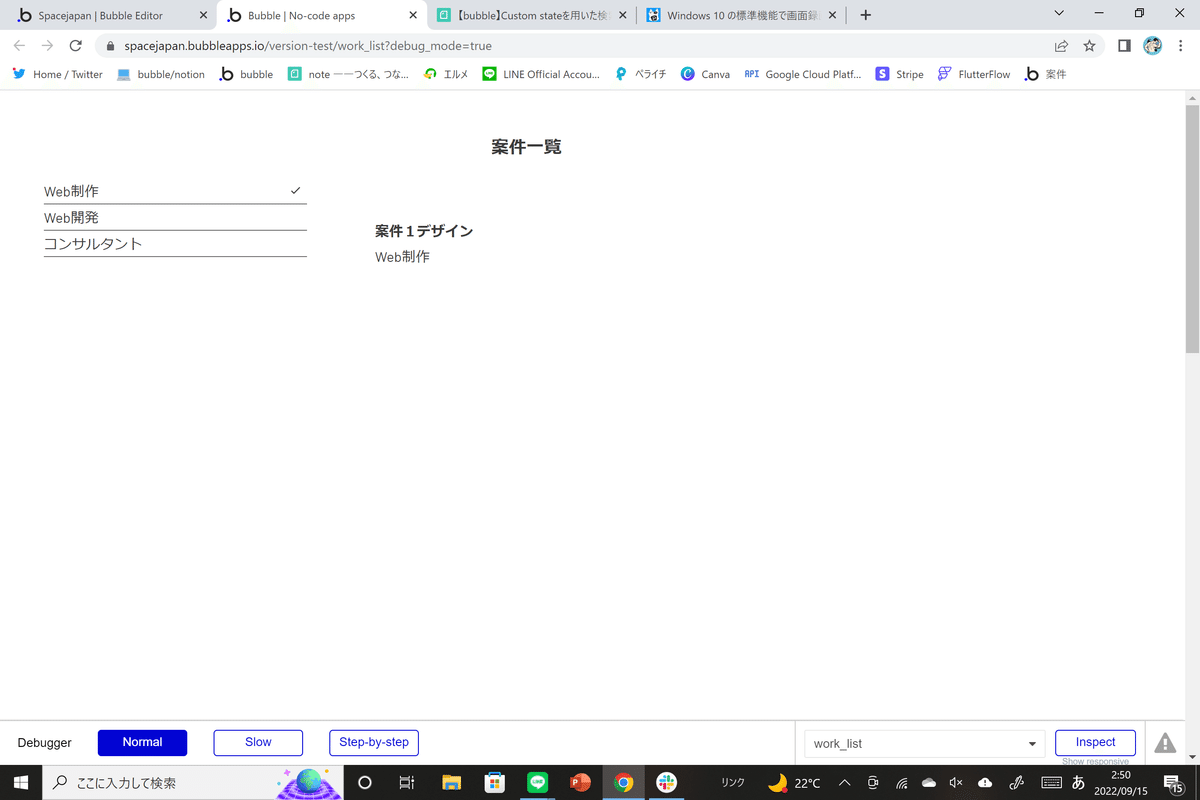
プレビューは以下の通り
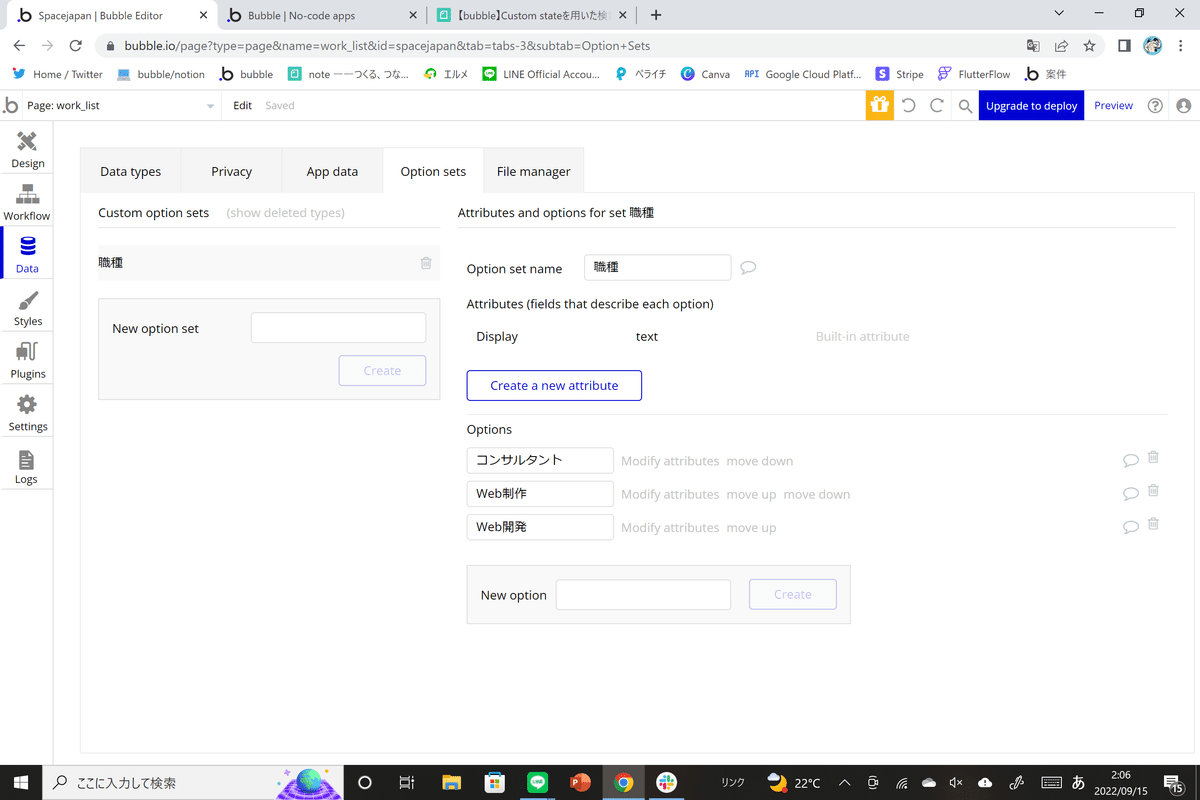
用意するデータとOptions setはこちら

準備ができたのでさっそくCustom stateを使った検索の絞り込みを実装していきます。
Custom stateを使おう
まずは、Custom stateを作成します。
手順
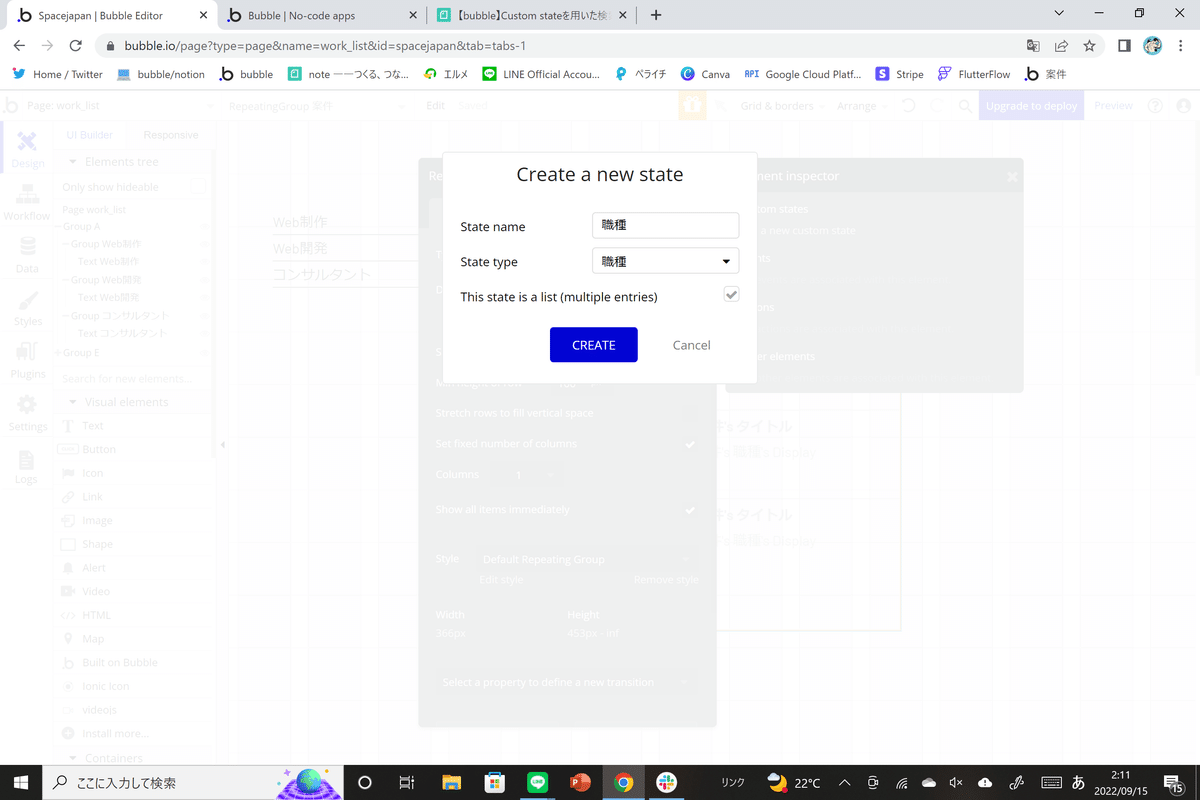
①Repeating groupの i(アイ)マークをクリックし、Add anew custom stateを選択
②State名を入力(今回は職種s)し、State typeを選択(今回は職種)
③複数選択ができる検索の絞り込みを実装するので、チェックボックスにチェックを入れる
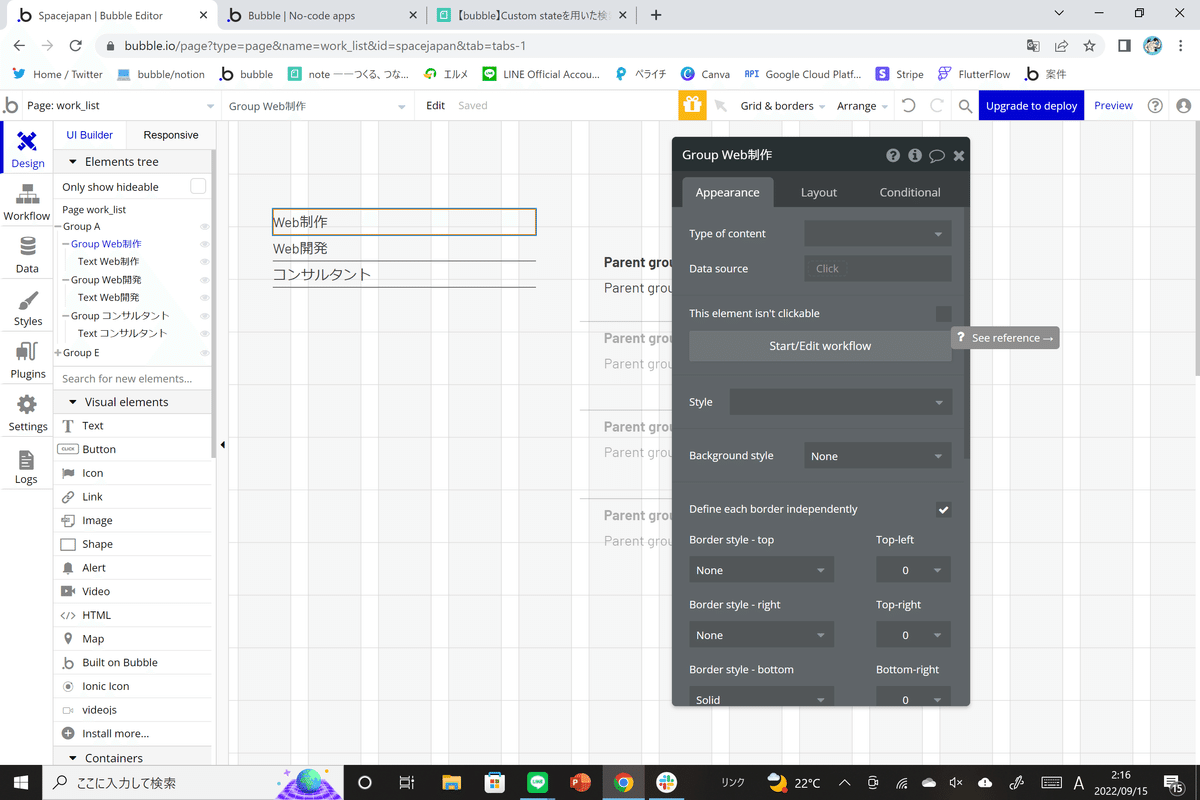
④グループを選択し、ワークフローからset stateを設定(step.1)
⑤Display listのdata sourceを設定(step.2)
⑥クリック時のOnly whenを設定
⑦複製し、反対の処理を行う
⑧ ④~⑦の処理を他のグループでも行う
①Repeating groupの i(アイ)マークをクリックし、Add anew custom stateを選択

②State名を入力(今回は職種s)し、State typeを選択(今回は職種)、③複数選択ができる検索の絞り込みを実装するので、チェックボックスにチェックを入れる
④グループを選択し、ワークフローからset stateを設定(step.1)


一次的に保持したい情報をRepeating groupに設定したcustom stateに追加するイメージ(このが場面ではWeb制作を一時的に保存する)
⑤Display listのdata sourceを設定(step.2)

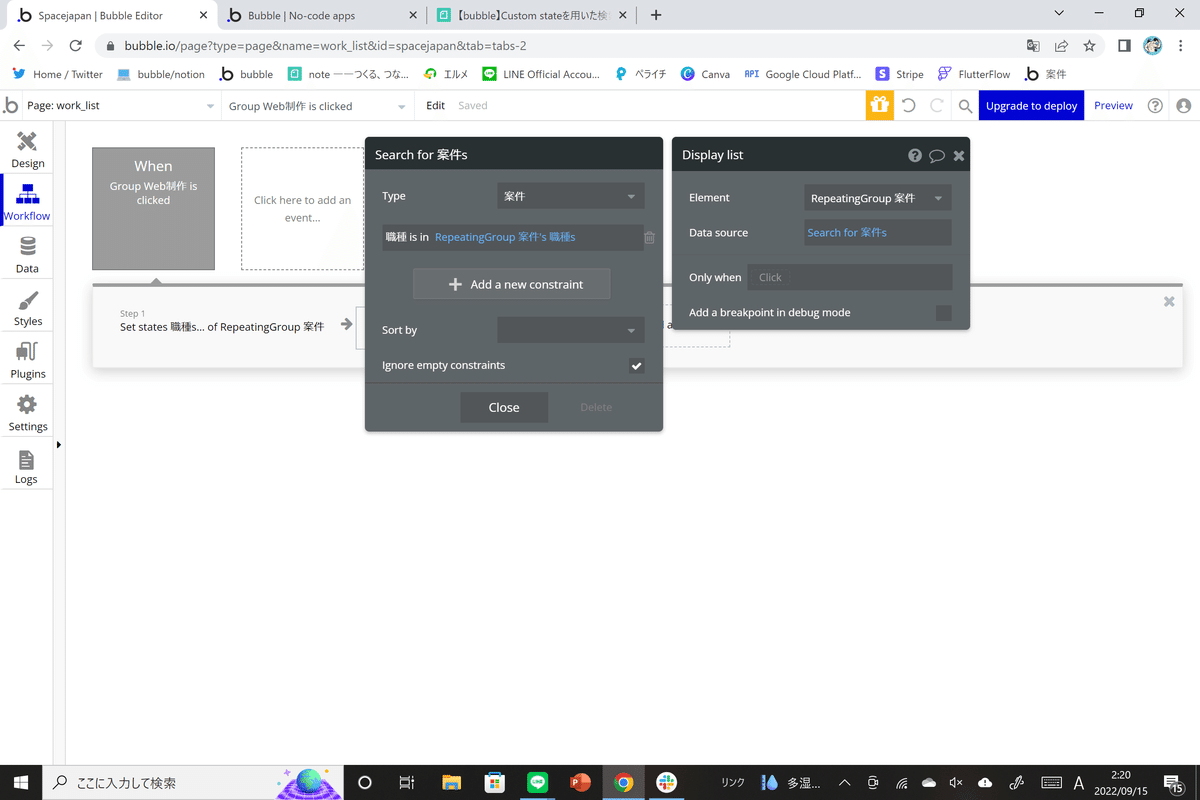
⑥クリック時のOnly whenを設定

⑦複製し、反対の処理を行う
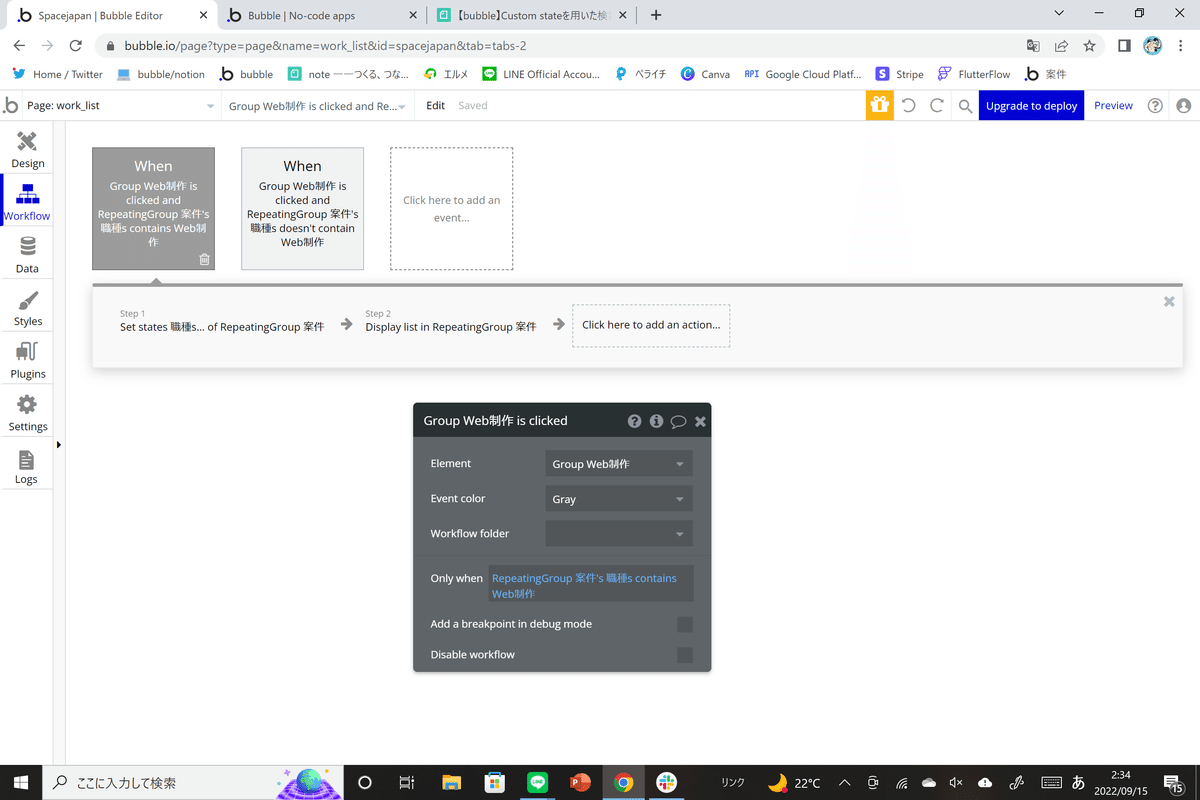
Only whenのdoesn't countainをcontainsに変更、plus itemをminus itemに変更する
⑧ ④~⑦の処理を他のグループでも行う

今回は3職種×各2通り=6通りです。
見やすいようにあえて色を付けています。
プレビューしてみる
Web制作をクリック

Web開発をクリック

コンサルタントをクリック

少しわかりづらいので、チェックのアイコンを追加します。

もう一度、プレビュー画面を見てみます。
Web制作をクリック
Web開発をクリック

コンサルタントをクリック

複数選択できているかと思います。
まとめ
今回はCustom stateを使った検索の絞り込みを実装しました。
Custom stateが使えるようになることで、開発の幅が広がると思います。
(なにより作業時間が大幅に短縮できます)
検索の絞り込みは多くの難所があるので、今後も解説していきたいと思います。
Youtubeはこちら
Twitterはこちら