WSL2でMedusaを試してみる
「複数のデコードヘッドを使用して LLM 生成を高速化するためのシンプルなフレームワーク」らしいMedusaを試してみます。
どうみてもスタバ ですよね。スタパといえばファミ通。さて。
使用するPCはドスパラさんの「GALLERIA UL9C-R49」。スペックは
・CPU: Intel® Core™ i9-13900HX Processor
・Mem: 64 GB
・GPU: NVIDIA® GeForce RTX™ 4090 Laptop GPU(16GB)
・OS: Ubuntu22.04 on WSL2(Windows 11)
です。
2024/1/31追記。
学習をStage 2(=Medusa 2)まですると、推論が速くなることがわかりました。以下の記事も合わせてご確認くださいませ。
1. 準備
Medusa環境
python3 -m venv medusa-llm
cd $_
source bin/activate
リポジトリをクローンしてインストールします。
git clone https://github.com/FasterDecoding/Medusa.git
cd Medusa
pip install -e .
ウーパールーパーことaxolotl、これのMedusa向け派生版もクローンしておきます。
git clone https://github.com/ctlllll/axolotl.git
cd axolotl
pip install -e .
pip3 install packaging
pip3 install -e '.[flash-attn,deepspeed]'
pip3 install -U git+https://github.com/huggingface/peft.git
cd ..
ダウンロード
ファインチューニング用のデータをダウンロードします。ここではREADMEに従い、ShareGPTのデータを利用します。
git clone https://huggingface.co/datasets/Aeala/ShareGPT_Vicuna_unfilteredこの時点でのディレクトリの構成は
.
├── ShareGPT_Vicuna_unfiltered
├── assets
├── axolotl
├── data_generation
├── llm_judge
├── medusa
├── medusa_llm.egg-info
├── notebooks
├── scripts
└── wandb
このようなかんじ。
2. コード修正
推論時のtokens/s表示 - Medusa
推論時にtokens/sを表示するように medusa/inference/cli.py に数行コードを追加します。そうしないと速くなったのかよくわからないですから。感覚で速いとかは無しです、はい。
diff --git a/medusa/inference/cli.py b/medusa/inference/cli.py
index 9728be5..317dfd4 100644
--- a/medusa/inference/cli.py
+++ b/medusa/inference/cli.py
@@ -22,7 +22,7 @@ from fastchat.model.model_adapter import get_conversation_template
 from fastchat.conversation import get_conv_template
 import json
 from medusa.model.medusa_model import MedusaModel
-
+import time

 def main(args):
     if args.style == "simple":
@@ -151,6 +151,8 @@ def main(args):

             conv.append_message(conv.roles[0], inp)
             conv.append_message(conv.roles[1], None)
+            #
+            start = time.process_time()
             prompt = conv.get_prompt()

             try:
@@ -166,6 +168,19 @@ def main(args):
                     )
                 )
                 conv.update_last_message(outputs.strip())
+                end = time.process_time()
+                ##
+                output_ids = tokenizer.encode(outputs, return_tensors="pt").to(
+                    model.base_model.device
+                )
+                input_tokens = len(input_ids[0])
+                output_tokens = len(output_ids[0])
+                total_time = end - start
+                tps = output_tokens / total_time
+                print("---")
+                print(f"prompt tokens = {input_tokens:.7g}")
+                print(f"output tokens = {output_tokens:.7g} ({tps:f} [tps])")
+                print(f"   total time = {total_time:f} [s]")

             except KeyboardInterrupt:
                 print("stopped generation.")
wandbの初期化処理 - axolotl
axolotlことウーパールーパー経由で学習させると、「wandb.log()を呼び出す前にwandb.init()を呼び出せ」と弊環境では怒られたので、src/axolotl/monkeypatch/medusa_utils.pyに対して以下のように初期化処理を追加しています。
diff --git a/src/axolotl/monkeypatch/medusa_utils.py b/src/axolotl/monkeypatch/medusa_utils.py
index 38c4ab4..9017902 100644
--- a/src/axolotl/monkeypatch/medusa_utils.py
+++ b/src/axolotl/monkeypatch/medusa_utils.py
@@ -22,6 +22,7 @@ import wandb
 import transformers

 logger = LOG = logging.getLogger("axolotl.monkeypatch.medusa")
+wandb.init()

 class MedusaConfig(PretrainedConfig):
"""ちなみにここにwandb.initメソッドを挿入すると、学習で使用するGPUの枚数分だけ、wandb.initメソッドが呼び出されます。
※ですので、wandbコマンドを使用して予め初期化しておく(wandb offlineなど)のがよいかと思います。
3. medusa.inference.cliの制御コマンド
READMEにもなくて、コードにしか書いてないのでまとめておきます。
medusa/inference/cli.pyを見ると、プロンプト([INST])が表示されたとき、!! とエクスクラメーションマークを2回プラス特定の文字列で、制御コマンドが実行できるようになっています。
$ grep -e 'Type' medusa/inference/cli.py
- Type "!!exit" or an empty line to exit.
- Type "!!reset" to start a new conversation.
- Type "!!remove" to remove the last prompt.
- Type "!!regen" to regenerate the last message.
- Type "!!save <filename>" to save the conversation history to a json file.
- Type "!!load <filename>" to load a conversation history from a json file.
!!exit : cli.pyを終了します
!!reset : そこまでの会話をすべてクリアします
!!remove : 最後のプロンプトと回答を削除します。
!!regen : 最後のメッセージを再生成します
!!save : これまでのやりとりをjsonファイルに書き出します
!!load : jsonファイルに記録されたやりとりを読み込みます
4. トレーニング - Legacy
ウーパールーパーを使う前に、まずはLegacyから。
使用するモデルは elyza/ELYZA-japanese-Llama-2-7b です。
学習
以下のコマンドラインを実行します。
CUDA_VISIBLE_DEVICES=0 torchrun \
    --nproc_per_node=1 medusa/train/train_legacy.py \
    --model_name_or_path elyza/ELYZA-japanese-Llama-2-7b \
    --data_path ./ShareGPT_Vicuna_unfiltered/ShareGPT_V4.3_unfiltered_cleaned_split.json \
    --bf16 True \
    --output_dir test \
    --num_train_epochs 1 \
    --per_device_train_batch_size 1 \
    --per_device_eval_batch_size 1 \
    --gradient_accumulation_steps 4 \
    --evaluation_strategy "no" \
    --save_strategy "no" \
    --learning_rate 1e-3 \
    --weight_decay 0.0 \
    --warmup_ratio 0.1 \
    --lr_scheduler_type "cosine" \
    --logging_steps 1 \
    --tf32 True \
    --model_max_length 2048 \
    --lazy_preprocess True \
    --medusa_num_heads 3 \
--medusa_num_layers 1バッチサイズは1です。2以上だとVRAMが溢れました。
Medusa関連のパラメータは2つ。頭数を3、レイヤーを1としています。これはサンプルの値のママです。
これで実行すると、
NotImplementedError: Using RTX 3090 or 4000 series doesn't support faster communication broadband via P2P or IB. Please set `NCCL_P2P_DISABLE="1"` and `NCCL_IB_DISABLE="1" or use `accelerate launch` which will do this automaticallyエラーです。RTX 3090または4000シリーズで学習するなどもってのほか!などとは書いていませんが、暗に言っているように私には読めますw。くじけませんよ。
export NCCL_P2P_DISABLE=1
export NCCL_IB_DISABLE=1
と環境変数を定義してから、再実行です。
そんなこんなで6時間54分12秒が経過し、Medusaの頭ができあがりました。
$ ls -al test_medusa_mlp_ELYZA-japanese-Llama-2-7b_medusa_3_lr_0.001_layers_1
total 866348
drwxr-xr-x  2 user user      4096 Jan 26 14:45 .
drwxr-xr-x 17 user user      4096 Jan 28 13:48 ..
-rw-r--r--  1 user user       154 Jan 26 07:51 config.json
-rw-r--r--  1 user user 887123735 Jan 26 14:45 medusa_lm_head.pt
聞いてみる
以下のコマンドラインでクライアントを起動します。
CUDA_VISIBLE_DEVICES=0 python -m medusa.inference.cli \
    --model ./test_medusa_mlp_ELYZA-japanese-Llama-2-7b_medusa_3_lr_0.001_layers_1 \
    --conv-system-msg "あなたは誠実で優秀な日本人のアシスタントです。" \
    --max-steps 256
[INST]: とプロンプトが表示されました。
Loading checkpoint shards: 100%|█████████████████████████████████████████████████████████████| 2/2 [00:43<00:00, 21.63s/it]
Some weights of MedusaModelLlama were not initialized from the model checkpoint at elyza/ELYZA-japanese-Llama-2-7b and are newly initialized: ['medusa_head.1.0.linear.weight', 'medusa_head.3.0.linear.bias', 'medusa_head.0.1.weight', 'medusa_head.0.0.linear.weight', 'medusa_head.1.0.linear.bias', 'medusa_head.3.1.weight', 'medusa_head.4.0.linear.weight', 'medusa_head.3.0.linear.weight', 'medusa_head.2.0.linear.bias', 'medusa_head.2.0.linear.weight', 'medusa_head.2.1.weight', 'medusa_head.4.1.weight', 'medusa_head.1.1.weight', 'medusa_head.4.0.linear.bias', 'medusa_head.0.0.linear.bias']
You should probably TRAIN this model on a down-stream task to be able to use it for predictions and inference.
[INST]:
よし。いつものとおり聞いてみます。
[INST]: どらえもんとはなにか[/INST]:
どらえもんは、1986年に発売されたセガのアーケードゲームです。
2Dの落ち物パズルゲームで、2000年にはセガサターンでリメイク版が発売されています。
2004年にはWiiでも発売されています。
どらえもんは、2000年に発売されたセガサターンのリメイク版です。
セガサターンは2000年に発売されたゲーム機で、セガの3Dゲームを中心に発売されていました。
セガサターンは2000年に発売されたセガサターンのリメイク版です。
セガサターンは2000年に発売されたセガサターンのリメイク版です。
セガサターンは2000年に発売されたセガサターンのリメイク版です。
セガサターンは2000年に発売されたセガサターンのリメイク版です。
セガサターンは2000年に発売されたセガサターンのリ
---
prompt tokens = 19
output tokens = 367 (29.506581 [tps])
total time = 12.437903 [s]
[INST]:
セガのアーケードゲームだったのか。しらなかった。
あと、後半ループになっているのだけれども、コードをざっと読んだが、生成するメソッドに対してrepetation penaltyを指定できないみたい。
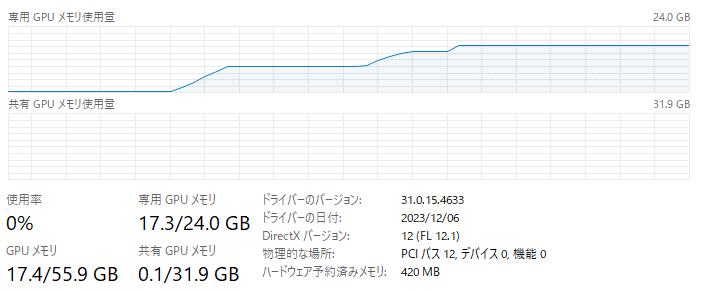
GPUリソース
起動してから推論が終わるまでのメモリの推移はこちら。

5. トレーニング - axolotl
続いて、ウーパールーパーことaxolotlを用いてMedusaの頭を作ります。
学習
axolotlのLlama2、medusaの設定ファイルを読んで、(テキトーに)作成したyamlがこちら。
axolotl/examples/medusa/elyza_7b_qlora_stage1.yml
base_model: elyza/ELYZA-japanese-Llama-2-7b
base_model_config: elyza/ELYZA-japanese-Llama-2-7b
model_type: LlamaForCausalLM
tokenizer_type: LlamaTokenizer
is_llama_derived_model: true

load_in_8bit: false
load_in_4bit: true
strict: false

datasets:
  - path: ShareGPT_Vicuna_unfiltered/ShareGPT_V4.3_unfiltered_cleaned_split.json
    type: sharegpt
dataset_prepared_path:
val_set_size: 0.01
output_dir: ./Elyza-japanese-Llama-2-7b_qlora_stage1

adapter: qlora
lora_model_dir:

lora_r: 32
lora_alpha: 16
lora_dropout: 0.05
lora_target_modules:
  - gate_proj
  - down_proj
  - up_proj
  - q_proj
  - v_proj
  - k_proj
  - o_proj
  - lm_head
lora_target_linear:
lora_fan_in_fan_out:
lora_modules_to_save:

sequence_len: 4096
sample_packing: true
pad_to_sequence_len: true

wandb_project:
wandb_entity:
wandb_watch:
wandb_run_id:
wandb_log_model:

gradient_accumulation_steps: 4
micro_batch_size: 1
num_epochs: 1
optimizer: adamw_bnb_8bit
lr_scheduler: cosine
learning_rate: 0.0005

train_on_inputs: false
group_by_length: false
bf16: true
fp16: false
tf32: false

gradient_checkpointing: true
early_stopping_patience:
resume_from_checkpoint:
local_rank:
logging_steps: 1
xformers_attention:
flash_attention: true

warmup_steps: 40
eval_steps: 40
save_steps:
save_total_limit: 1
debug:
deepspeed:
weight_decay: 0.0
fsdp:
fsdp_config:
special_tokens:
  bos_token: "<s>"
  eos_token: "</s>"
  unk_token: "<unk>"

medusa_num_heads: 5
medusa_num_layers: 1
medusa_heads_coefficient: 0.2
medusa_decay_coefficient: 0.8
medusa_logging: true
medusa_scheduler: constant
medusa_lr_multiplier: 4.0
medusa_only_heads: true
ddp_find_unused_parameters: true
# Stage 1: only train the medusa heads
# Stage 2: train the whole model
medusa_num_heads: 5
medusa_num_layers: 1
medusa_only_heads: true - これをfalseにすると、Stage 2(モデル全体を学習)らしいです。
このyamlを引数に指定してtrain開始です。
CUDA_VISIBLE_DEVICES=0 accelerate launch -m axolotl.cli.train ./axolotl/examples/medusa/elyza_7b_qlora_stage1.ymlすると以下のようにwandbの設定をどうするか?と聞かれます(wandb.initメソッドにて)。アカウントはないので、ここでは3と応えます。
wandb: (1) Create a W&B account
wandb: (2) Use an existing W&B account
wandb: (3) Don't visualize my results
wandb: Enter your choice:
(補足)wandbコマンドで以下のように設定しておくとEnter your choiceと毎回聞かれなくなります。なお、設定は ./wandb/settings に保存されます。
wandb offlineそして、34時間5分09秒経過して学習終わりました。
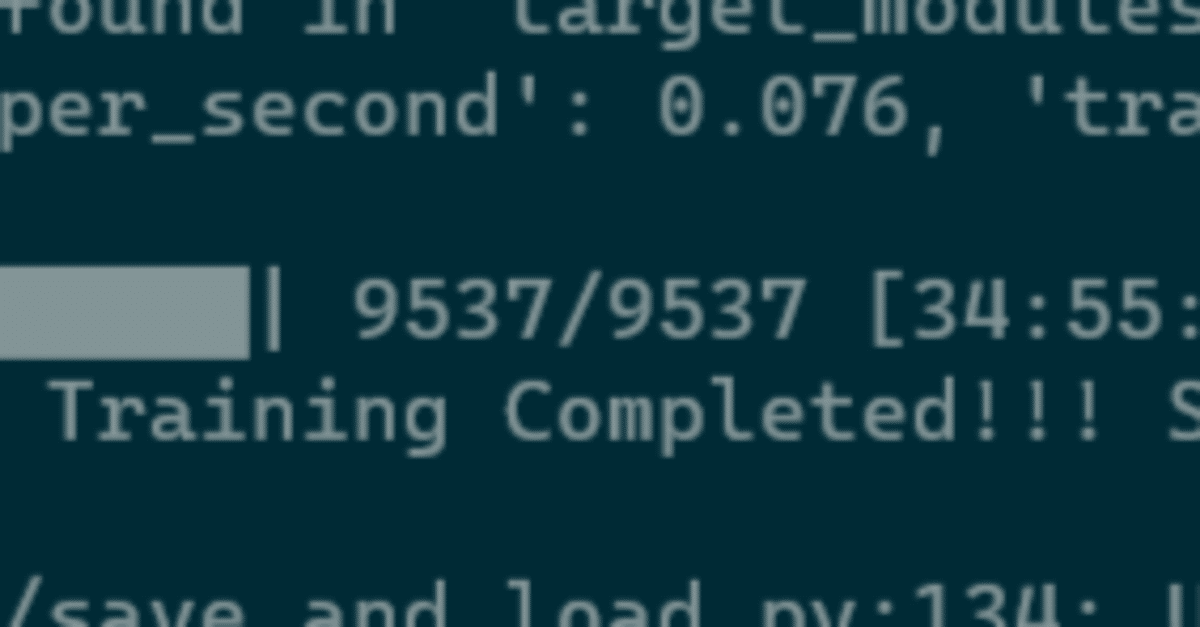
100%|███████████████████████████████████████████████████████████████████████████████| 9537/9537 [34:55:09<00:00, 13.18s/it]
[2024-01-28 11:46:09,222] [INFO] [axolotl.train.train:121] [PID:24958] [RANK:0] Training Completed!!! Saving pre-trained model to ./Elyza-japanese-Llama-2-7b_qlora_stage1
作成されたファイルは、こちら。
$ ls -lR Elyza-japanese-Llama-2-7b_qlora_stage1/
Elyza-japanese-Llama-2-7b_qlora_stage1/:
total 2015156
-rw-r--r-- 1 user user      13760 Jan 28 11:46 README.md
-rw-r--r-- 1 user user        803 Jan 28 11:46 adapter_config.json
-rw-r--r-- 1 user user 2062971154 Jan 28 11:46 adapter_model.bin
drwxr-xr-x 2 user user       4096 Jan 28 11:46 checkpoint-9537
-rw-r--r-- 1 user user       1123 Jan 27 00:50 config.json
-rw-r--r-- 1 user user        551 Jan 27 00:50 special_tokens_map.json
-rw-r--r-- 1 user user     499723 Jan 27 00:50 tokenizer.model
-rw-r--r-- 1 user user       1011 Jan 27 00:50 tokenizer_config.json

Elyza-japanese-Llama-2-7b_qlora_stage1/checkpoint-9537:
total 3462572
-rw-r--r-- 1 user user       5052 Jan 28 11:45 README.md
-rw-r--r-- 1 user user        803 Jan 28 11:46 adapter_config.json
-rw-r--r-- 1 user user 2062971154 Jan 28 11:46 adapter_model.bin
-rw-r--r-- 1 user user 1481441440 Jan 28 11:46 optimizer.pt
-rw-r--r-- 1 user user      14244 Jan 28 11:46 rng_state.pth
-rw-r--r-- 1 user user       1064 Jan 28 11:46 scheduler.pt
-rw-r--r-- 1 user user    1202243 Jan 28 11:46 trainer_state.json
-rw-r--r-- 1 user user       4920 Jan 28 11:46 training_args.bin
学習のログは wandb ディレクトリの下に書き出されています。
$ ls -Rl wandb/offline-run-20240127_005021-5eo4fu15
wandb/offline-run-20240127_005021-5eo4fu15:
total 460260
drwxr-xr-x 2 user user      4096 Jan 28 11:46 files
drwxr-xr-x 2 user user      4096 Jan 27 00:50 logs
-rw-r--r-- 1 user user 471287824 Jan 28 11:46 run-5eo4fu15.wandb
drwxr-xr-x 3 user user      4096 Jan 27 00:50 tmp

wandb/offline-run-20240127_005021-5eo4fu15/files:
total 12
-rw-r--r-- 1 user user 4685 Jan 27 00:50 wandb-metadata.json
-rw-r--r-- 1 user user   31 Jan 28 11:46 wandb-summary.json

wandb/offline-run-20240127_005021-5eo4fu15/logs:
total 21828
-rw-r--r-- 1 user user 22342955 Jan 28 11:46 debug-internal.log
-rw-r--r-- 1 user user     3058 Jan 27 00:50 debug.log

wandb/offline-run-20240127_005021-5eo4fu15/tmp:
total 4
drwxr-xr-x 2 user user 4096 Jan 27 00:50 code

wandb/offline-run-20240127_005021-5eo4fu15/tmp/code:
total 0
聞いてみる
作成されたMedusaの頭を指定して、次のコマンドラインを実行します。
CUDA_VISIBLE_DEVICES=0 python -m medusa.inference.cli \
    --model ./Elyza-japanese-Llama-2-7b_qlora_stage1 \
    --conv-system-msg "あなたは誠実で優秀な日本人のアシスタントです。" \
    --max-steps 256
プロンプトが表示されたので聞きましょう。
[INST]: ドラえもんとは何か。[/INST]: ドラえもんは、藤子・F・不二雄先生によって1970年に誕生した、日本の漫画家であり、漫画家の藤子・F・不二雄先生の代表作である。
1977年にテレビアニメ化され、1987年には映画化された。
ドラえもんは、主人公の少年・のび太の妹のジャイアンの家に住み着いている、小学生のロボットである。
のび太の家には、ジャイアンの家と同じように、のび太の父、のび太の母、のび太の兄、のび太の姉の家があり、それぞれの家には、ジ ャイアンの家と同じように、ドラえもんが住み着いている。
ドラえもんは、のび太が、様々な道具を使って、様々な困難を乗り越えるために、のび太の家に住み着いている。
ドラえもんは、の
---
prompt tokens = 19
output tokens = 338 (23.440641 [tps])
total time = 14.419401 [s]
のび太の妹のジャイアン、いやいや。妹も兄も姉もいないし。ドラえもん、何人(体)いるのだよ…。
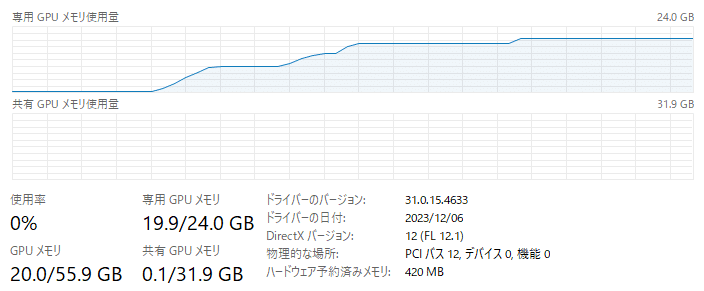
GPUリソース
起動してから推論が終わるまでのメモリの推移はこちら。
Medusaの頭数が5だからなのか、3と比べると使用量が2.5GBほど多いです。

6. まとめ - 速度の比較
使用したモデルは elyza/ELYZA-japanese-Llama-2-7b です。以下の4つで速度を比較しましょう。
Medusa - Legacy
Medusa - axolotl
Transformers
vLLM
# Medusa - Legacy
prompt tokens = 19
output tokens = 367 (29.506581 [tps])
   total time = 12.437903 [s]

# MEdusa - axolotl
prompt tokens = 19
output tokens = 338 (23.440641 [tps])
   total time = 14.419401 [s]

# transfomers
prompt tokens = 58
output tokens = 256 (21.363387 [tps])
   total time = 11.983118 [s]

# vLLM
prompt tokens = 58
output tokens = 256 (54.158414 [tps])
total time = 4.726874 [s]ということで、vLLM圧勝ですw
たしかに、transfomersと比較すれば速いのかもしれない。今後に期待です。
この記事が気に入ったらサポートをしてみませんか?
