Chat with RTXでELYZA-japanese-Llama-2-7b-instructを試してみる
日本語が使えないのなんだか虚しい。なので使えるようにできるかを試してます。
(注)タイトルに7bとありますが、13bでも試しています。
Chat with RTXのインストールは先に済ませておいてください。
1. WSL2での操作
量子化モデルの作成までは、WSL2側で実施します。
環境構築
python3 -m venv tensorrt-llm
cd $_
source activate
TensorRT-LLMをクローンします。ChatWithRTXが使用しているバージョン0.7.0を使用します。
git clone -b v0.7.0 https://github.com/NVIDIA/TensorRT-LLM.git TensorRT-LLM/TensorRT-LLM-0.7.0
cd TensorRT-LLM/TensorRT-LLM-0.7.0
パッケージのインストール。
pip install tensorrt_llm==0.7 --extra-index-url https://pypi.nvidia.com --extra-index-url https://download.pytorch.org/whl/cu121
#
pip install -r requirements.txt

# 量子化のために
cd examples/quantization
pip install -r requirements.txt
pip install --no-cache-dir --extra-index-url https://pypi.nvidia.com tensorrt-libs==9.2.0.post12.dev5
pip install --no-cache-dir --extra-index-url https://pypi.nvidia.com tensorrt-bindings==9.2.0.post12.dev5
cd ../../
#
量子化モデルの作成
ELYZAの7B instructモデルを4bit量子化します。
# HFのキャッシュディレクトリにあるELYZA 7Bのディレクトリを指し示します
hf_elyza_cache=~/.cache/huggingface/hub/models--elyza--ELYZA-japanese-Llama-2-7b-instruct/snapshots/48fa08b3098a23d3671e09565499a4cfbaff1923
#
cd examples/llama
python quantize.py --model_dir ${hf_elyza_cache}  \
                --dtype float16 \
                --qformat int4_awq \
                --export_path ./elyza7_int4_awq_weights \
                --calib_size 32
できました。
$ ls -l elyza7_int4_awq_weights/
total 13340604
-rw-r--r-- 1 user user      102513 Feb 17 03:17 llama_tp1.json
-rw-r--r-- 1 user user 13660664828 Feb 17 03:18 llama_tp1_rank0.npz
$
Chat with RTXが参照できる場所へ諸々コピー
Chat with RTXが参照可能な場所に、Hugging Faceの定義ファイルと量子化モデルをコピーします。
まず、HFの定義ファイル。
cd /mnt/c/Users/Hoge/AppData/Local/NVIDIA/ChatWithRTX/RAG/trt-llm-rag-windows-main/model
mkdir -p elyza/elyza7_hf
cd elyza/elyza7_hf
#
cp -p ${hf_elyza_cache}/config.json .
cp -p ${hf_elyza_cache}/tokenizer.json .
cp -p ${hf_elyza_cache}/tokenizer.model .
cp -p ${hf_elyza_cache}/tokenizer_config.json .
#
続いて、先ほど作成した量子化モデルをコピーします。
cp -pr /path/to/venv/tensortr-llm/TensorRT-LLM/TensorRT-LLM-0.7.0/examples/llama/elyza7_int4_awq_weights elyzaChat With RTXのconfig.jsonファイルの修正
ディレクトリを移動して、
cd /mnt/c/Users/Hoge/AppData/Local/NVIDIA/ChatWithRTX/RAG/trt-llm-rag-windows-main/configconfig.jsonファイルに以下の + 行を追記します。
--- config.json.orig    2024-02-15 01:28:28.800430900 +0900
+++ config.json 2024-02-15 01:26:33.496724600 +0900
@@ -2,6 +2,18 @@
     "models": {
         "supported": [
             {
+                "name": "ELYZA japanese Llama 2 7B instruction int4",
+                "installed": true,
+                "metadata": {
+                    "model_path": "model\\elyza\\elyza7_int4_engine",
+                    "engine": "llama_float16_tp1_rank0.engine",
+                    "tokenizer_path": "model\\elyza\\elyza7_hf",
+                    "max_new_tokens": 1024,
+                    "max_input_token": 3900,
+                    "temperature": 0.1
+                }
+            },
+            {
                 "name": "Mistral 7B int4",
                 "installed": true,
                 "metadata": {
ここまでがWSL2での操作でした。
2. Windowsでの操作
TRT engineの作成
TRT engineはWindowsで作成します。WSL2でTRT engineを作成し、それをロードしようとすると以下のエラーが発生します。
[02/17/2024-03:47:15] [TRT] [E] 1: [runtime.cpp::nvinfer1::Runtime::parsePlan::369] Error Code 1: Serialization (Serialization assertion plan->header.pad == expectedPlatformTag failed.Platform specific tag mismatch detected. TensorRT plan files are only supported on the same OS/Arch platform they were created on.)コマンドプロンプトを起動します。
続いて、env_nvd_rag仮想環境を有効にします。
%localappdata%\NVIDIA\MiniConda\Scripts\activate.bat %localappdata%\NVIDIA\ChatWithRTX\env_nvd_ragカレントディレクトリをChat with RTXに移動します。
cd %localappdata%\NVIDIA\ChatWithRTX\TRT engineを作成します。
python TensorRT-LLM\TensorRT-LLM-0.7.0\examples\llama\build.py --model_dir RAG\trt-llm-rag-windows-main\model\elyza\elyza7_hf --quant_ckpt_path RAG\trt-llm-rag-windows-main\model\elyza\elyza7_int4_awq_weights\llama_tp1_rank0.npz --dtype float16 --remove_input_padding --use_gpt_attention_plugin float16 --enable_context_fmha --use_gemm_plugin float16 --use_weight_only --weight_only_precision int4_awq --per_group --output_dir RAG\trt-llm-rag-windows-main\model\elyza\elyza7_int4_engine --world_size 1 --tp_size 1 --parallel_build --max_input_len 3900 --max_batch_size 1 --max_output_len 1024はい、できました。
C>dir RAG\trt-llm-rag-windows-main\model\elyza\elyza7_int4_engine
 ドライブ C のボリューム ラベルは Windows です
 ボリューム シリアル番号は F2E4-30C6 です

 C:\Users\Hoge\AppData\Local\NVIDIA\ChatWithRTX\RAG\trt-llm-rag-windows-main\model\elyza\elyza7_int4_engine のディレクトリ

2024/02/17  03:20    <DIR>          .
2024/02/17  03:28    <DIR>          ..
2024/02/17  03:52             1,624 config.json
2024/02/17  03:52     3,676,190,908 llama_float16_tp1_rank0.engine
2024/02/17  03:52           221,214 model.cache
コピーと作成でelyzaディレクトリの下に存在するファイルはこちら。
elyza/elyza7_hf:
total 2300
-rwxrwxrwx 1 user user     641 Jan  5 22:42 config.json
-rwxrwxrwx 1 user user 1842866 Jan  5 22:43 tokenizer.json
-rwxrwxrwx 1 user user  499723 Jan  5 22:43 tokenizer.model
-rwxrwxrwx 1 user user     725 Jan  5 22:43 tokenizer_config.json

elyza/elyza7_int4_awq_weights:
total 25515920
-rwxrwxrwx 1 user user      102513 Feb 17 03:17 llama_tp1.json
-rwxrwxrwx 1 user user 13660664828 Feb 17 03:18 llama_tp1_rank0.npz

elyza/elyza7_int4_engine:
total 3590256
-rwxrwxrwx 1 user user       1624 Feb 17 03:52 config.json
-rwxrwxrwx 1 user user 3676190908 Feb 17 03:52 llama_float16_tp1_rank0.engine
-rwxrwxrwx 1 user user     221214 Feb 17 03:52 model.cache
3. Chat with RTXの起動
では起動しましょう。
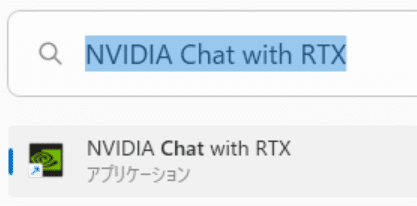
ELYZA-japanese-Llama-2-7b-instruct
選択肢に現れ、ロード時のエラーもなし。
だがしかし・・・。


量子化のせいかしら。
ELYZA-japanese-Llama-2-13b-instruct
・・・ということで、ELYZA-japanese-Llama-2-13b-instructでも試してみましょう。
配置したファイルはこちら。
elyza/elyza13_hf:
total 2300
-rwxrwxrwx 1 user user     695 Dec 27 12:48 config.json
-rwxrwxrwx 1 user user 1842767 Dec 27 12:48 tokenizer.json
-rwxrwxrwx 1 user user  499723 Dec 27 12:48 tokenizer.model
-rwxrwxrwx 1 user user     945 Dec 27 12:48 tokenizer_config.json

elyza/elyza13_int4_awq_weights:
total 25769728
-rwxrwxrwx 1 user user      128017 Feb 17 01:26 llama_tp1.json
-rwxrwxrwx 1 user user 26388067120 Feb 17 01:26 llama_tp1_rank0.npz

elyza/elyza13_int4_engine:
total 6801440
-rwxrwxrwx 1 user user       1624 Feb 17 04:31 config.json
-rwxrwxrwx 1 user user 6964389556 Feb 17 04:31 llama_float16_tp1_rank0.engine
-rwxrwxrwx 1 user user     278302 Feb 17 04:31 model.cache
config.jsonも7bのときと同じように修正して、Chat with RTXを起動します。
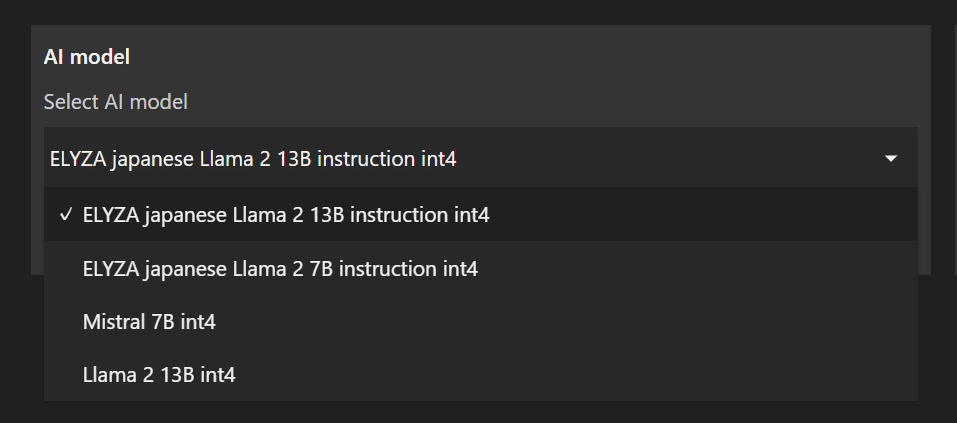
では聞いてみましょう。
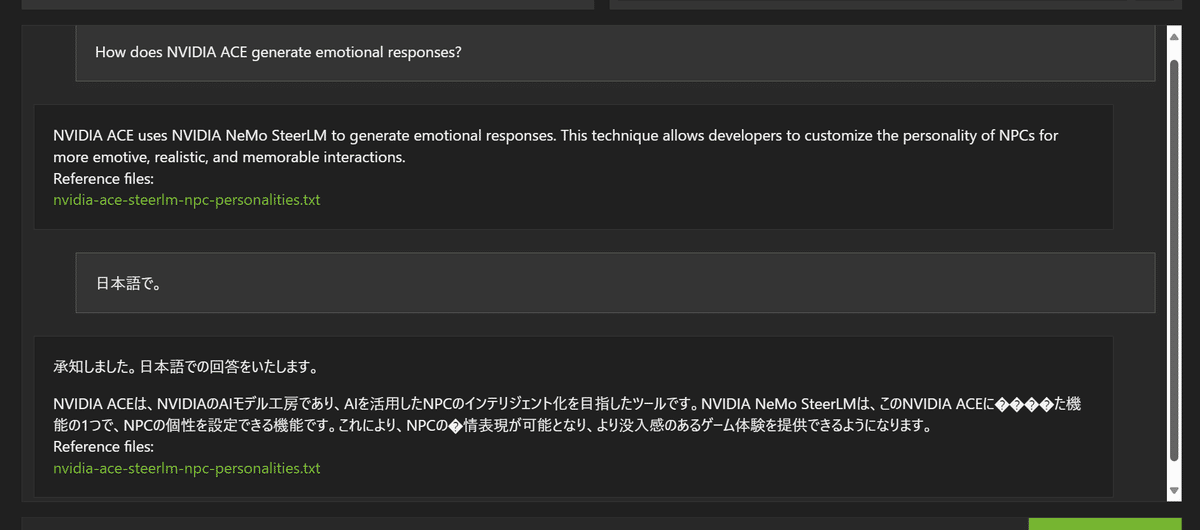
いい感じの回答ではある。文字化けしているけれど。
