
WSL2でPhotoMakerを試してみる

巷で話題のTencentのPhotoMakerをお昼休みの限られた時間で試してみます。
使用するPCはドスパラさんの「GALLERIA UL9C-R49」。スペックは
・CPU: Intel® Core™ i9-13900HX Processor
・Mem: 64 GB
・GPU: NVIDIA® GeForce RTX™ 4090 Laptop GPU(16GB)
・OS: Ubuntu22.04 on WSL2(Windows 11)
です。
1. 準備
venvを構築し、
python3 -m venv photomaker
cd $_
source bin/activate
リポジトリをクローンします。
git clone https://github.com/TencentARC/PhotoMaker.git
cd PhotoMaker/
requirements.txtを修正します。pytorch-cudaをコメントアウト。
diff --git a/requirements.txt b/requirements.txt
index ec0d361..249538c 100755
--- a/requirements.txt
+++ b/requirements.txt
@@ -1,6 +1,6 @@
 torch==2.0.1
 torchvision==0.15.2
-pytorch-cuda==11.8
+#pytorch-cuda==11.8
 diffusers==0.25.0
 transformers==4.36.2
 huggingface-hub==0.20.2
それからの
pip install -r requirements.txt2. 試してみる
デモアプリの実行
python gradio_demo/app.pyとすると、エラーが発生しました。
Traceback (most recent call last):
  File "/path/to/venv/photomaker/PhotoMaker/gradio_demo/app.py", line 13, in <module>
    from photomaker.pipeline import PhotoMakerStableDiffusionXLPipeline
ModuleNotFoundError: No module named 'photomaker.pipeline'
「photomekerなどというパッケージはない!」らしい。といいますか、これがphotomakerですし。
もちろん、photomakerというディレクトリにはあるので
$ ls photomaker
__pycache__  model.py  pipeline.py
$簡易的に、PYTHONPATHに現在のカレントディレクトリを設定して回避します。
export PYTHONPATH=`pwd`:$PYTHONPATH
python gradio_demo/app.py
起動しました。

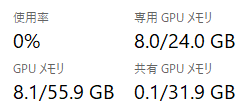
起動直後のVRAM使用量は 8GBほど。
画像とプロンプトを与える
フリー画像とプロンプトを与えて試してみましょう。
Prompt: a photo of a devil img
Style template: Photographic (Default)


笑顔が素敵。
さて、ディズニーキャラクターにして実行してみると、
Prompt: a photo of a devil img
Style template: Desney Character
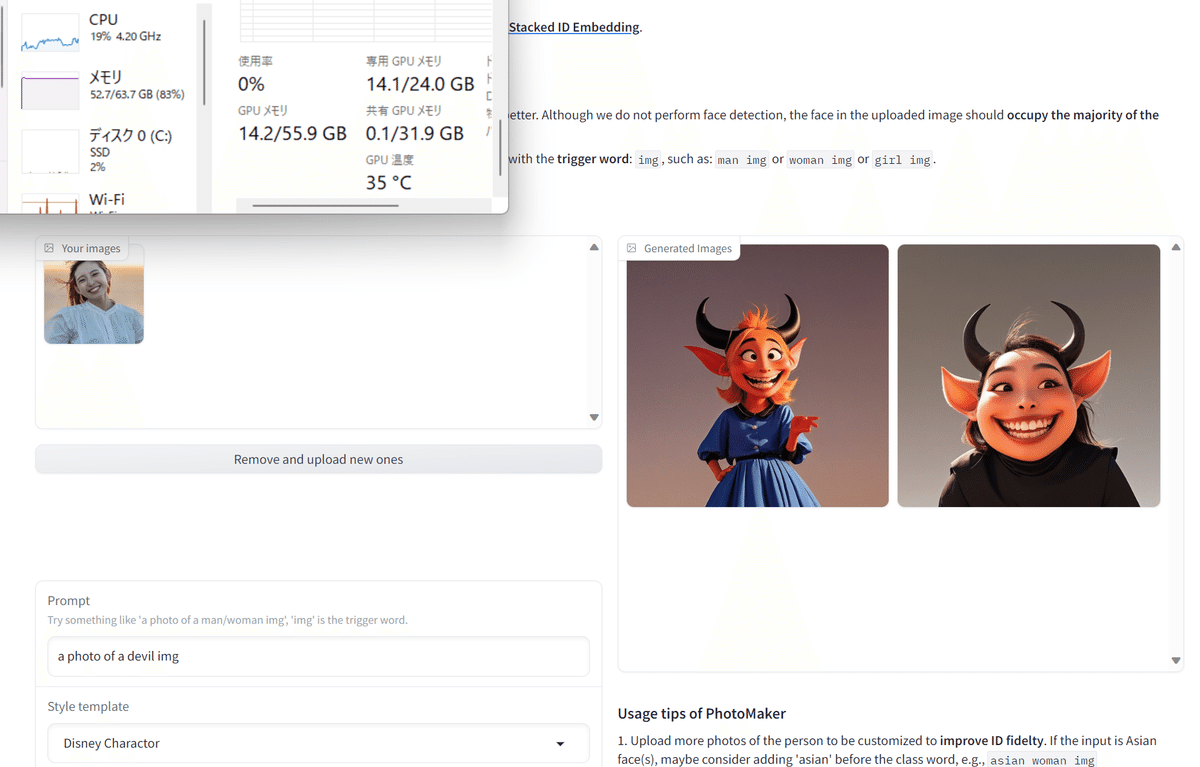
確かにディズニーっぽい。
リソース使用状況 - RTX 4090(24GB)
起動直後のVRAMは 8GBほど。生成時、14.2GB程となりました。
画像2枚(デフォルト値)の生成で 24~25秒ほどでした。
リソース使用状況 - RTX 4090 Laptop GPU(16GB)
起動直後は 9.7 - 1.6 = 8.1GB と、RTX 4090とほぼかわらず。
(注)1.6GBをディスプレイで使用しています。
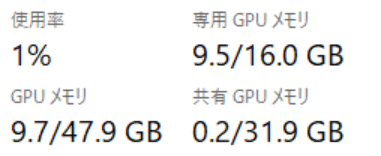
生成時は 15.7 - 1.6 = 14.1 GB程となりました。こちらも変わらず
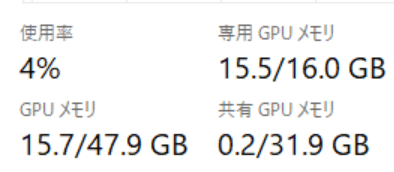
なお、画像2枚の生成で 45~46秒ほどとなっています。VRAMは溢れていないように見えるので、おそらくLaptopとLaptopでない4090との性能の違いですね(※)。
※CUDAコアが1.68倍(16,384÷9,728)を踏まえ換算すると、45秒÷1.68 = 26.78秒で近しい。
3. まとめ
VRAM 16GBあれば、ローカルPCで普通にうごきました。
・複数枚の画像を同時に生成できること
・テンプレートが予め用意されていてお手軽にアレンジできること
がアドバンテージですね。とてもいい。