
【Zoom Rooms】講師と部屋全体が見える!Neat FrameでコンパニオンZoom Roomsやってみた

コンパニオンZoom Rooms
って知ってますか?Zoom Roomsに対してNeat FrameやNeat Board、DTEN ME ProなどのZoom Rooms for Touchデバイスかサポートされたタッチディスプレイを接続したNeat BarなどがコンパニオンZoom Roomsとして動くようです。
前提条件詳細は以下双日テックイノベーションの記事をご確認ください。
何ができるの?
というところですが、メインのZoom Roomsとコンパニオンとして設定したZoom Roomsのそれぞれのカメラ使えます。つまり、セカンドカメラとして使えるということですね!
大きな会場や教室、会議室などで、前に立っている司会者や講師などの顔をコンパニオンZoom Roomsで映し、メインのZoom Roomsは教室などを映します。
↓↓↓こんな感じ。(講師の前にNeat Frame置いてます)

この需要結構あると思うので、やってみました。
手順
1.Zoom Rooms for Touchデバイス(ここではNeat Frameを使用)を、メインのZoom Roomsが設置されている場所に移動させる。
2.Zoom Rooms for Touchデバイス(Neat Frame)でメインZoom Roomsのアクティベーションコードと同じコードでサインインする。
※メインZoom Roomsを先にサインインさせておくこと。
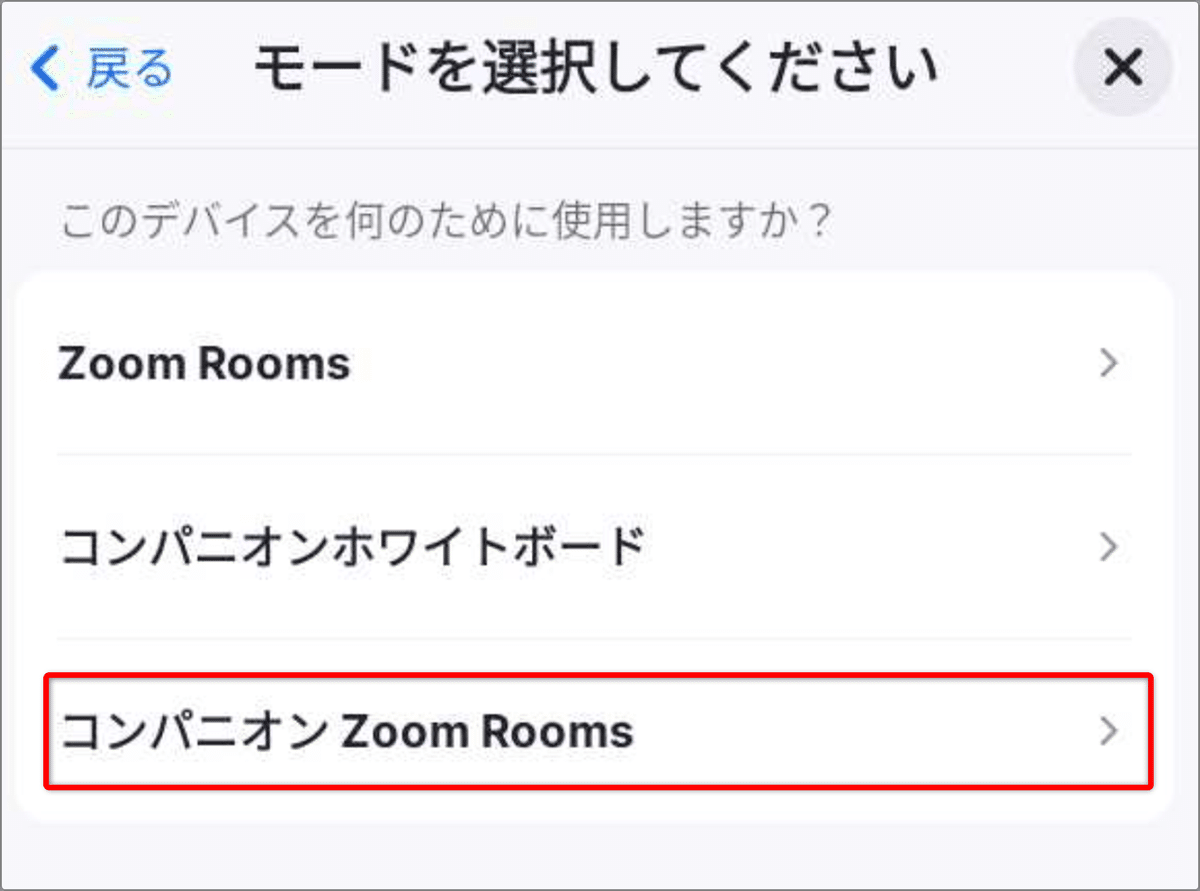
3. [コンパニオンZoom Rooms]をタップする。
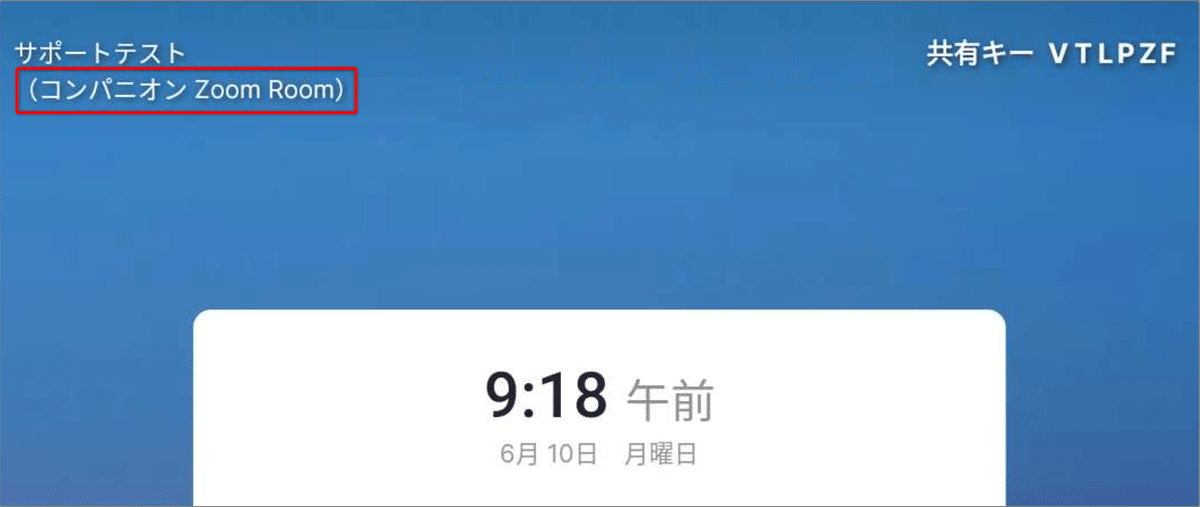
4.Zoom Rooms for Touchデバイス(Neat Frame)の画面左上に[(コンパニオン Zoom Room)]と表示されれば成功。
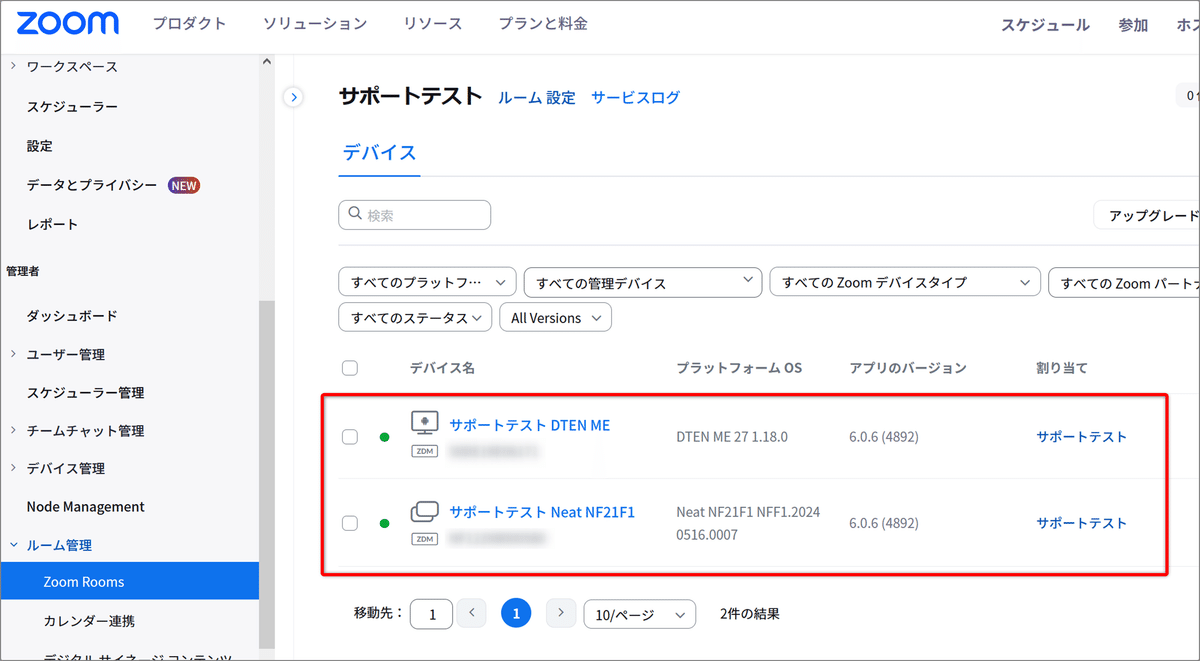
Zoom Webポータル上ではメインZoom Roomsを見るとこんな感じになってます。Neat Frameのアイコンも違いますね
※↓↓↓のスクショはDTEN Me Proをメイン、Neat Frameをコンパニオンとして実施したものです。
5.Zoom Webポータルで[ルーム設定]>[マルチカメラモードを許可します]を有効にする。ついでにコンパニオンZoom Roomsのカメラのモードも設定。

他にも方法はある※ようですが、ここでは一旦これまでとします。
※コンパニオンZoom Roomsをご覧ください。
コンパニオンZoom Roomsの動画はこちら↓↓↓
最後に
もーいーよっ
