
FreeRTOS Windows Simulatorを動かしてみる

経緯
ESP32-S3でUSB Host機能を活用したく、色々、試している
以下の記事でESP32をUSB MIDIコントローラーのHostにすることを試した
USB関連の処理をするのにFreeRTOSのTask、Queue、EventGroupなどを活用した方がよさそうと理解(Espressif SystemsのGitHubのサンプルコードで活用しているので)
ESP32-S3のフラッシュメモリへの書き込みが遅くて、FreeRTOSを実験的に試すのに時間がかかるのを解決したい
環境
Windows 10
Visual Studio 2019
Visual Studio2022でも動作すると思われる
Eclipse、MingW版も用意されている
FreeRTOS 202212.01
注意事項
「Windowsで動作させるSimulator」と「実際に組み込むマイコン」で、動作のタイミングなどが異なる
関数の使い方を理解する、という用途が向いていると感じた
準備
IDEの準備
Visual Studio 2019のインストール
Windowsで動作するFreeRTOS Simulatorをダウンロード
https://www.freertos.org/a00104.html にあるFreeRTOS 202212.01をダウンロード
`\FreeRTOSv202212.01\FreeRTOSv202212.01\FreeRTOS\Demo\WIN32-MSVC\WIN32.sln` をVisual Studioで開く
Windowsアプリ(コンパイル済みのアプリ)のSimulatorが提供されるのではなく、FreeRTOS側の実装を含めたコードとして提供されている
最も簡単なサンプルの動作確認
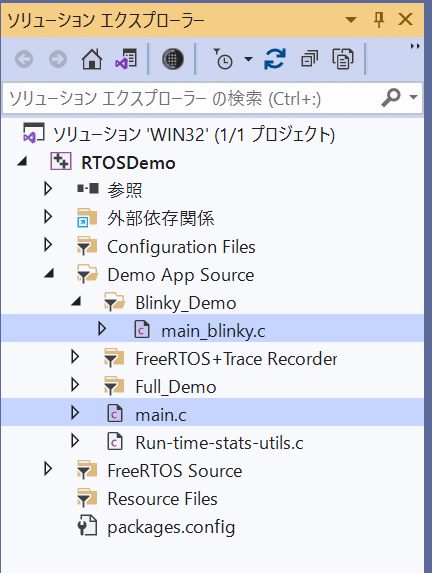
`main.c`を開き、のdefineを書き換えて、最も簡単なサンプルが動作するようにする(※1)
`main_blinky.c`の `main_blinky()` が実行されるようになる
書き換え前(※1)
#define mainCREATE_SIMPLE_BLINKY_DEMO_ONLY 0書き換え後(※1)
#define mainCREATE_SIMPLE_BLINKY_DEMO_ONLY 1ビルド&実行
Visual Sduioの[デバッグ] - [デバッグの開始] を押す
実行結果
以下のように表示される
Trace started.
The trace will be dumped to the file "Trace.dump" whenever a call to configASSERT()
fails or the 't' key is pressed.
Note that the trace output uses the ring buffer mode, meaning that the output trace
will only be the most recent data able to fit within the trace recorder buffer.

Starting the blinky demo. Press 'r' to reset the software timer used in this demo.

Message received from task - idle time 97%
Message received from task - idle time 97%
Message received from task - idle time 98%
Message received from task - idle time 98%
Message received from task - idle time 98%
Message received from task - idle time 98%
Message received from task - idle time 98%
Message received from task - idle time 98%
Message received from task - idle time 98%
Message received from software timer
Message received from task - idle time 98%
Message received from task - idle time 98%
Message received from task - idle time 98%
Message received from task - idle time 98%
Message received from task - idle time 98%
main_blinky.c の解読
main_blinky.c の概要
Queueを作る GitHub
Queueからメッセージを取り出してプリントするタスクを作る GitHub
200msに1回、メッセージをQueueに詰めるタスクを作る GitHub
2000msに1回、メッセージをQueueに詰めるタイマーを作る GihHub
タイマーを開始 GitHub
スケジューラーの開始 GitHub
rボタンを押して、タイマーのリセット GitHub
動作結果と照合
Message received from task が9回表示された後
Message received from software timer が表示される
200ms×10回目、2000ms後にタイマーの処理がされていて、正しそう
実際の関数のコード
/*** SEE THE COMMENTS AT THE TOP OF THIS FILE ***/
void main_blinky( void )
{
const TickType_t xTimerPeriod = mainTIMER_SEND_FREQUENCY_MS;

    printf( "\r\nStarting the blinky demo. Press \'%c\' to reset the software timer used in this demo.\r\n\r\n", mainRESET_TIMER_KEY );

	/* Create the queue. */
	xQueue = xQueueCreate( mainQUEUE_LENGTH, sizeof( uint32_t ) );

	if( xQueue != NULL )
	{
		/* Start the two tasks as described in the comments at the top of this
		file. */
		xTaskCreate( prvQueueReceiveTask,			/* The function that implements the task. */
					"Rx", 							/* The text name assigned to the task - for debug only as it is not used by the kernel. */
					configMINIMAL_STACK_SIZE, 		/* The size of the stack to allocate to the task. */
					NULL, 							/* The parameter passed to the task - not used in this simple case. */
					mainQUEUE_RECEIVE_TASK_PRIORITY,/* The priority assigned to the task. */
					NULL );							/* The task handle is not required, so NULL is passed. */

		xTaskCreate( prvQueueSendTask, "TX", configMINIMAL_STACK_SIZE, NULL, mainQUEUE_SEND_TASK_PRIORITY, NULL );

		/* Create the software timer, but don't start it yet. */
		xTimer = xTimerCreate( "Timer",				/* The text name assigned to the software timer - for debug only as it is not used by the kernel. */
								xTimerPeriod,		/* The period of the software timer in ticks. */
								pdTRUE,			    /* xAutoReload is set to pdTRUE, so this timer goes off periodically with a period of xTimerPeriod ticks. */
								NULL,				/* The timer's ID is not used. */
								prvQueueSendTimerCallback );/* The function executed when the timer expires. */

		xTimerStart( xTimer, 0 ); /* The scheduler has not started so use a block time of 0. */

		/* Start the tasks and timer running. */
		vTaskStartScheduler();
	}

	/* If all is well, the scheduler will now be running, and the following
	line will never be reached.  If the following line does execute, then
	there was insufficient FreeRTOS heap memory available for the idle and/or
	timer tasks	to be created.  See the memory management section on the
	FreeRTOS web site for more details. */
	for( ;; );
}
main_blinkyに登場する重要な関数
Queue
xQueueCreate():キューを作成
xQueueSend():キューにデータを送信(詰める)
xQueueReceive():キューからデータを受信(取り出す)
Task
xTaskCreate():タスクの作成
vTaskStartScheduler():タスク、タイマーの開始
vTaskDelayUntil():タスク内で待つ
Timer
xTimerCreate():タイマーの作成
xTimerStart():タイマーの開始
xTimerReset():タイマーのリセット
xやvやpdの意味
vやxをみて、呪文みたくみえてしまい、面を食らってしまった
以下の命名の慣習(Naming Conventions)の項目で述べられている
non stdint型の変数のプレフィックスはx
void型の戻り値の関数のプレフィックスはv
prvは、satatic private function
vTaskCreateのTaskは、tasks.cに定義された関数
マクロは、定義されたファイルによってプレフィックスがつく
pdTRUE、pdFALSEは、`projdefs.h`に定義されているから、プレフィックスがpd
(だと思われる)追記:以下の「Mastering the FreeRTOS Real Time Kernel」に明記されている。
最初、`preprocessor directives`の略だと考えていた
感想
Windowsで気楽に試せるようになり、たいぶ理解が進んだ
命名の慣習を理解して、見通しがよくなった
次回は、タスクやイベントを使って、実際にESP32-S3を使って、USB Hostの実装してみようと思う
この記事が気に入ったらサポートをしてみませんか?