Shopify|@cosme shoppingみたいなランキングアイコンを付けてみた(Dawn)
こんにちは、ななこまです。
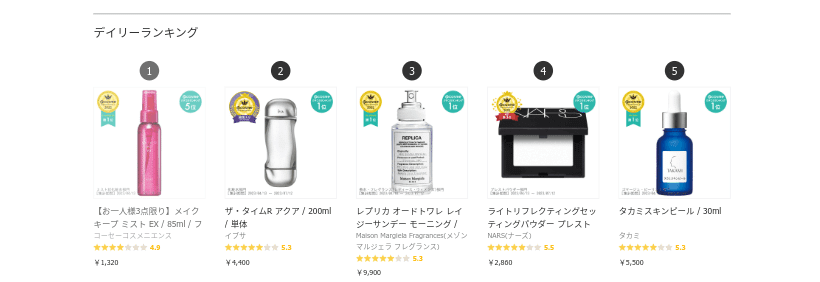
今回は、Shopify「Dawn」テーマの特集コレクションに@cosme shoppingのようなランキングアイコンを付けてみました。
コード初心者の方にも分かりやすいかと思いますので、ぜひ試してみてください◎
《 今回やること 》
①「featured-collection.liquid」を編集する
②「ranking.css」を追加する
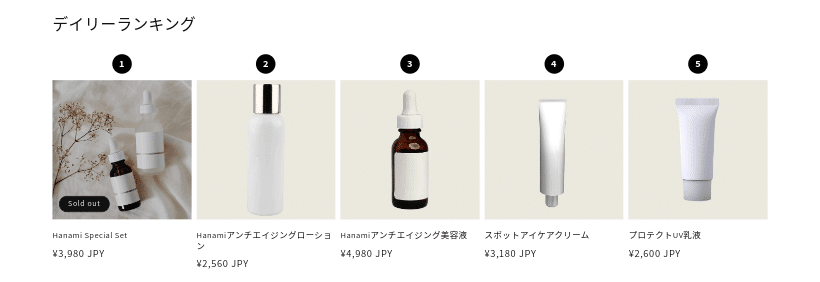
目標がこちら↓

1. 「featured-collection.liquid」を編集する
コード編集>「featured-collection.liquid」の70~90行目あたりにある下記コードを探す。
 {%- for product in section.settings.collection.products limit: section.settings.products_to_show -%}
     <li
       id="Slide-{{ section.id }}-{{ forloop.index }}"
       class="grid__item{% if show_mobile_slider or show_desktop_slider %} slider__slide{% endif %}"
     >
            {% render 'card-product',
              card_product: product,
              media_aspect_ratio: section.settings.image_ratio,
              show_secondary_image: section.settings.show_secondary_image,
              show_vendor: section.settings.show_vendor,
              show_rating: section.settings.show_rating,
              show_quick_add: section.settings.enable_quick_add,
              section_id: section.id
            %}
      </li>
       {%- else -%}
上記コードの {% render 'card-product', の上に下記コードを追加。
    {% if section.settings.show_ranking %}
      <span class="ranking-badge">{{ forloop.index }}</span>
    {% endif %}
こんな感じになります↓
 {%- for product in section.settings.collection.products limit: section.settings.products_to_show -%}
     <li
       id="Slide-{{ section.id }}-{{ forloop.index }}"
       class="grid__item{% if show_mobile_slider or show_desktop_slider %} slider__slide{% endif %}"
     >
    {% if section.settings.show_ranking %}
      <span class="ranking-badge">{{ forloop.index }}</span>
    {% endif %}
            {% render 'card-product',
              card_product: product,
              media_aspect_ratio: section.settings.image_ratio,
              show_secondary_image: section.settings.show_secondary_image,
              show_vendor: section.settings.show_vendor,
              show_rating: section.settings.show_rating,
              show_quick_add: section.settings.enable_quick_add,
              section_id: section.id
            %}
      </li>
       {%- else -%}
続いて、{% schema %}内の330行目あたりに下記コードを追加。
    {
    "type": "checkbox",
    "id": "show_ranking",
    "label": "ランキングアイコンを表示",
    "default": false
    },
こんな感じになります↓
    {
      "type": "checkbox",
      "id": "show_vendor",
      "default": false,
      "label": "t:sections.featured-collection.settings.show_vendor.label"
    },
    {
    "type": "checkbox",
    "id": "show_ranking",
    "label": "ランキングアイコンを表示",
    "default": false
    },
    {
      "type": "checkbox",
      "id": "show_rating",
      "default": false,
      "label": "t:sections.featured-collection.settings.show_rating.label",
      "info": "t:sections.featured-collection.settings.show_rating.info"
    },
これで、特集コレクションに「ランキングアイコンを表示」が表示され、チェックを入れると番号が振り分けられるはずです。
2. カスタムcssを追加する
それでは、デザインを加えていきます。
特集コレクション>カスタムcssに下記コードを追加。
.ranking-badge {
  display: block;
  width: 3rem;
  height: 3rem;
  border-radius: 50%;
  color: #fff;
  background-color: #000;
  margin-bottom: 1rem;
  text-align: center;
  margin-left: auto;
  margin-right: auto;
  font-weight: 600;
}
これだけです!


cssだけで簡単にお洒落ランキングアイコンが作れそうです!
編集は自己責任となりますので、バックアップを取ってからお試しください。以上ななこまでした☺
