【Raspberry Pi Pico】GPIO制御サンプル

はじめに
Raspberry Pi pico (W)でGPIO出力と入力の制御をするだけのサンプルコード(micropython)を書きました
電子回路初心者用にブレッドボード配線図(Fritzing)も記載してます
ソースコードも記載して、コピペですぐ試せるようにしたつもり

1. GPIO出力でLチカ
ブレッドボード配線図

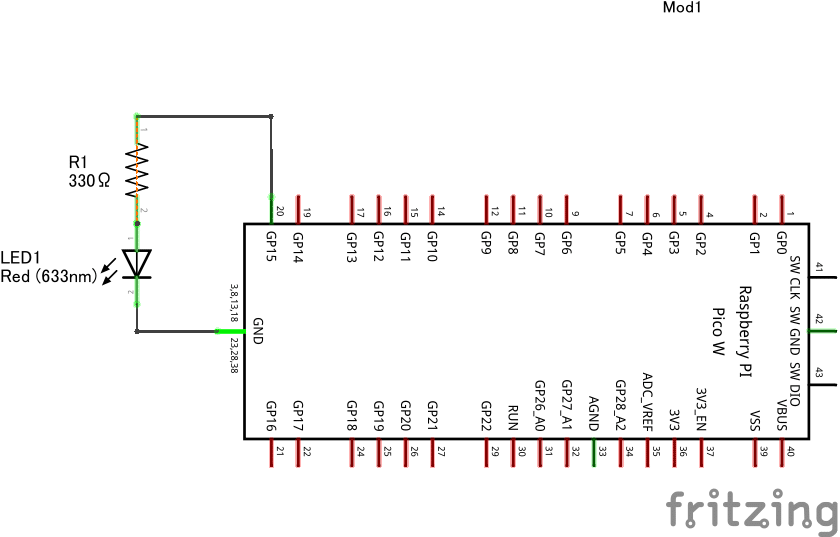
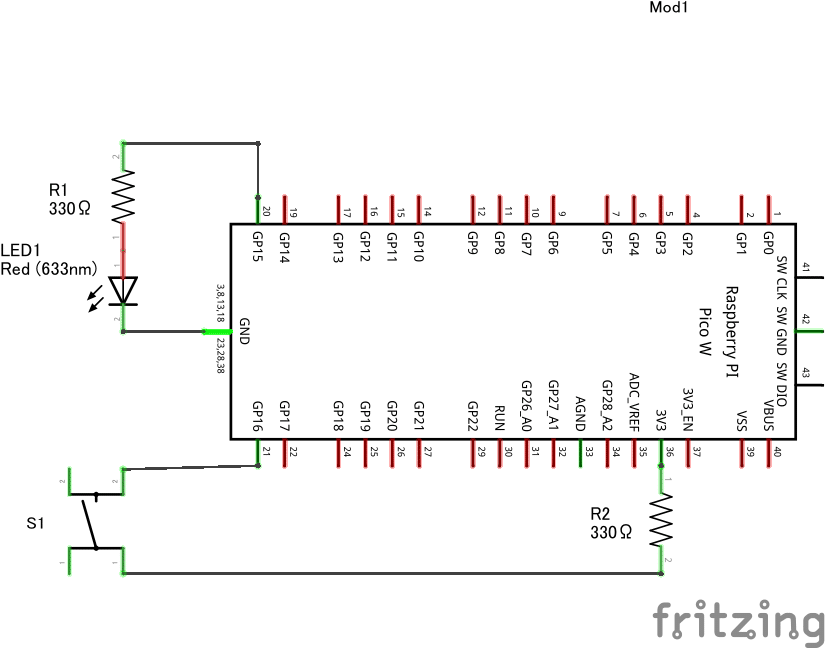
回路図
ソースコード(micropython)
import rp2  # bootselボタンの状態取得に必要
import machine  # GPIO制御に必要
import utime  # 一時停止用に使用

led = machine.Pin(15, machine.Pin.OUT)  # GPIO15 を出力モードに設定
led.value(0)  # 出力をlowにする(LEDが消灯)
now_button = 0  # 現在のボタン押下状態
before_button = 0  # 1つ前のボタン押下状態

while True:  # infinite loop
    now_button = rp2.bootsel_button()  # bootselボタンの状態を取得
    utime.sleep(0.1)  # 0.1秒間一時停止
    if now_button == 1 and before_button == 0:
        print(f"1. LEDを点灯\t\t({now_button=}, {before_button=})")
        led.value(1)  # 出力をHIGHにする(LEDが点灯)
    elif now_button == 0 and before_button == 1:  # bootselボタンが押下されていない場合
        print(f"2. LEDを消灯\t\t({now_button=}, {before_button=})")
        led.value(0)  # 出力をlowにする(LEDが消灯)
    else:
        print(f"3. LEDの状態を維持\t({now_button=}, {before_button=})")

    before_button = now_button  # 1つ前のボタン押下状態を保持する
実行時の出力(Thonny)
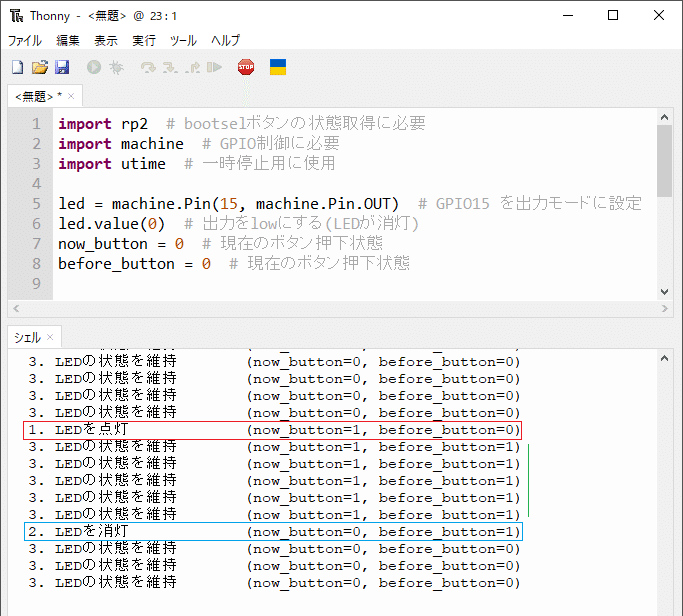
1->0に変化した場合、出力をlowにしています(変化がない場合は状態を維持してます)
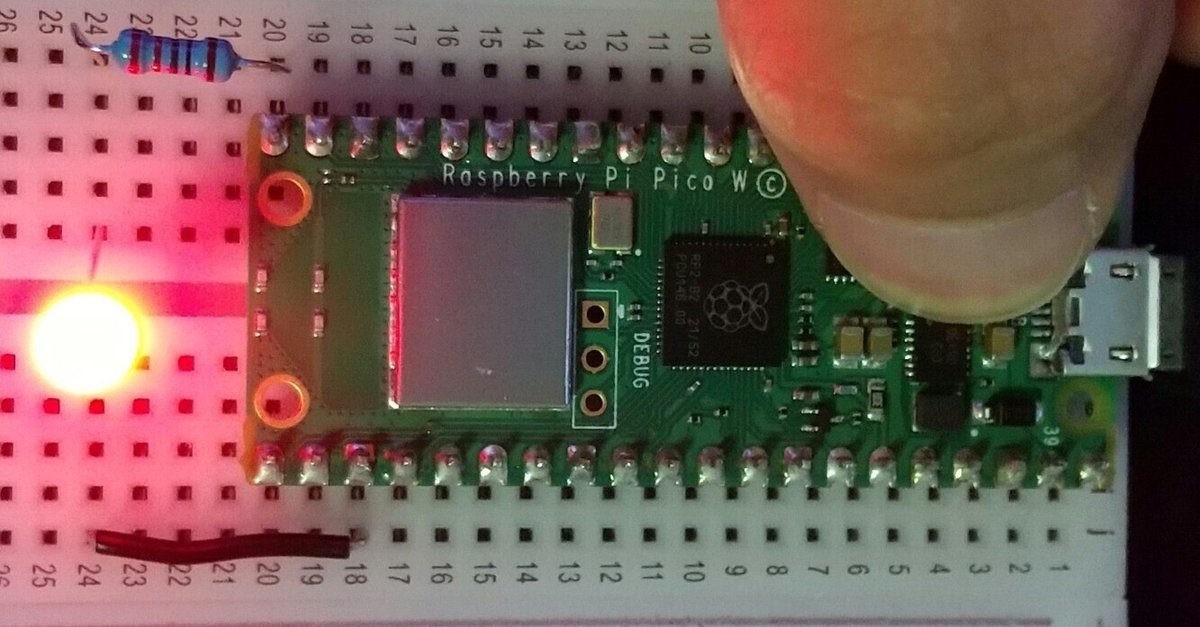
写真

2. GPIO入力でLチカ
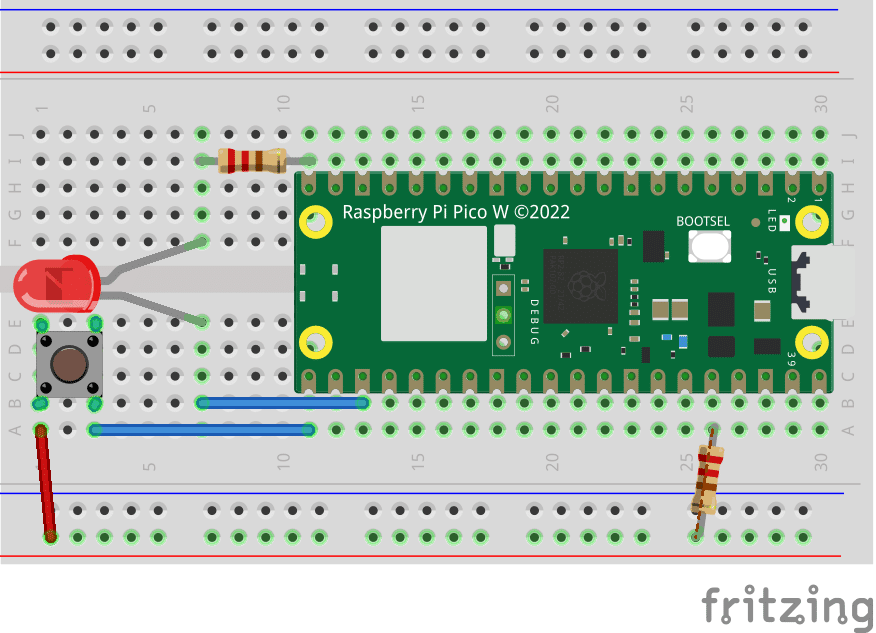
回路図
ソースコード(micropython)
import machine  # GPIO制御に必要
import utime  # 一時停止用に使用

led = machine.Pin(15, machine.Pin.OUT)  # GPIO15 を出力モードに設定
led.value(0)  # 出力をlowにする(LEDが消灯)
now_button = 0  # 現在のボタン押下状態
before_button = 0  # 1つ前のボタン押下状態

btn = machine.Pin(16, machine.Pin.IN, machine.Pin.PULL_DOWN)  # GPIO19 ボタン押下判定用

while True:  # infinite loop
    now_button = btn.value()  # タクトボタンの状態を取得
    utime.sleep(0.1)  # 0.1秒間一時停止
    if now_button == 1 and before_button == 0:
        print(f"1. LEDを点灯\t\t({now_button=}, {before_button=})")
        led.value(1)  # 出力をHIGHにする(LEDが点灯)
    elif now_button == 0 and before_button == 1:  # bootselボタンが押下されていない場合
        print(f"2. LEDを消灯\t\t({now_button=}, {before_button=})")
        led.value(0)  # 出力をlowにする(LEDが消灯)
    else:
        print(f"3. LEDの状態を維持\t({now_button=}, {before_button=})")

    before_button = now_button  # 1つ前のボタン押下状態を保持する
実行時の出力(Thonny)
※1と同じため(押すボタンがBOOTSELボタンでなく、タクトボタンであること以外同じなため)割愛
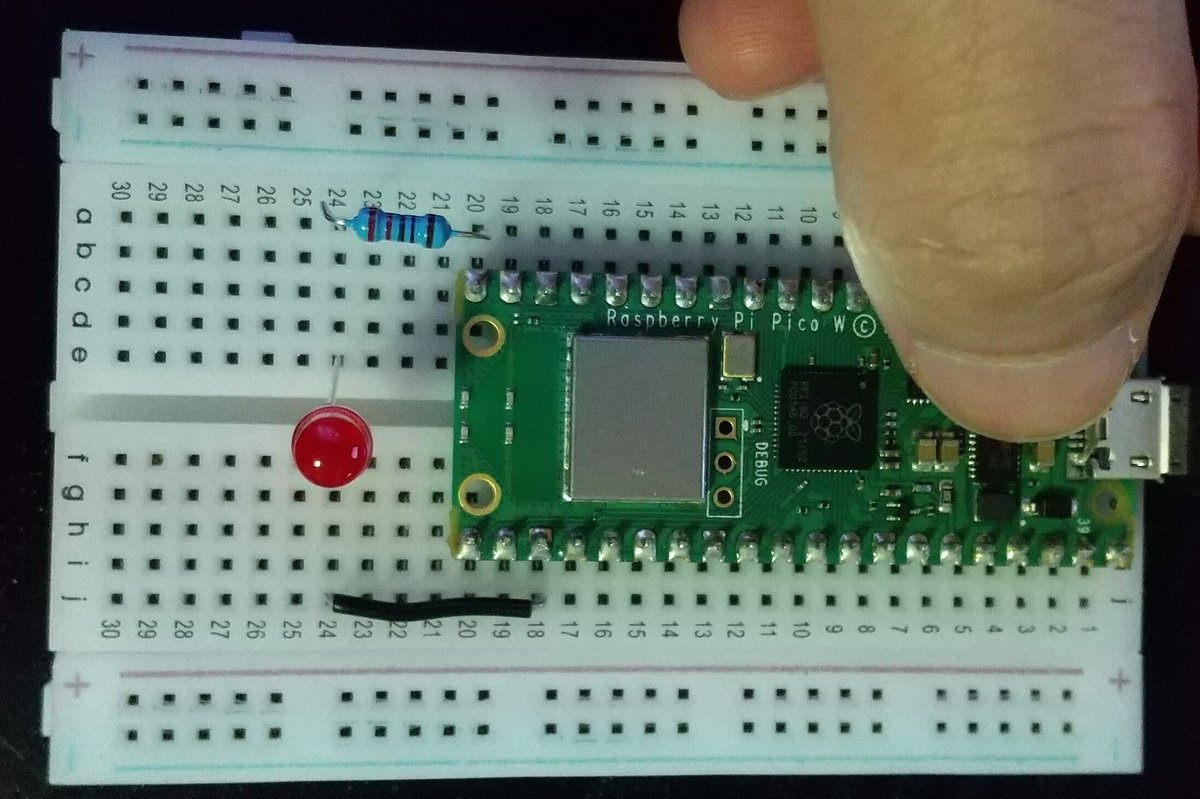
写真


以上。