Updates:Blockchain Development Beginner's Guide

This article is an UPDATES to the following my book. Based on feedback from readers, corrections and supplements to the books are described.
Deployment to Production Environment
The following chapters are related.
0-4 [Preparation] Install FastAPI and create Deta Account
1-7 Deployment to Production Environment
2-4 Deployment to Production Environment
3-7 Deployment to Production Environment
The free cloud service Deta Cloud, used for production deployments in this book, has been upgraded to Deta Space, announced on Valentine's Day, 2/14/2023.
Accordingly, I introduce Render ( https://render.com/ ) as the service to be used for production deployments. Of course, you may use another service. The following is the procedure for deploying using Render.
I hope that you will replace deploying to Deta with deploying to Render in the book.
1 Preparing Files for Deployment
The following two files will be used as sample files.
Filename:main.py
from fastapi import FastAPI

app = FastAPI()

# Define processing when a request is made to "/" with the GET method
@app.get("/")
def index():
    return {"Hello": "World"}

# Define processing when requested with the GET method in "/items/{item_id}".
@app.get("/items/{item_id}")
def read_item(item_id: int):
return {"item_id": item_id}Filename:requirement.txt
😲😲😲Note😲😲😲
uvicorn == 0.13 is added from the status described in the book.
fastapi==0.70.0
uvicorn==0.13
2 Create a GitHub account
First, please create a GitHub account.
3 Upload source code to GitHub
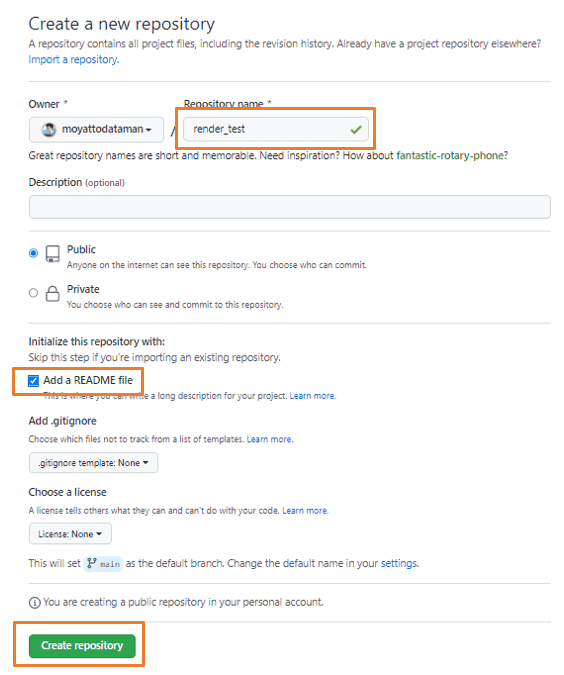
Next, upload the source code to GitHub. After logging in, go to https://github.com/new
As shown in the image below, enter a favorite name for the Repository name, and check the Add a README file checkbox. Then click Create repository.
Click Upload files in Add file.
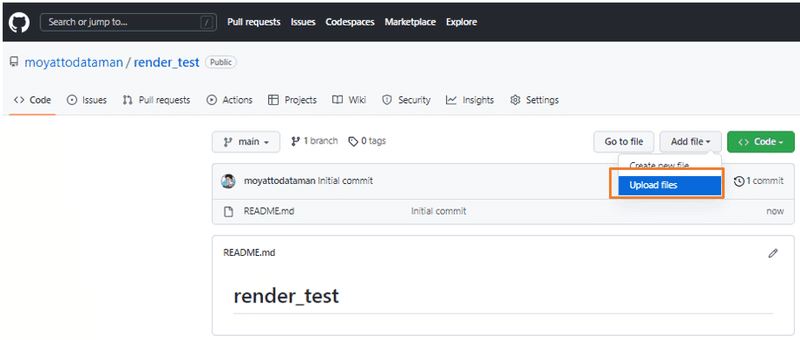
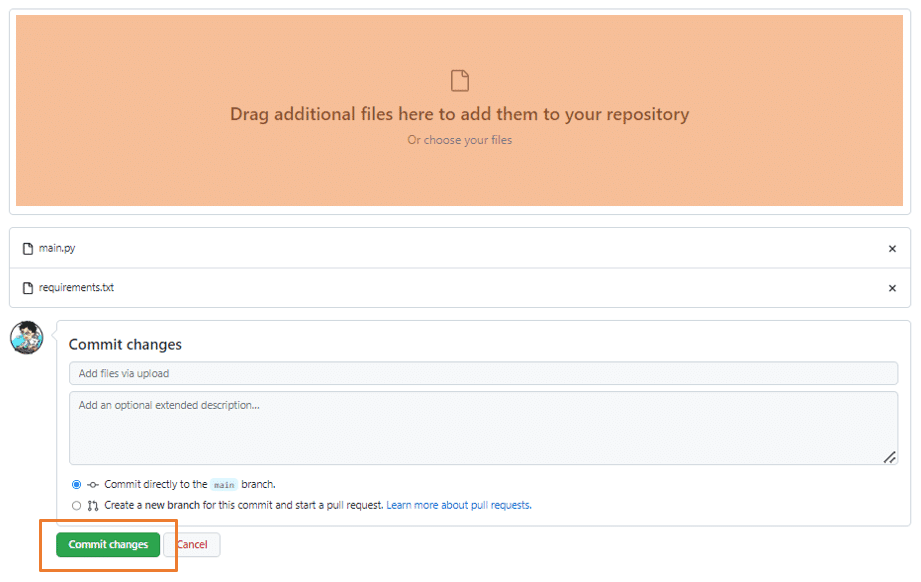
Drag and drop main.py and requirement.txt into the orange area and click Commit changes.

4 Create a Render account
Create your Render account.
5 Connecting Render and GitHub and deploying
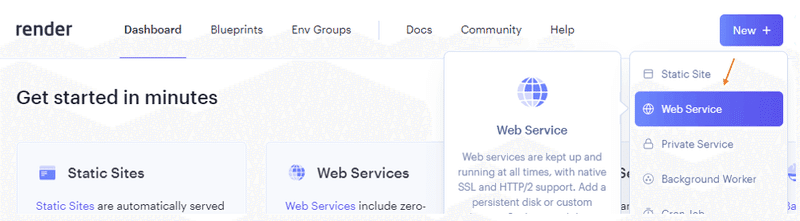
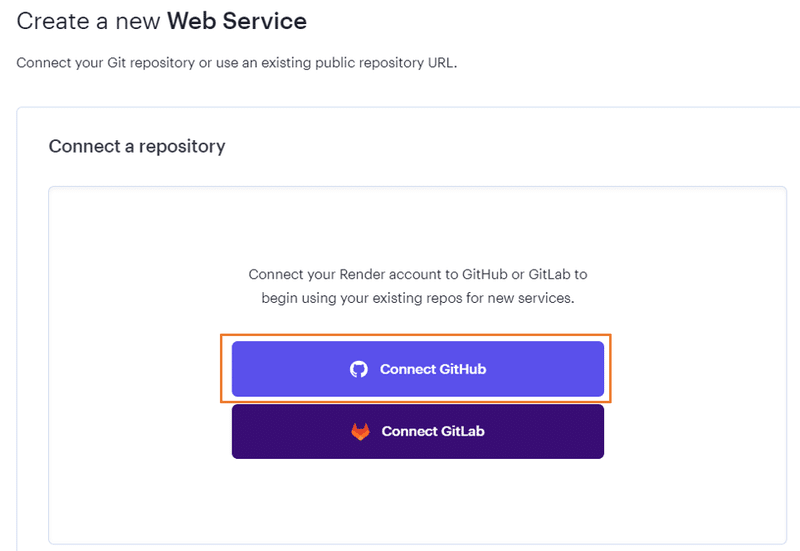
After logging in, click New, then Web Service.
Click Connect GitHub to link to the GitHub account you created.
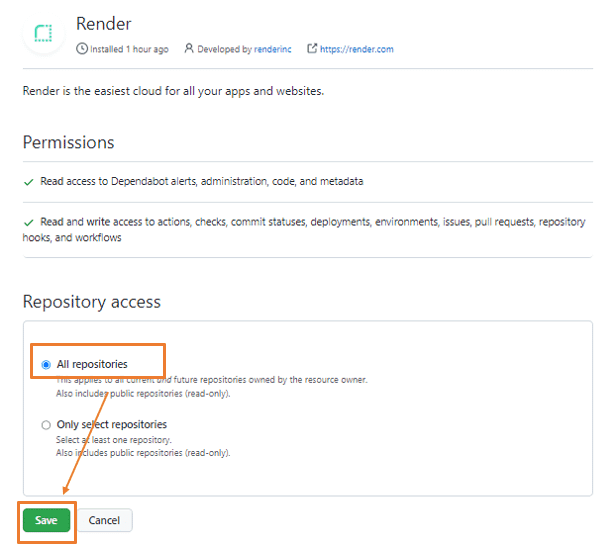
Select All repositries and click Save.
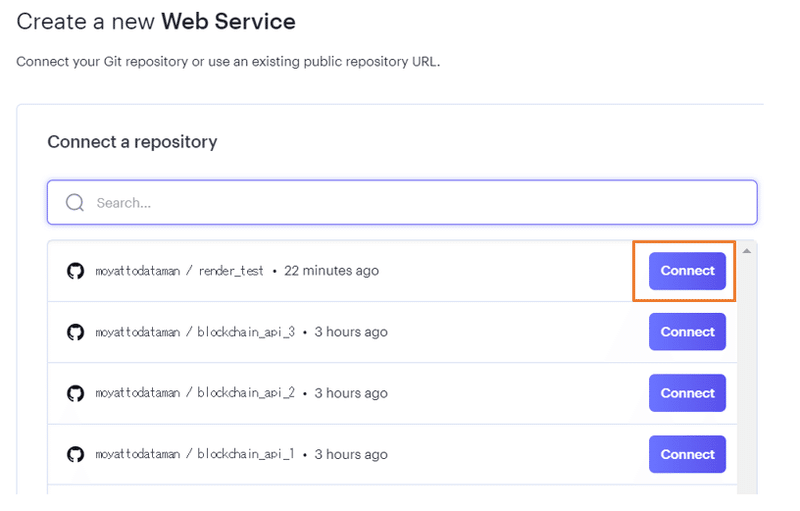
Click Connect on the Repository you wish to deploy.
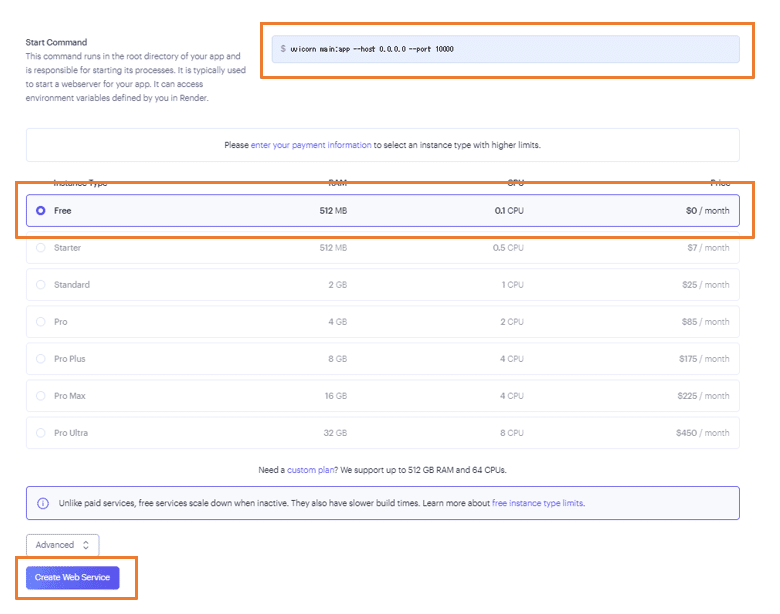
In Name, enter any name you like; in Region, select an area close to the expected users.
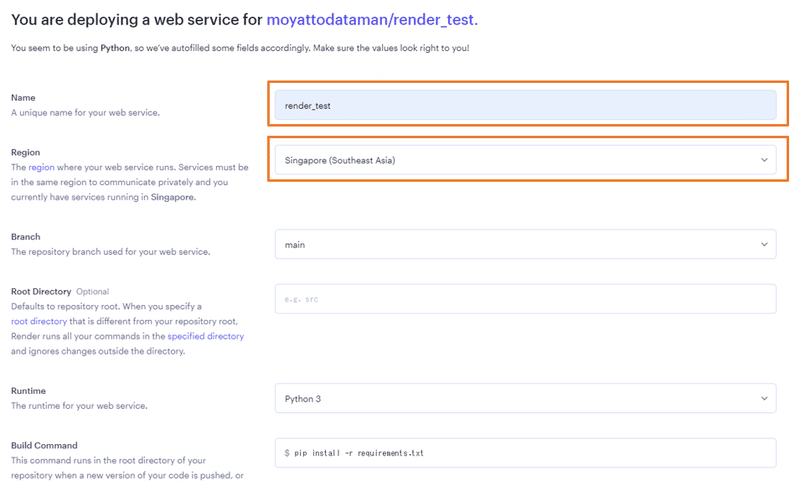
Enter uvicorn main:app --host 0.0.0.0 --port 10000 in Start Command, select Free as the price, and click Create Web Service.
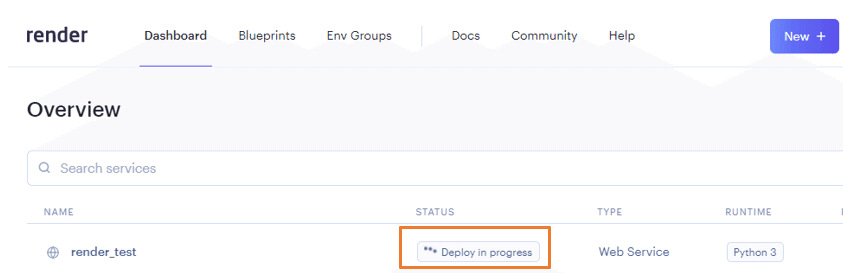
Deployment is complete when In Progress→Live is reached. You can access the application from the URL in the upper left corner.
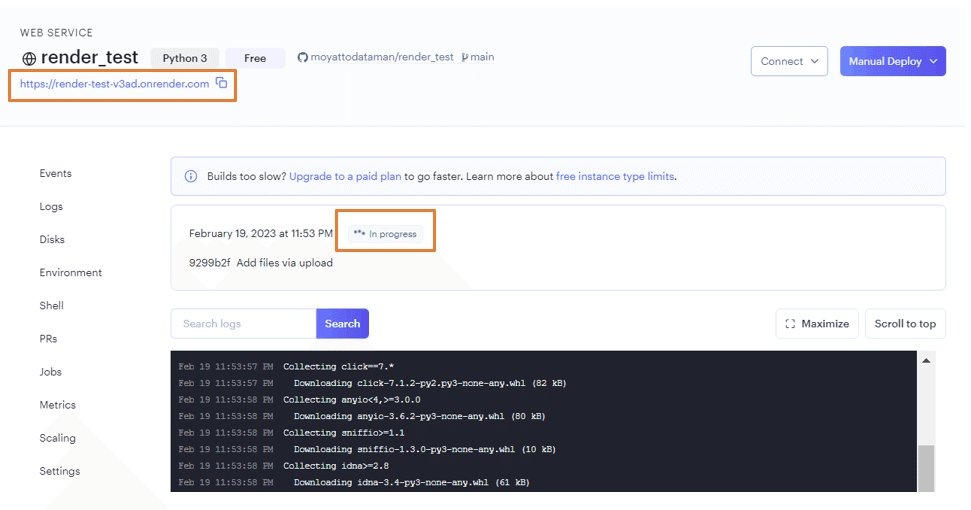
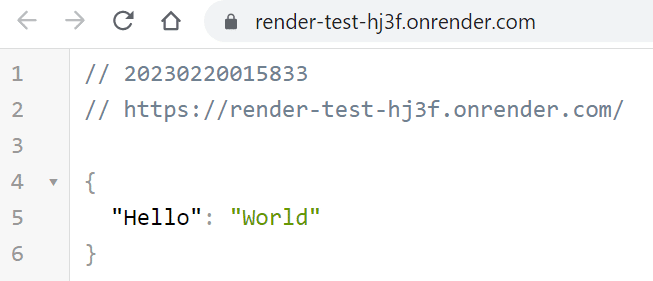
Screenshot of URL accessed
6 How to redeploy when revising source code
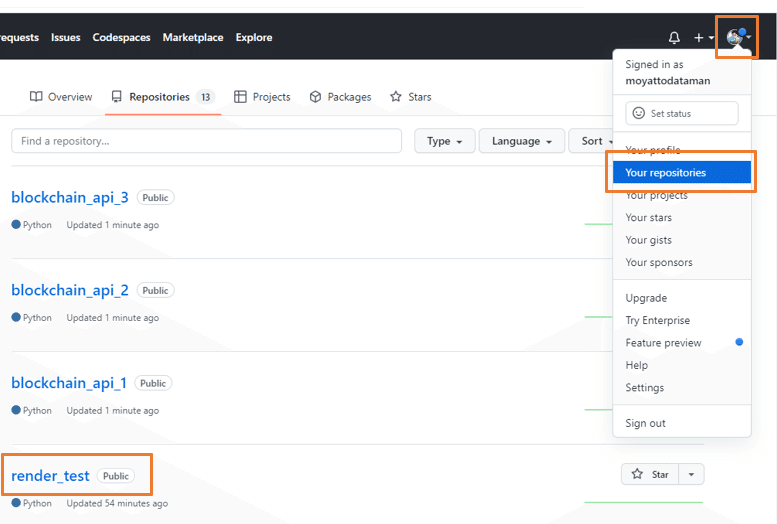
Log in to GitHub and click Your repositories from the top right icon. Then click the name of the Repository you want to upload to.
Click Upload files in Add files.

Drag and drop revised files into the orange area and click Commit changes.
The deployment process is automatically started in Render, access the Render dashboard ( https://dashboard.render.com/ ). When the status changes from Deploy in progress to Deploy Succeeded, the deployment is complete.