api gateway + lambda(python) + laravel (2) フォームから送信して受け取る編
とりあえず、いま laravel側が
Route::get('/test', function () {
みたいになっているので、これだと具合があんまよくないというか、getしたときはformを表示してpostしたときにapiの送信を行いたいので、ちょっと組替える
use Illuminate\Http\Request;

Route::get('/test', function () {
    // フォームの提示
    return Inertia::render('Test');
});
Route::post('/test', function (Request $request) {
    // apiの送信
    dd($request->all());
})->name('test.api');
で、今回はややこしい事にinertia + reactという構成でいくので、過去の記事読んでだめならこの先はキツいかもしれん
inertiaによるformの提示
とりあえずチェックボックス1つだけ付けておいて様子を見てみよう。
use Inertia\Inertia;
Route::get('/test', function () {
    // フォームの提示
    return Inertia::render('Test');
}
で resources/js/Pages/Test.jsx
import React, { useState, useEffect } from 'react';
import GuestLayout from '@/Layouts/GuestLayout';
import { Head, useForm } from '@inertiajs/react';

export default function ApiTestForm() {
  return (
    <GuestLayout>
      <Head title="Api Gateway テストページ" />


    </GuestLayout>
  )
}
これが最低限の表示であり、formもまだない
ここにcheckboxとsubmitを書いていく。各種フォームはそれぞれコンポーネントがあるからそれ使ったらよさそう(もちろん書いてもいいけど…)
まあこの辺りはいつものように resources/js/Pages/Auth/Login.jsx からコピってくるといいだろう。
resources/js/Pages/Test.jsx
import React, { useState, useEffect } from 'react';
import GuestLayout from '@/Layouts/GuestLayout';
import PrimaryButton from '@/Components/PrimaryButton'
import { Head, useForm } from '@inertiajs/react';

import Checkbox from '@/Components/Checkbox'
import InputError from '@/Components/InputError'
import InputLabel from '@/Components/InputLabel'

export default function ApiTestForm() {
  const { data, setData, post, processing, errors, reset } = useForm({
    flag1: false,
  });

  const submit = (e) => {
    e.preventDefault();
    post(route('test.api'))
  }

  return (
    <GuestLayout>
      <Head title="Api Gateway テストページ" />

      <form onSubmit={submit}>
        <div className="block mt-4">
          <label className="flex items-center">
            <Checkbox
              name="flag1"
              checked={data.flag1}
              onChange={(e) => setData('flag1', e.target.checked)}
            />
            <span className="ml-2 text-sm text-gray-600">Flag1</span>
          </label>
        </div>
        <div className="flex items-center justify-end mt-4">
          <PrimaryButton className="ml-4" disabled={processing}>
            APIテスト
          </PrimaryButton>
        </div>
      </form>
    </GuestLayout>
  )
}
admin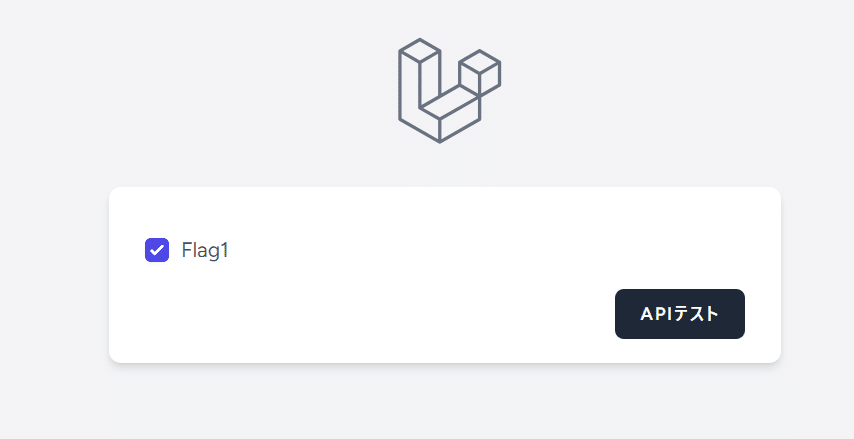
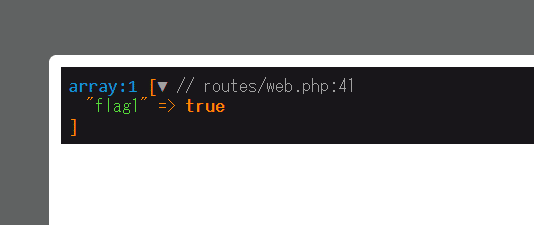
受けとれているようだ。
DBに保存してみる
まあ、DBに保存なんてしなくてもいいのかもしれんが、とりあえずそれっぽいものを作るという意味で、やってみよう。モデルもそのものずばりTestでok
% ./vendor/bin/sail artisan make:model Test -m

   INFO  Model [app/Models/Test.php] created successfully.

   INFO  Migration [database/migrations/2023_09_04_030831_create_tests_table.php] created successfully.
        Schema::create('tests', function (Blueprint $table) {
            $table->id();
            $table->json('data');
            $table->timestamps();
        });
json型で作りまるっとはめこむ事にしよう。
% ./vendor/bin/sail artisan migrate:fresh class Test extends Model
{
use HasFactory;
protected $fillable = ['data'];
}
fillableを書いて準備はokだ
postをぶん投げる
今
Route::post('/test', function (Request $request) {
    // apiの送信
    dd($request->all());
})->name('test.api');
こういう謎コードなので、書き換えていく、ってまあ基本的に前ののコピペだけど…
use GuzzleHttp\Client;
use GuzzleHttp\Exception\GuzzleException;
Route::post('/test', function (Request $request) {
    // apiの送信
    $client = new Client();
    $data = $request->all();
    try {
        $response = $client->post('https://*.execute-api.ap-northeast-1.amazonaws.com/test', [
            'json' => $data  // リクエストボディとしてJSONを送信
        ]);

        $statusCode = $response->getStatusCode();  // HTTPステータスコード
        $headers = $response->getHeaders();  // レスポンスヘッダー
        $body = $response->getBody()->getContents();  // レスポンスボディ

        dd([
            'status_code' => $statusCode,
            'headers' => $headers,
            'body' => json_decode($body, true)  // JSONをPHPの配列に変換
        ]);

    } catch (GuzzleException $e) {
        // 例外処理
        dd([
            'error_message' => $e->getMessage()
        ]);
    }
})->name('test.api');
(いい加減apiのurlはconfig(.env)に追い出してもいいかもね)
lambdaの更新
import json

def lambda_handler(event, context):
    # eventの 'body' からデータを取得し、JSONとして解析
    body = json.loads(event.get('body', '{}'))

    # keyとvalueのペアを格納する辞書
    output_dict = {}

    # body内のすべてのkey-valueペアをイテレーション
    for key, value in body.items():
        output_dict[key] = value  # キーと値をoutput_dictに追加

    # レスポンスを生成
    response = {
        'statusCode': 200,
        'body': json.dumps(output_dict)  # output_dictをJSON形式にしてbodyに設定
    }

    return response
こんな感じでoutput_dictに詰めて、json_dumpして返す
まあいずれにせよこれで
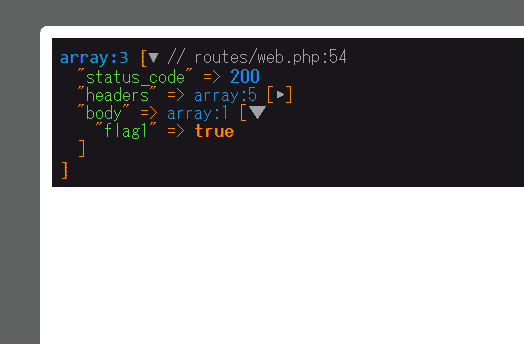
こんな感じで取得できるようになったはずだ。
DBへの書き込み
まあこれに関してはbody部だけでいい
今回はtestsテーブルにじゃんじゃん書いていく。id=1をひたすら更新したいという場合はupdateOrCreateでもいい、かも
Route::post('/test', function (Request $request): RedirectResponse
{
    // apiの送信
    $client = new Client();
    $data = $request->all();
    try {
        $response = $client->post('https://5bxynejh3h.execute-api.ap-northeast-1.amazonaws.com/test', [
            'json' => $data  // リクエストボディとしてJSONを送信
        ]);

        $statusCode = $response->getStatusCode();  // HTTPステータスコード
        $headers = $response->getHeaders();  // レスポンスヘッダー
        $body = $response->getBody()->getContents();  // レスポンスボディ
        // Test::updateOrCreate(['id' => 1], ['data' => $body]); // ID1をひたす>
ら更新
        Test::create(['data' => $body]);
        return redirect()->back();

    } catch (GuzzleException $e) {
        // 例外処理
        dd([
            'error_message' => $e->getMessage()
        ]);
    }
})->name('test.api');
取り出し
use App\Models\Test;
Route::get('/test', function () {
    // フォームの提示
    $testData = Test::latest()->get();
    return Inertia::render('Test', ['testData' => $testData]);
});
的な、なお
app/Models/Test.php
class Test extends Model
{
    use HasFactory;

    protected $fillable = ['data'];

    protected $casts = [
        'data' => 'array',
    ];
}
json型をphpで使う場合このようにarrayのcastを書いておく必要がある(必要があるというか、これがないと面倒くさい)
viewを書く
resources/js/Pages/Test.jsx
import React, { useState, useEffect } from 'react';
import GuestLayout from '@/Layouts/GuestLayout';
import PrimaryButton from '@/Components/PrimaryButton'
import { Head, useForm } from '@inertiajs/react';

import Checkbox from '@/Components/Checkbox'
import InputError from '@/Components/InputError'
import InputLabel from '@/Components/InputLabel'

export default function ApiTestForm({ testData }) {
  const { data, setData, post, processing, errors, reset } = useForm({
    flag1: false,
  });

  const submit = (e) => {
    e.preventDefault();
    post(route('test.api'))
  }

  return (
    <GuestLayout>
      <Head title="Api Gateway テストページ" />

      <form onSubmit={submit}>
        <div className="block mt-4">
          <label className="flex items-center">
            <Checkbox
              name="flag1"
              checked={data.flag1}
              onChange={(e) => setData('flag1', e.target.checked)}
            />
            <span className="ml-2 text-sm text-gray-600">Flag1</span>
          </label>
        </div>
        <div className="flex items-center justify-end mt-4">
          <PrimaryButton className="ml-4" disabled={processing}>
            APIテスト
          </PrimaryButton>
        </div>
      </form>

      <div className="min-w-full bg-white shadow rounded-lg overflow-hidden">
        <table className="min-w-full bg-white">
          <thead>
            <tr className="w-full h-16 border-gray-300 border-b py-8">
              <th className="pl-14 text-gray-600 text-left text-sm leading-4 tracking-wider">ID</th>
              <th className="text-gray-600 text-left text-sm leading-4 tracking-wider">Flag1</th>
            </tr>
          </thead>
          <tbody>
            {testData.map((item, index) => (
              <tr key={item.id} className="h-20 border-gray-300 border-b">
                <td className="pl-14 text-sm leading-4 text-blue-500 tracking-wider">{item.id}</td>
                <td className="text-sm leading-4 tracking-wider">{item.data.flag1 ? 'True' : 'False'}</td>
              </tr>
            ))}
          </tbody>
        </table>
      </div>
    </GuestLayout>
  )
}
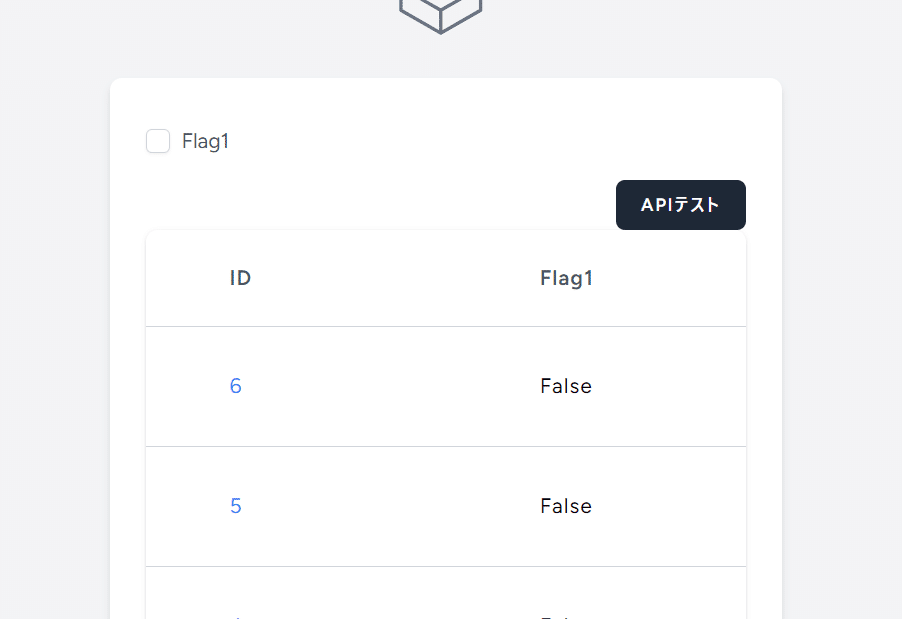
ま、デザインはともかく、正しく取得できてはいるようだ。
まとめ
とまあこのように値を送信し、api gatewayでそれを受信してそのまま投げ返す場合、あとはどんどん生やしていけばいいという感じである。ただ、値を送信したものをそのまま投げ返す事はほぼ無いだろうから、実際には整形済みデーター等を受け取る事になるだろう(終わり)
次回はflagのあるなしで読み込むファイルを変化させてその内容をloggingしたりしよう。
