紳士服売り場のアレを再現!大口素男さんの「シャツ」/"Shirt" designed by Motoo Ohguchi

アトリエまさにぃへ、ようこそ。
Welcome to Atelier masanii.
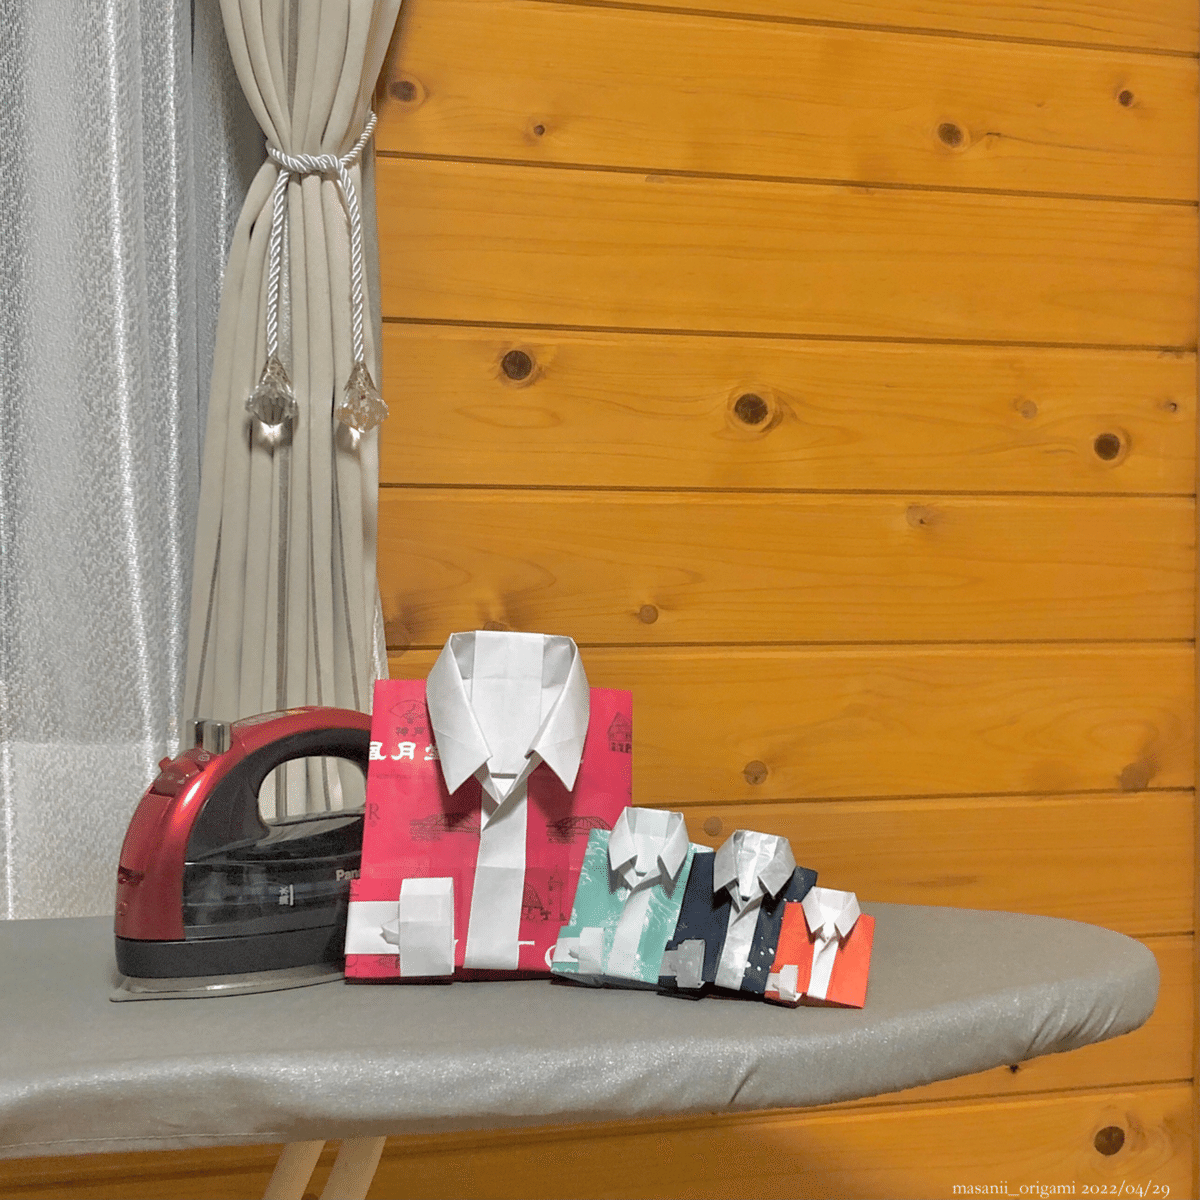
今日ご紹介するのは、大口素男さんの「シャツ」。
折紙探偵団マガジン190号の掲載作品です。
Today I introduce is "Shirt" designed by Motoo Ohguchi, listed in Origami Tanteidan Magazine vol.190.
袖口をチラ見せする畳み方…
そう、売ってるまんまの形です!!!

It's folded while the cuff glimpses
Yes, that's same as an appearance sold in store!
一体どこからこんなアイディアが湧いてくるのでしょう。
えぐい複雑系より、こういう絶妙にユニークな作品の方が興奮します。
I wonder why he comes up with such an idea.
I'm excited about unique works like this, rather than highly complex models.
エリ・前立て・袖口には紙の裏面が当てられ、お洒落なアクセントカラーになっています。
よく見ると、袖口の「剣ポロ」まであるという芸の細かさ。粋ですねぇ〜。

Back side of a paper is assigned to collar, top center pleat and cuffs, and they're in the role of fashionable accent colors.
Oh, there's "sleeve placket" on the cuff. Stylish!!!
単色はもちろん、どんな絵柄でもイケそうだ!
ということで。
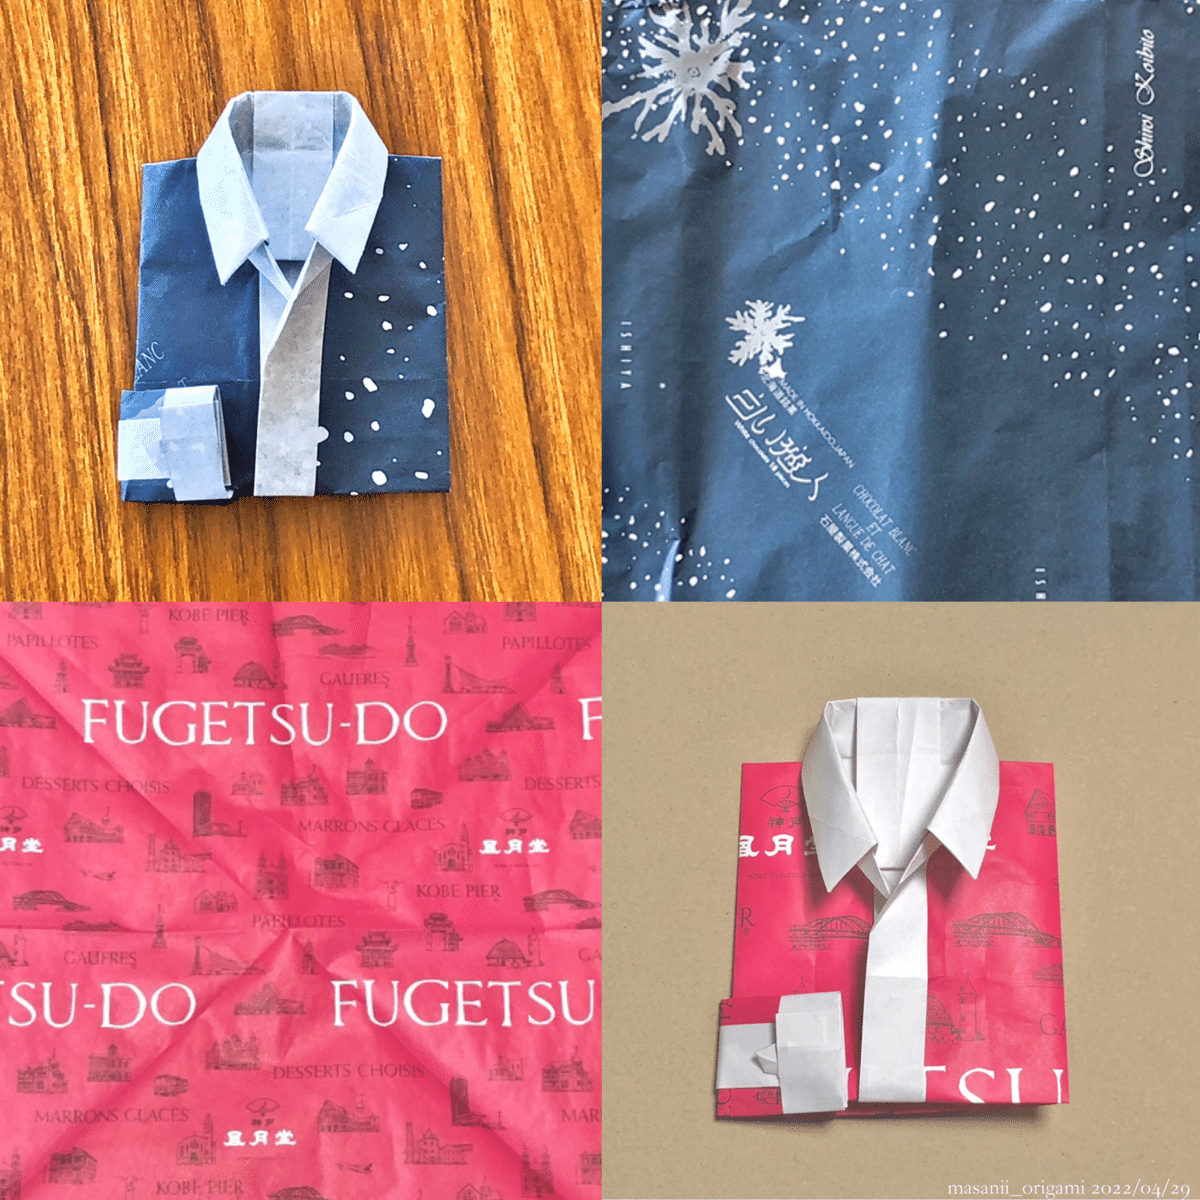
家中の包装紙をかき集めて、色々なバリエーションを作ってみました。
This model may suit not only single colors but also any patterns, so I tried various wrapping papers.
■何か忘れたけど良さそうだった白系
■フォートナム&メイソン

■Unknown white paper
■FORTNUM & MASON
■白い恋人
■神戸風月堂

■Shiroi Koibito (Souvenir in Hokkaido)
■FUGETSU-DO (Souvenir in Kobe)
■メリーチョコレート

■Merry Chocolate
え、お菓子ばっかり食べてるって?
良いんです、甘党だもの。
Huh, there're only sweets?
That's Okay, I'm sweet tooth.
☘️☘️☘️
さて、制作レポです。
工程数は60。
一つ一つの動作が丁寧に描かれているので、必然的に長くなるのでしょう。
無理に短くすると、複数の動作が同時進行になったりするので、かえって難度が上がっちゃうんですよね。
こうした方向性の配慮、Tatsumiさんの「にゃんこ」を思い出します。
(2021/09/23)
Now, let's report.
This model has 60steps.
You may feel it pretty long, but it's unavoidable because each step is described in detail.
If the process make short forcibly, it contraly be difficult.
The kindness like this reminds me "Cat" designed by Shigeru Mitsuda. (link above)
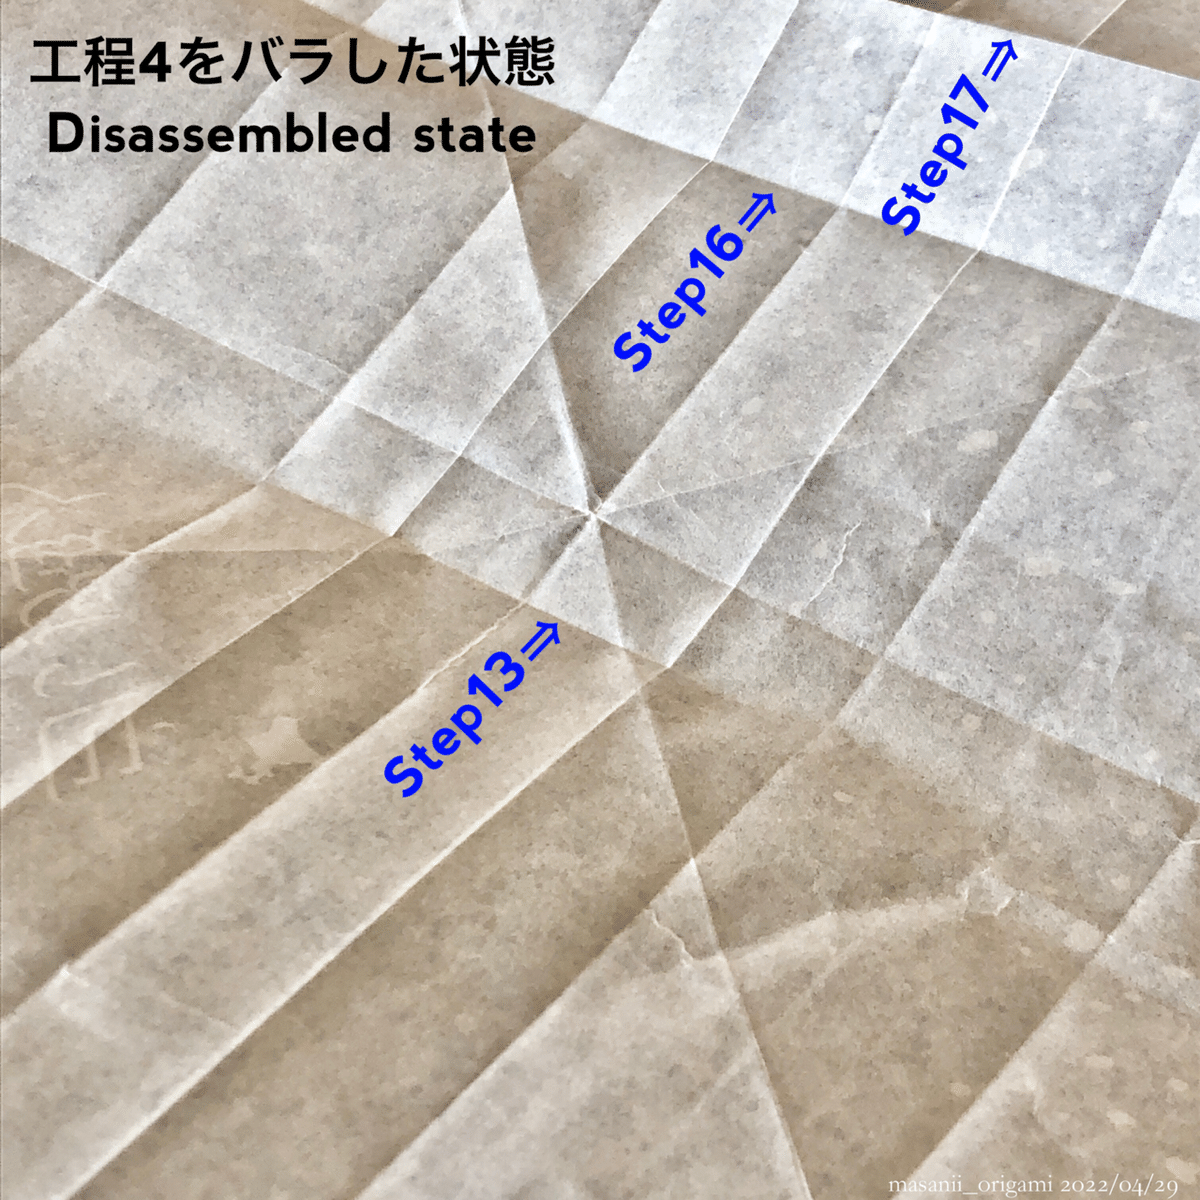
前面に色が出るのは、どの部分かな?
と思って、完成後に一度バラしてみました。
(緑にペイントしたところ)
包装紙などの絵柄モノを使う際、参考にしてみてください。
観音開き構造なので、写真と完成形は左右逆になります。
※写真のものは工程13のラインが数ミリ間違っているので、現密には下端の位置が少し異なります。(詳細後述)

I disassembled the completed model to analyze which spot is assigned to the front color.
(Green zone in the paper)
You can refer to it when using something patterns.
Completed model and the above photo are reversed because the structure is "double door".
※Strictly speaking, lower end of the green zone is little wrong because I misunderstood Step13's line a few millimeters. (I'll explain later)
そして、カンの良い方ならお気付きかと思いますが…
これ、紙の対角線がオモテ側に出ないんです。
つまり!
包装紙などの長方形を正方形にカットする際、よく端から三角形(45°)に折ることで幅を定めますが、この跡が残らないんですよね。
これは地味に嬉しいポイントです。
And you may be able to find that the diagonal creases of the original square don't appear on the surface.
When I cut a rectangle such as wrapping paper into a square, I often adjust by folding at 45 degree angle from one end.
In this model, the creases mentioned above are hidden.
This characteristic is sober but notable point.
サイズは15cm×15cmでも可能でしたが、首まわりや袖口の厚みを考慮すると、大きめの方がいいでしょう。
包装紙のような大判サイズはもちろん、17cm〜18cmでも大分やりやすくなります。
(写真は15cm×15cmで折ったもの)

You can make it by 15cm×15cm paper, but larger one is better considering the thickness of neck and cuffs.
Of course wrapping paper it suitable, and it becomes much easier even 17cm〜18cm.
(Above photo is made of 15cm×15cm paper)
☘️☘️☘️
続いて、工程ごとのレポ。
■工程4・12
この折り込みで中心に厚みが出るので、タテに分断する際は、一度バラすとキレイに線を付けられます。
具体的には、工程8・9・13・16・17をバラして折りました。
もちろん最終的には戻して折り直すので、折り筋どおりに畳めない時は、揉み込んで微調整しましょう。

Next, each process.
■Step4・12
These steps cause thickness in center.
When folding vertically, disassemble it in advance, you can make creases firmly.
Specifically, step8・9・13・16・17.
Of course it must be refold. When you can't fold along the creases, adjust by kneading & pressing.
■工程4・9・12
ピッタリでなく、すこ〜し控えめに折ると重なりが相殺され、後がラクになります。

■Step4・9・12
You'd better to fold modestly short rather than fitting to the crease.
Surplus edges that may stick out of layers are offset, and you can proceed easier.
■工程22-38
左右同時進行でもイケます。
途中でお互いが微妙〜に干渉しますが、浮かせれば大丈夫。
■Step22-38
You can proceed both side at the same time.
Sometimes they interfere each other, but it's Okay if you lift the other side.
■工程41-42
この「ひっくり返す」シーンは、工程34-35の重なりが逆転しないよう、ご注意ください。
逆転すると重なりがバラけて、そのまま畳むと首のうしろが浮きます。
工程35はエリの形を決定づけるだけでなく、34のストッパーとしても機能していたんですね。
■Step41-42
This process "Turnover", be careful so that Step34-35 layers aren't reversed.
In that case they will be separated, and if you proceed in that state, back of the neck will be peeled off.
Step35 only forms the neck shape but also works as fastener of Step34!
■完成後
首のうしろを根元から立ててあげると、首まわりがナチュラルに仕上がります。
シワになりやすいですが、両脇から揉み込むと、曲線を付けやすいですよ〜!

■After completion
If you stand the neck from the root, the surrounding area will become more natural.
It tends to be wrinkled, but kneading from both sides, you can make natural curve.
☘️☘️☘️
次に、個人的な注意ポイント。
(単に私の不注意で見逃しただけですが…)
Next, some important points I personally felt.
(They're simply my mistakes!)
まず、工程13で折るラインは、紙の中心ではありません。
中心より少し下、工程8のラインに合わせて折ります。

First, Step13's line is NOT the centerline of a paper.
It's slightly below the centerline, and you must fold along Step8's crease.
それから、何回か工程33をすっ飛ばしてしまいました。
忘れるとエリが太くなり、内側との密着度も下がります。

And I sometimes skipped Step33.
If forgetting to do it, collar becomes thick and leaves form the inner.
結果的にどちらも致命傷にならず完成できたのですが、何ともお恥ずかしい。
皆さんも、お気をつけくださいませ。
(こんなミスするの、私だけ?)
As a result, neither case was a serious mistake, but embarrassing...
Be careful not to do such a thing.
(It's only me and no worth worrying!?)
もう一つ、これは未解決な課題なのですが…
完成後の整形で、左右で重なった前立てが、片方だけ高くなっちゃうんですよね。
私は対症療法として、内側に新しい折り目を入れて開いたり、胸元を外側へ折ったりしています。
構造上やむを得ない気がしますが、スッキリ仕上げる妙案があれば、ぜひお寄せください。
This is an unsolved issue...
About shaping after completion, one side of the top center pleat tends to rise, because of their overlapping.
As a symptomatic treatment, I open by making some creases inside, or fold the chest outside.
Although I also think it's structurally unavoidable, if you have any solution, let me know!
☘️☘️☘️
というわけで、久しぶりに新作レポ。
折紙探偵団マガジン190号より、大口素男さんの「シャツ」でした!
ずっと折りたかった作品なので、折り図化してくれて本当に感謝です。

My new report after a long absence, "Shirt" designed by Motoo Ohguchi, from Origami Tanteidan Magazine vol.190.
I've wanted to play this model for a long time, so I really thank him to publish a diagram.
憧れの作品の折り図化・書籍化はファン待望の喜びですが、それに費やされる労力はどれほどのものでしょう。
クリエイター本人にはもちろん、編集者・出版社にも心より敬意を表します。
Publication of diagram or textbook of longing model is a long-awaited pleasure. However, I wonder how much effort is spent for them!
I must pay a great respect not only to the creator, but also editor & publisher.
せめてもの御礼として私ができることは、楽しく折って、写真を撮って、作品の魅力を発信すること。
その結果、作家さんの人気が高まったり、書籍が売れたり、フォロワー同士の交流が活発化したり…
微力ではありますが、私の記事が、作家さん・プレイヤー双方のモチベーションに繋がれば幸いです。
The only thing I can do is playing happily, taking photos, and expressing the charm of Origami works.
As a result, creator's popularity is increased, their textbooks sold, interaction among my followers become active...
Though my influence is few, I'm happy if my activities lead the motivation for both creators & players.
それにしても。
ありふれた題材から、毎年のように斬新な作品が生まれてくるのが不思議でなりません。
一生かけても折りきれない、作品の数々。
これからも、果てしない折り紙の世界にどっぷり浸かって、泳ぎ回っていきます!
By the way.
It's beyond understanding that innovative works are generated continuously, from ordinary common models.
There're countless models that I can't complete all even for my lifetime.
From now on, I'll immerse myself & wander in eternal origami world!
それでは、今日はここまで。
アトリエまさにぃで、またお会いしましょう。That's all for today.
See you again in Atelier masanii:)
#アトリエまさにぃ
#ateliermasanii
#大口素男
#折紙探偵団 #折紙探偵団マガジン
#origamitanteidan #日本折紙学会
#おりがみ #origami #paperwork #折り紙 #折り紙作品 #まさにぃ
この記事が気に入ったらサポートをしてみませんか?
