
まさにぃの佐藤ローズ、迷走の末に新たなステージへ/masanii's Advanced Sato rose

アトリエまさにぃへ、ようこそ。
Welcome to Atelier masanii.
先日、嬉しいことがありました。
佐藤ローズの生みの親・佐藤直幹さんとの再会です。
それから、愛好家の皆様との温かい交流。
バラの仕上げ方やパーツの組み方、素材選びなど、たくさんのヒントをいただきました。
色々な方の「バラ観」を間近で体感でき、大変有意義な一日となりました。この場を借りて御礼申し上げます。
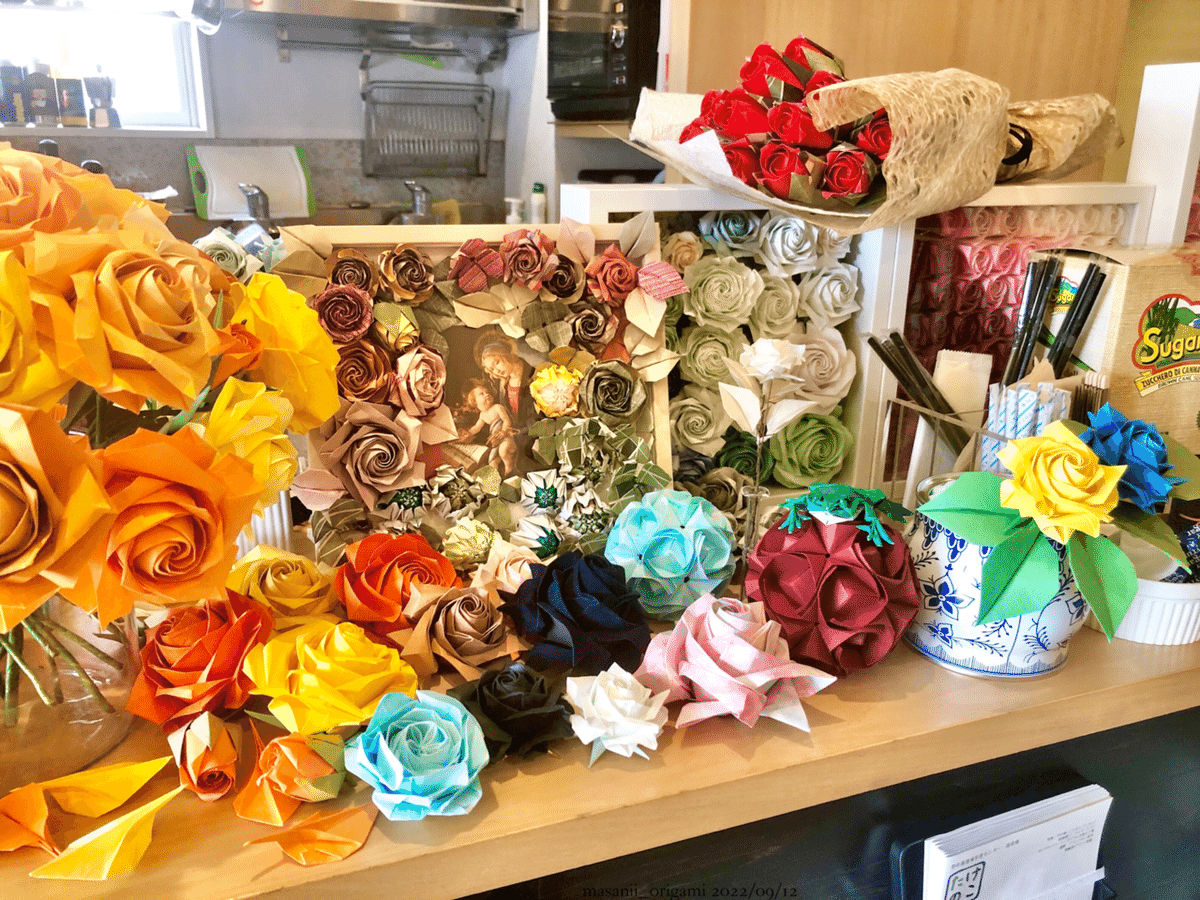
The other day I spent a pleasant time with dear Mr. Naomiki Sato who created "Sato rose", and interacted with enthusiastic origamists.
I got many tips to finish rose beautifully, assemble with the other parts, and choose the materials.
They showed me various views on the origami rose, it was so meaningful day. I appreciate everyone!
さて。
あの日の収穫を、少しでも自身のバラに活かしたい!
という思いで、あれこれ試行錯誤してみました。
まだまだ消化しきれていませんが、それでも一皮むけたハイブリッドティーローズ。
挑戦と迷走の顛末をお楽しみください。
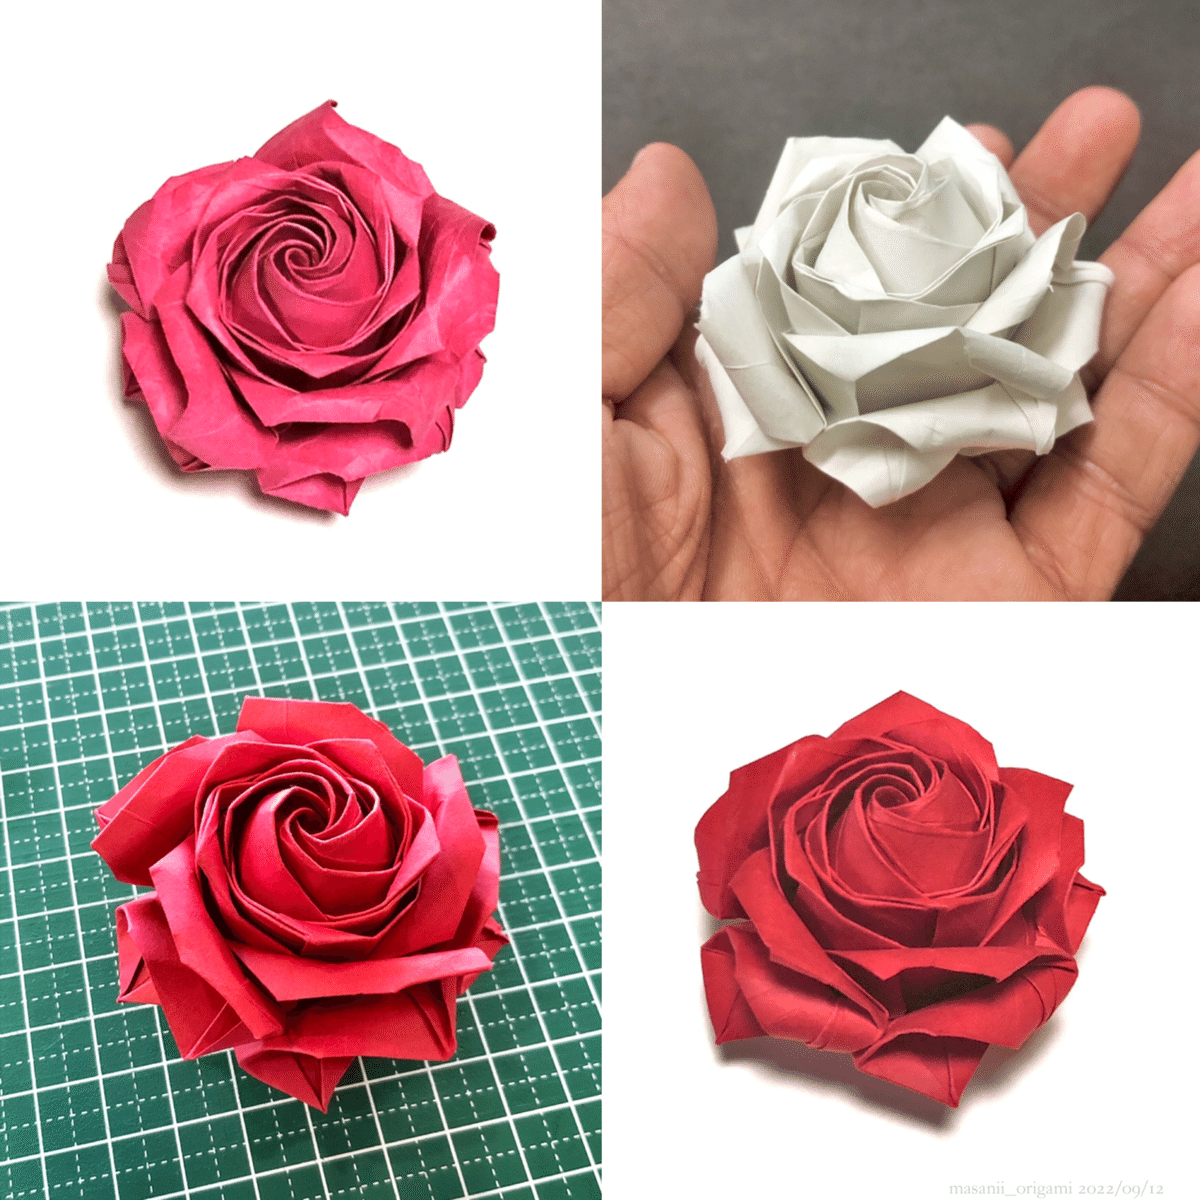
By the way, I expected simulating their techniques to my rose and tried several times.
I haven't learned enough yet, but my rose has changed somewhat.
I'll show you all my attempts!
なお、今回の記事は完成後のアレンジが主題です。
ハイブリッドティーローズの折り方を知りたい方は、佐藤ローズ第1のテキスト「1枚の紙から作る バラの折り紙」をご参照ください。
Today's article focused on a deformation of "Hybrid tea rose", so if you haven't known its diagram, check the first textbook of Sato rose.
また、HTローズ本体も上級者向けなので、過去記事でちょっとしたコツをお伝えしています。参考にどうぞ。
(2019/07/12)
(2019/07/14)
(2019/07/16)
This model is simply difficult, so I left some tips in my past posts. don't miss it!
☘️☘️☘️
ご紹介するのは「花びらのカール」。
結構ポピュラーなアレンジらしいのですが、教科書どおり作って満足していた私にとっては未知の領域でした。
目の前で繰り広げられたテクニックを、少しでも真似できるよう頑張りました。
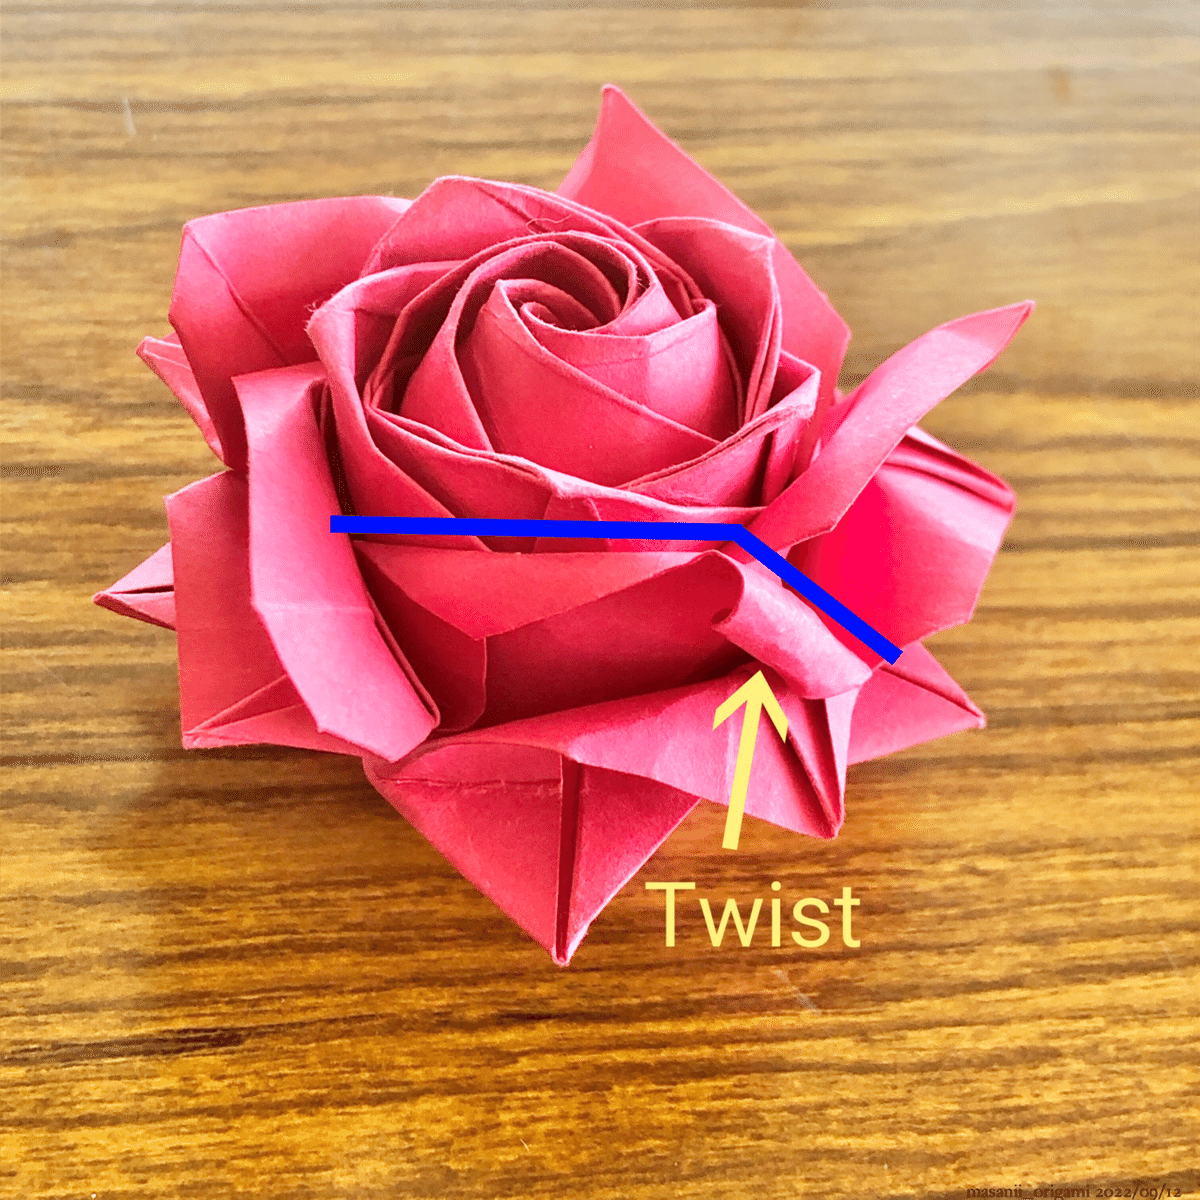
I'll introduce the technique "Curl".
I heard this method is pretty popular but it was fresh experience for me because I'd been satisfied with my works just made along the diagram.
I struggled to simulate the appearance that they showed, as much as possible.
用意したのは「丸ペンチ」。
断面が丸い、手芸用のラジオペンチです。
ピンセットを使う人が多かったのですが、ダイソーで偶然見つけたコレに一目惚れしました。
潤滑オイル(グリス)が染み出していたので、紙に付かないようティッシュでふきふき。

I prepared a pliers that has round cross section.
Many people use tweezers, but I decided to adopt this when I found at Daiso store.
It's necessary to wipe off the exuded grease.
まず仕込み段階で、一番内側の花びらに細工をします。
完成間近の工程44でめくる部分です。
工程14で花びらの原形ができたら、先っぽをペンチでグリッ!
こうすることで、先端をボッキリ折ることなく、なめらかな曲線を作れます。

Before assembling, make a certain process to the innermost petals.
This parts will be the step44's petal.
When the petal's form appears in step14, twist the tip with pliers!
This action makes natural curves without being folded.
次に内側から2番目、大きな花びら。
ここは、工程43で先端を尖らせる代わりに、根本から大胆に折り込んでしまいます。
先端はどこまで折るかというと…
辺の長さが
「工程39の折り線=紙のフチ=ここで折るライン」
という感じ。
六角形を作るイメージでしょうか。
うん、分かりにくいですね!
さらに言うと、
・新しくできたカド
・花の中心
・工程39で生じる内側のカド(反対側の花びら)
これら3つが一直線に並ぶよう調整するとキレイです。
うん。
ますます分かりにくいですね!!
図を見れば、何とな〜くご理解いただけるかと思います。

Next, large petals that place second from the inside.
I folded them boldly from the roots, instead of sharpening the tips in step43.
The degree is...
"Step39's crease = edge of paper = this time's crease"
Like making Hexagon.
Well, I can hardly explain...
In addition,
・Newly built tip
・Center of the flower
・The tip appear in Step39 (The opposite side)
Arrange them in a straight line to be seen neat.
Well, difficult more & more!
It may be easy to understand if you check my pictures above.
あとは、カドを片っ端からひねっていきろます。
力強く大胆に。
憎しみを込めてはいけません。ヘンな跡ついちゃうから。
慈愛の心をもって臨めば、美しく仕上がるでしょう。きっと。
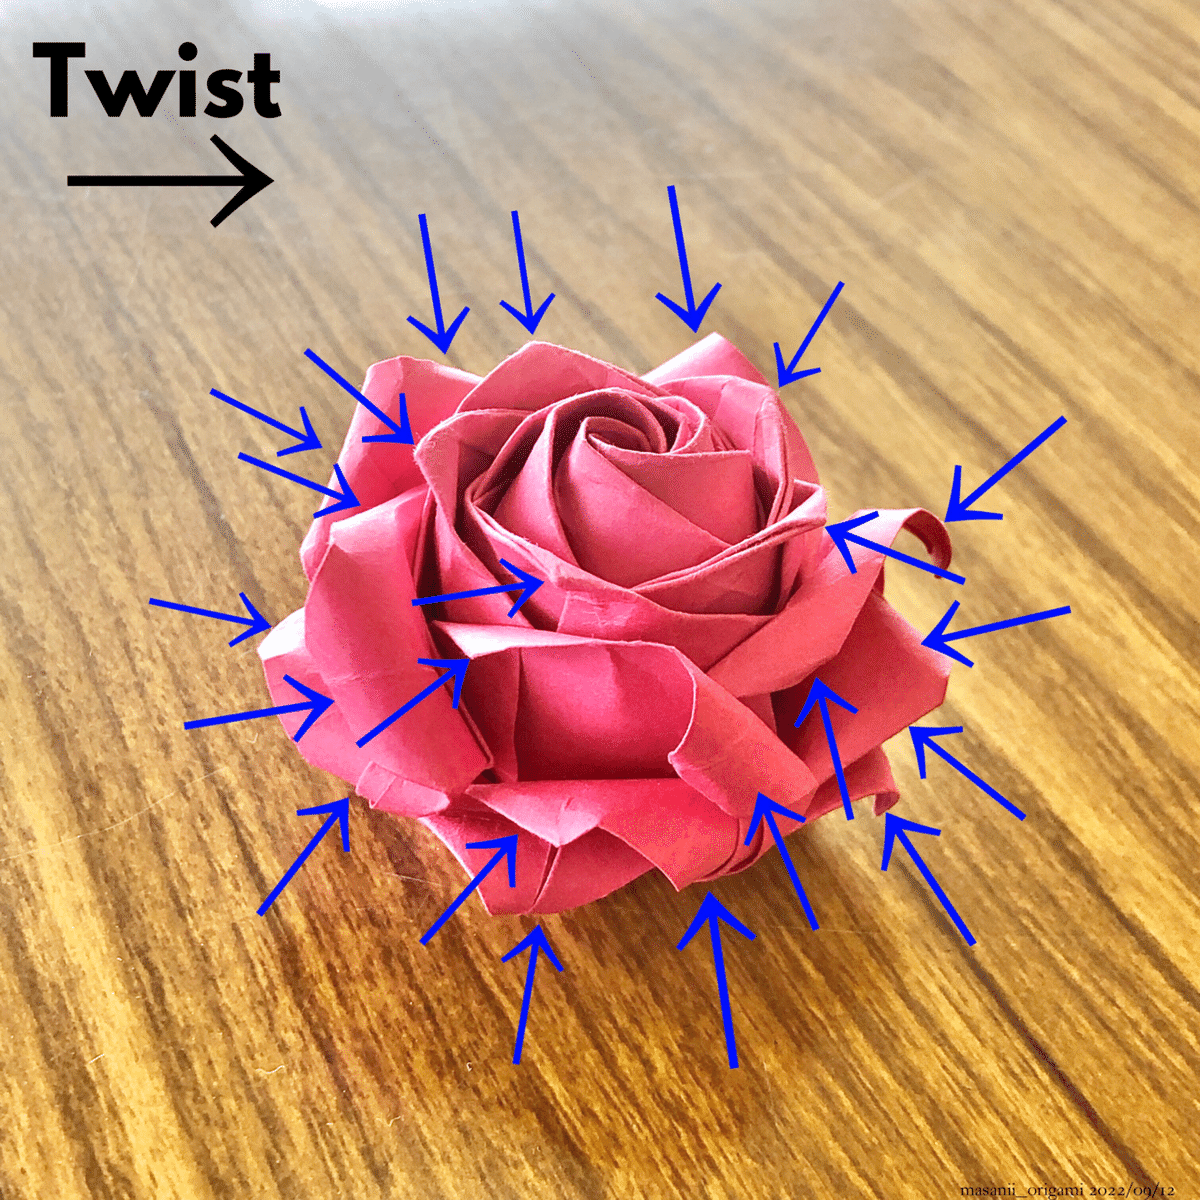
After that, twist & twist every tip I found.
Strong & bold, but no hate. Otherwise ugly scars leave.
If you work with an affection, it'll finish beautifully, maybe.
で、恐らく当時の私には邪念があったのでしょう。
心のトゲが表出するかのごとく、ツンツンにしてしまいました。
悪くはないんだけど…なんだか毒がありそうです。
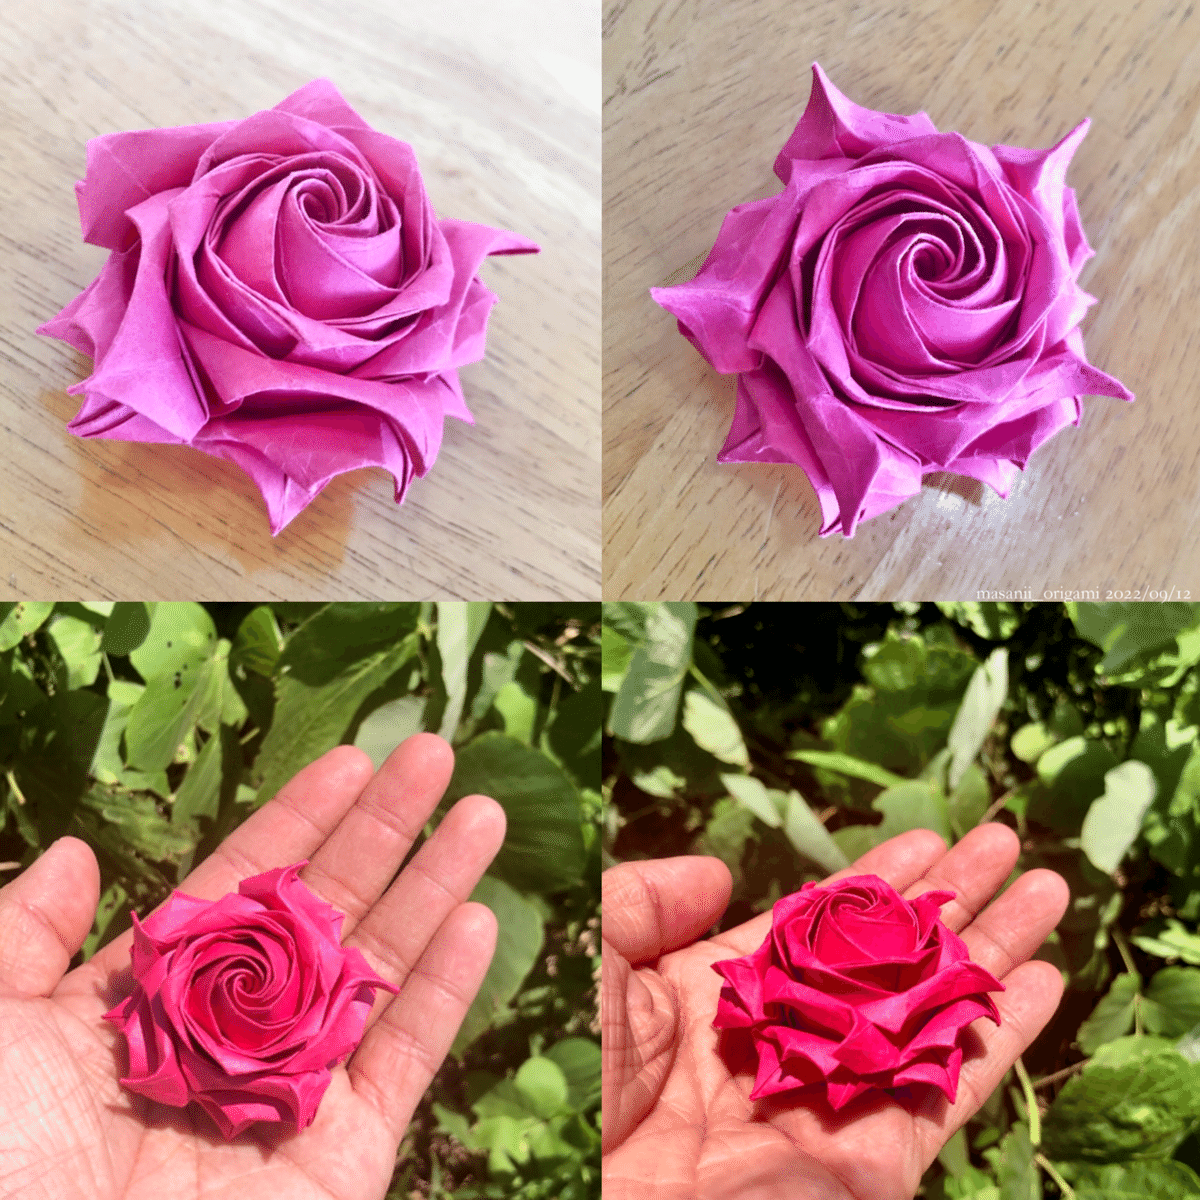
Probably I had impure mind.
It became terribly spiky like appearing my ruined heart.
I don't think it bad... It seems to have some poison.
で、落ち着いた形がこちら。

I remodeled.
ヴィヴァルディREDで「清書」したのがこちら。

I tried again with Vivaldi RED.
iPhoneでビネットを上げれば、舞台役者のできあがり。
まだまだ改善の余地はありそうですが、私の従来テイストといい感じに融合できた気がします。

I processed on iPhone like a stage actor.
It still have some improvements, but I could mix with my style well.
☘️☘️☘️
今日は色々教わったテクニックの中から「花びらのカール」に焦点を当ててご紹介しました。
もちろんアレンジなので決まりはなく、私の記憶や感覚に頼った仕上げですから、皆さんも好きなように触ってみてくださいね。

Today I focused on "Curl" that I was taught.
Of course there're various ideas and no constraint. My works depend on my experiences & feelings, so you can play how you like.
今回ご一緒した皆さんのハイレベルぶりと、佐藤ローズに注ぐ情熱の深さには、圧倒されるばかり。
ここだけの話、私の天井の低さに自信をなくしかけたのですが…
しばらく悩んだ末たどり着いたのは「苦労は成長のチャンス」ということ。
前回の記事で自分が言った言葉に励まされ、少しずつ前を向くことができました。
「こんなもんで天狗になっちゃイカンよ」と、初心の自分に襟を正された気がして、清々しさすら覚えます。
(2022/09/03)
I was overwhelmed by their amazing skill and passion for Sato rose.
Actually I was disappointed by the immaturity of my skill, however after worrying about that, I realized "The hardship brings the chance".
The words I wrote on previous blog encouraged and made me positive.
I may have been conceited, I felt refreshed on this occasion.
自分の「とりえ」って何だろう?
真剣に考えていたら、やっぱりブログに行き着いたんですよね。
成功も失敗も、プロセスまるごと記録する。
どうしてそうなったのか、考え抜いて言語化する。
こうして生まれた記事が重宝され、誰かがステップアップする足掛かりになれば、これほど幸せなことはありません。
皆が驚く超絶技巧やユニークな創作はできないけれど、だからこそ勿体ぶらず謙虚にやっていきたいものです。
What is my value?
I've been thinking about that, after all I got to BLOG.
Success & failure, I'll show you all progresses.
I'll verbalize how it became so, considering thoroughly.
I'm pleasure if someone find these articles created by my effort useful, and become their opportunity to improve.
I don't have a special skill that everyone admires and can't create unique models, that's why I ganna be modest without swank.
ということで。
ありのまま、素っ裸スタイル(概念的な意味で)で、惜しみなく大事なところ(折り紙の)をさらけ出していきます。よろしゅう!

Anyway.
From now on I'll be naked (in conceptual meaning) and show all of me (only about origami). Stay tuned!
今日はここまで。
アトリエまさにぃで、またお会いしましょう。
That's all for today.
See you again in Atelier masanii:)
#アトリエまさにぃ
#ateliermasanii
#佐藤ローズ練習中 #佐藤ローズアレンジ
#ハイブリッドティーローズ #hybridtearose
#佐藤ローズ #satorose #バラ #rose
#キャンソンヴィヴァルディ #cansonvivaldi
#origamirose #おりがみ #origami #paperwork #折り紙 #折り紙作品 #まさにぃ
この記事をご覧になって「ためになった!」「今後も応援したい」と思った方は、ぜひページ下部から記事をご購入ください。
※ 任意のカンパという位置付けですので、内容の続きではありません
ここから先は
¥ 300
この記事が気に入ったらサポートをしてみませんか?
