Hyperledger Fabricを学ぶ(8回目) サンプルネットワークの構築②「ソフトウェアのインストール」
こんにちは。
このブログでは、ブロックチェーン関連を中心としたテック系の情報の紹介をしております。
この連載では、オープンソースのブロックチェーンプラットフォーム「Hyperledger Fabric」について、少しずつ勉強を進めてゆきます。
自分なりに公式のドキュメントを噛み砕きながら、分かり易くまとめて行きたいと思います。
今回から、Hyperledger Fabricのネットワークを構築する環境のためのソフトウェアをインストールしてゆきます。
インストールするソフトウェア一覧
Hyperledger Fabricのネットワークの構築に必要なソフトウェアは以下です。
・DockerとDocker-Compose
・Java
・command line tools for xcode
・homebrew
・git
・wget
・go
・nodebrew
・node
・nmp
・libtool
結構な数ですが、頑張ってインストールして行きましょう。
前回(こちら)もお話しましたが、インストールするPCは↓です。
MacBook 12-inchi 2016 Early
MacOS Catalina 10.15.1
Docker と Docker-Composeのインストール
まずはDockerのインストールからです。
DockerのインストールにはDockerでアカウントを作成する必要があります。
↓へアクセスします
https://hub.docker.com/editions/community/docker-ce-desktop-mac

赤枠のリンクから「Sign Up」を選択してアカウントを作成後、↓の画面でログインしてください。

ログインすると↓の画面からインストーラーがダウンロードできるようになりますので、赤枠のリンクをクリックしてインストーラーをダウンロードしてください。(650MB位あります汗)

ダウンロードした「Docker.dmg」を実行してください。
↓の画面が表示されますので、Docker.appのアイコンをApplicationsフォルダのアイコンへドラックアンドドロップします。

MacにDockerがインストールされますので、アプリケーションのリストからDockerを選択して起動します。

Dockerが起動して、ログインを要求されます。(途中で警告が出た場合はOKで先に進んでください)

先ほど作成したアカウントでログインすると、Dockerが起動の状態になります。

ターミナルを起動して、Dockerがインストールされているか確認します。
ターミナルを起動して、
docker versionと入力してください。Dockerのバージョンが表示されます。
Client: Docker Engine - Community
Version:           19.03.5
(以下略)
Docke-Composeも一緒にインストールされているはずです。
ターミナルを起動して、
docker-compose versionと入力してください。Docker-Composeのバージョンも表示されます。
docker-compose version 1.24.1, build 4667896b
docker-py version: 3.7.3
(以下略)
以上で、DockerとDocker-Composeのインストールは完了です。
Javaのインストール
次にJavaをインストールします。
↓のURLにアクセスします。
https://www.oracle.com/technetwork/java/javase/downloads/index.html

赤枠の「DOWNLOAD」ボタンをクリックします。

赤枠の「macOS」「jdk-13.0.1_osx-x64_bin.dmg」をクリックしてダウンロードします。
ダウンロードした「jdk-13.0.1_osx-x64_bin.dmg」を実行します。
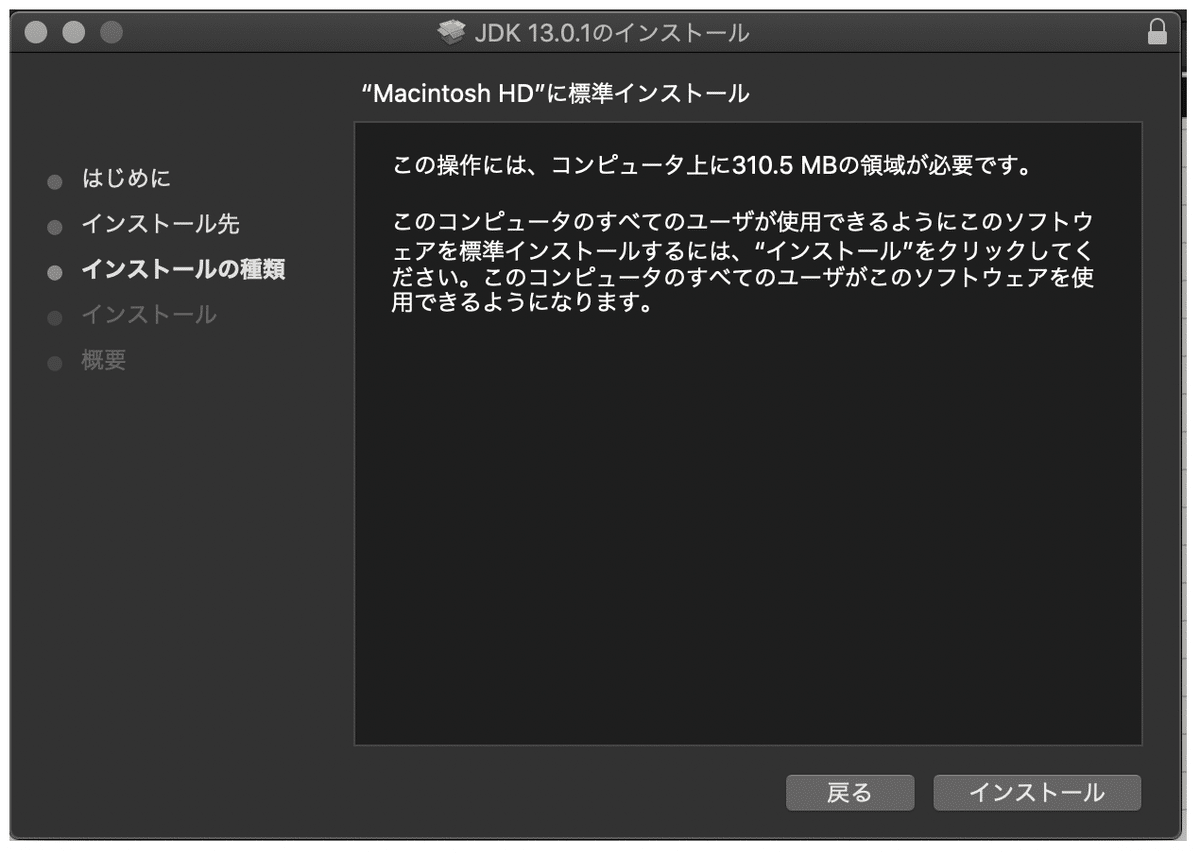
Javaのインストール画面が表示されるので、画面の案内にしたがってインストールしていきます。


インストールが完了したら、ターミナルで↓のコマンドを実行します。
java -version以下のようにJavaのバージョンが表示されればインストールは完了です。
java version "13.0.1" 2019-10-15
Java(TM) SE Runtime Environment (build 13.0.1+9)
Java HotSpot(TM) 64-Bit Server VM (build 13.0.1+9, mixed mode, sharing)
XCodeのインストール
次にXcodeのインストールを進めていきます。
ターミナルを起動して、↓のコマンドを実行します。
xcode-select --install以下のインストールウィンドウが表示されますので、案内に沿ってインストールをしていきます。


「ソフトウェアがインストールされました。」と表示されればインストールは完了です。
homebrewのインストール
homebrewをインストールしていきます。
ターミナルを起動して、↓のコマンドを入力して実行します。
/usr/bin/ruby -e "$(curl -fsSL https://raw.githubusercontent.com/Homebrew/install/master/install)"
/usr/bin/ruby -e "$(curl -fsSL https://raw.githubusercontent.com/Homebrew/install/master/install)"しばらくして”==> Installation successful!”と表示されていればインストールは完了です。
==> Homebrew is run entirely by unpaid volunteers. Please consider donating:
 https://github.com/Homebrew/brew#donations
==> Tapping homebrew/core
Cloning into '/usr/local/Homebrew/Library/Taps/homebrew/homebrew-core'...
remote: Enumerating objects: 5093, done.
remote: Counting objects: 100% (5093/5093), done.
remote: Compressing objects: 100% (4888/4888), done.
remote: Total 5093 (delta 51), reused 313 (delta 9), pack-reused 0
Receiving objects: 100% (5093/5093), 4.14 MiB | 1.05 MiB/s, done.
Resolving deltas: 100% (51/51), done.
Tapped 2 commands and 4875 formulae (5,135 files, 12.8MB).
Already up-to-date.
==> Installation successful!
==> Homebrew has enabled anonymous aggregate formulae and cask analytics.
Read the analytics documentation (and how to opt-out) here:
 https://docs.brew.sh/Analytics
==> Homebrew is run entirely by unpaid volunteers. Please consider donating:
 https://github.com/Homebrew/brew#donations
==> Next steps:
- Run `brew help` to get started
- Further documentation:
   https://docs.brew.sh
ターミナルに↓を入力して実行します。
brew doctor"Your system is ready to brew."と表示されていれば正常にインストールが完了しています。
Your system is ready to brew.gitのインストール
gitをインストールしていきます。
home brewのインストール後、↓のコマンドをターミナルに入力して実行します。
brew install gitしばらくするとインストールが完了します。
==> Installing git
==> Downloading https://homebrew.bintray.com/bottles/git-2.24.0_2.catalina.bottle.tar.gz
==> Downloading from https://akamai.bintray.com/87/87100f6c01be17be5501be0ee5d674610e594ee0ae2d57ac3a2ebefec601e589?__gda__=exp=1574860724~hma
######################################################################## 100.0%
==> Pouring git-2.24.0_2.catalina.bottle.tar.gz
==> Caveats
Bash completion has been installed to:
 /usr/local/etc/bash_completion.d
zsh completions and functions have been installed to:
 /usr/local/share/zsh/site-functions
Emacs Lisp files have been installed to:
 /usr/local/share/emacs/site-lisp/git
==> Summary
🍺  /usr/local/Cellar/git/2.24.0_2: 1,547 files, 45.5MB
==> Caveats
==> gettext
gettext is keg-only, which means it was not symlinked into /usr/local,
because macOS provides the BSD gettext library & some software gets confused if both are in the library path.
If you need to have gettext first in your PATH run:
 echo 'export PATH="/usr/local/opt/gettext/bin:$PATH"' >> ~/.bash_profile
For compilers to find gettext you may need to set:
 export LDFLAGS="-L/usr/local/opt/gettext/lib"
 export CPPFLAGS="-I/usr/local/opt/gettext/include"
==> git
Bash completion has been installed to:
 /usr/local/etc/bash_completion.d
zsh completions and functions have been installed to:
 /usr/local/share/zsh/site-functions
Emacs Lisp files have been installed to:
 /usr/local/share/emacs/site-lisp/git
ターミナルに↓のコマンドを入力して実行します。
git versiongitのバージョンが表示されれば正常にインストールされています。
git version 2.24.0
wgetのインストール
wgetをインストールしていきます。
home brewのインストール後、↓のコマンドをターミナルに入力して実行します。
brew install wgetしばらくすると、wgetのインストールが完了します。
==> Installing wget
==> Downloading https://homebrew.bintray.com/bottles/wget-1.20.3_2.catalina.bottle.tar.gz
==> Downloading from https://akamai.bintray.com/ef/ef65c759c5097a36323fa9c77756468649e8d1980a3a4e05695c05e39568967c?__gda__=exp=1574861211~hma
######################################################################## 100.0%
==> Pouring wget-1.20.3_2.catalina.bottle.tar.gz
🍺  /usr/local/Cellar/wget/1.20.3_2: 50 files, 4.0MB
==> Caveats
==> openssl@1.1
A CA file has been bootstrapped using certificates from the system
keychain. To add additional certificates, place .pem files in
 /usr/local/etc/openssl@1.1/certs
and run
 /usr/local/opt/openssl@1.1/bin/c_rehash
openssl@1.1 is keg-only, which means it was not symlinked into /usr/local,
because openssl/libressl is provided by macOS so don't link an incompatible version.
If you need to have openssl@1.1 first in your PATH run:
 echo 'export PATH="/usr/local/opt/openssl@1.1/bin:$PATH"' >> ~/.bash_profile
For compilers to find openssl@1.1 you may need to set:
 export LDFLAGS="-L/usr/local/opt/openssl@1.1/lib"
 export CPPFLAGS="-I/usr/local/opt/openssl@1.1/include"
ターミナルに↓のコマンドを入力して実行します。
wget -Vwgetのバージョンが表示されたらインストールは正常に完了しています。
GNU Wget 1.20.3 built on darwin19.0.0.goのインストール
goをインストールしていきます。
↓のURLからインストールパッケージをダウンロードします。
https://dl.google.com/go/go1.7.6.darwin-amd64.pkg
ダウンロードしたパッケージを実行すると、インストールウィンドウが表示されるので、案内にしたがってインストールしていきます。


インストールが完了したら、念のためターミナルで↓のコマンドを入力して実行します。
go versiongoのバージョンが表示されればインストールは正常に終了しています。
go version go1.7.6 darwin/amd64nodebrewのインストール
nodebrewのインストールを進めていきます。
home brewのインストール後、ターミナルで↓のコマンドを入力して実行します。
brew install nodebrewしばらくするとインストールが完了します。
==> Downloading https://github.com/hokaccha/nodebrew/archive/v1.0.1.tar.gz
==> Downloading from https://codeload.github.com/hokaccha/nodebrew/tar.gz/v1.0.1
##O#- #
==> Caveats
You need to manually run setup_dirs to create directories required by nodebrew:
 /usr/local/opt/nodebrew/bin/nodebrew setup_dirs
Add path:
 export PATH=$HOME/.nodebrew/current/bin:$PATH
To use Homebrew's directories rather than ~/.nodebrew add to your profile:
 export NODEBREW_ROOT=/usr/local/var/nodebrew
Bash completion has been installed to:
 /usr/local/etc/bash_completion.d
zsh completions have been installed to:
 /usr/local/share/zsh/site-functions
==> Summary
🍺  /usr/local/Cellar/nodebrew/1.0.1: 8 files, 38.6KB, built in 9 seconds
ターミナルで↓のコマンドを入力して実行します。
nodebrew versionnodebrewのバージョンが表示されればインストールは正常に完了しています。
nodebrew 1.0.1
Usage:
   nodebrew help                         Show this message
   nodebrew install <version>            Download and install <version> (from binary)
   nodebrew compile <version>            Download and install <version> (from source)
   nodebrew install-binary <version>     Alias of `install` (For backword compatibility)
   nodebrew uninstall <version>          Uninstall <version>
   nodebrew use <version>                Use <version>
   nodebrew list                         List installed versions
   nodebrew ls                           Alias for `list`
   nodebrew ls-remote                    List remote versions
   nodebrew ls-all                       List remote and installed versions
   nodebrew alias <key> <value>          Set alias
   nodebrew unalias <key>                Remove alias
   nodebrew clean <version> | all        Remove source file
   nodebrew selfupdate                   Update nodebrew
   nodebrew migrate-package <version>    Install global NPM packages contained in <version> to current version
   nodebrew exec <version> -- <command>  Execute <command> using specified <version>
Example:
   # install
   nodebrew install v8.9.4
   # use a specific version number
   nodebrew use v8.9.4
nodebrewのPATH変数の設定
nodebrewのインストールが完了したら、nodebrewコマンドをターミナルで使用できるようにするため、PATH変数へ設定します。
ターミナルで以下のコマンドを入力して実行します。
$ vi ~/.bash_profile".bash_profile"がviで開かれます。
「i」を入力し、インサートモードにし、以下の内容をコピー&ペーストしてください。
export PATH=$HOME/.nodebrew/current/bin:$PATH".bash_profile"の編集が完了したら、↓のコマンドをターミナルに入力して実行します。
source ~/.bash_profile
node.jsのインストール
nodeをインストールしていきます。
まずはインストールようのディレクトリを作成します。
ターミナルに↓のコマンドを入力して実行します。
mkdir -p ~/.nodebrew/srcディレクトリの作成ができたら、ターミナルに↓のコマンドを入力して実行します。(nodeのバージョンは指定します)
nodebrew install-binary v6.9.1しばらくするとインストールが完了します。
Fetching: https://nodejs.org/dist/v6.9.1/node-v6.9.1-darwin-x64.tar.gz
######################################################################### 100.0%
Installed successfully
インストールの完了後、ターミナルに↓のコマンドを入力して実行します。
使用するnodeのバージョンを指定します。
nodebrew use v6.9.1ターミナルに↓のコマンドを入力して実行します。
node -vnodeのバージョンが表示されれば、インストールは正常に完了しています。
v6.9.1npmのインストール
npmをインストールしていきます。
ターミナルに↓のコマンドを入力して実行します。(npmのバージョンは指定します)
npm install npm@3.10.10 -gしばらくするとインストールが完了します。
└─┬ npm@3.10.10
 ├── asap@2.0.5
 ├── config-chain@1.1.11
 ├─┬ glob@7.1.0
 │ └── path-is-absolute@1.0.1
 ├── graceful-fs@4.1.9
 ├── lockfile@1.0.2
 ├── opener@1.4.2
 ├── path-is-inside@1.0.2
 ├─┬ request@2.75.0
 │ ├─┬ form-data@2.0.0
 │ │ └── asynckit@0.4.0
 │ ├─┬ har-validator@2.0.6
 │ │ └─┬ is-my-json-valid@2.15.0
 │ │   └── jsonpointer@4.0.0
 │ ├─┬ http-signature@1.1.1
 │ │ ├─┬ jsprim@1.3.1
 │ │ │ └── json-schema@0.2.3
 │ │ └─┬ sshpk@1.10.1
 │ │   ├── bcrypt-pbkdf@1.0.0
 │ │   └── tweetnacl@0.14.3
 │ └─┬ mime-types@2.1.12
 │   └── mime-db@1.24.0
 └── sorted-object@2.0.1
ターミナルに↓のコマンドを入力して実行します。
npm --versionnpmのバージョンが表示されていれば正常にインストールが完了しています。
3.10.10libtoolのインストール
libtoolをインストールしていきます。
homebrewのインストール後、↓のコマンドをターミナルに入力して実行します。
brew install libtoolしばらくするとインストールが完了します。
==> Downloading https://homebrew.bintray.com/bottles/libtool-2.4.6_1.catalina.bo
==> Downloading from https://akamai.bintray.com/38/38212486e78db33048438cffe38b6
######################################################################## 100.0%
==> Pouring libtool-2.4.6_1.catalina.bottle.tar.gz
==> Caveats
In order to prevent conflicts with Apple's own libtool we have prepended a "g"
so, you have instead: glibtool and glibtoolize.
==> Summary
🍺  /usr/local/Cellar/libtool/2.4.6_1: 71 files, 3.7MB
インストール作業お疲れ様でした。
ここまでで、ひとまずHyperledger Fabricのネットワークを構築する下準備は完了になります。
次回からはいよいよHyperledger Fabricのサンプルネットワークのインストールを進めていきます。
おわり。
