
【徒然iOS】気ままにUIKit35〜コレクションビューにセクションを追加する方法〜

概要
このマガジンは四十を過ぎたおっさんが、
を参考にStoryboardでiOSアプリを完全に趣味で楽しんでいるだけな記事を気ままに上げてます。
前回手間取ったので、やっとこ本題💦
今回
をやる〜〜〜〜!
前準備
は、前回
でやったので、バックアップだけとって本題へ!
本題
セクションとは、
一定のルールに従ってデータを区分したもの
👉要は、テーブルビューでやった感じの見出しってことね!
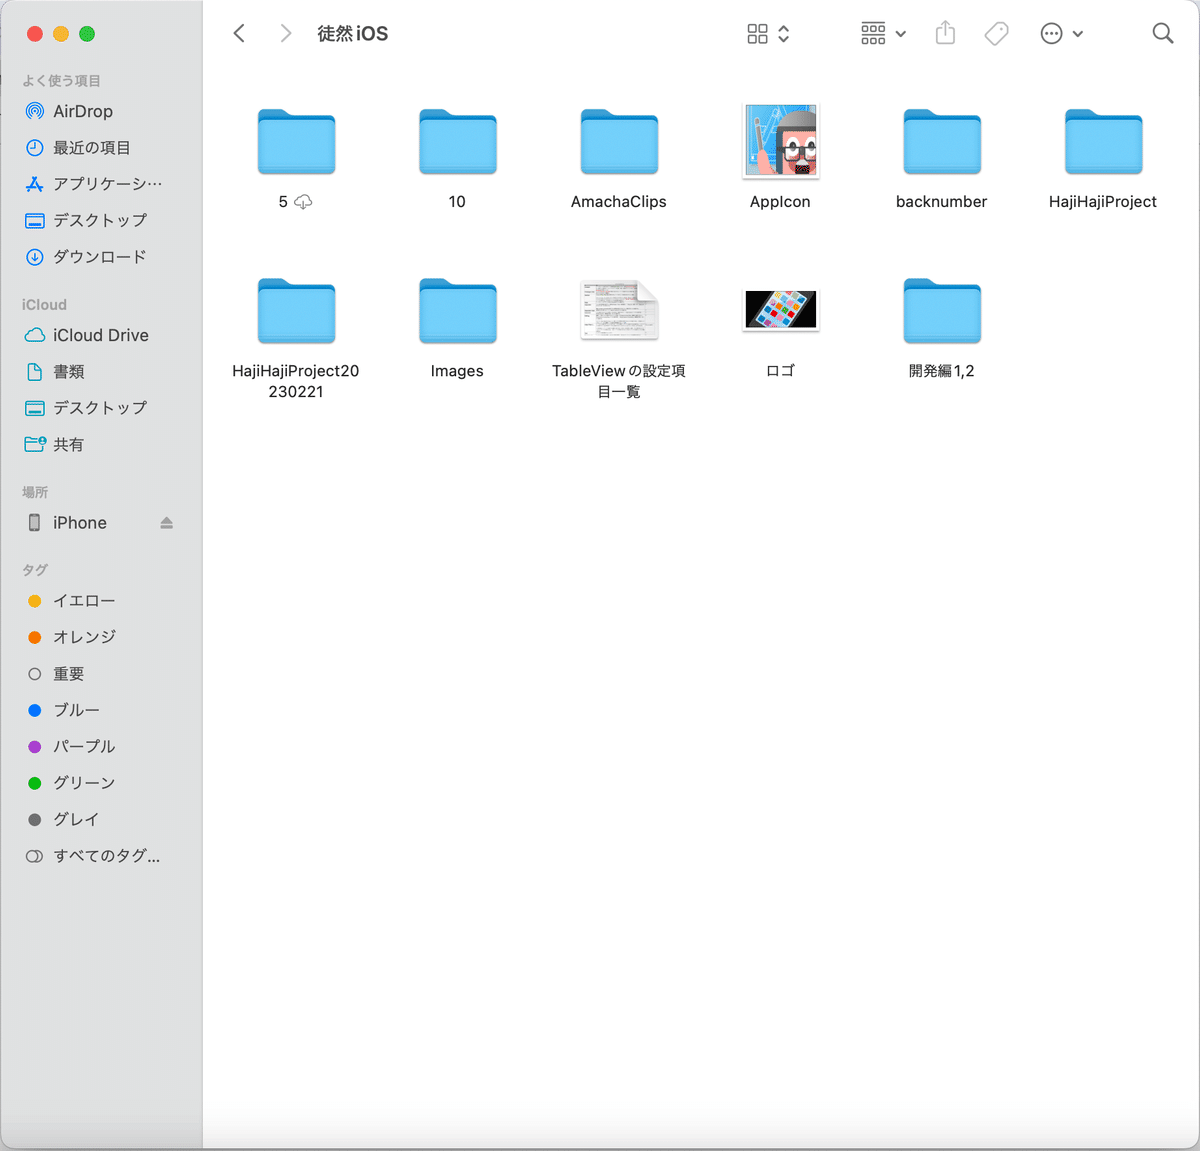
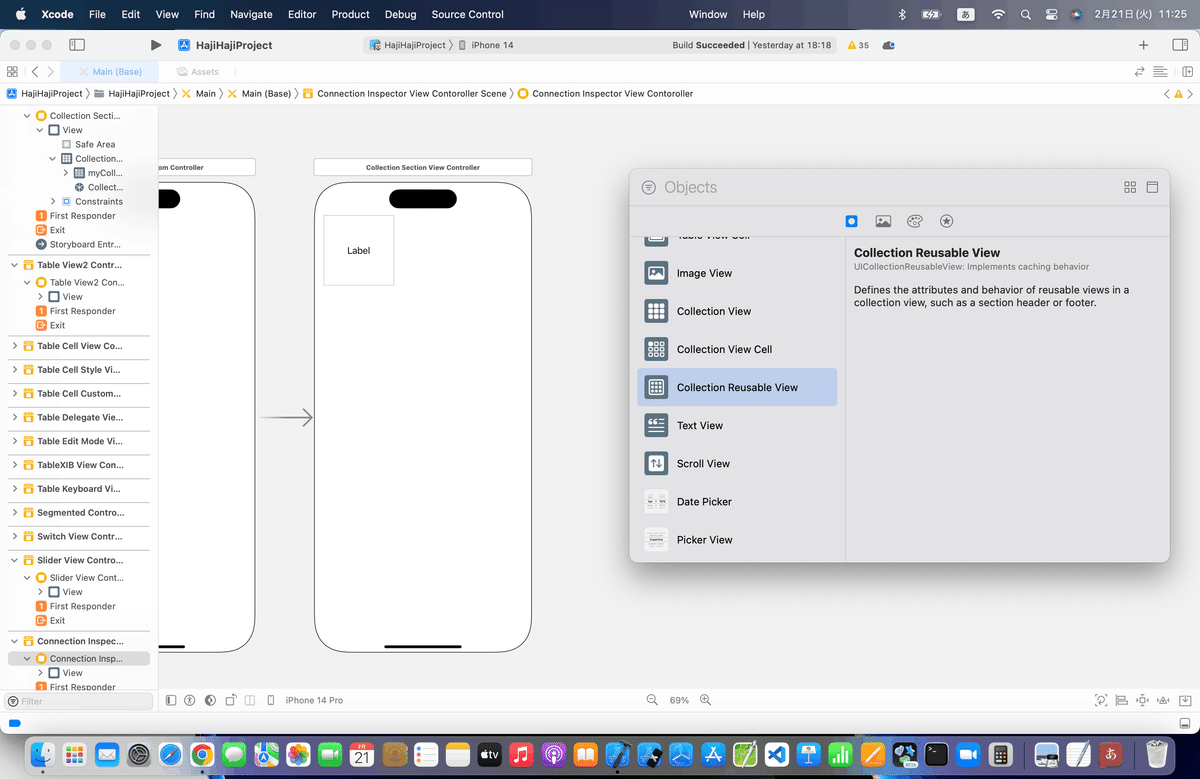
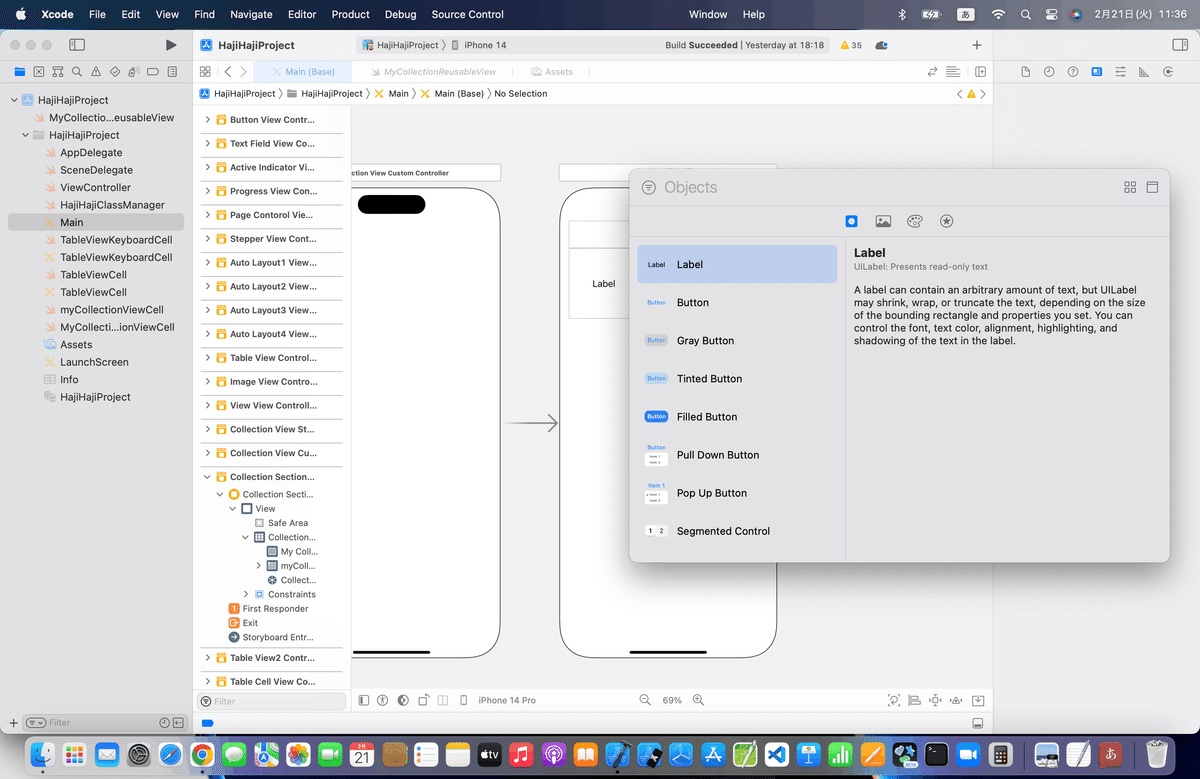
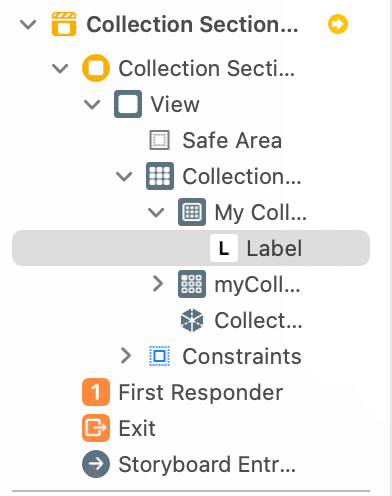
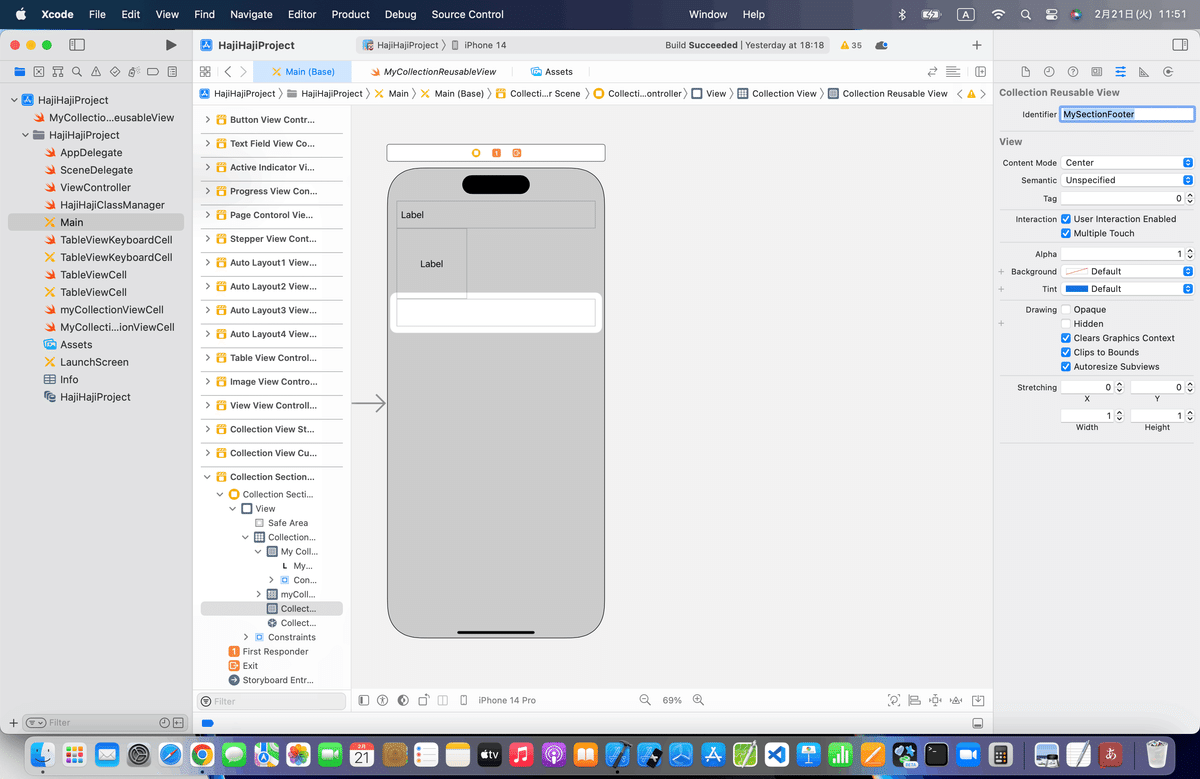
⒈コレクションビューの中にCollection Reusable Viewをドラッグ&ドロップで入れる
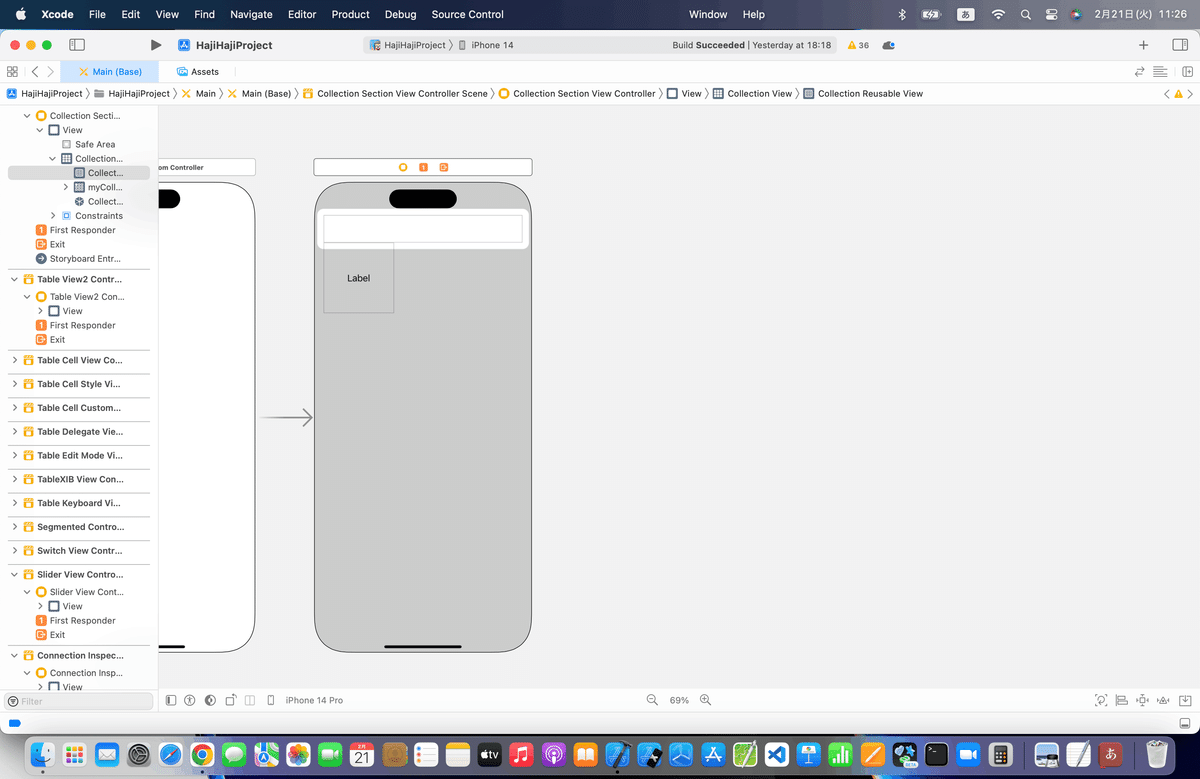
⒉アトリビュートインスペクタボタンを押して設定画面を開き、IdentifierにSection名を入力
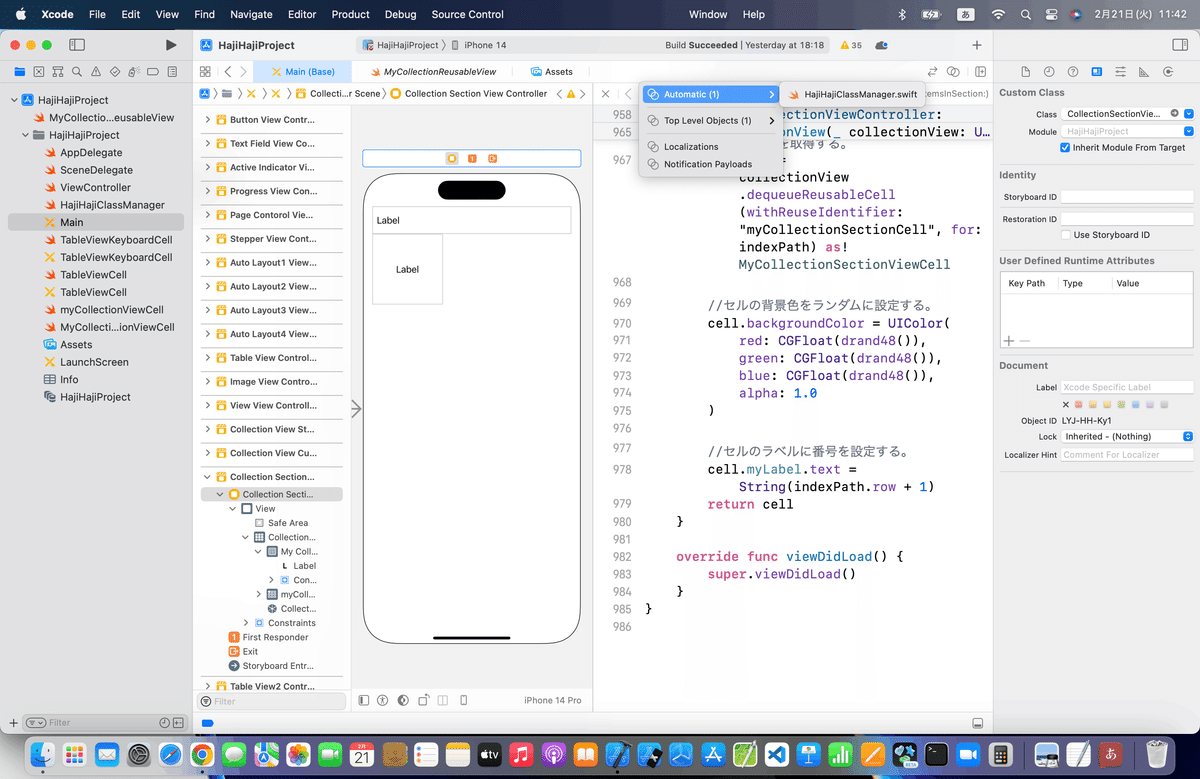
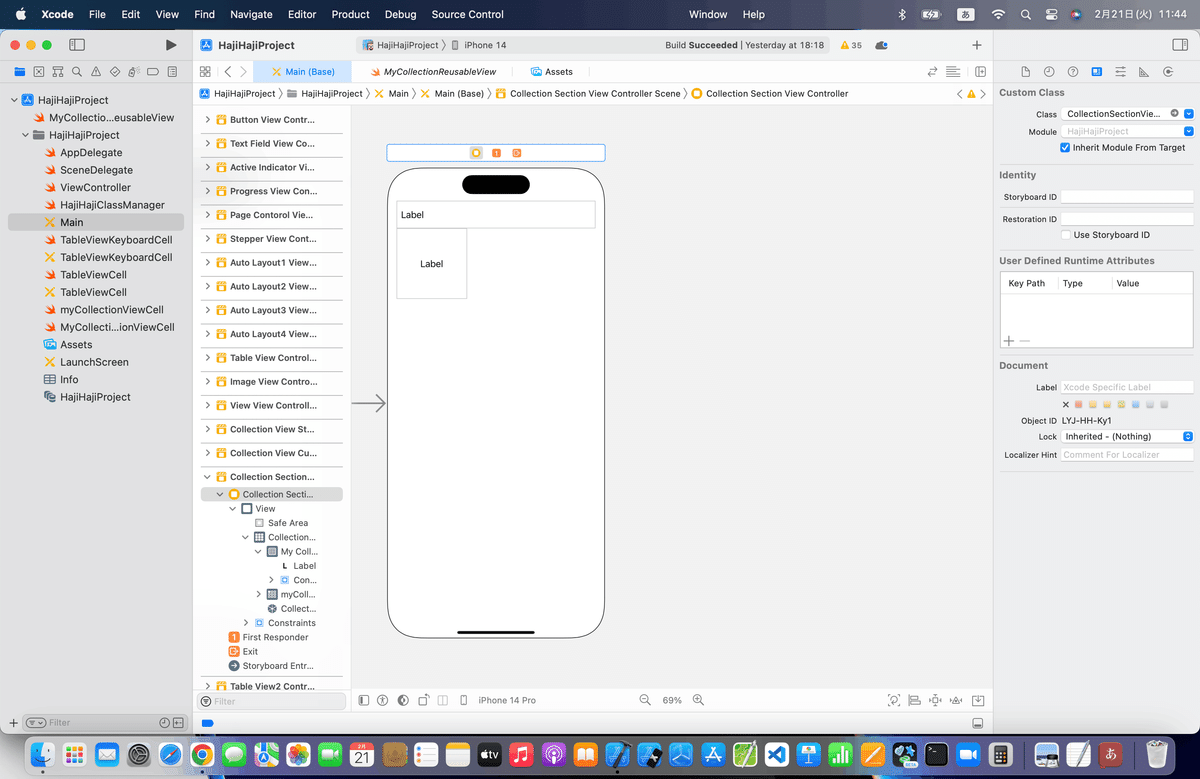
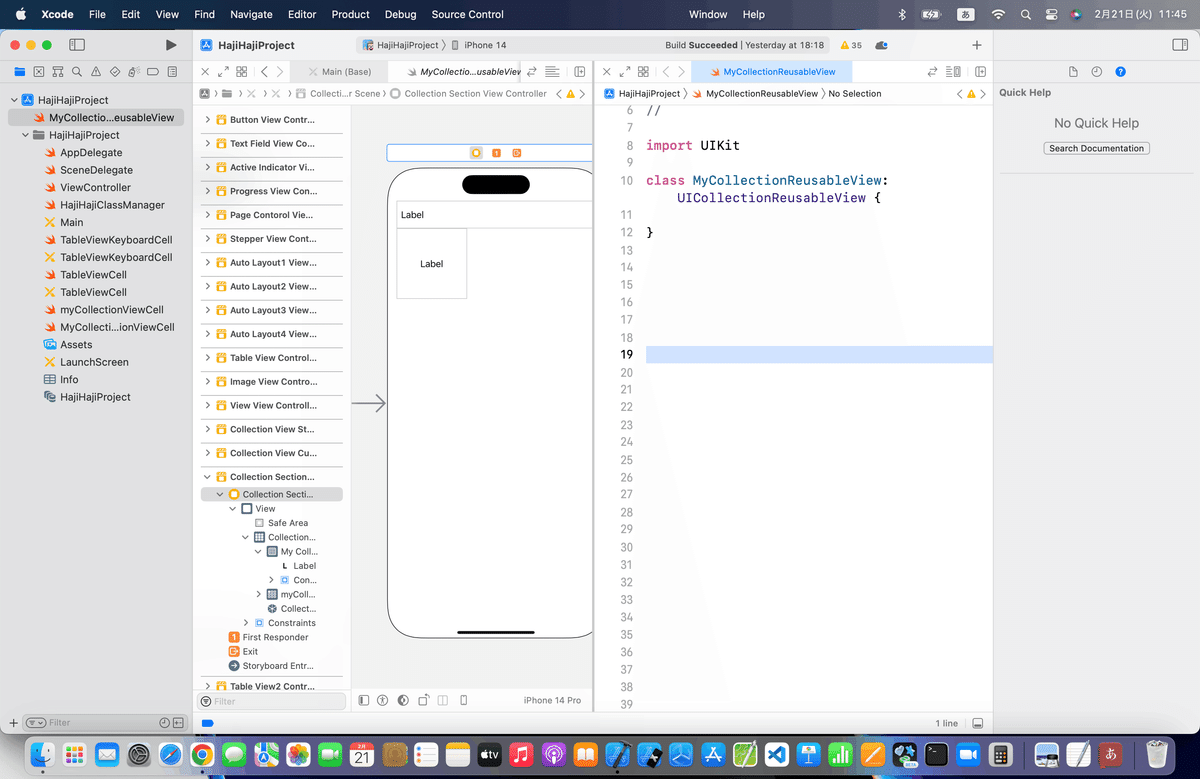
⒊セクションの中にセクション名を表示するために、自作クラスを作成
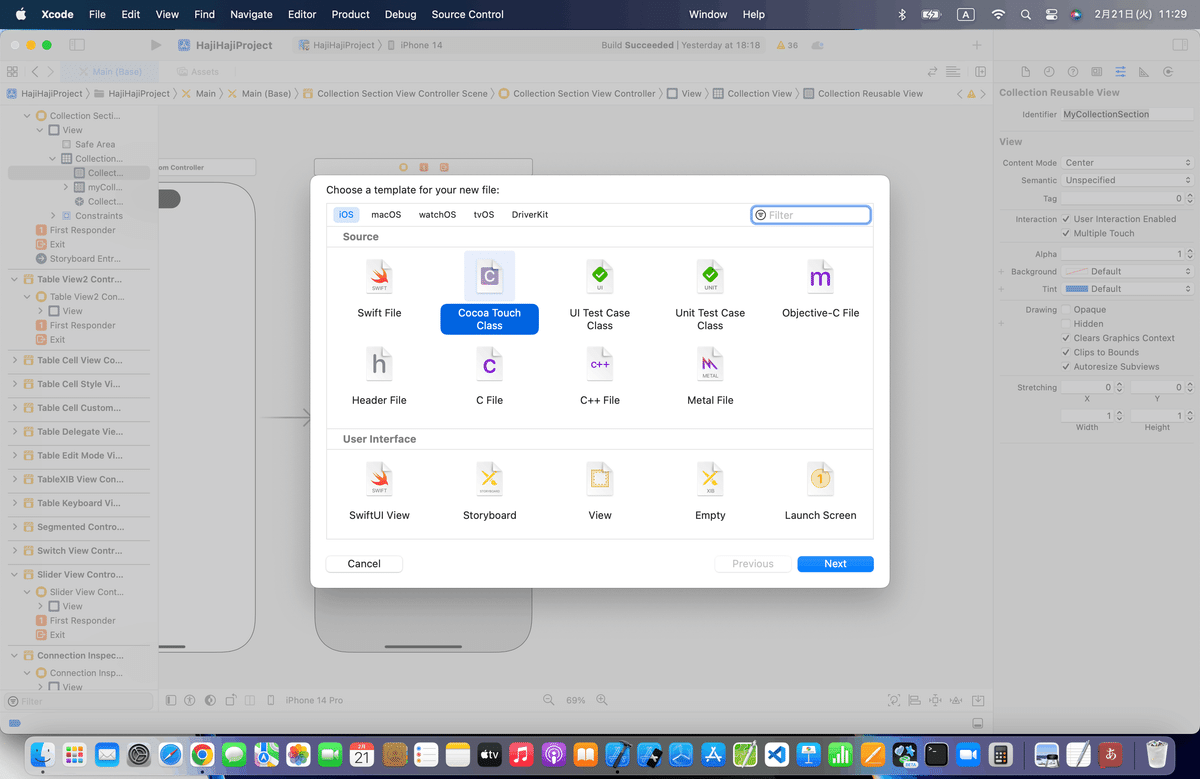
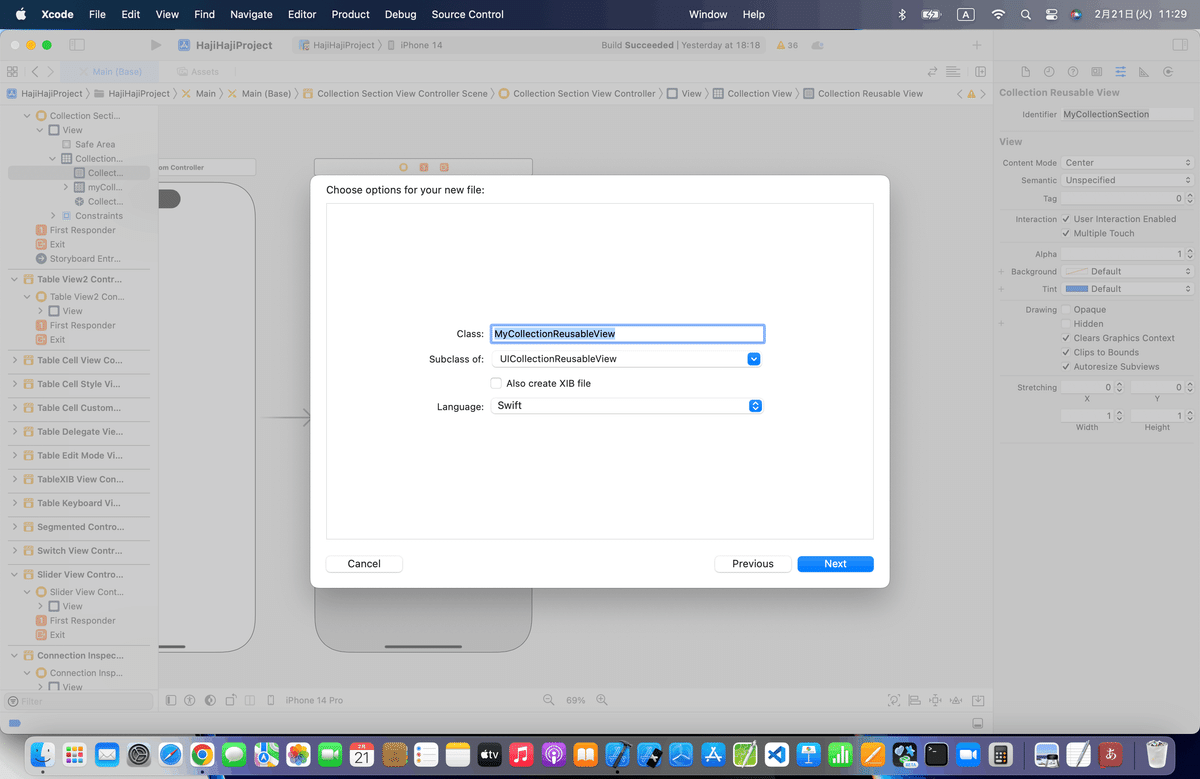
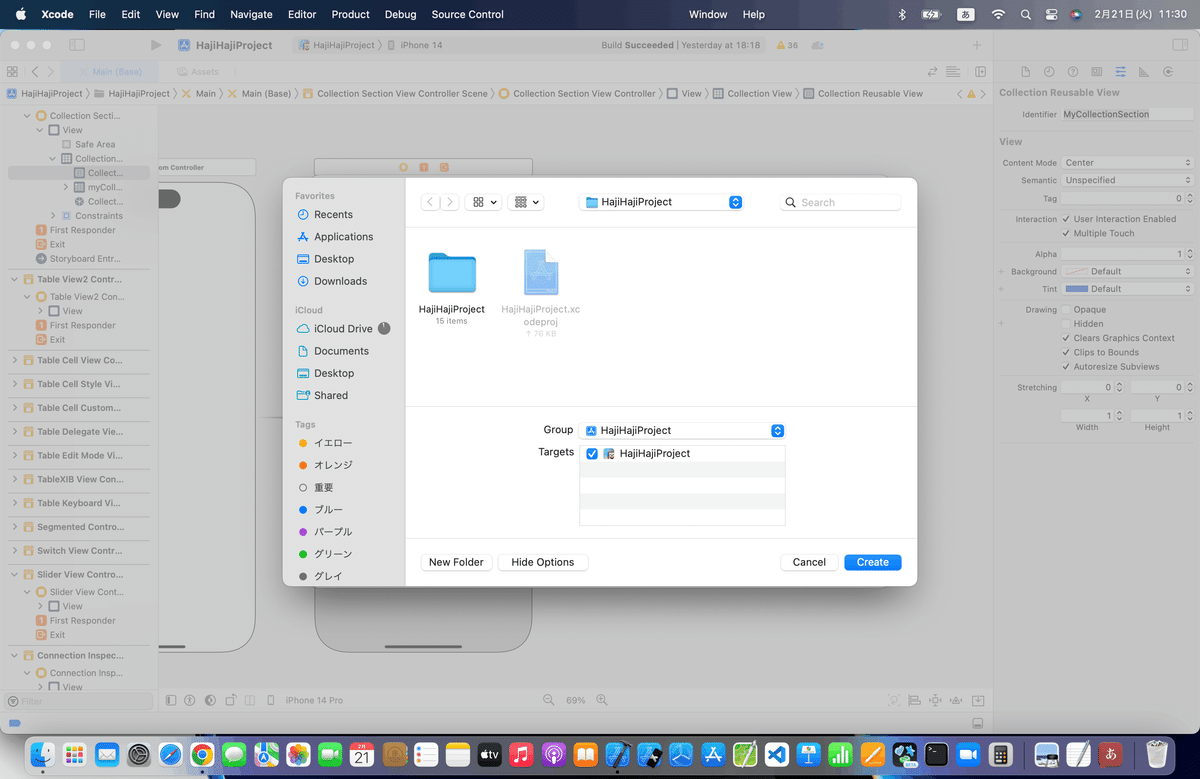
⒋追加した部品のClassにMyCollectionReusableViewを入力
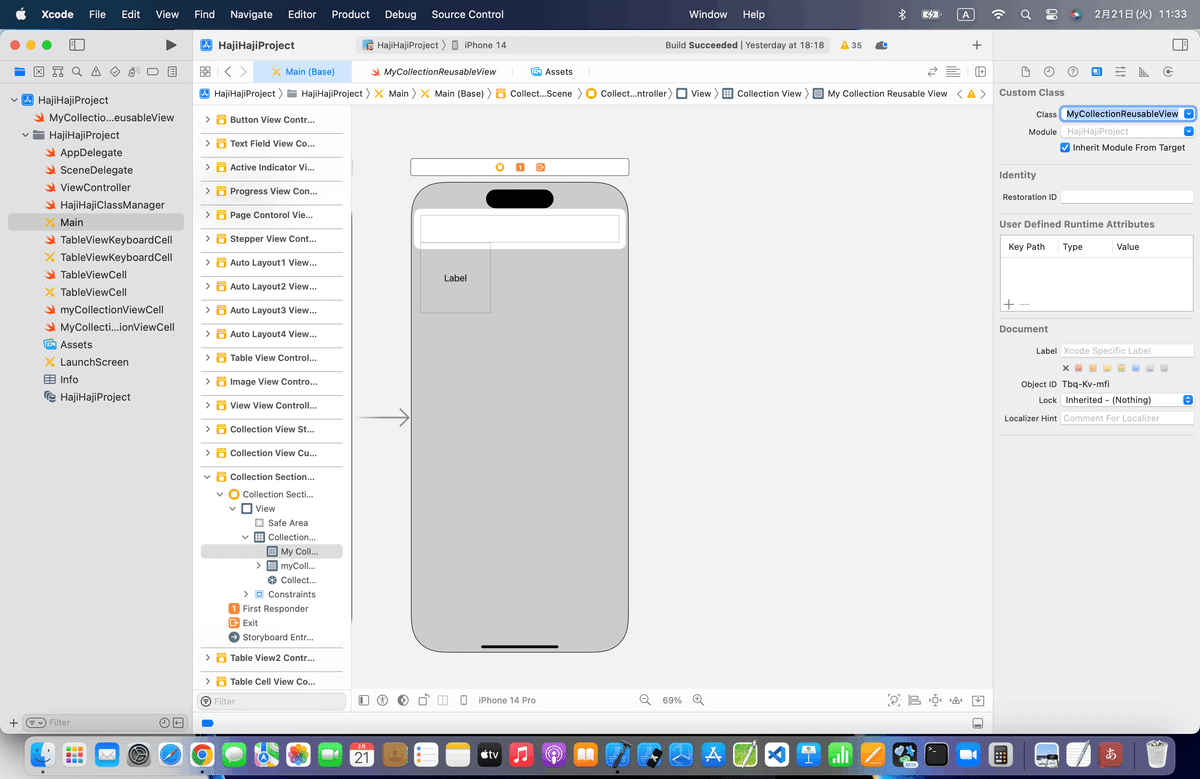
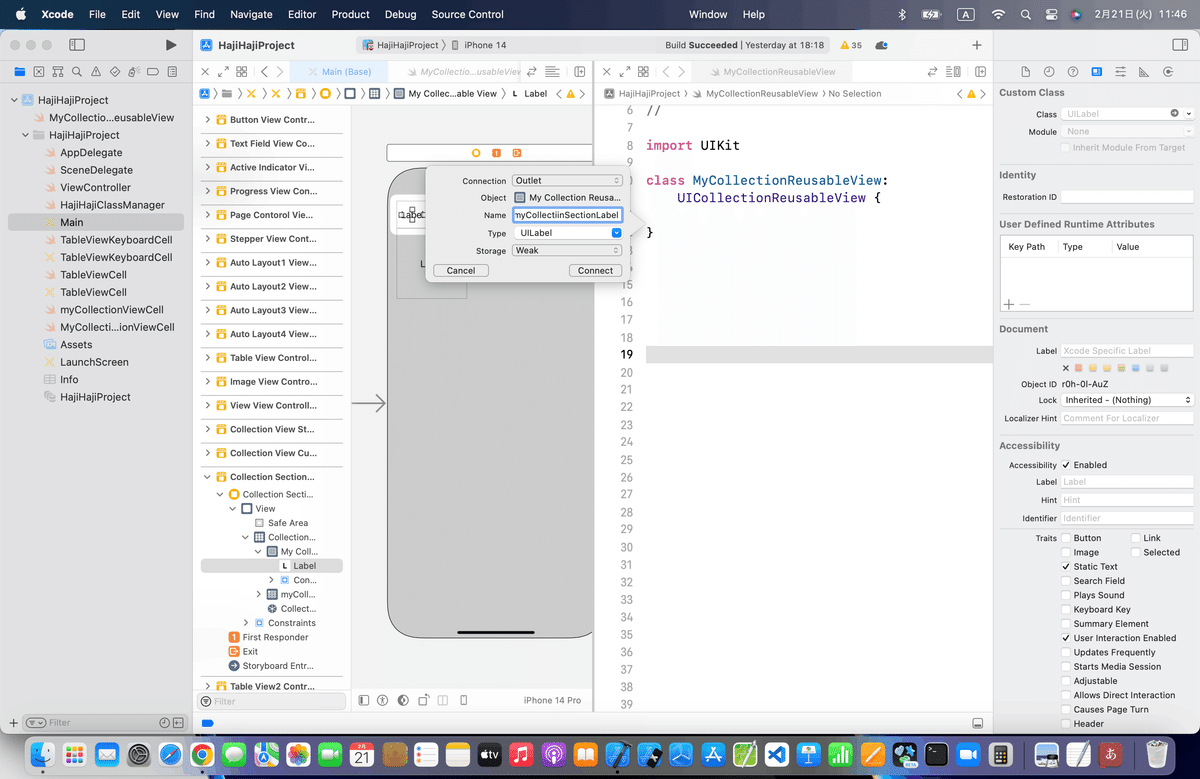
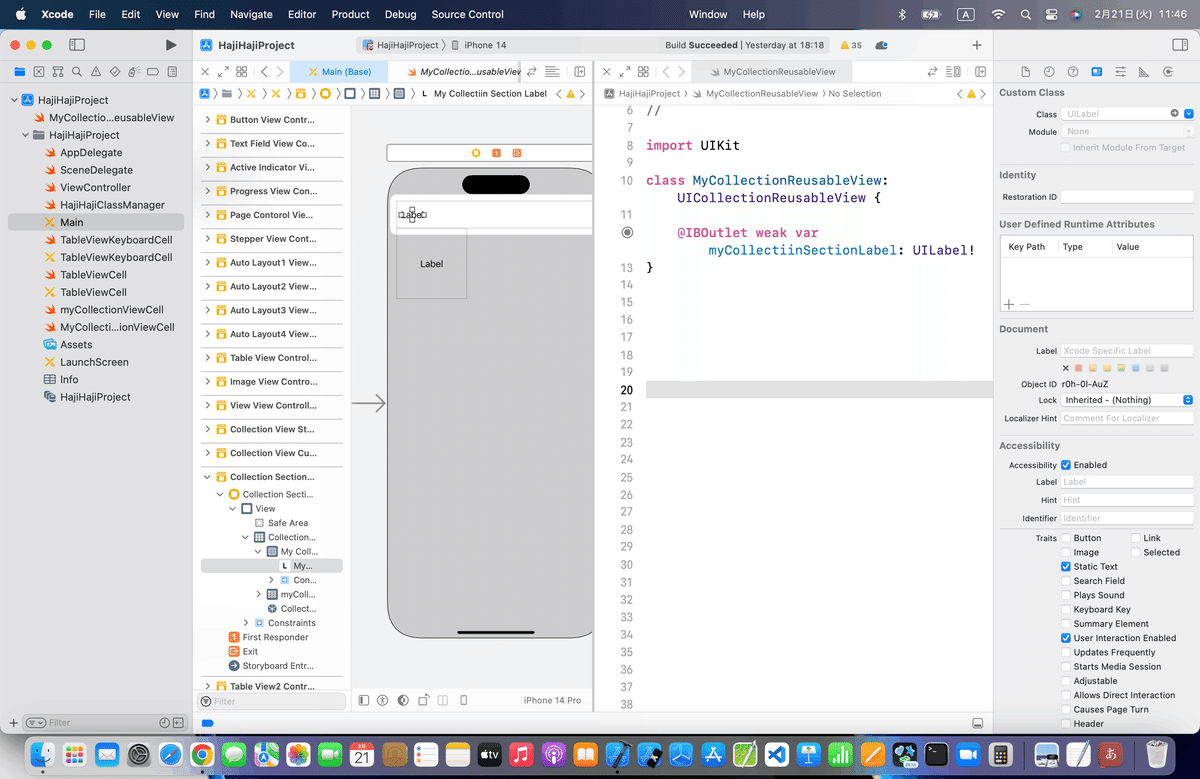
⒌ビュー内にラベルを配置して、さっきのクラスとアウトレット接続

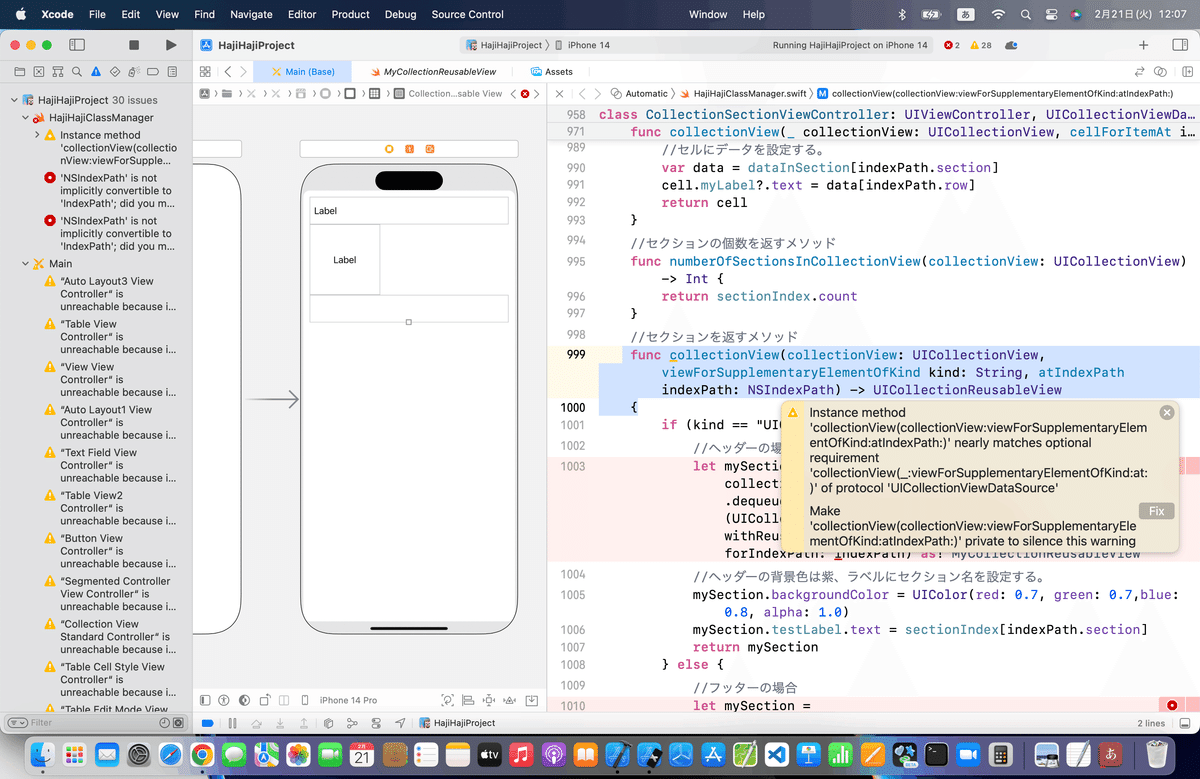
と、ここで!
前回手間取った教訓なんだけど、
の黄色警告が出てるので
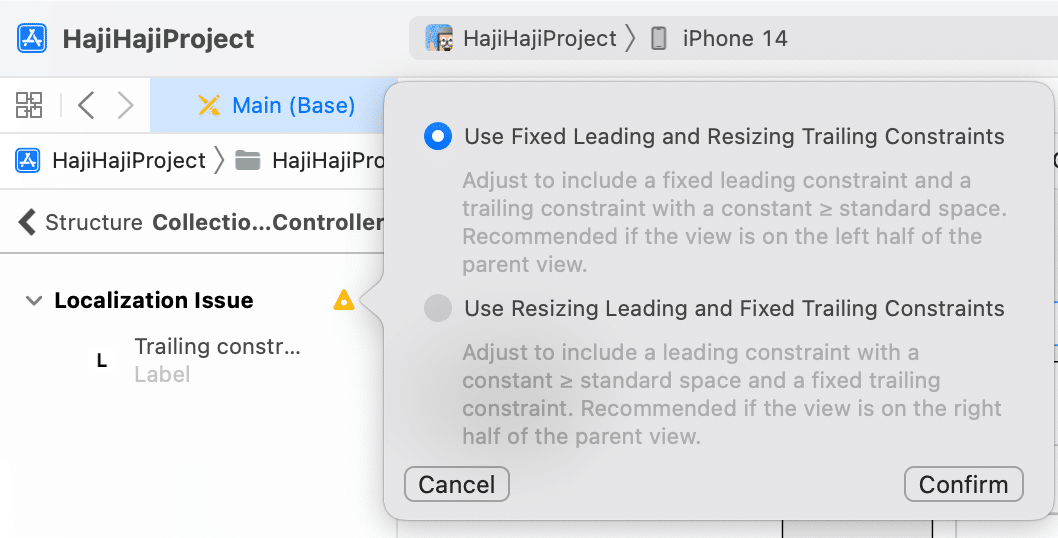
で、アシスタントを開いてみると〜〜〜
アシスタントを左端の×で消して、
前回も紹介したコイツ
で、Optionキーを押しながらファイル名をクリックして、
*今回はうまくいったけど、赤文字の警告が出たりしてうまくいかないときは、前回の最後に紹介してる
を試してみてね
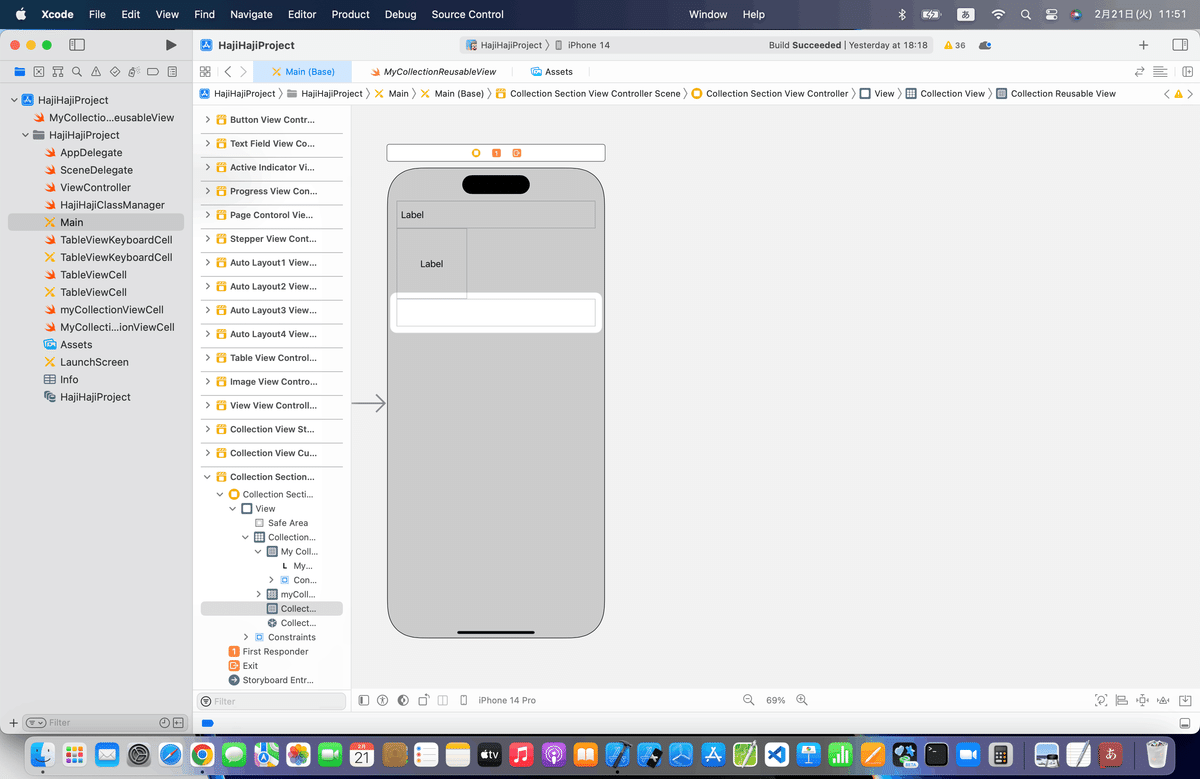
⒍フッターも入れろってことなので、フッターも入れる

⒎今回のコードを組み込む
今回のコード(長いので余計な改行スペースは削除)
import UIKit
class ViewController: UIViewController, UICollectionViewDataSource {
    //データ
    var dataInSection = [["青山","阿部"], ["加藤","川島","神田"], ["佐藤","坂田"], ["田中"]]
    //セクション
    var sectionIndex:[String] = ["あ行", "か行", "さ行", "た行"]
    //データの個数を返すメソッド
    func collectionView(collectionView: UICollectionView, numberOfItemsInSection section: Int) -> Int
    {
        return dataInSection[section].count
    }
    //データを返すメソッド
    func collectionView(collectionView: UICollectionView, cellForItemAtIndexPath indexPath: NSIndexPath) -> UICollectionViewCell
    {
        //識別子「TestCell」のセルを取得する。
        let cell = collectionView.dequeueReusableCellWithReuseIdentifier("TestCell", forIndexPath: indexPath) as! TestCollectionViewCell
        //セルの背景色は灰色
        cell.backgroundColor = UIColor(red: 0.9, green: 0.9,blue: 0.9, alpha: 1.0)
        //セルにデータを設定する。
        var data = dataInSection[indexPath.section]
        cell.testLabel?.text = data[indexPath.row]
        return cell
    }
    //セクションの個数を返すメソッド
    func numberOfSectionsInCollectionView(collectionView: UICollectionView) -> Int {
        return sectionIndex.count
    }
    //セクションを返すメソッド
    func collectionView(collectionView: UICollectionView, viewForSupplementaryElementOfKind kind: String, atIndexPath indexPath: NSIndexPath) -> UICollectionReusableView
    {
        if (kind == "UICollectionElementKindSectionHeader") {
            //ヘッダーの場合
            let testSection = collectionView.dequeueReusableSupplementaryViewOfKind(UICollectionElementKindSectionHeader, withReuseIdentifier: "TestSection", forIndexPath: indexPath) as! TestCollectionReusableView
            //ヘッダーの背景色は紫、ラベルにセクション名を設定する。
            testSection.backgroundColor = UIColor(red: 0.7, green: 0.7,blue: 0.8, alpha: 1.0)
            testSection.testLabel.text = sectionIndex[indexPath.section]
            return testSection
        } else {
            //フッターの場合
            let testSection = collectionView.dequeueReusableSupplementaryViewOfKind(UICollectionElementKindSectionFooter, withReuseIdentifier: "TestSectionFooter", forIndexPath: indexPath)
            //フッターの背景色は緑
            testSection.backgroundColor = UIColor(red: 0.5, green: 0.6,blue: 0.5, alpha: 1.0)
            return testSection
        }
    }
    //最初からあるメソッド
    override func viewDidLoad() {
        super.viewDidLoad()
    }
}
ここまでで、一旦シミュレータを実行してみる
今回追記で重要な、セクション管理のコードを組み込んでいこう
👉これはすでにメソッドの書き方が変わってる可能性が高い
なので、
UICollectionViewDataSourceのJumptoDefinitionを開いて、
viewForSupplementaryElementOfKindが含まれるメソッドを調べてみると、、、
//追加したメソッド
func collectionView(collectionView: UICollectionView, viewForSupplementaryElementOfKind kind: String, atIndexPath indexPath: NSIndexPath) -> UICollectionReusableView

//JumptoDefinition
func collectionView(_ collectionView: UICollectionView, viewForSupplementaryElementOfKind kind: String, at indexPath: IndexPath) -> UICollectionReusableView
で書き方が違ってることがわかる
👉書き換えてみると、、、
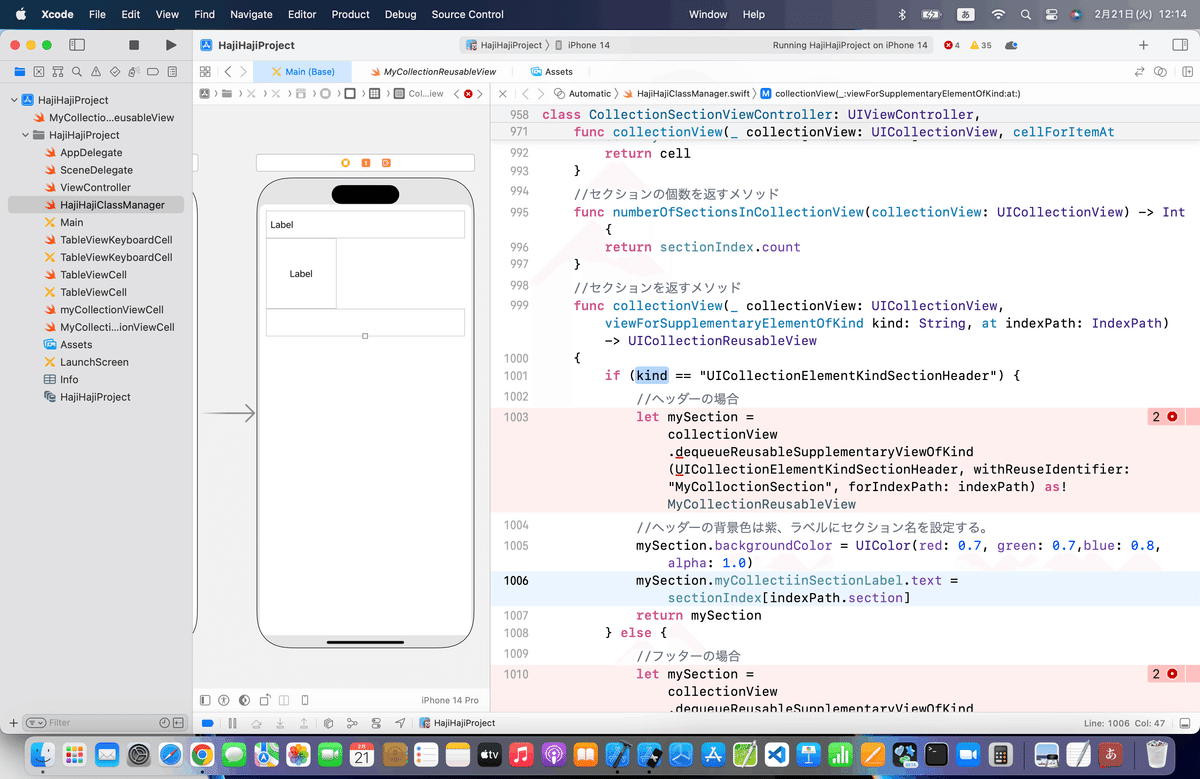
あとは、赤丸警告なので、

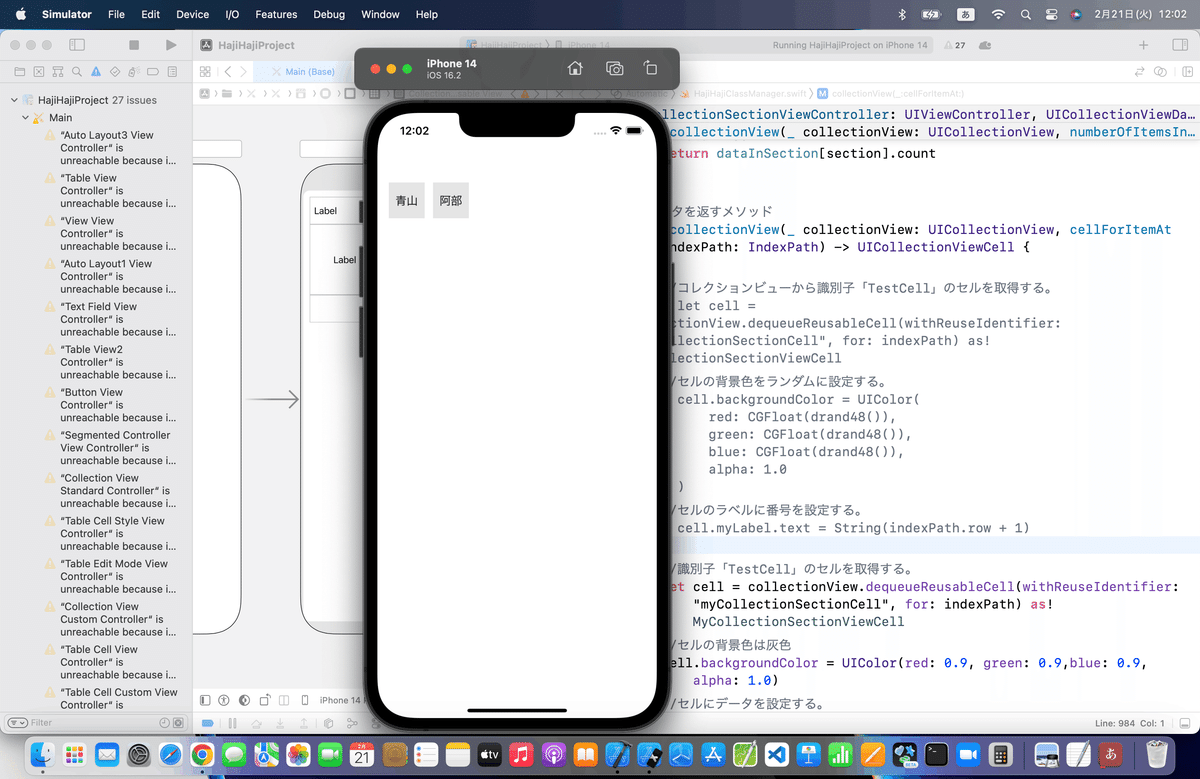
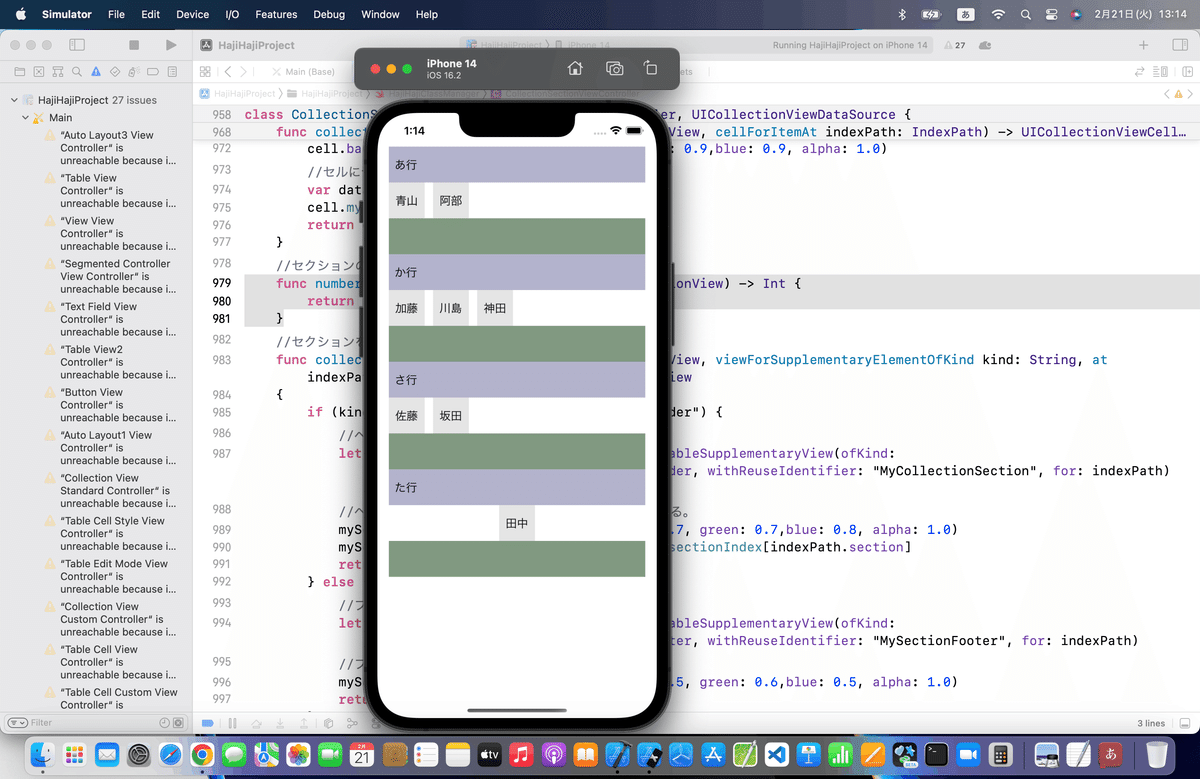
⒏シミュレータを実行
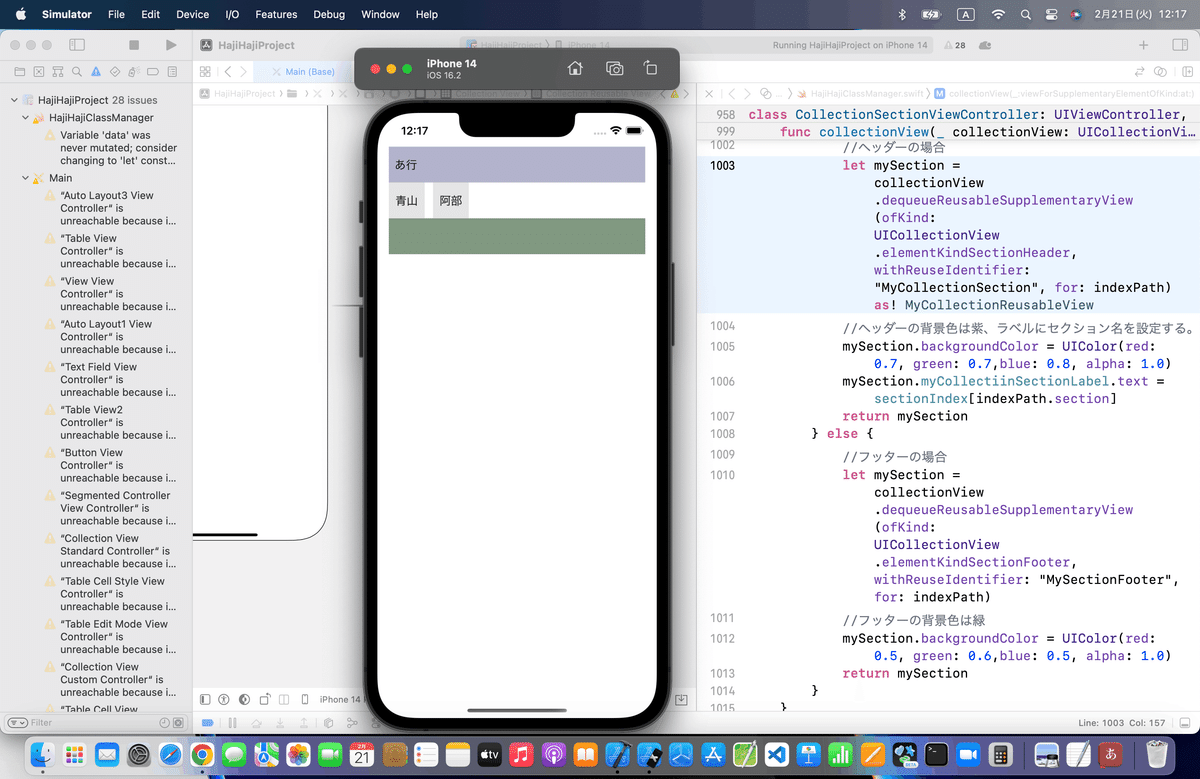
あ行のみだな💦
原因を調べないと、、、
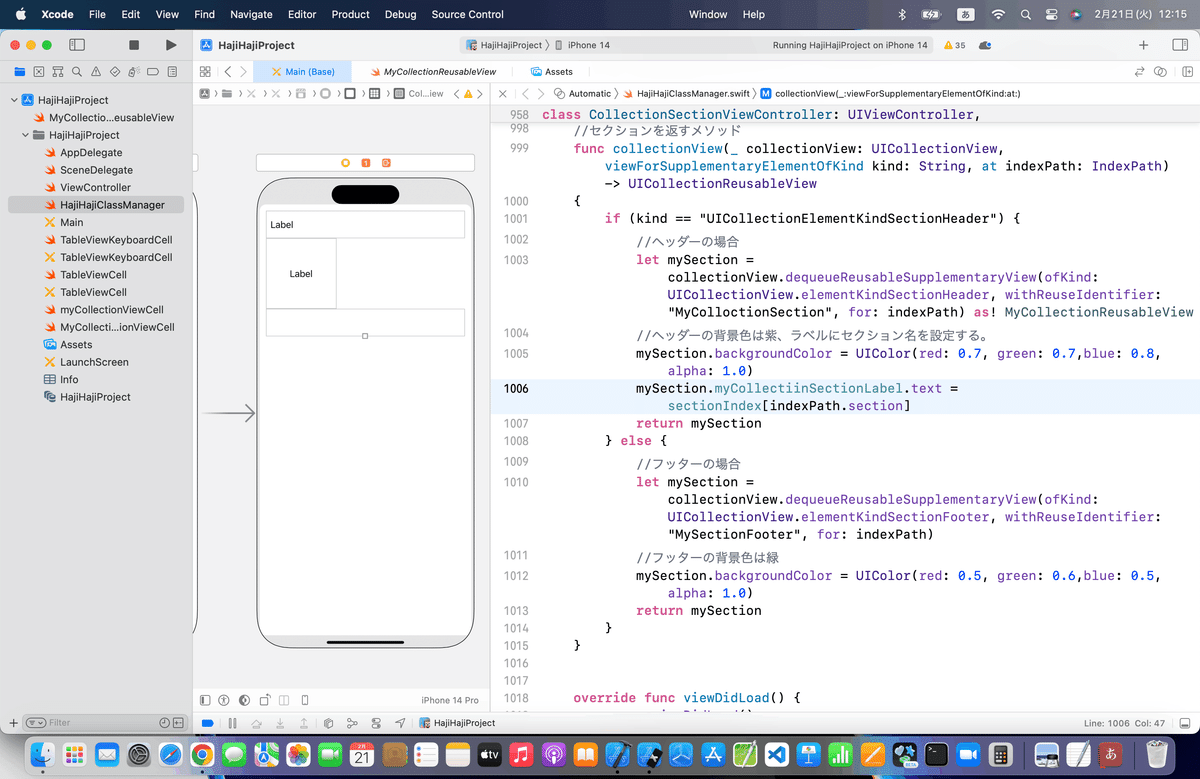
ここまでのコード
class CollectionSectionViewController: UIViewController, UICollectionViewDataSource {
//データ
var dataInSection = [["青山","阿部"], ["加藤","川島","神田"], ["佐藤","坂田"], ["田中"]]
//セクション
var sectionIndex:[String] = ["あ行", "か行", "さ行", "た行"]
//データの個数を返すメソッド
func collectionView(_ collectionView: UICollectionView, numberOfItemsInSection section: Int) -> Int {
return dataInSection[section].count
}
//データを返すメソッド
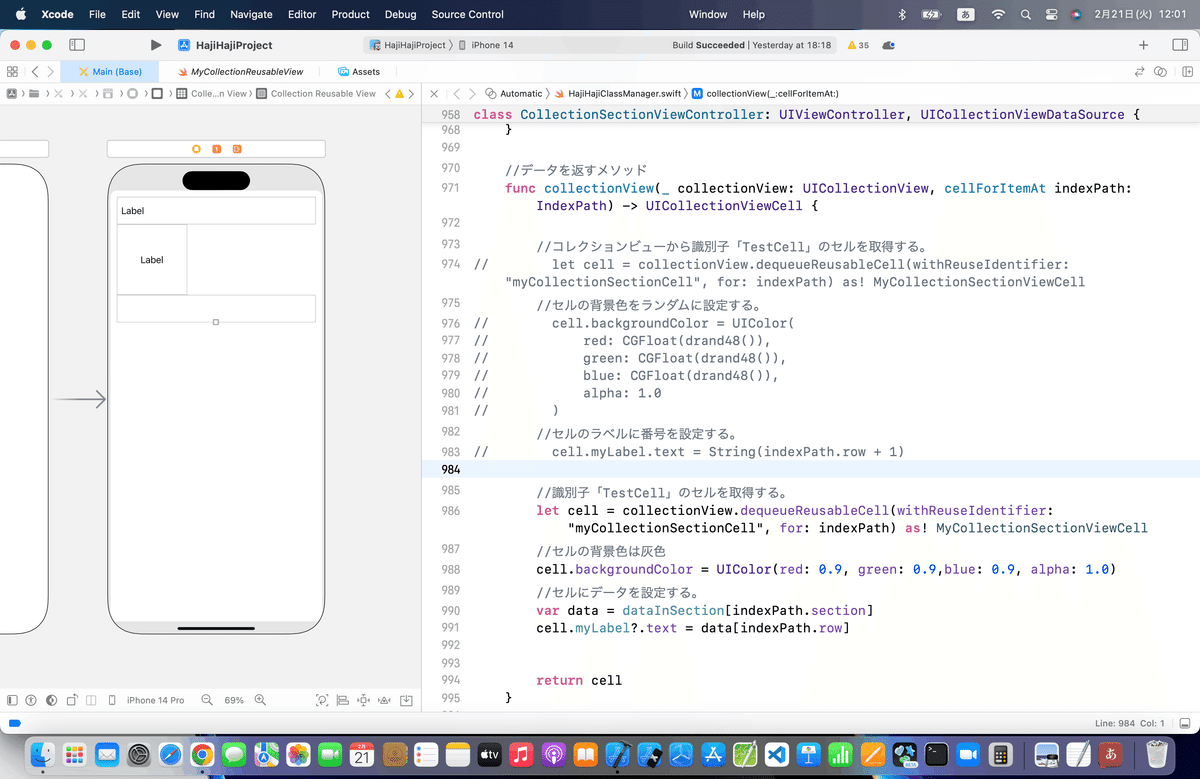
func collectionView(_ collectionView: UICollectionView, cellForItemAt indexPath: IndexPath) -> UICollectionViewCell {
//識別子「TestCell」のセルを取得する。
let cell = collectionView.dequeueReusableCell(withReuseIdentifier: "myCollectionSectionCell", for: indexPath) as! MyCollectionSectionViewCell
//セルの背景色は灰色
cell.backgroundColor = UIColor(red: 0.9, green: 0.9,blue: 0.9, alpha: 1.0)
//セルにデータを設定する。
var data = dataInSection[indexPath.section]
cell.myLabel?.text = data[indexPath.row]
return cell
}
//セクションの個数を返すメソッド
func numberOfSectionsInCollectionView(collectionView: UICollectionView) -> Int {
return sectionIndex.count
}
//セクションを返すメソッド
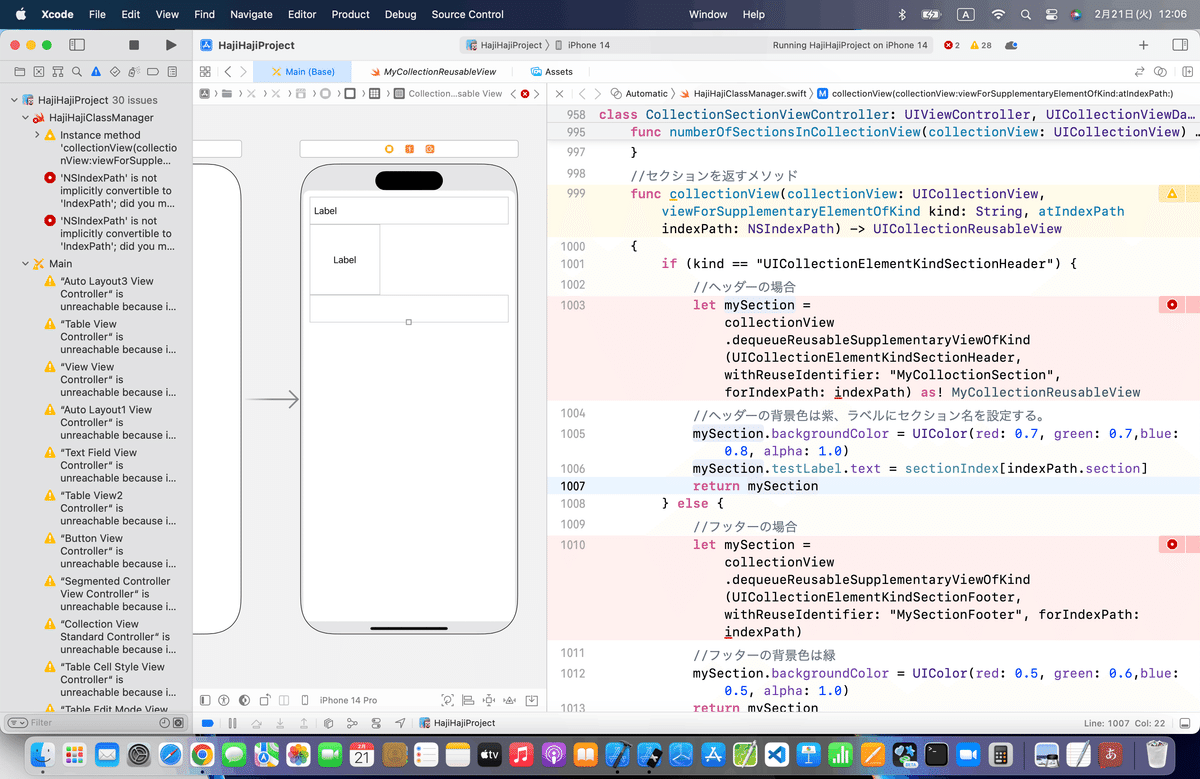
func collectionView(_ collectionView: UICollectionView, viewForSupplementaryElementOfKind kind: String, at indexPath: IndexPath) -> UICollectionReusableView
{
if (kind == "UICollectionElementKindSectionHeader") {
//ヘッダーの場合
let mySection = collectionView.dequeueReusableSupplementaryView(ofKind: UICollectionView.elementKindSectionHeader, withReuseIdentifier: "MyCollectionSection", for: indexPath) as! MyCollectionReusableView
//ヘッダーの背景色は紫、ラベルにセクション名を設定する。
mySection.backgroundColor = UIColor(red: 0.7, green: 0.7,blue: 0.8, alpha: 1.0)
mySection.myCollectiinSectionLabel.text = sectionIndex[indexPath.section]
return mySection
} else {
//フッターの場合
let mySection = collectionView.dequeueReusableSupplementaryView(ofKind: UICollectionView.elementKindSectionFooter, withReuseIdentifier: "MySectionFooter", for: indexPath)
//フッターの背景色は緑
mySection.backgroundColor = UIColor(red: 0.5, green: 0.6,blue: 0.5, alpha: 1.0)
return mySection
}
}
override func viewDidLoad() {
super.viewDidLoad()
}
}今日は用事があるのと、先週までの疲労があるので、続きは次回💦
セクションは問題なく表示できてるようなので、そもそもデータが怪しい💦🙇
でも出てきた事象が原因のようだから、見直してみよう!
ランチ後に、、、解決 藁
でも起きた事象だったので、、、、💦
追加したコードで
    //セクションの個数を返すメソッド
    func numberOfSectionsInCollectionView(collectionView: UICollectionView) -> Int {
        return sectionIndex.count
    }
を、
    func numberOfSections(in collectionView: UICollectionView) -> Int {
        return sectionIndex.count
    }
に書き換えて、、、シミュレータを実行すると
いやあ、しかしこれまでの蓄積があったから、
勘+記事の見返し
すんなり解決できた〜〜〜〜🕺
で紹介したけど、JumptoDefinitionはマジで重宝するね〜〜〜〜〜〜〜〜🕺
さてと
⒐ブラッシュアップ
が恒例なんだけど、前回ですでにビュー自体のAutoLayoutとラベルについてもここまでの操作でやっているので今回は割愛
今回のまとめコード
class CollectionSectionViewController: UIViewController, UICollectionViewDataSource {
    //データ
    var dataInSection = [["青山","阿部"], ["加藤","川島","神田"], ["佐藤","坂田"], ["田中"]]
    //セクション
    var sectionIndex:[String] = ["あ行", "か行", "さ行", "た行"]
    //データの個数を返すメソッド
    func collectionView(_ collectionView: UICollectionView, numberOfItemsInSection section: Int) -> Int {
        return dataInSection[section].count
    }
    //データを返すメソッド
    func collectionView(_ collectionView: UICollectionView, cellForItemAt indexPath: IndexPath) -> UICollectionViewCell {
        //識別子「TestCell」のセルを取得する。
        let cell = collectionView.dequeueReusableCell(withReuseIdentifier: "myCollectionSectionCell", for: indexPath) as! MyCollectionSectionViewCell
        //セルの背景色は灰色
        cell.backgroundColor = UIColor(red: 0.9, green: 0.9,blue: 0.9, alpha: 1.0)
        //セルにデータを設定する。
        var data = dataInSection[indexPath.section]
        cell.myLabel?.text = data[indexPath.row]
        return cell
    }
    //セクションの個数を返すメソッド
    func numberOfSections(in collectionView: UICollectionView) -> Int {
        return sectionIndex.count
    }
    //セクションを返すメソッド
    func collectionView(_ collectionView: UICollectionView, viewForSupplementaryElementOfKind kind: String, at indexPath: IndexPath) -> UICollectionReusableView
    {
        if (kind == "UICollectionElementKindSectionHeader") {
            //ヘッダーの場合
            let mySection = collectionView.dequeueReusableSupplementaryView(ofKind: UICollectionView.elementKindSectionHeader, withReuseIdentifier: "MyCollectionSection", for: indexPath) as! MyCollectionReusableView
            //ヘッダーの背景色は紫、ラベルにセクション名を設定する。
            mySection.backgroundColor = UIColor(red: 0.7, green: 0.7,blue: 0.8, alpha: 1.0)
            mySection.myCollectiinSectionLabel.text = sectionIndex[indexPath.section]
            return mySection
        } else {
            //フッターの場合
            let mySection = collectionView.dequeueReusableSupplementaryView(ofKind: UICollectionView.elementKindSectionFooter, withReuseIdentifier: "MySectionFooter", for: indexPath)
            //フッターの背景色は緑
            mySection.backgroundColor = UIColor(red: 0.5, green: 0.6,blue: 0.5, alpha: 1.0)
            return mySection
        }
    }

    override func viewDidLoad() {
        super.viewDidLoad()
    }
}
今回の教訓
💃行き詰まったら、
警告が出てないメソッド名をJumptoDefinitionで調べよう🕺
Apple公式
さてと、次回は
をやる〜〜〜!