【Photoshop】ダイナミックな残像効果を作る方法

1.写真をPhotoshopで開き、レイヤーのロックを解除する

PC内の画像を右クリック→Photoshopで開いた後、鍵のアイコンをクリックし写真のロックを解除します
2.「Command(ctrl)+J」で複製し、下のレイヤーを非表示にする

レイヤーの複製→「Command(ctrl)+J」
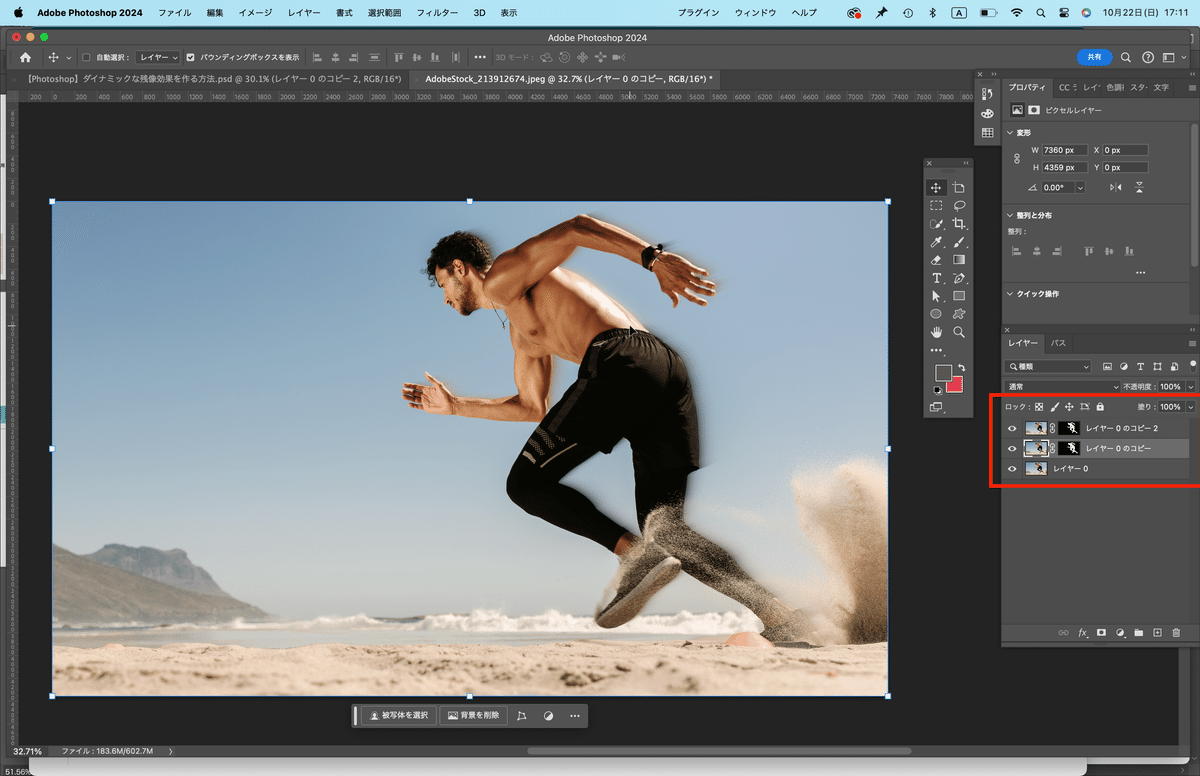
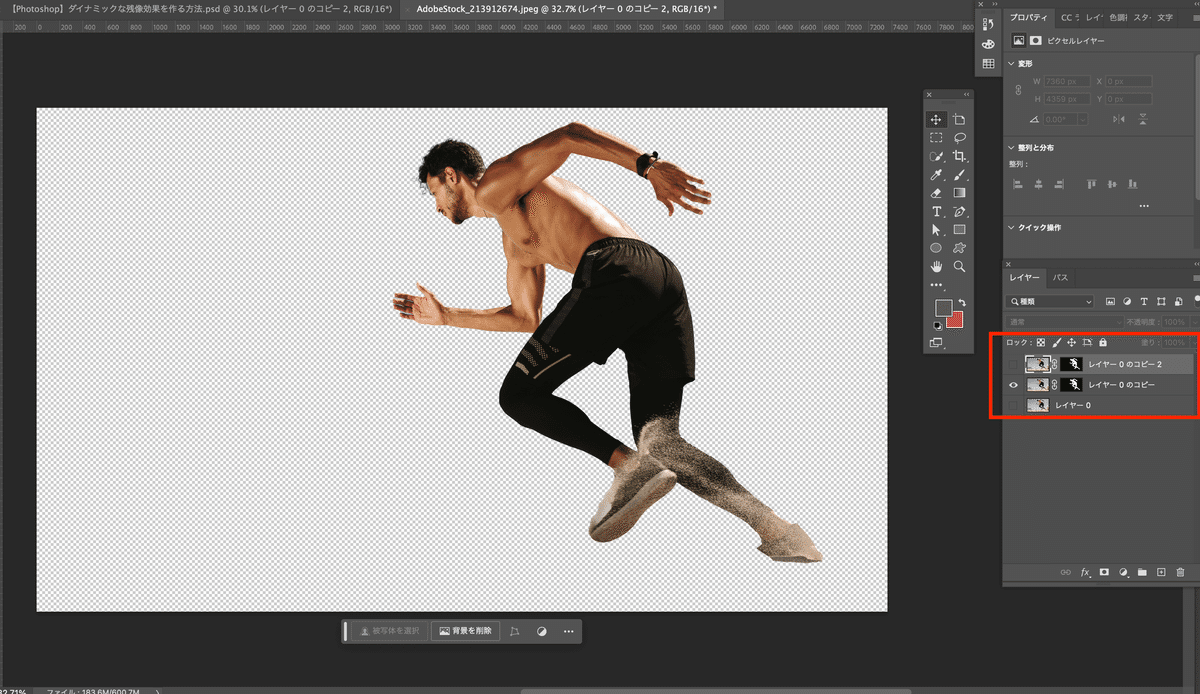
3.複製した一番上のレイヤーの背景を削除、さらに「Command(ctrl)+J」で複製し一番上のレイヤーを非表示にする
4.真ん中のレイヤーを選択、「フィルター」→「ぼかしギャラリー」→「パスぼかし」を選択
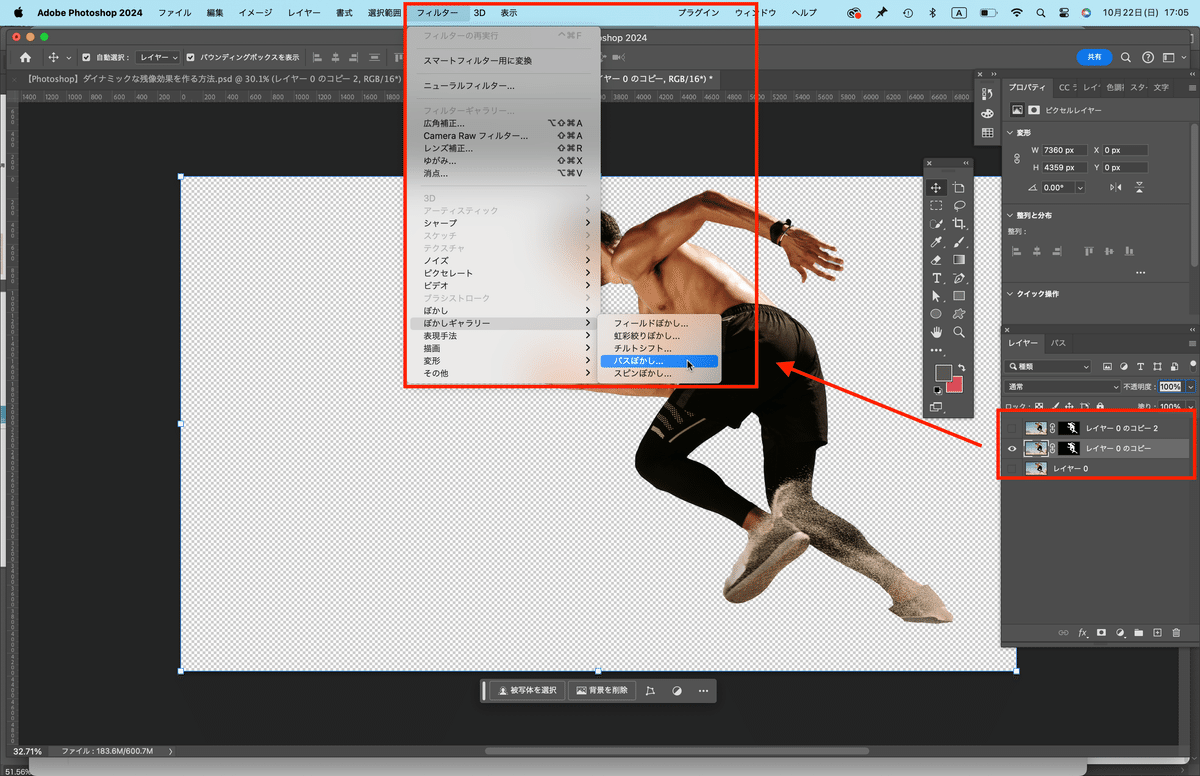
※必ず真ん中のレイヤーを選んでください。
5.「基本ぼかし」→「後幕シンクロフラッシュ」を選択
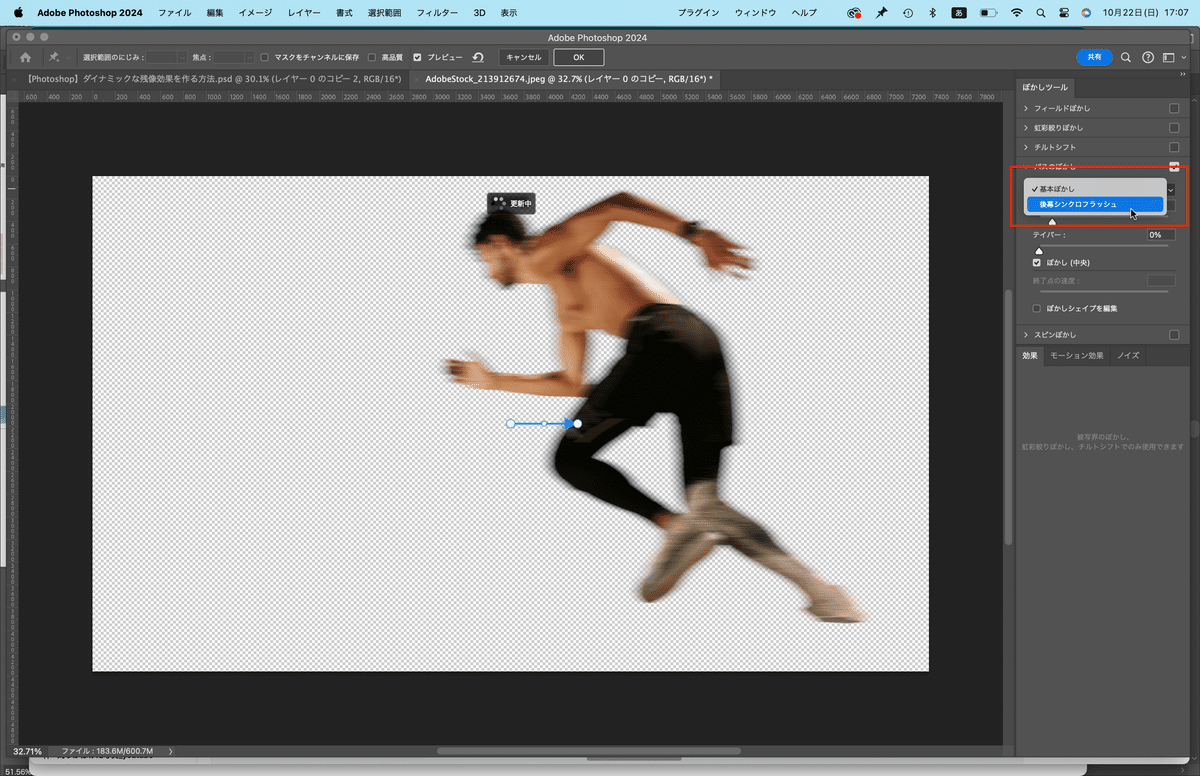
6.右肩上がりのパスを作り、OKを押す

パスは2点繋げるのが、簡単でおすすめです!
パスを終わる方法はキーボード左上にある「esc」を押します。
(Mac、Windows共通)
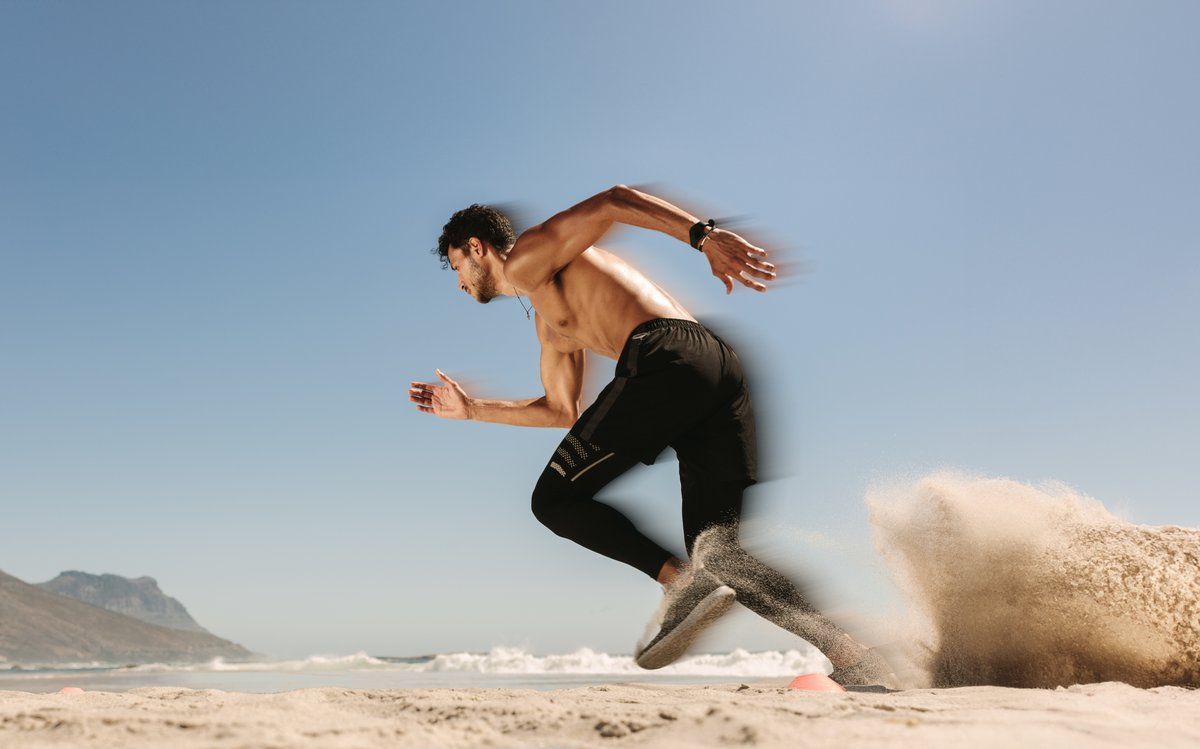
7.非表示にしていたレイヤーを全て表示させれば完成!