[MyVket] Furniture Enthusiasts must-see! How to elegantly import your glb models to MyRoom


The biggest feature of My Vket is that you can upload your own 3D models and arrange them not only for your own "avatar'' but also for the furniture in "My Room''!
While you can freely design your room, some people may find that after trying it out, they may find that the furniture they uploaded is too dark, or that the colors are different from what they expected.
In this article, we will explain step-by-step the preparation for uploading a 3D furniture model to My Vket, adjusting its appearance, and uploading it!
Let's create a special room where you can easily invite your friends and have fun on your browser!
If you haven't registered for My Vket yet, please do so from the official website!
1. Prepare the furniture model you want to use
In My Room, you can coordinate your room with furniture items that are pre-prepared in My Vket, or you can upload your own or existing furniture models by converting them into glb files.
The glb file conversion using Unity introduced this time can use .fbx, .obj, .dae ( Collada ) , and .dxf files .
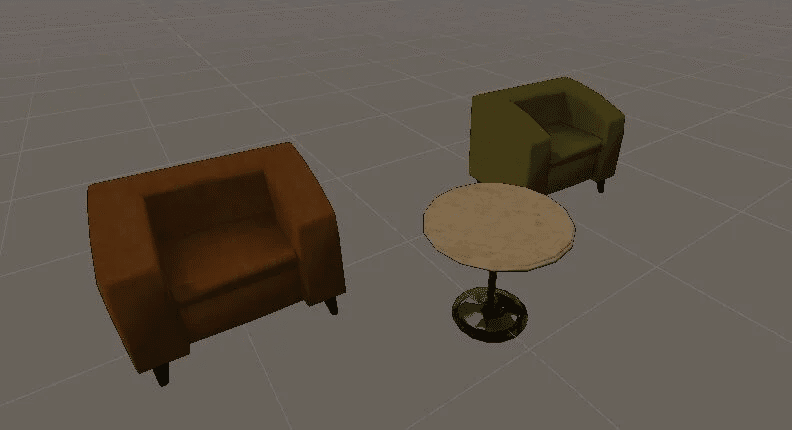
As an example, this time we will use a model obtained from the Vket Store .
*When uploading a model to My Vket, please be careful that it does not violate the model usage license or guidelines.
In particular, please be careful that the public settings (described below) at the time of upload do not conflict with the model usage license.
2. UniGLTF (Introduction of UniVRM)
First, prepare the environment to output the glb file of the furniture model.
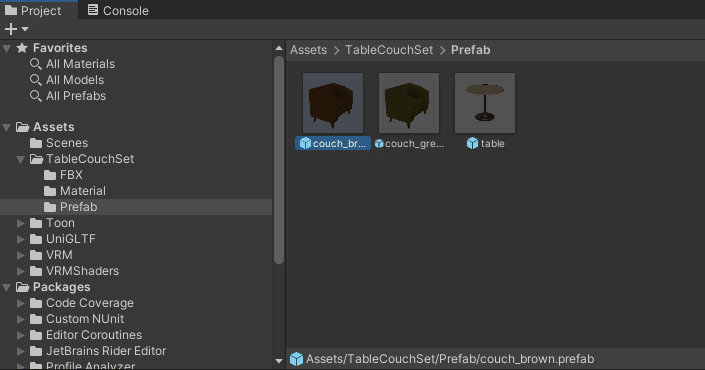
Of course, you can also output glb files directly from modeling software such as Blender. In this case, the furniture model we want to use is stored in Unitypackage, so we will work with Unity for convenience in adjusting materials and size.
To convert to glb files, use UniGLTF in the UniVRM package distributed by VRM Consortium . Since VRM is an extension of the glTF standard, the introduction of this library will make it easier to output glb files in Unity.
At the time of writing, the Unity version supported by the latest UniVRM is 2021.3LTS or later, so 2022.3.8f1 was used in this article.
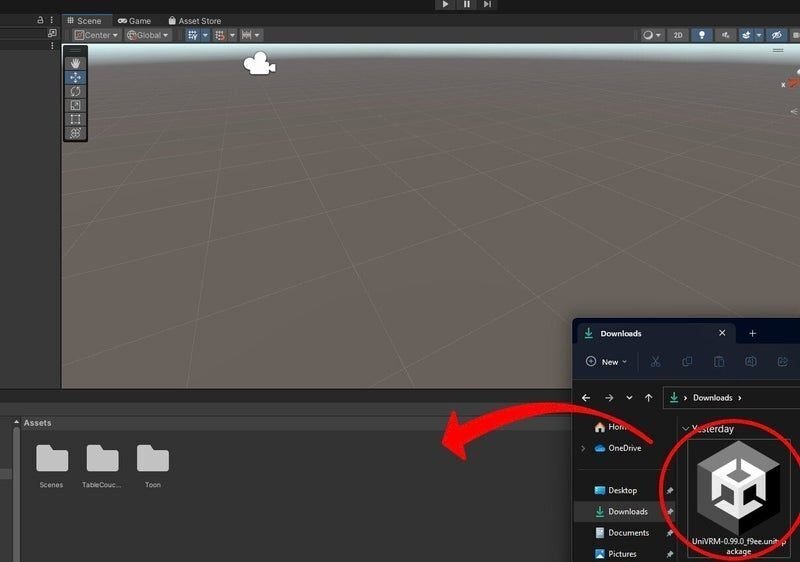
UniVRM can be installed by downloading UnityPackage or by specifying the package using UPM.
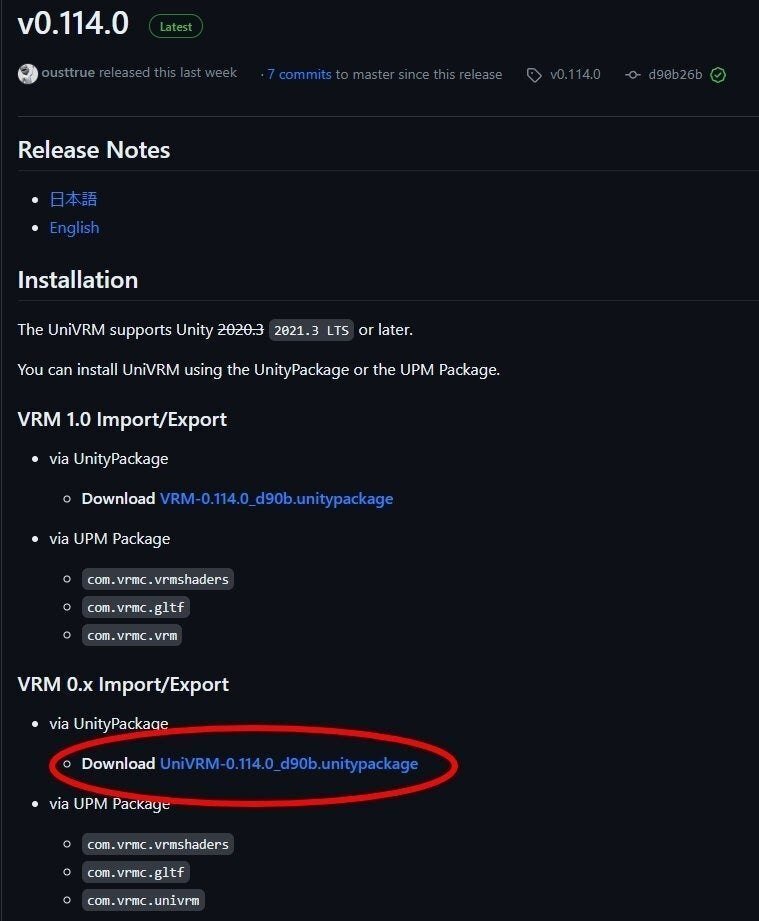
Once the download is complete, install UnityPackage by dragging and dropping it into the editor.
Once the installation is complete, it's time to convert the furniture model to glb!
3.Adjust furniture models in Unity
Once UniVRM has been installed, we will introduce the furniture prepared here into the Unity project and upload the model data to the scene screen.
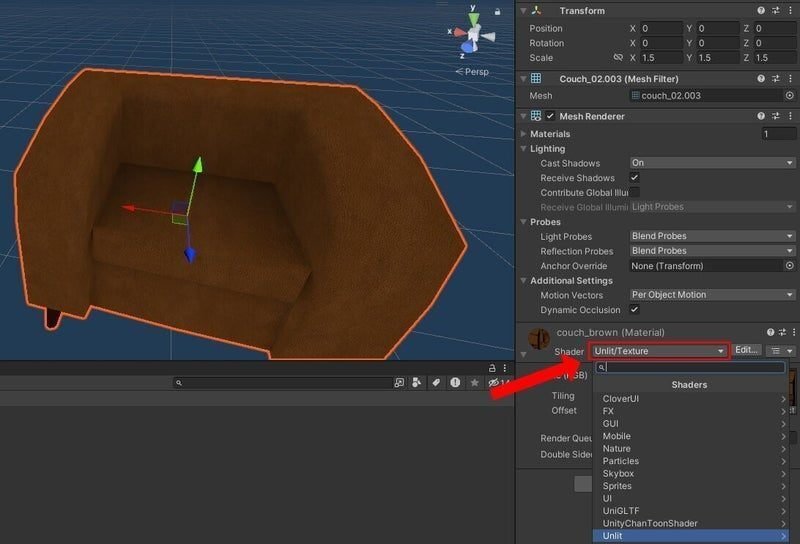
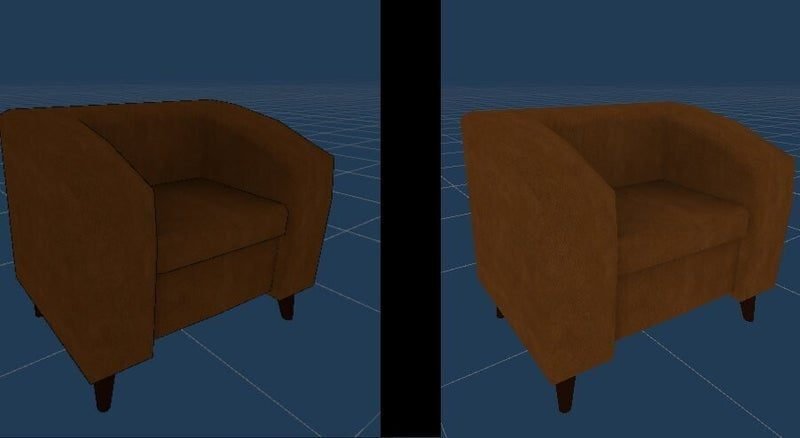
In this model, UTS (UnitychanToonShader) is assigned as the shader.
You can convert it to a glb file and upload it as is, but it tends to look dark on My Vket, so we recommend converting it to the Unlit shader.
To change the shader assigned to a 3D model, select the model and change the Shader item from the material at the bottom of the inspector screen.
As an example, in the image below, we select "Unlit/Texture" and change the material settings.
By changing to the Unlit shader, the appearance became brighter as shown below.
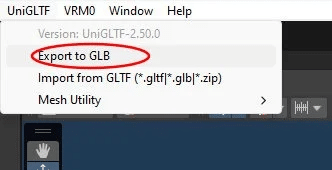
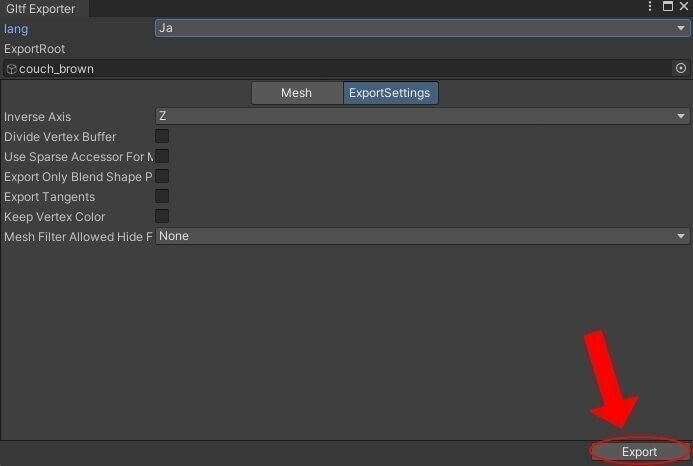
After completing the visual adjustments, output the glb file. Select Export to GLB from the UniGLTF tab to output the file.
4. Upload furniture to My Vket
Once the file output is complete, it's time to upload the model to My Vket! After
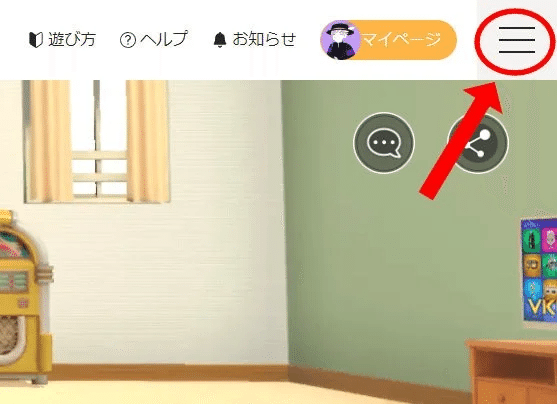
logging into My Vket , go to Item Upload from the Avatar/Item Management page.
*Currently, the furniture model upload function is only supported on PC.
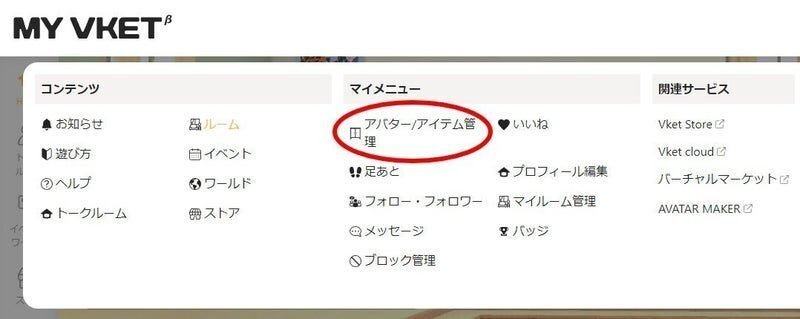
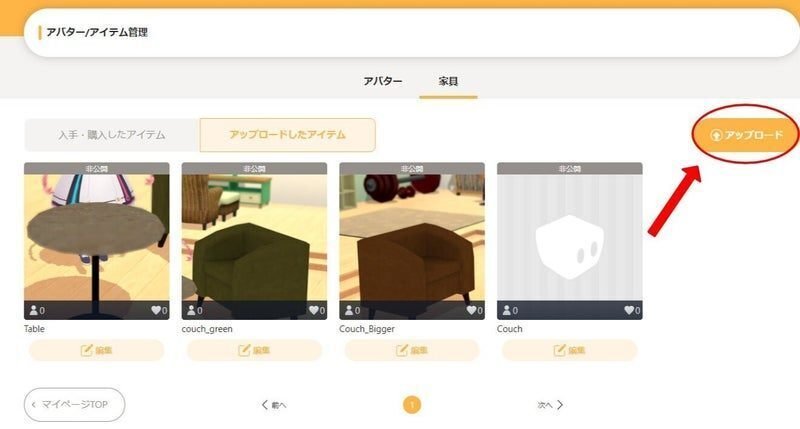
On the avatar/item management page, you can manage the avatars and furniture you have uploaded.
If you want to upload a new file, select "Upload".
On the item upload screen, upload the glb file output above and add the item name, category/subcategory , and thumbnail .
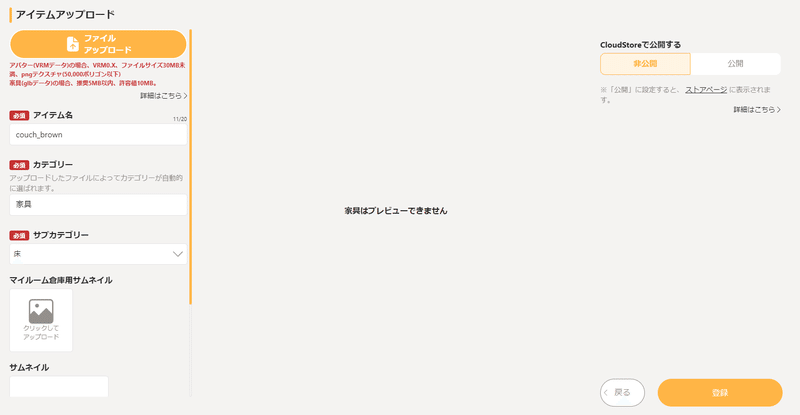
When uploading, please refer to the following articles for detailed explanations of each item and the differences between categories.
If you select "Publish" for "Publish on CloudStore" , it will be published on the store page for other users to use. Make sure to set it to "Private" unless it is a furniture model that you can make yourself or that can be redistributed or resold .
After the upload is complete, it will take some time for it to appear in the avatar management list, so please wait for a while.
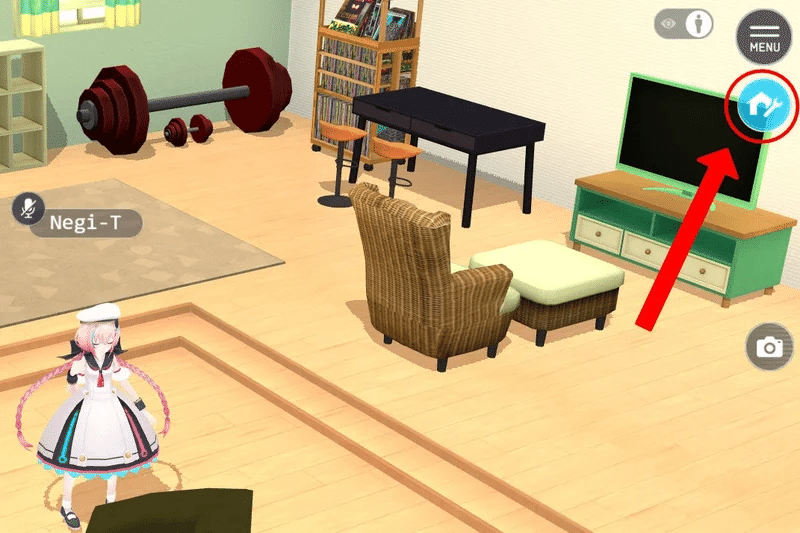
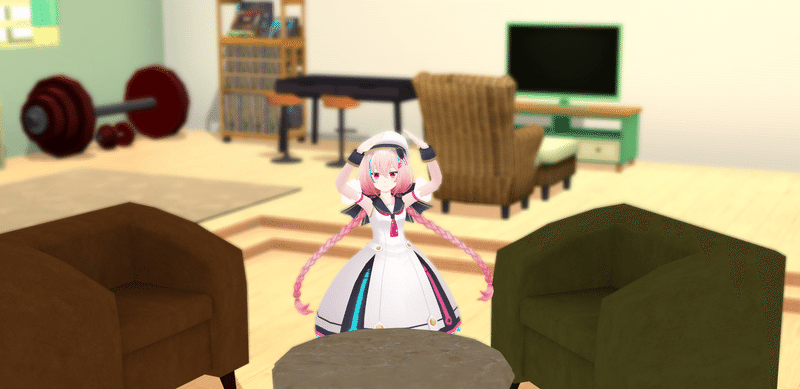
5. Check the appearance, example room combining homemade furniture and free items
After uploading the furniture, select "Go to My Room" on the top page to move to My Room!
Once you enter your room, immediately place the furniture you uploaded.
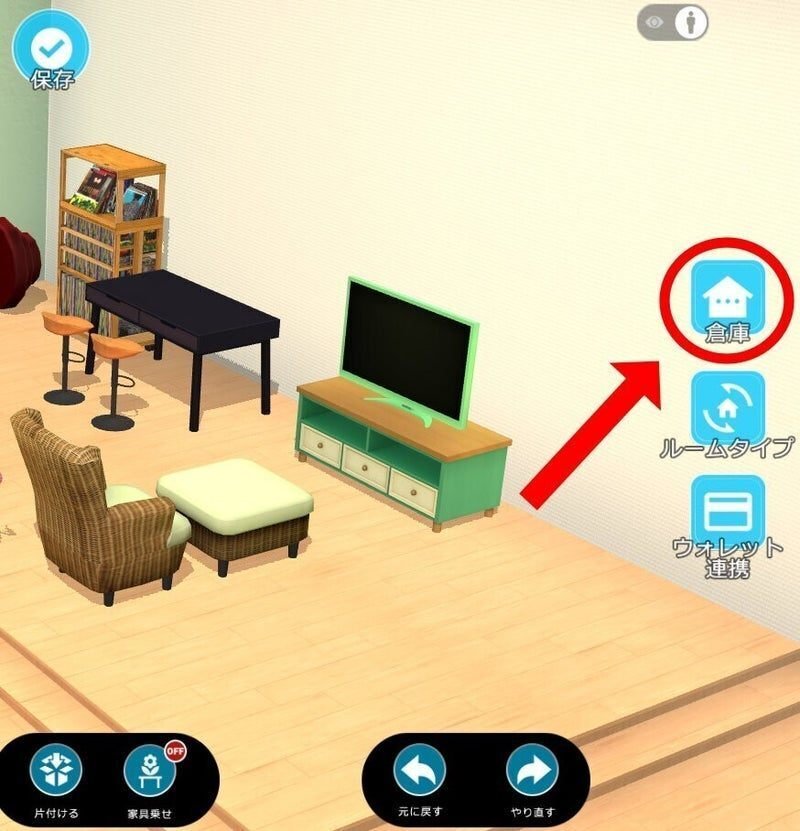
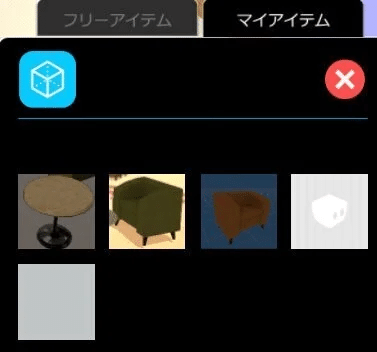
When you select the uploaded furniture from "My Items", the uploaded furniture will appear in your room!
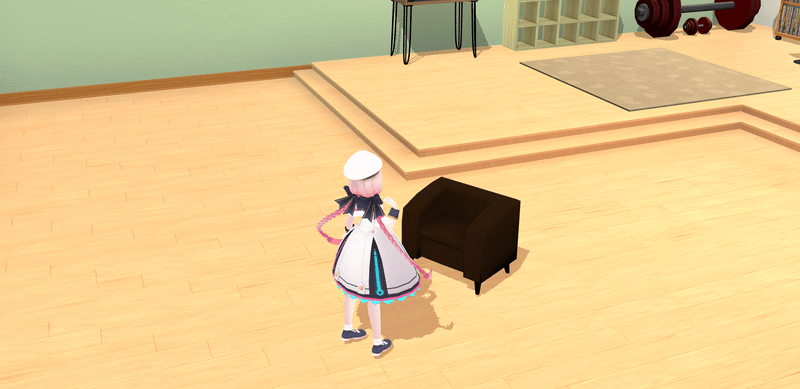
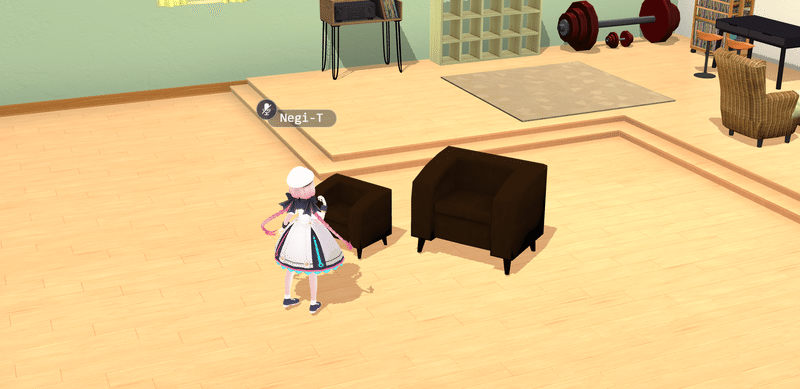
Furthermore, since the size of the furniture this time was small, after checking the appearance here, we re-outputted the original size in Unity by multiplying it by 1.5.

By re-uploading, we were able to place a chair that matches Vket's size as shown in the image below!
We followed the above steps to the other models and placed the furniture!
In this way, in My Room, you can create a room by combining furniture models provided as "free items" and uploaded models. Once you have completed your masterpiece, be sure to invite your friends!
In conclusion
With My Vket, you can create your own room that expresses your "likes" as described above. Create your own room and show it off to your friends! Also, we want to create my own room after reading this article! ! If you think so, please visit My Vket!
Recommended articles