超簡単なRemixの始め方
これはKent C.DoddsによるSuper Simple Start to Remixの翻訳です。
一部のコードは原文の方が見やすいです。また、noteの機能の都合上原文とは違う拡張子を使用しています。ぜひ元の記事も見てみてください。
この記事が「超簡単な開始」の記事の一つであるということにご留意ください。つまり、対象となる読者はRemixを使用した経験があり、Remixが提供する素晴らしい機能の数々抜きで、細々とした部分がどう動くか興味がある人たちです。そういうことなので、この記事は実際よりもRemixを使うことが難しいという印象を与えるかもしれません。この記事はRemixを使い始めたばかりという人やRemixの導入をしてほしいという人には向いてません。近々初心者向けの手引きとなる記事も書こうと思っています。
Remixのおかげでより良いウェブサイトを構築することに、2015年にReactを使い始めてから今までの中で何よりもワクワクしています。語りたいことは山ほどありますが、この投稿では、できるだけ無駄なものを取り除いて、Remixに「超簡単な開始」を施したいと思います。なので、Remixには(これから私がお見せするものより遥かに簡単な)よくできた`npx create-remix@lates`なるものがあるにもかかわらず、私たちはこれを無視して簡易的なRemixのアプリを完全に何もないところから運用するところまで構築していきます。そうすることで我々はそのアプリを動かすのに必要な一つ一つの細片を詳しく調べることができます。
始める前に、私たちのプロジェクトのフォルダを作りましょう。私は超独自的に行きたいので「super-simple-start-to-remix」という名前のフォルダにしてデスクトップに置くとします。よし、これで準備万端です!
1. Remixのインストール
Remixはいつもと同じように、開始時に必要な他のパッケージと一緒にインストールできます:
npm install react react-dom
npm install --save-dev @remix-run/dev
2. Remixの設定
さて、それらのパッケージがインストールできたら、Remixの設定をしましょう。`remix.config.js`を作成します:
// remix.config.js

module.exports = {}
ええ、必要なのはこれだけです。初期状態で全く問題なく動作しますが、Remixは設定ファイルがないとビルドしないので、ファイルは作成しましょう。
3. Remixでのアプリの構築
`build`スクリプトを`package.json`に足しましょう。
// package.json

{
  "scripts": {
    "build": "remix build"
  },
  "dependencies": {
    "react": "^18.2.0",
    "react-dom": "^18.2.0"
  },
  "devDependencies": {
    "@remix-run/dev": "^1.6.5"
  }
}
上出来です。ではビルドを実行しましょう。
npm run build

Building Remix app in production mode...
Missing "entry.client" file in ~/Desktop/super-simple-start-to-remix/app
おっと、そのファイルを足しましょう:
mkdir app
touch app/entry.client.jsx
そしてもう一度ビルドを実行します:
npm run build

Building Remix app in production mode...
Missing "entry.server" file in ~/Desktop/super-simple-start-to-remix/app
よし、それを足しましよう:
touch app/entry.server.jsx今度こそ:
npm run build

Building Remix app in production mode...
Missing "root" file in ~/Desktop/super-simple-start-to-remix/app
多分最後の一つでしょう?
touch app/root.jsxよし、今一度ビルドを実行しましょう:
npm run build

Building Remix app in production mode...
Built in 234ms成功!今のファイル構成を見てみましょう。これはビルド前です(`node_modules`は無視します):
.
├── app
│   ├── entry.client.jsx
│   ├── entry.server.jsx
│   └── root.jsx
├── package-lock.json
├── package.json
└── remix.config.jsひとたび`npm run build`を実行すると、Remixはいくつかのファイルを作成してくれます:
.
├── app
│   ├── entry.client.jsx
│   ├── entry.server.jsx
│   └── root.jsx
├── build
│   ├── assets.json
│   └── index.js
├── package-lock.json
├── package.json
├── public
│   └── build
│       ├── _shared
│       │   └── chunk-DH6LPQ4Z.js
│       ├── entry.client-CY7AAJ4Q.js
│       ├── manifest-12E650A9.js
│       └── root-JHXSOSD4.js
└── remix.config.js注釈:RemixはTypeScriptを標準サポートしていますが、今回は簡単であることを貫きます。また、JSXを使う予定なのでそれらのファイルは`.jsx`拡張子が必要です。RemixはJSXを使用したい場合は`.jsx`もしくは`.tsx`拡張子が必要なesbuildを使います。
4. Remixアプリのコーディング
Remixがサーバー側レンダリングするReactのフレームワークです。今のところコンパイルしてもらっただけですが、実際にサーバーを動作させて、スクリーンに何か表示させてみましょう。
`root.jsx`を何かしらで埋めるところから始めましょう。これがRemixがレンラーするルート要素です。
// app/root.jsx

import * as React from 'react'

export default function App() {
  const [count, setCount] = React.useState(0)
  return (
    <html>
      <head>
        <title>My First Remix App</title>
      </head>
      <body>
        <p>This is a remix app. Hooray!</p>
        <button onClick={() => setCount(c => c + 1)}>{count}</button>
      </body>
    </html>
  )
}`<html>`をレンダーできるのは素敵ですよね?ええ、あなたが思ってるよりイケてますよ、確実に。
さて、次は、`entry.client.jsx`を埋めましょう。
// app/entry.client.jsx

import {RemixBrowser} from '@remix-run/react'
import {hydrateRoot} from 'react-dom/client'

hydrateRoot(document, <RemixBrowser />)これは何でしょう?私たちは、、、`document`をハイドレーションしてる?!なんて素敵なんでしょう?!
そして最後に、`entry.server.jsx`を埋めましょう。
// entry.server.jsx

import ReactDOMServer from 'react-dom/server'
import {RemixServer} from '@remix-run/react'

export default function handleRequest(
  request,
  responseStatusCode,
  responseHeaders,
  remixContext,
) {
  const markup = ReactDOMServer.renderToString(
    <RemixServer context={remixContext} url={request.url} />,
  )

  responseHeaders.set('Content-Type', 'text/html')

  return new Response(`<!DOCTYPE html>${markup}`, {
    status: responseStatusCode,
    headers: responseHeaders,
  })
}これも大変素晴らしいですね。つまり必要なものを全て受け入れ、そのレスポンスを返すデフォルト関数をエクスポートします。その`Response`は本物の(もしくは少なくともnodeと同等の)`Response`オブジェクトです。MDNについて学びたまえ!(すみません、ただRemixのこの部分が本当に好きなだけです)。
私はここでこれだけコントロールできることをとても気に入ってます。私たちは`renderToString`と`hydrate`を呼び出す責任を担っています。つまり私たちは多くの力を手にし、かつ余計なRemix専用のAPIを覚える必要がなく、カスタマイズするために余計なオプションを作る必要もないのです。なぜならその操作は私たちの手中にあるからです。大変素晴らしい。
よし、もう一度ビルドを実行してみましょう。
npm run build

Building Remix app in production mode...
The path "@remix-run/react" is imported in app/entry.server.jsx but "@remix-run/react" was not found in your node_modules. Did you forget to install it?

✘ [ERROR] Could not resolve "@remix-run/react"

    app/entry.client.jsx:1:29:
      1 │ import { RemixBrowser } from "@remix-run/react";
        ╵                              ~~~~~~~~~~~~~~~~~~

  You can mark the path "@remix-run/react" as external to exclude it from the bundle, which will remove this error.


Build failed with 1 error:
app/entry.client.jsx:1:29: ERROR: Could not resolve "@remix-run/react"そうでした、私たちは`RemixBrowser`と`RemixServer`ように`@remix-run/react`を使っています。それをインストールしましょう。
npm install @remix-run/react今一度ビルドを実行してみましょう:
npm run build

Building Remix app in production mode...
Built in 121ms上出来です!動作しました🎉つまり私たちは今何かしら実際に動作しビルドできる実体を手に入れたのです。
5. Remixサーバーの動作
プラットフォーム特有のものを動かすために使える`@remix-run/{adapter}`パッケージというものがあります。今のところ私たちが使えるアダプターは全部でこれだけです:
nodeと(もしくは)ドッカーコンテナが使えるところでデプロイする:
`@remix-run/node`
`@remix-run/express`
`@remix-run/serve`
(サーバーレスなど)特別なプラットフォームでデプロイする:
`@remix-run/deno`
`@remix-run/architect`
`@remix-run/vercel`
`@remix-run/netlify`
`@remix-run/cloudflare-workers`
また、自分用のアダプターを構築することも可能です。ほとんどのアダプターはたった数百行のコードです(しかも中にはそこまででないものもあります)。
これらのアダプターが行う主な事柄はプラットフォーム独自のリクエスト/リスポンスオブジェクトをウェブ標準のリクエスト/リスポンス(かもしくはポリフィルされたバージョンのもの)です。
私たちのシンプルなアプリでは、`@remix-run/serve`を使います。それは実は`@remix-run/express`の上に構築された、`@remix-run/express`の上に構築されています。そのためこのアプリは`node`サーバーがデプロイできる環境であればどこへでもデプロイできます。これの良いところはそのプラットフォームがあなたのコードやその他の依存関係をサポートしてる限り、`package.json`を使ってアダプターを入れ替えるだけで、どこへでもデプロイでき問題なく使えるというところです。
`@remix-run/serve`をインストールしましょう。
npm install @remix-run/serveそうだ、私たちはこのアプリを「開発」したいですよね?では`dev`を`package.json`に足しましょう:
// package.json

{
  "scripts": {
    "build": "remix build",
    "dev": "remix dev"
  },
  "dependencies": {
    "@remix-run/react": "^1.6.5",
    "@remix-run/serve": "^1.6.5",
    "react": "^18.2.0",
    "react-dom": "^18.2.0"
  },
  "devDependencies": {
    "@remix-run/dev": "^1.6.5"
  }
}ここで`npm run dev`を実行するとこのようなアウトプットを得ます:
Watching Remix app in development mode...
💿 Built in 156ms
Remix App Server started at http://localhost:3000 (http://192.168.115.103:3000)このアウトプットは`remix dev`が2つのことをしていることを示しています:
`Remix App Server started at http://localhost:3000`:これは`build`ディレクトリを基に簡単なexpressサーバーを実行してる`remix-serve`から来ています。
`💿 Built in 156ms`:これはウォッチモードと開発モードで実行している`remix build`から来ています。
私たちが変更を加えるたびに`build`内のアウトプットは更新され、expressサーバーがその変更点を拾い上げます。
もう一つ`remix dev`がすることは、ライブリロードをサポートするために、ブラウザでウェブソケットを立ち上げることです。今のところ「Hot Module Replacement 」(HMR)のサポートはなく、それが多くの人の障壁になっていることを私もわかっていますが、あなたには是非ともこれに付き合ってほしい思っているのです。何はともあれ私はアプリでHMRを(storybookのようなツール内では素晴らしいですが)一度も信用したことがなくHRMの設定をしていたとしても必ず全ページ更新をしていました。加えて、あなたがRemixで書く多くのコードはサーバー側なので、通常は全てのサーバーサイドのコードを再び実行させるためにどんな場合でも全ページ更新したくなります。繰り返しになりますが、HMRは将来的にはサポートされるでしょう。
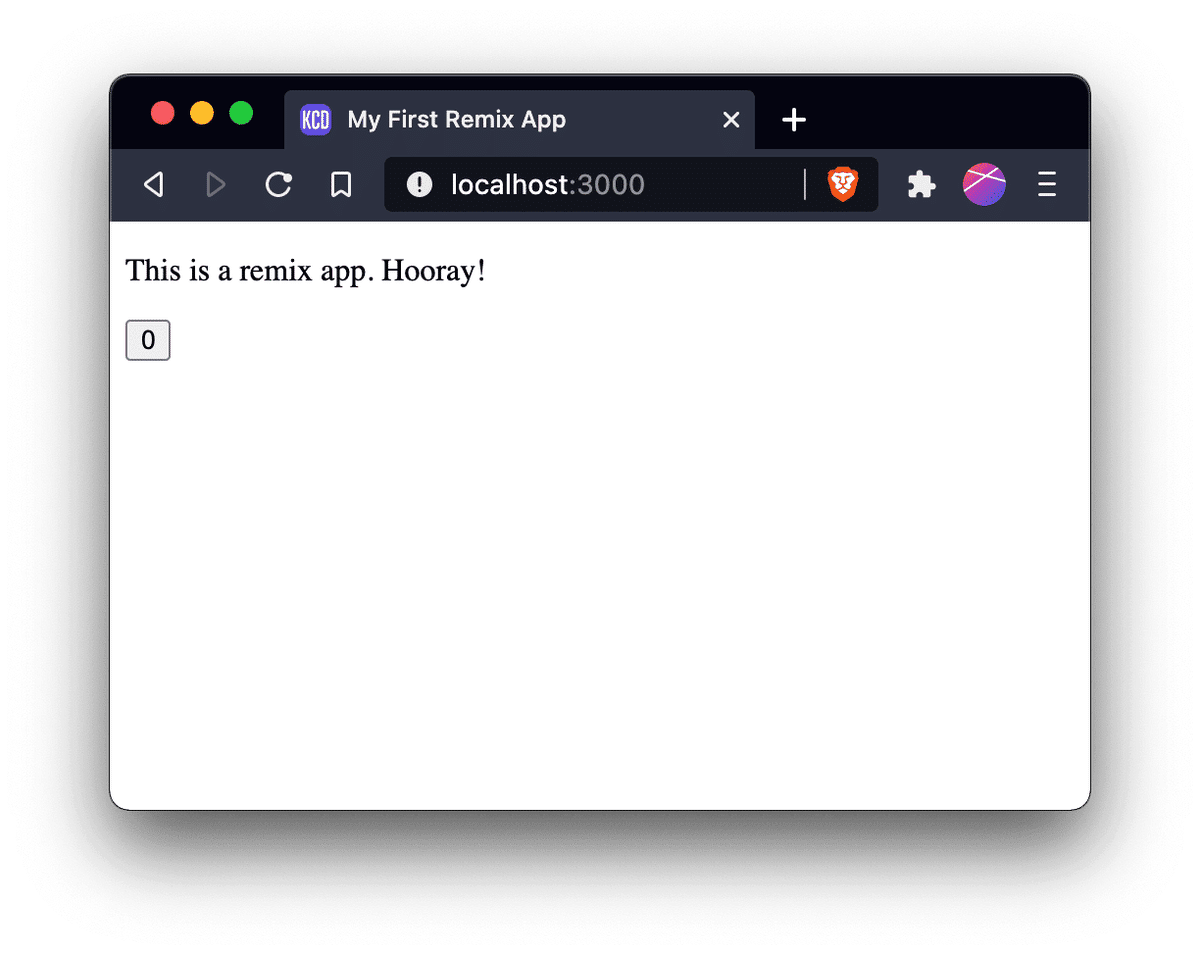
よし、良いでしょう。アプリを開いてみましょう!localhost:3000に移動して(サッ):

6. Remixアプリのハイドレート
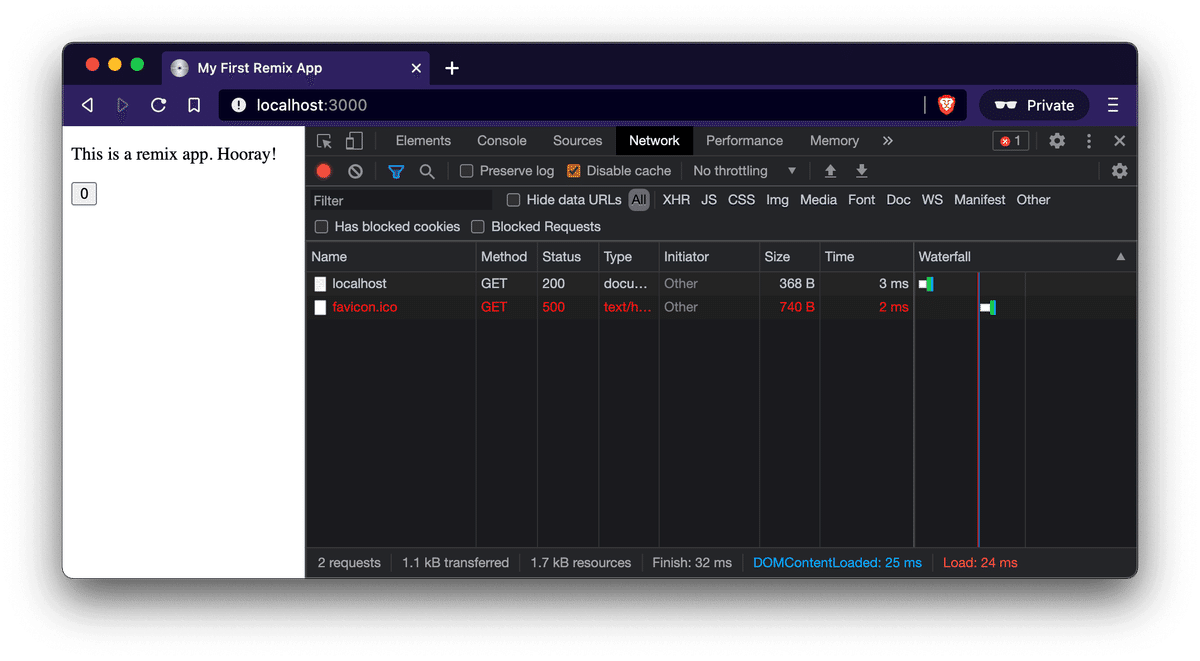
でも、ダメだ!そのボタンをクリックしても何も起きません。おかしい、、、Reactのアプリだと思ったのですが。ネットワークタブを見てみましょう。

何か忘れてはいないか?おっとそうだ!JavaScriptがない!そうなのです、RemixではJavaScriptを読み込むかどうか自体を選択することができるのです。そしてこれは設定ファイルの話ではありません。どのようにして`<html>`から始まってドキュメント全体まで管理しているか覚えていますか?そうですよね?ではスクリプトタグを含むように`app/root.jsx`を更新しましょう。Remixは便利なことにスクリプトタグをレンダーできるコンポーネントを提供してくれています。
// app/root.jsx

import * as React from 'react'
import {Scripts} from '@remix-run/react'

export default function App() {
  const [count, setCount] = React.useState(0)
  return (
    <html>
      <head>
        <title>My First Remix App</title>
      </head>
      <body>
        <p>This is a remix app. Hooray!</p>
        <button onClick={() => setCount(c => c + 1)}>{count}</button>
        <Scripts />
      </body>
    </html>
  )
}
あと、ファビコンがないのは目障りなのでこのカッコいいCDをファビコンにしようと思います:

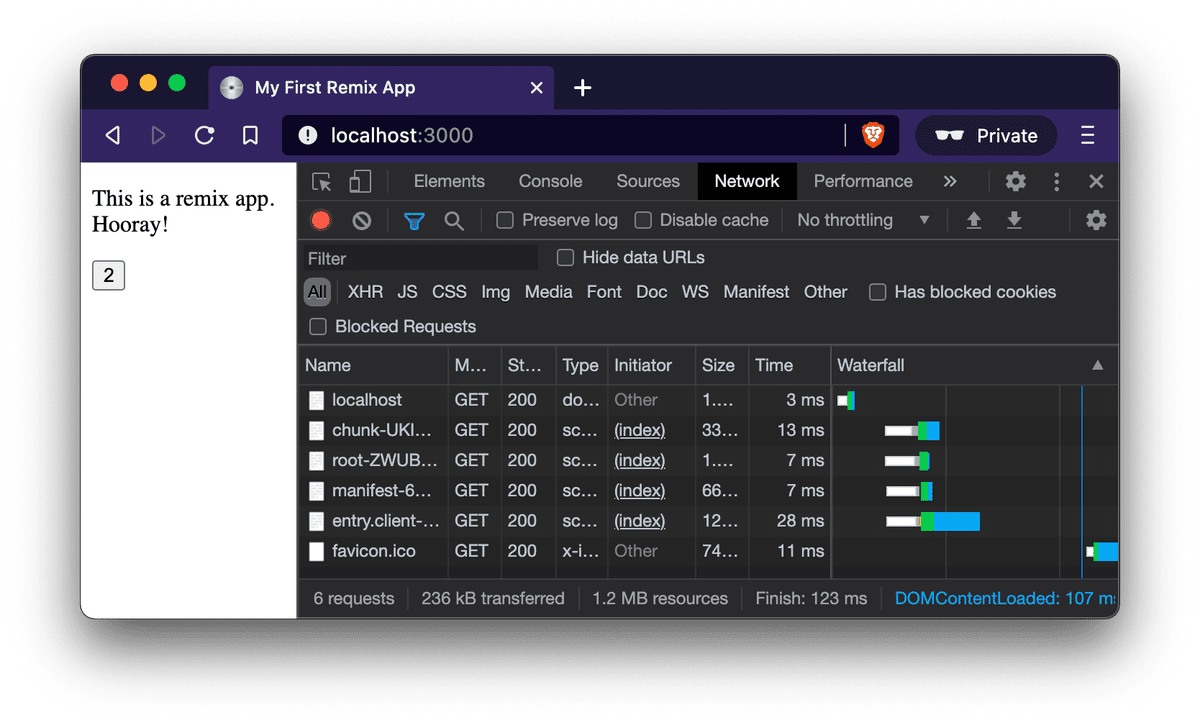
`.ico`ファイルを`public`ディレクトリに追加しましょう。`@remix-run/serve`は自動的に`public`ディレクトリにあるファイルを提供し、(デフォルトでそのファイルを探す)ブラウザはこうしてファイルを手に入れることができるのです。
素晴らしい、ここで試してみましょう:

そしてドキュメント上で「sourceを見る」と、これを得ることができます。
<!DOCTYPE html>
<html>
  <head>
    <title>My First Remix App</title>
  </head>
  <body>
    <p>This is a remix app. Hooray!</p>
    <button>0</button>
    <link rel="modulepreload" href="/build/_shared/chunk-PYN2BJX3.js" />
    <link rel="modulepreload" href="/build/root-FYPD7R2X.js" />
    <script>
      window.__remixContext = {
        actionData: undefined,
        appState: {
          trackBoundaries: true,
          trackCatchBoundaries: true,
          catchBoundaryRouteId: null,
          renderBoundaryRouteId: null,
          loaderBoundaryRouteId: null,
          error: undefined,
          catch: undefined,
        },
        matches: [
          {
            params: {},
            pathname: '/',
            route: {
              id: 'root',
              parentId: undefined,
              path: '',
              index: undefined,
              caseSensitive: undefined,
              module: '/build/root-FYPD7R2X.js',
              imports: undefined,
              hasAction: false,
              hasLoader: false,
              hasCatchBoundary: false,
              hasErrorBoundary: false,
            },
          },
        ],
        routeData: {},
      }
    </script>
    <script src="/build/manifest-142295AD.js"></script>
    <script type="module">
      import * as route0 from '/build/root-FYPD7R2X.js'
      window.__remixRouteModules = {root: route0}
    </script>
    <script src="/build/entry.client-UK7WD5HF.js" type="module"></script>
  </body>
</html>
これは素晴らしいことです。Remixはスプリクトタグを足しただけでなく、これらをプリロードしてくれます。つまりウォーターフォールではないのです(あなたはネットワークタブで全てのリソースの読み込みを同時に開始していることに気づくでしょう)。ルーターを使う場合より興味深いことになりますが、今回はシンプルを貫きます。
7. ローカルで本番モードを実行する
さて、これをローカルでビルドし実行しましょう。ではまず最初に、全てを軽量化しReactが本番環境に最適化するように、本番環境用のビルドを実行する必要があります:
npm run build

Building Remix app in production mode...
Built in 281msここで、`build`に`remix-serve`を実行する`start`スクリプトを追加しましょう。
// package.json

{
  "scripts": {
    "build": "remix build",
    "dev": "remix dev",
    "start": "remix-serve ./build"
  },
  "dependencies": {
    "@remix-run/react": "^1.6.5",
    "@remix-run/serve": "^1.6.5",
    "react": "^18.2.0",
    "react-dom": "^18.2.0"
  },
  "devDependencies": {
    "@remix-run/dev": "^1.6.5"
  }
}もう一つやりたいのは、`NODE_ENV`を`production`に設定して本番モードでは微妙に違う動作をする依存関係が想定通り動くようにします。では、`cross-env`を足して`NODE_ENV`を設定しましょう。
// package.json

{
  "scripts": {
    "build": "remix build",
    "dev": "remix dev",
    "start": "cross-env NODE_ENV=production remix-serve ./build"
  },
  "dependencies": {
    "@remix-run/react": "^1.6.5",
    "@remix-run/serve": "^1.6.5",
    "cross-env": "^7.0.3",
    "react": "^18.2.0",
    "react-dom": "^18.2.0"
  },
  "devDependencies": {
    "@remix-run/dev": "^1.6.5"
  }
}
では、開始しましょう。
npm start

Remix App Server started at http://localhost:3000 (http://192.168.115.103:3000)
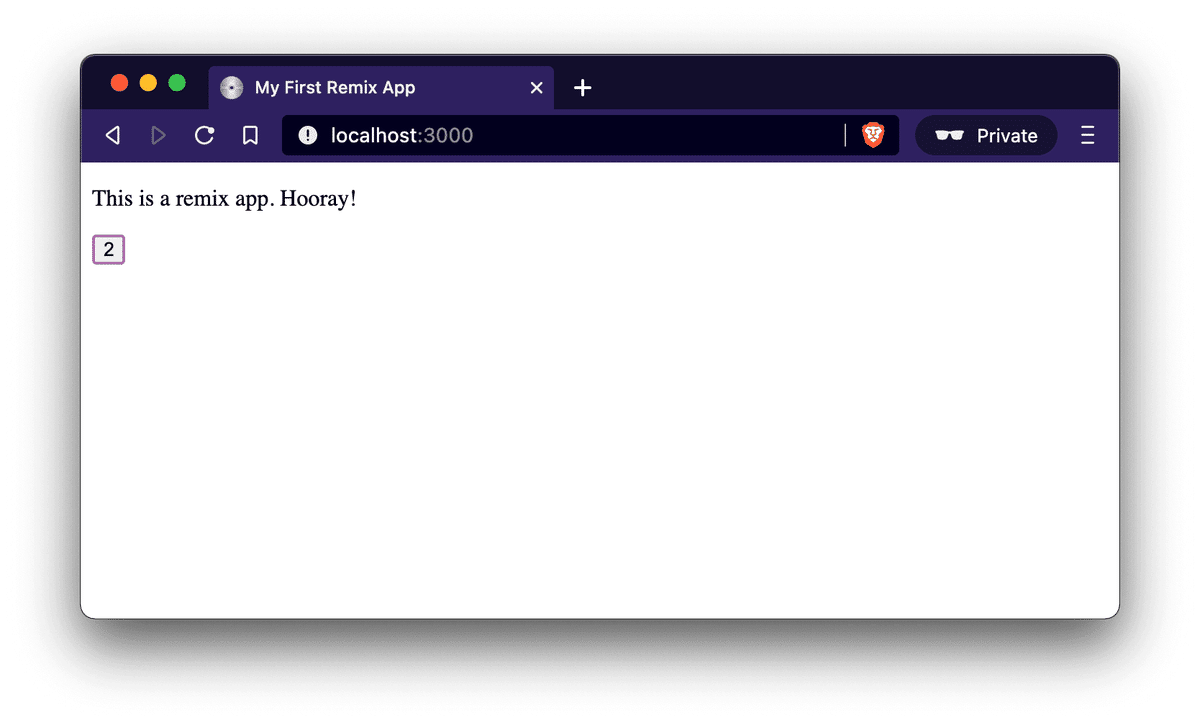
それを開くと、完璧に動作しているのがわかります:

万歳!
8. 結論
実は、Remixアプリの本番環境のデプロイ方法はたくさんあり、簡単な方法(`npx create-remix@latest`)でRemixを設定した場合、サポートされているサービスの中から使いたいものを選ばせてくれ、必要な設定や開始するための手順を全て提供してくれます。そのためここでは深入りしません。
Remixにはもっとたくさんのことがありますがこれは「超簡単な開始」なのでRemixで何かを起動させるために必要な要素がどこで何をしているのかを必要最低限のことで説明したかったのです。前述の通り`npx create-remix@latest`ではこれら全ては簡単なことです。しかしこのチュートリアルがRemixのどのパートが何をしているのか理解する手助けになれば幸いです。
このチュートリアルのコードはこちらからどうぞ:kentcdodds/super-simple-start-to-remix
楽しんで!
※誤訳などはコメント等でお知らせいただけますと幸いです。
