誰でも見れちゃう!?Difyアプリを守るNginx認証テクニック
はじめに
「作ったDifyのアプリのURLがばれて知らない人に使われちゃうか心配...」
そんな悩みを抱えているDifyユーザーの皆さん!
実は、Nginxの機能を使えば、あなたのDifyアプリで、簡単にパスワード認証(Basic認証)が実装できるんです。
今回は、NginxのBasic認証を使って、Difyアプリにアクセス制限をかける方法をご紹介します。
以下の記事を参考にさせていただきました。
注意点
「アプリごとにユーザを設定する」方法ではありません。
補足:アプリ単位に使うユーザを分けるのあれば、Next.jsやReactなどでフロントを立て、フロント側でアクセス制御するやり方が管理面でも効率的だと思います。(個人的な見解)「default.conf.template」を編集することで、次回のDifyアップデートコマンド(git pull)の時にコンフリクトのエラーが起きます。(雑に説明すると「新しいファイルでアップデートしようとしたら、もっと新しいファイルがローカルにあるからマージできないよぅ~」😢by Git君)
※Gitの基本的な部分を理解したうえ自己責任でお願いいたします。
なお、docker-compose.yamlを編集したときにも起きるコンフリクトの問題を解消する方法については、こちらのサイトが参考になると思います。
htpasswd コマンドのインストール
パスワードファイルに記載する「暗号化されたパスワード」を生成するために、htpasswd コマンド(apache2-utils)をインストールします。
補足:コマンドのインストールは必須ではありません。(手書きでつくってもよい)たとえば、暗号化テキストを生成してくれるサイトなどもありますが、ちょっと心配もあるので安全をとってコマンドで生成します。
$ sudo apt-get install apache2-utils

Reading package lists... Done
Building dependency tree... Done
Reading state information... Done
The following additional packages will be installed:
  libapr1t64 libaprutil1t64
The following NEW packages will be installed:
  apache2-utils libapr1t64 libaprutil1t64
0 upgraded, 3 newly installed, 0 to remove and 139 not upgraded.
Need to get 297 kB of archives.
After this operation, 907 kB of additional disk space will be used.
Do you want to continue? [Y/n] Y
Get:1 http://nova.clouds.archive.ubuntu.com/ubuntu noble-updates/main amd64 libapr1t64 amd64 1.7.2-3.1ubuntu0.1 [108 kB]
Get:2 http://nova.clouds.archive.ubuntu.com/ubuntu noble/main amd64 libaprutil1t64 amd64 1.6.3-1.1ubuntu7 [91.9 kB]
Get:3 http://nova.clouds.archive.ubuntu.com/ubuntu noble-updates/main amd64 apache2-utils amd64 2.4.58-1ubuntu8.4 [97.1 kB]
Fetched 297 kB in 2s (169 kB/s)
Selecting previously unselected package libapr1t64:amd64.
(Reading database ... 126460 files and directories currently installed.)
Preparing to unpack .../libapr1t64_1.7.2-3.1ubuntu0.1_amd64.deb ...
Unpacking libapr1t64:amd64 (1.7.2-3.1ubuntu0.1) ...
Selecting previously unselected package libaprutil1t64:amd64.
Preparing to unpack .../libaprutil1t64_1.6.3-1.1ubuntu7_amd64.deb ...
Unpacking libaprutil1t64:amd64 (1.6.3-1.1ubuntu7) ...
Selecting previously unselected package apache2-utils.
Preparing to unpack .../apache2-utils_2.4.58-1ubuntu8.4_amd64.deb ...
Unpacking apache2-utils (2.4.58-1ubuntu8.4) ...
Setting up libapr1t64:amd64 (1.7.2-3.1ubuntu0.1) ...
Setting up libaprutil1t64:amd64 (1.6.3-1.1ubuntu7) ...
Setting up apache2-utils (2.4.58-1ubuntu8.4) ...
Processing triggers for man-db (2.12.0-4build2) ...
Processing triggers for libc-bin (2.39-0ubuntu8.3) ...
Scanning processes...
Scanning candidates...
Scanning linux images...

Pending kernel upgrade!
Running kernel version:
  6.8.0-40-generic
Diagnostics:
  The currently running kernel version is not the expected kernel version 6.8.0-45-generic.

Restarting the system to load the new kernel will not be handled automatically, so you should consider rebooting.

Restarting services...

Service restarts being deferred:
 /etc/needrestart/restart.d/dbus.service
 systemctl restart docker.service
 systemctl restart getty@tty1.service
 systemctl restart serial-getty@ttyS0.service
 systemctl restart systemd-logind.service
 systemctl restart unattended-upgrades.service

No containers need to be restarted.

No user sessions are running outdated binaries.

No VM guests are running outdated hypervisor (qemu) binaries on this host.
.htpasswd ファイルの作成
先にdocker-compose.yamlを確認しておきます。
「nginx」の volumes 設定を見ると以下の記述があります。
”- ./nginx/conf.d:/etc/nginx/conf.d”
これは、カレントディレクトリにある「./nginx/conf.d」の中身がコンテナ上の「/etc/nginx/conf.d」に同期されることを意味しています。
  # The nginx reverse proxy.
  # used for reverse proxying the API service and Web service.
  nginx:
    image: nginx:latest
    restart: always
    volumes:
      - ./nginx/nginx.conf.template:/etc/nginx/nginx.conf.template
      - ./nginx/proxy.conf.template:/etc/nginx/proxy.conf.template
      - ./nginx/https.conf.template:/etc/nginx/https.conf.template
      - ./nginx/conf.d:/etc/nginx/conf.d      # ★この部分
      - ./nginx/docker-entrypoint.sh:/docker-entrypoint-mount.sh
      - ./nginx/ssl:/etc/ssl # cert dir (legacy)
      - ./volumes/certbot/conf/live:/etc/letsencrypt/live # cert dir (with certbot container)
      - ./volumes/certbot/conf:/etc/letsencrypt
      - ./volumes/certbot/www:/var/www/html
dify ディレクトリの「./nginx/conf.d」に移動してから、パスワードファイルを作成します。
sudo htpasswd -c ./.htpasswd [username]
※[username]は登録するユーザ名に読み替え
登録するパスワードを聞かれるので、確認も含めて2回入力します。
$ cd docker-compose/dify/docker/nginx/conf.d
$ ls -l
total 8
drwxrwxr-x 2 xxxxxxxx xxxxxxxx 4096 Oct 13 09:03 .
drwxrwxr-x 4 xxxxxxxx xxxxxxxx 4096 Oct 12 15:20 ..
-rw-r--r-- 1 xxxxxxxx xxxxxxxx 719 Oct 12 15:22 default.conf
-rw-rw-r-- 1 xxxxxxxx xxxxxxxx 790 Aug 10 14:52 default.conf.template
$ sudo htpasswd -c ./.htpasswd [username]
New password:
Re-type new password:
Adding password for user [username]
$ ls -la
total 20
drwxrwxr-x 2 xxxxxxxx xxxxxxxx 4096 Oct 13 09:03 .
drwxrwxr-x 4 xxxxxxxx xxxxxxxx 4096 Oct 12 15:20 ..
-rw-r--r-- 1 root        root          50 Oct 13 09:03 .htpasswd
-rw-r--r-- 1 xxxxxxxx xxxxxxxx 719 Oct 12 15:22 default.conf
-rw-rw-r-- 1 xxxxxxxx xxxxxxxx 790 Aug 10 14:52 default.conf.template
default.comf.templateの編集
管理画面やアプリも含めた全体に対してパスワードをかけます。
補足:コンテナの中で、アプリIDでfindしたところ検出はなかったので、アプリIDとディレクトリ階層は紐づいていないようです。(おそらくDBに情報が記載されている)
そのため、今回扱うNginxのしくみを使って、アプリ単位のユーザ設定が可能かどうかについては別途確認が必要となります。
個人的にはアプリ単位にアクセス制御を行うのであれば、Next.jsやReactなどでフロントを立て、フロント側でコントロールするやり方が管理面でも効率的だと思います。
".htpasswd" を作成した「./nginx/conf.d」にある "default.conf.template" を編集します。(このファイルをもとに、”default.conf” がつくられます)
$ vi default.conf.template"location /" に2行追記します。
"auth_basic_user_file" でBasic認証のパスワードファイルを指定します。ここはコンテナ内のディレクトリを指定することに注意してください。
なお、”auth_basic” は「認証時に表示されるメッセージ」とのことですが、このあと出てくる、実際のブラウザでログインするメッセージに表示はありませんでした。(内部的なやりとりで使われているのかな?)
    location / {
      auth_basic "Restricted";
      auth_basic_user_file /etc/nginx/conf.d/.htpasswd;
server {
listen ${NGINX_PORT};
server_name ${NGINX_SERVER_NAME};
location /console/api {
proxy_pass http://api:5001;
include proxy.conf;
}
location /api {
proxy_pass http://api:5001;
include proxy.conf;
}
location /v1 {
proxy_pass http://api:5001;
include proxy.conf;
}
location /files {
proxy_pass http://api:5001;
include proxy.conf;
}
location / {
auth_basic "Restricted"; # ★ここに追記
auth_basic_user_file /etc/nginx/conf.d/.htpasswd; # ★
proxy_pass http://web:3000;
include proxy.conf;
}
# placeholder for acme challenge location
${ACME_CHALLENGE_LOCATION}
# placeholder for https config defined in https.conf.template
${HTTPS_CONFIG}
}コンテナの再起動
コンテナの再起動を行います。
補足:"docker-nginx-1" がwebサーバのコンテナになります。コンテナ名は「docker compose ps」コマンドで確認することもできます。
$ docker compose restart
[+] Restarting 1/9
[+] Restarting 3/9r-nginx-1       Restarting          # webサーバのコンテナ                                                                                                  2.2s
 ⠹ Container docker-nginx-1       Restarting                                                                                                            2.3s
 ⠹ Container docker-db-1          Restarting
~<略>~
念のためWebサーバのコンテナに入り、設定が反映されているかを確認します。以下では「/etc/nginx/conf.d/」の ”.htpasswd" と "default.conf" の中身を確認しています。
$ docker exec -it docker-nginx-1 bash
# # コンテナにログインした状態
# cd /etc/nginx/conf.d/
# ls -la
total 24
drwxrwxr-x 2 1000 1000 4096 Oct 13 00:12 .
drwxr-xr-x 1 root root 4096 Oct 12 06:22 ..
-rw-r--r-- 1 root root   50 Oct 13 00:03 .htpasswd
-rw-r--r-- 1 1000 1000  813 Oct 13 00:16 default.conf
-rw-rw-r-- 1 1000 1000  884 Oct 13 00:12 default.conf.template
# cat .htpasswd
[username]:[暗号化パスワード]
# cat default.conf
# Please do not directly edit this file. Instead, modify the .env variables related to NGINX configuration.

server {
    listen 80;
    server_name _;

    location /console/api {
      proxy_pass http://api:5001;
      include proxy.conf;
    }

    location /api {
      proxy_pass http://api:5001;
      include proxy.conf;
    }

    location /v1 {
      proxy_pass http://api:5001;
      include proxy.conf;
    }

    location /files {
      proxy_pass http://api:5001;
      include proxy.conf;
    }

    location / {
      auth_basic "Restricted";
      auth_basic_user_file /etc/nginx/conf.d/.htpasswd;
      proxy_pass http://web:3000;
      include proxy.conf;
    }

    # placeholder for acme challenge location


    # placeholder for https config defined in https.conf.template

}
Difyのログイン確認
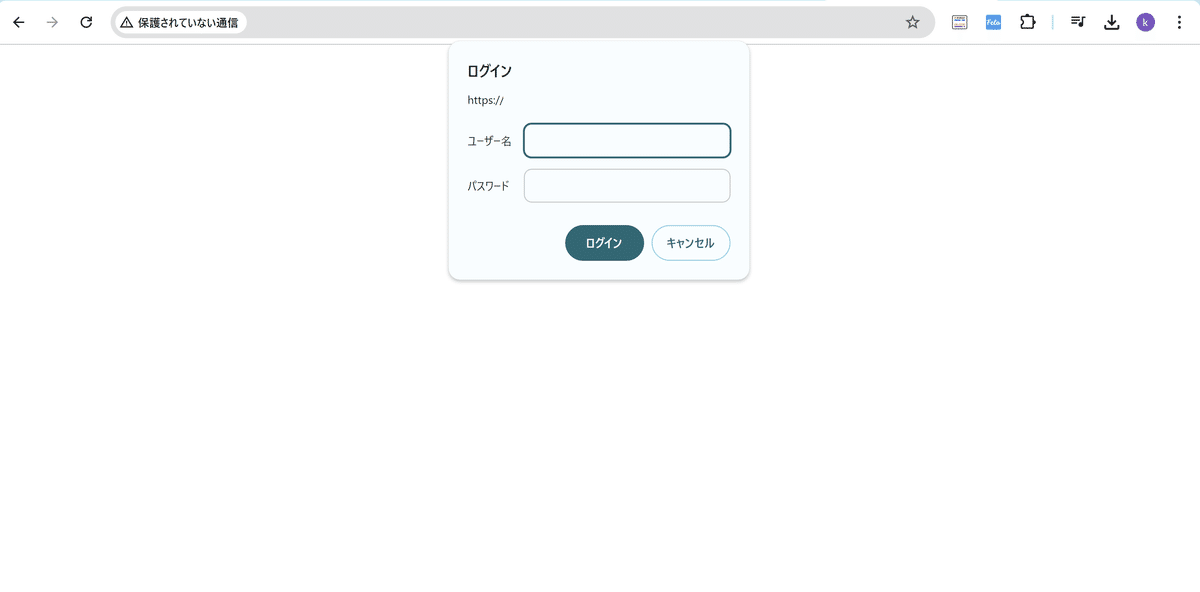
まずは管理画面のURLでパスワードが聞かれることを確認します。
次に、アプリへ接続する際にもパスワードを聞かれることを確認します。
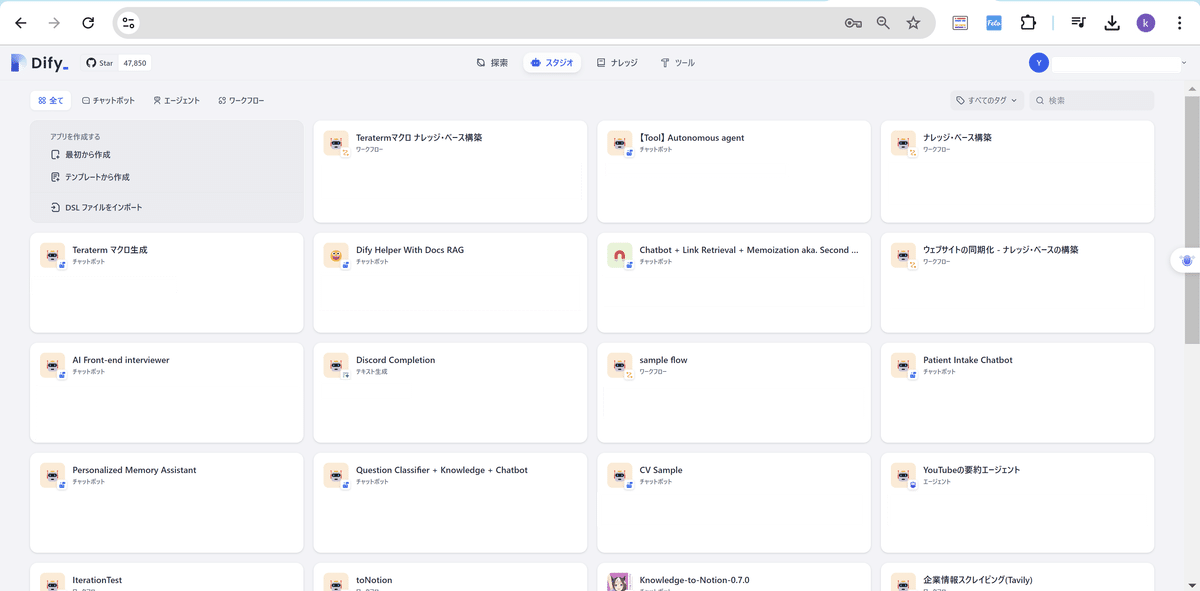
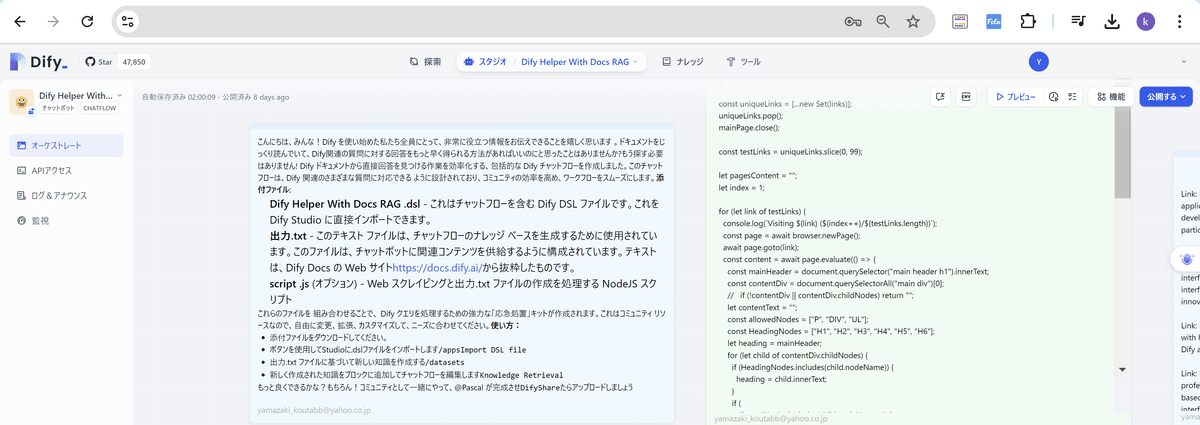
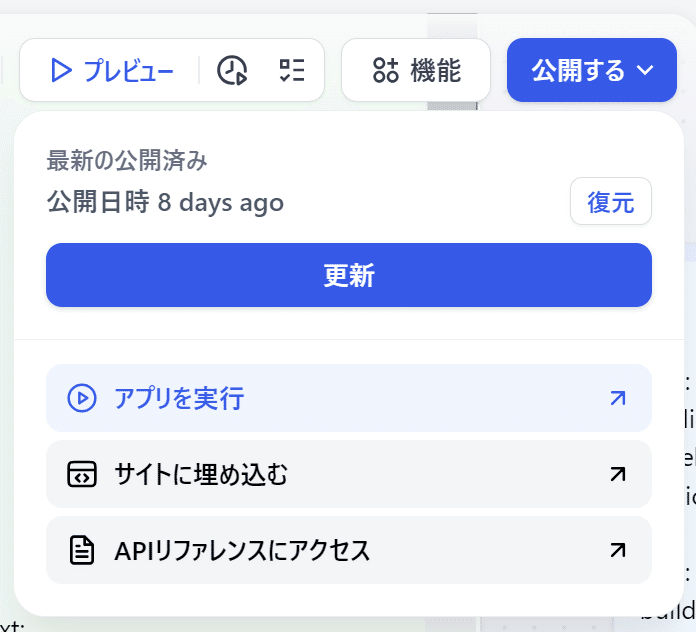
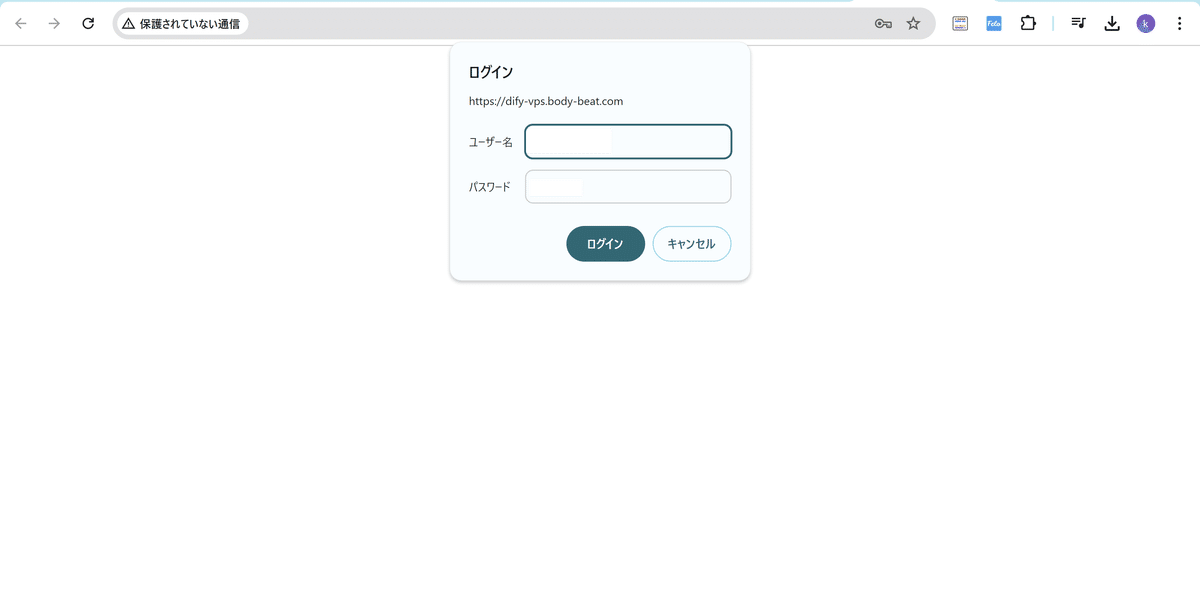
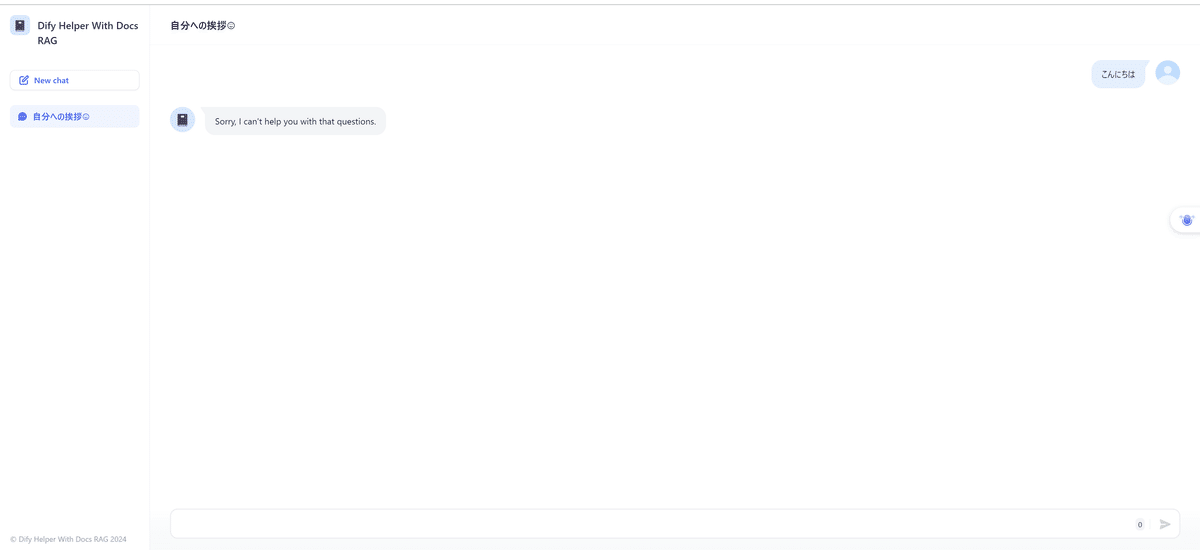
なお、ユーザ名かパスワードが違う場合はブラウザで延々とパスワード入力画面が表示され続けます。すでにログイン済みの状態から「入れないこと」の確認をする場合は、一度キャッシュをクリアするか、別のブラウザで試すなどが必要です。
まとめ
今回ご紹介したNginxのBasic認証は、Difyアプリのセキュリティを高めるには手軽で効果的な方法です。
しかし、これはセキュリティ強化の一例に過ぎません。より高度なニーズに応えるためには、以下のような方法も検討してみてください:
Next.jsやReactなどでカスタムフロントエンドを構築
アプリケーション単位でのユーザ管理システムの実装
OAuth2.0やJWTを使用した認証システムの導入
セキュリティに完璧はありません。常に最新の脅威に注意を払い、定期的にセキュリティ対策を見直すことが大切です。
Difyの可能性は無限大。セキュリティを強化することで、より自信を持ってアプリケーションを展開できるはずです。ぜひ、あなたのプロジェクトに最適なセキュリティ対策を見つけてください。
安全なAI開発、そして楽しいDifyライフを!
