
Pythonライブラリ(画像データ拡張):torchvision
1.概要
画像処理に特化したPytorchのライブラリであるtorchvisionにおいてdata argumentation(データ拡張・データ水増し)の紹介をします。
2.データの前処理:transforms
データ拡張の前に簡単にtorchvisionによる前処理方法を説明します。画像は下記画像を使用しました。
基本的に前処理は"torchvision.transforms"を使用します。

2-1.データのtensor化
PIL形式の画像をtensorに変換する場合は"ToTensor()"を使用します。このメソッドでは処理と同時に正規化(min=0, max=1)も処理されます。
[IN]
import matplotlib.pyplot as plt
import numpy as np
import torchvision
import torchvision.transforms as Trans
from PIL import Image

path_img = 'konan.JPG'

img_PIL = Image.open(path_img) #PIL形式でファイルを開く
print('PIL形式:', type(img_PIL), img_PIL.size, img_PIL.mode, img_PIL.format) #PILサイズは(幅, 高さ)

Totensor = Trans.ToTensor() #オブジェクト作成
img = Totensor(img_PIL) #torch型に変換
print('Tenso:', type(img), img.shape, f'(Min,Max)={img.min(),img.max()}') #torch.Tensorは(チャネル数, 高さ, 幅)

[OUT]
PIL形式: <class 'PIL.JpegImagePlugin.JpegImageFile'> (484, 648) RGB JPEG
Tensor: <class 'torch.Tensor'> torch.Size([3, 648, 484]) (Min,Max)=(tensor(0.), tensor(1.))
参考までに上記も含めてメソッド一覧を紹介します。
【データ形式の変換】
●ToPILImage([mode]):テンソルやnumpy配列をPIL形式に変換
●ToTensor():Pytorchのテンソルに変換+自動で正規化
●PILToTensor():Pytorchのテンソルに変換(正規化はなし)
[IN]
ToPILImage = Trans.ToPILImage() #Tensor->PIL
ToPILToTensor = Trans.PILToTensor() #PIL->Tensor

img_toPIL = ToPILImage(img) #TensorをPILに変換
print('img_toPIL:', type(img_toPIL), img_toPIL.size, img_toPIL.mode, img_toPIL.format) #PILサイズは(幅, 高さ)
img_tensor = ToPILToTensor(img_PIL) #PILをTensorに変換
print('img_tensor:', type(img_tensor), img_tensor.shape, f'(Min,Max)={img_tensor.min(),img_tensor.max()}') #torch.Tensorは(チャネル数, 高さ, 幅)

[OUT]
img_toPIL: <class 'PIL.Image.Image'> (484, 648) RGB None
img_tensor: <class 'torch.Tensor'> torch.Size([3, 648, 484]) (Min,Max)=(tensor(0, dtype=torch.uint8), tensor(255, dtype=torch.uint8))
2-2.前処理のパイプライン化:transforms.Compose
個別の前処理だけでなく複数の前処理を一つの処理のようにまとめる(パイプライン化)には"transforms.Compose"を使用します。記法としてはCompose([<処理1,>, <処理2>・・・])のようにリスト内にメソッドのオブジェクトを渡します。
[IN]
transforms = Trans.Compose([
    Trans.ToTensor()
])

img = transform(img_PIL)
print('Tensor:', type(img), img.shape, f'(Min,Max)={img.min(),img.max()}') #torch.Tensorは(チャネル数, 高さ, 幅)

[OUT]
Tensor: <class 'torch.Tensor'> torch.Size([3, 648, 484]) (Min,Max)=(tensor(0.), tensor(1.))
2-3.自作関数の追加:Lambda()
transformsのLambda()メソッドより無名関数を使用できるため自作の関数を前処理として追加できます。参考として正規化されたtensorを1byte(255倍)に戻してみました。
[IN]
transforms2 = Trans.Compose([
    Trans.ToTensor(),
    Trans.Lambda(lambda x: 255*x) #正規化->1byteのデータに戻す
])

img2 = transform2(img_PIL)
print('Tensor:', type(img2), img2.shape, f'(Min,Max)={img2.min(),img2.max()}') #torch.Tensorは(チャネル数, 高さ, 幅)

[OUT]
Tensor: <class 'torch.Tensor'> torch.Size([3, 648, 484]) (Min,Max)=(tensor(0.), tensor(255.))
2-4.参考:tensor形式での画像表示
データ構造の詳細は別記事で紹介しますが"Matplotlib"で画像を表示させる場合、データ配列がそのままだと適切でないため変換が必要です。
[IN]
plt.imshow(img)

[OUT]
TypeError: Invalid shape (3, 648, 484) for image data
[IN]
print('オリジナル:', img.shape) #Original
print('配列変換:', img.permute(1,2,0).shape) #torch.Tensorは(チャネル数, 高さ, 幅)なので、(高さ, 幅, チャネル数)に変換
plt.imshow(img.permute(1,2,0))
[OUT]
オリジナル: torch.Size([3, 648, 484])
配列変換: torch.Size([648, 484, 3])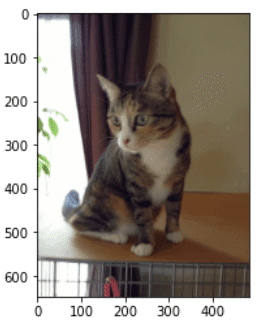
3.データ加工:形状変換(幾何変換)
公式Docsを参照して画像の幾何変換を紹介していきます。なお基本的にPIL形式/Tensor形式の両方とも処理できますが一部のメソッドでは片方しか対応していないことがあるため注意が必要です。
事前に下記コードは実行しました。
①同じ出力が出せるように事前に乱数シードは固定
②複数のPIL画像を並べることが出来る関数追加
[IN]
import torch
torch.manual_seed(0) #乱数のシードを固定

def image_grid(imgs, rows, cols):
    assert len(imgs) == rows*cols

    w, h = imgs[0].size
    grid = Image.new('RGB', size=(cols*w, rows*h))
    grid_w, grid_h = grid.size

    for i, img in enumerate(imgs):
        grid.paste(img, box=(i%cols*w, i//cols*h))
    return grid

plt.rcParams["savefig.bbox"] = 'tight'

def plot(imgs,orig_img=img_PIL, with_orig=True, row_title=None, **imshow_kwargs):
    if not isinstance(imgs[0], list):
        # Make a 2d grid even if there's just 1 row
        imgs = [imgs]

    num_rows = len(imgs)
    num_cols = len(imgs[0]) + with_orig
    fig, axs = plt.subplots(nrows=num_rows, ncols=num_cols, squeeze=False)
    for row_idx, row in enumerate(imgs):
        row = [orig_img] + row if with_orig else row
        for col_idx, img in enumerate(row):
            ax = axs[row_idx, col_idx]
            ax.imshow(np.asarray(img), **imshow_kwargs)
            ax.set(xticklabels=[], yticklabels=[], xticks=[], yticks=[])

    if with_orig:
        axs[0, 0].set(title='Original image')
        axs[0, 0].title.set_size(8)
    if row_title is not None:
        for row_idx in range(num_rows):
            axs[row_idx, 0].set(ylabel=row_title[row_idx])

    plt.tight_layout()
3-1.トリミング:Crop
画像の一部を切り取る処理:トリミングは複数のメソッドがあります。
【torchvisionのとリング(Crop)処理】
●CenterCrop(size):画像の中心から指定サイズを切り抜く
●FiveCrop(size):ランダムに5個の画像を切り抜く(出力はTuple)
●RandomCrop(size):ランダムな位置で画像を切り抜く
●RandomResizedCrop(size[, scale, ratio, …]):ランダム位置で切り抜き+指定サイズにリサイズ
●TenCrop(size[, vertical_flip]):(四隅(角4か所)+中央切り抜き)×水平反転の有無(2種)=10枚の画像を生成
【RandomResizedCrop:下記は引数】
size (int or sequence) :トリミング後の出力画像サイズ(値がint型の場合は(size, size)の寸法となる)
scale (tuple of python:float):リサイズする上限・下限を設定する。
ratio (tuple of python:float):アスペクト比(ランダム)の上限・下限を設定
interpolation (InterpolationMode):ー
[IN]
t_ramresize = Trans.Compose([
    Trans.RandomResizedCrop(150)
])

image_grid([t_ramresize(img_PIL) for _ in range(10)], 2, 5)

[OUT]
ランダムなエリアから150×150に切り出された画像
[IN]
t_ramresize_scale1 = Trans.Compose([
    Trans.RandomResizedCrop(150, scale=(1.0, 1.0)) #scale=(1.0, 1.0)で元のサイズになる
])

image_grid([t_ramresize_scale1(img_PIL) for _ in range(10)], 2, 5)


t_ramresize_scale1 = Trans.Compose([
    Trans.RandomResizedCrop(150, scale=(0.5, 0.5)) #元の画像サイズ(484, 648):scale=(0.5, 0.5)で縦横の半分になる
])

image_grid([t_ramresize_scale1(img_PIL) for _ in range(10)], 2, 5)

[OUT]
scale=1.0だと元サイズと同じ比率で150×150の画像として出力
scale=(0.5, 0.5)で縦横の半分になる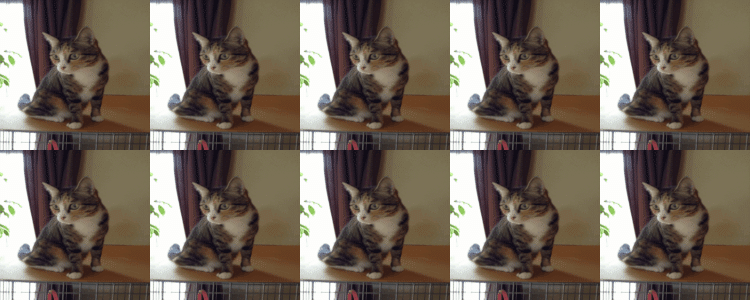

【CenterCrop】
[IN]
t = Trans.Compose([
    Trans.CenterCrop(size=150) #切取りsize指定
    ])
t(img_PIL)

[OUT]

【FiveCrop】
[IN]
t = Trans.Compose([
    Trans.FiveCrop(size=150)
])

imgs_five = t(img_PIL)
print(type(imgs_five), len(imgs_five), imgs_five[0])
image_grid(imgs_five, 1, 5)

[OUT]
<class 'tuple'> 5 <PIL.Image.Image image mode=RGB size=150x150 at 0x24B88349190>
【RandomCrop】
[IN]
t = Trans.Compose([
    Trans.RandomCrop(size=150)
])
t(img_PIL)

[OUT]
【TenCrop】
[IN]
t = Trans.Compose([
    Trans.TenCrop(size=150)
])

imgs_ten = t(img_PIL)
print(type(imgs_ten), len(imgs_ten), imgs_ten[0])
image_grid(imgs_ten, 2, 5)

[OUT]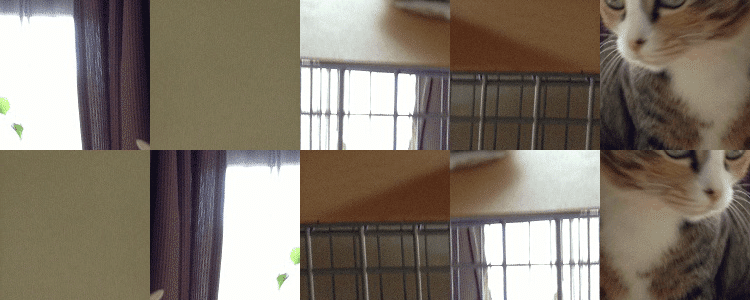
3-2.リサイズ/モザイク処理:Resize
画像のサイズ変更はResizeを使用します。
【リサイズ】
●Resize(size[, interpolation, max_size, …]):指定サイズにリサイズ
[IN]
t = Trans.Compose([
    Trans.Resize(150)
])
t(img_PIL)

[OUT]
[IN]
t = Trans.Compose([
    Trans.Resize(50),
    Trans.Resize(300),
])
t(img_PIL)

[OUT]
3-3.回転:Rotation
画像を回転させる処理はRotationを使用します(サンプルは15°の範囲でランダムに回転)。
【回転処理】
●RandomRotation(degrees[, interpolation, …]):
[IN]
t = Trans.Compose([
    Trans.RandomRotation(degrees=45)
])
t(img_PIL)

[OUT]
3-4.反転:Flip
画像の反転処理はFlip([p])があります。反転させる確率は引数pで設定できます。
【反転処理】
●RandomHorizontalFlip([p]):水平反転
●RandomVerticalFlip([p]):垂直反転
[IN]
t = Trans.Compose([
    Trans.RandomHorizontalFlip()
])
t(img_PIL)

[OUT]
[IN]
t = Trans.Compose([
    Trans.RandomVerticalFlip()
])
t(img_PIL)
[OUT]
3-5.枠埋め:Padding
画像の周りを埋める処理はPadを使用します。
[IN]
t = Trans.Compose([
    Trans.Pad(padding=150)
])
t(img_PIL)

[OUT]
3-6.透視図法・奥行き:Perspective
奥行きが見えるような図にするにはPerspectiveを使用します。
[IN]
t = Trans.Compose([
    Trans.RandomPerspective()
])
t(img_PIL)

[OUT]
3-7.Affile変換:RandomAffine
Affine変換は下記の通りです(理解できてないためコードだけ記載)。
[IN]
affine_transfomer = Trans.RandomAffine(degrees=(30, 70), translate=(0.1, 0.3), scale=(0.5, 0.75))
affine_imgs = [affine_transfomer(img_PIL) for _ in range(4)]
plot(affine_imgs)

[OUT]
4.データ加工:配色変換
4-1.グレー変換:Grayscale
色をグレーに変換する場合はGrayscaleを使用します。グレースケールのためチャネル数も3->1次元に変換されていることが確認できます。
【グレー処理】
●Grayscale:グレースケール処理
●RandomGrayscale([p]):ランダムでグレースケール化する(確率pのデフォルトは0.1)
[IN]
t = Trans.Compose([
    Trans.Grayscale()
    ])
gray= t(img)
print('Tensor:', type(gray), gray.shape, f'(Min,Max)={gray.min(),gray.max()}') #torch.Tensorは(チャネル数, 高さ, 幅)
plt.imshow(gray.permute(1,2,0))

[OUT]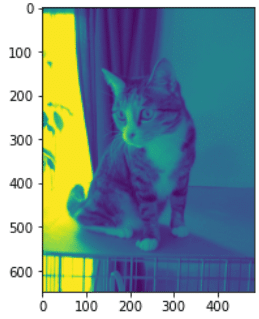
[IN]
t = Trans.Compose([
    Trans.RandomGrayscale()
    ])
t(img_PIL)

[OUT]
4ー2.ぼかし(平滑化)
ぼかし処理は下記の通りです。
【ぼかし処理】
●GaussianBlur(kernel_size[, sigma]):ランダムに選ばれたガウシアンぼかしでぼかしを入れる
[IN]
t = Trans.Compose([
    Trans.GaussianBlur(kernel_size=13)
    ])
t(img_PIL)

[OUT]
4-3.bit数の調整:RandomPosterize
bit数の調整を行います。bits引数は入力必須です。今回は結果を確認したいため処理確率pは1.0にしました。
[IN]
t1 = Trans.Compose([Trans.RandomPosterize(bits=1, p=1.0)])
t2 = Trans.Compose([Trans.RandomPosterize(bits=2, p=1.0)])
t3 = Trans.Compose([Trans.RandomPosterize(bits=3, p=1.0)])
t4 = Trans.Compose([Trans.RandomPosterize(bits=4, p=1.0)])
t5 = Trans.Compose([Trans.RandomPosterize(bits=5, p=1.0)])
t6 = Trans.Compose([Trans.RandomPosterize(bits=6, p=1.0)])
t7 = Trans.Compose([Trans.RandomPosterize(bits=7, p=1.0)])
t8 = Trans.Compose([Trans.RandomPosterize(bits=8, p=1.0)])
imgs = [t1(img_PIL),t2(img_PIL),t3(img_PIL),t4(img_PIL),t5(img_PIL),t6(img_PIL),t7(img_PIL),t8(img_PIL)]
image_grid(imgs, 2, 4)

[OUT]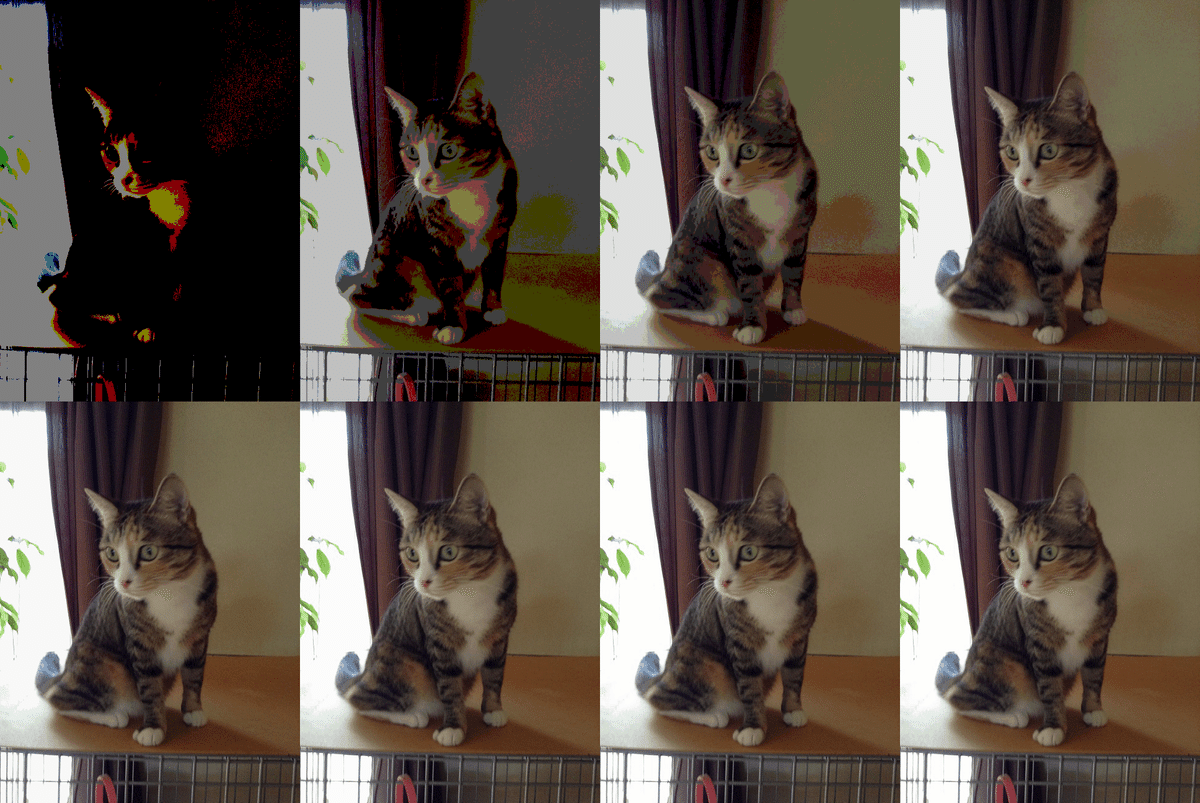
4-3.露出調整:Solarize
露出調整はSolarizeを使用します。
[IN]
t = Trans.Compose([
    Trans.RandomSolarize(threshold=1)
    ])
t(img_PIL)

[OUT]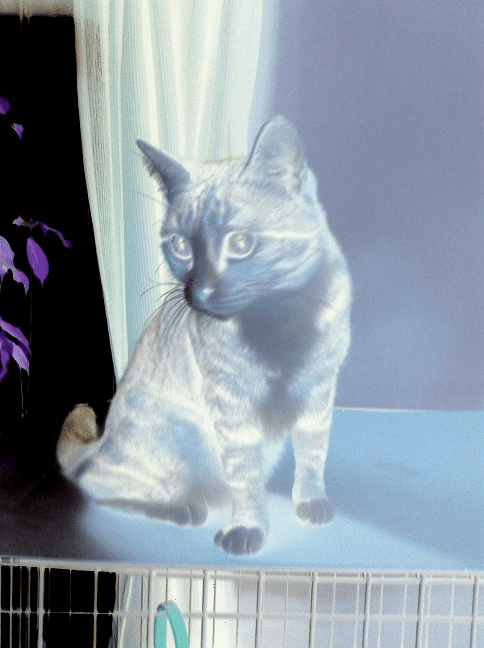
4-4.明彩調整:ColorJitter
明彩などの調整はColorJitterを使用します。引数で設定した数値内においてランダムで画像を出力します(サンプルは10枚ランダムで出力)
【ColorJitterの引数】
●brighttness:明るさ
●contrast:コントラス
●saturation:彩度
●hue:色相
【BrightnessとSaturation】
[IN]
t_bs = Trans.Compose([
    Trans.ColorJitter(brightness=0.5, #明るさ
                      saturation=0.3), #彩度
    ])

image_grid([t_bs(img_PIL) for _ in range(10)], 2, 5)

[OUT]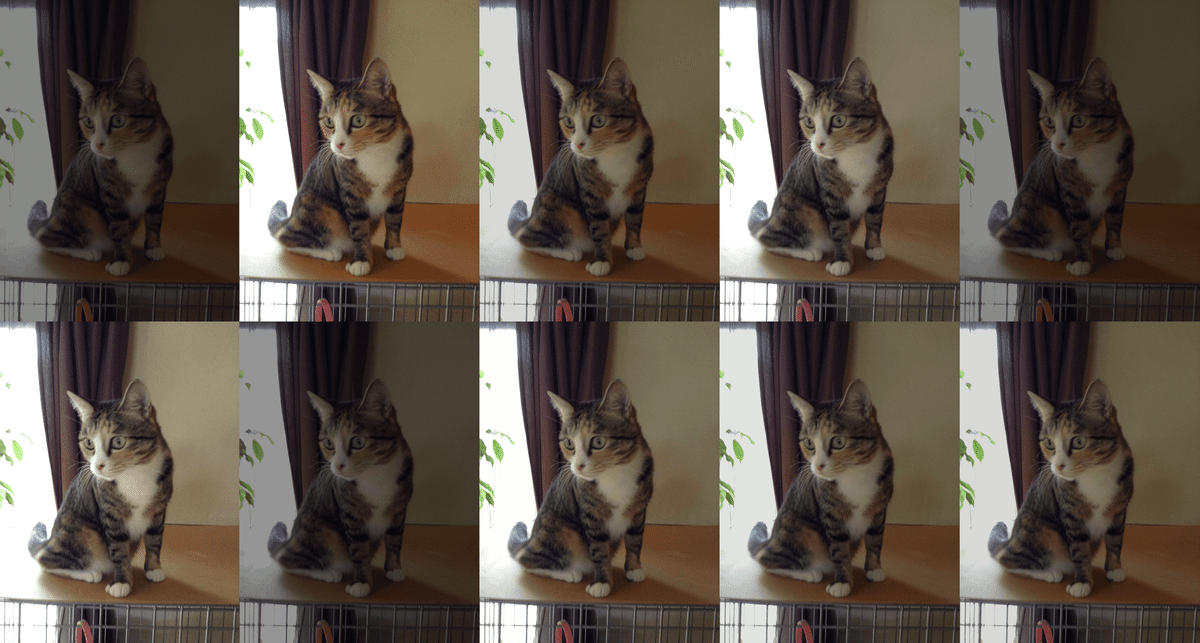
【Brightness、Saturation、Contrast】
[IN]
t_bsc = Trans.Compose([
    Trans.ColorJitter(brightness=0.5, #明るさ
                      saturation=0.3,
                      contrast=0.5) #彩度
    ])

image_grid([t_bsc(img_PIL) for _ in range(10)], 2, 5)

[OUT]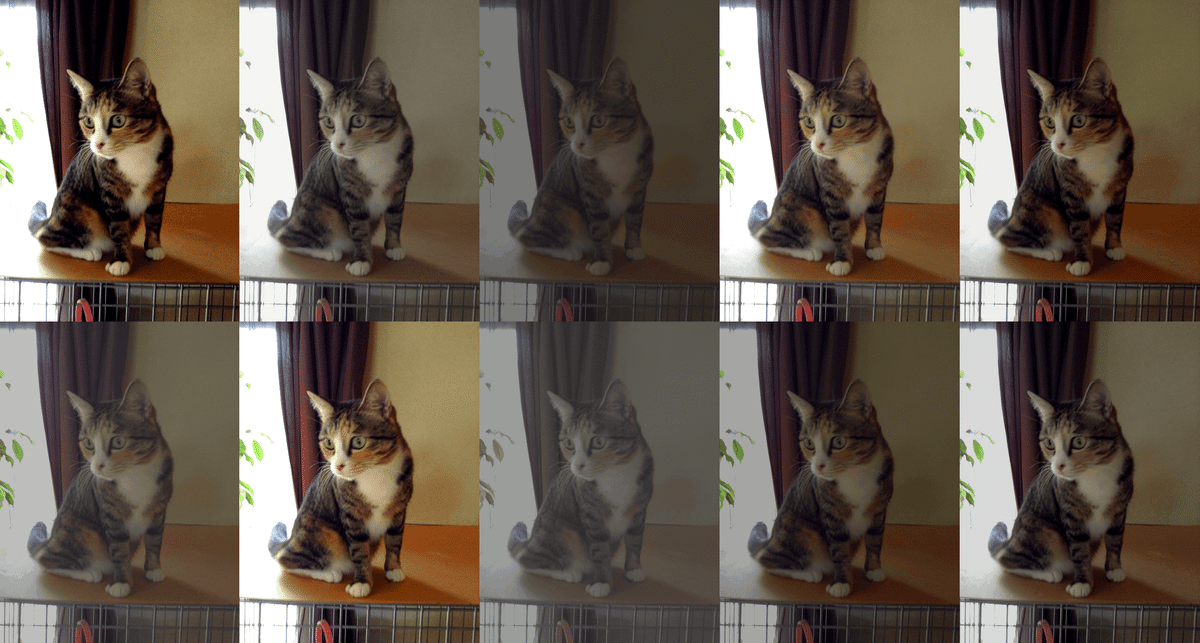
【全指定】
[IN]
t_all = Trans.Compose([
    Trans.ColorJitter(brightness=0.5, #明るさ
                      contrast=0.5, #コントラスト
                      saturation=0.5, #彩度
                      hue=0.5) #色相
    ])

image_grid([t_all(img_PIL) for _ in range(10)], 2, 5)

[OUT]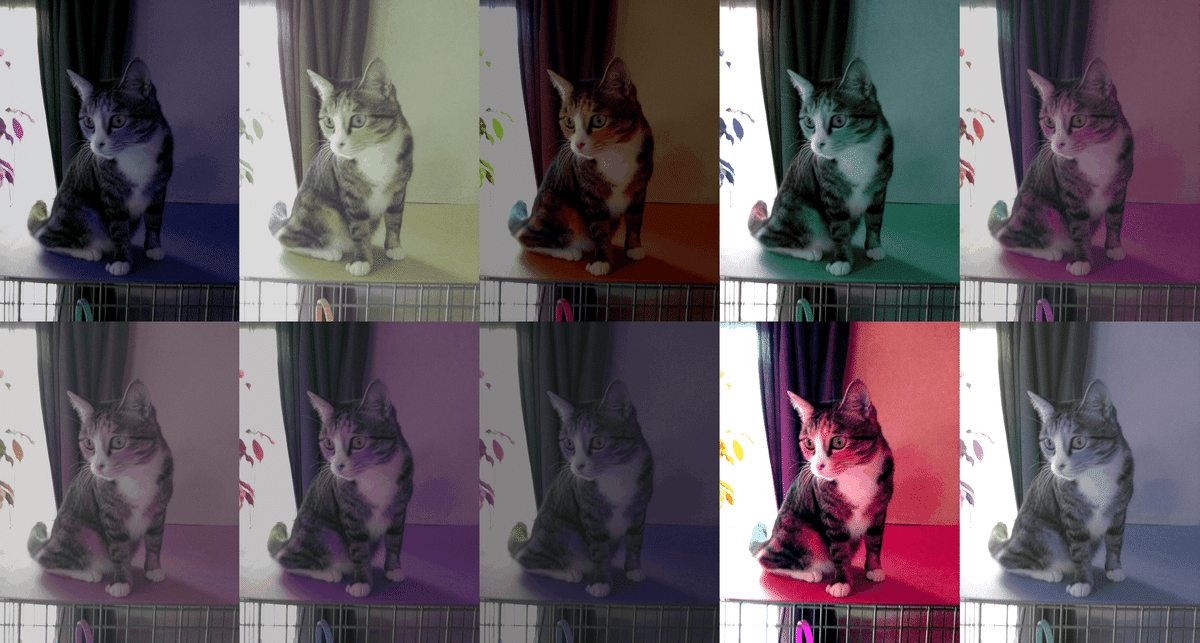
5.テンソル処理
tensorに処理を与えるメソッドを紹介します。こちらはPIL形式のデータには適用できませんのでご留意ください。
5-1.正規化:Normalize
前提としてToTensor()処理で正規化(min=0, max=1)となっております。”Normalize(mean, std[, inplace])”はμとσを指定することで下記式の正規化が可能です。
$$
X=\frac{(x-μ)}{σ}=\frac{(元データの値-平均値μ)}{標準偏差σ}\\
$$
$$
(例:)Max=\frac{(1.0-0.5)}{0.5}=1.0
$$
$$
(例:)Min=\frac{(0-0.5)}{0.5}=-1.0
$$
[IN]
t = Trans.Compose([
    Trans.Normalize(0.5, 0.5)
    ])

t_std = t(img)
print('Tensor_org:', type(img), img.shape, f'(Min,Max)={img.min(),img.max()}') #torch.Tensorは(チャネル数, 高さ, 幅)
print('Tensor_Std:', type(t_std), t_std.shape, f'(Min,Max)={t_std.min(),t_std.max()}') #torch.Tensorは(チャネル数, 高さ, 幅)
plt.imshow(t_std.permute(1,2,0))

[OUT]
Tensor_org: <class 'torch.Tensor'> torch.Size([3, 648, 484]) (Min,Max)=(tensor(0.), tensor(1.))
Tensor_Std: <class 'torch.Tensor'> torch.Size([3, 648, 484]) (Min,Max)=(tensor(-1.), tensor(1.))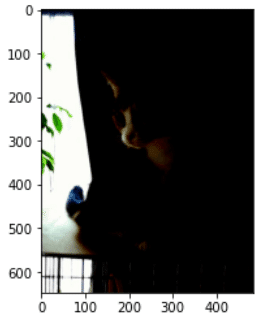
5-2.マスク化(ピクセルの削除):Erasing
画像のマスク(長方形でピクセルを除去)は”RandomErasing([p, scale, ratio, value, inplace])”で実行可能です。
[IN]
t = Trans.Compose([
    Trans.RandomErasing()
    ])

img_erase = t(img)
print('Tensor_org:', type(img), img.shape, f'(Min,Max)={img.min(),img.max()}') #torch.Tensorは(チャネル数, 高さ, 幅)
print('Tensor_Ers:', type(img_erase), img_erase.shape, f'(Min,Max)={img_erase.min(),img_erase.max()}') #torch.Tensorは(チャネル数, 高さ, 幅)
plt.imshow(img_erase.permute(1,2,0))

[OUT]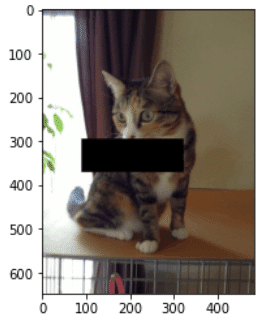
5-3.dtype(データ型)の変更:ConvertImageDtype
数値型を変更する場合は"ConvertImageDtype(dtype)"を使用できます。なおdtypeは"torch.dtype"を使用する必要があります。
参考として正規化時にfloatになったデータ型をint型に変更しました。uinit8型では最大値が255->127へと小さくなり色が暗くなっています。
[IN]
t1 = Trans.Compose([ Trans.ConvertImageDtype(torch.uint8)])
t2 = Trans.Compose([ Trans.ConvertImageDtype(torch.int8)])

img_uint8, img_int8 = t1(img), t2(img)
print('Tensor_org:', type(img), img.shape, f'(Min,Max)={img.min(),img.max()}', img.dtype) #torch.Tensorは(チャネル数, 高さ, 幅)
print('Tensor_Ers:', type(img_uint8), img_uint8.shape, f'(Min,Max)={img_uint8.min(),img_uint8.max()}', img_uint8.dtype) #torch.Tensorは(チャネル数, 高さ, 幅)
print('Tensor_Ers:', type(img_int8), img_int8.shape, f'(Min,Max)={img_int8.min(),img_int8.max()}', img_uint8.dtype) #torch.Tensorは(チャネル数, 高さ, 幅)
plt.imshow(img_uint8.permute(1,2,0))
plt.imshow(img_int8.permute(1,2,0))

[OUT]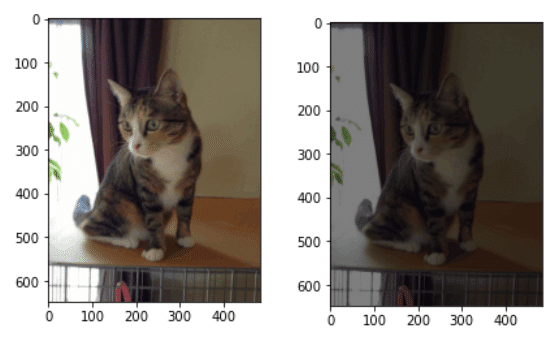
6.AutoAugment:自動加工
おそらく普段は使用しませんが参考として自動(ランダム)でデータ拡張するメソッドを紹介します。
特定のデータセットにうまく適用できるデータ拡張があり、それらを自動で適用する場合”Trans.AutoAugment(<Policy>)”を実行します。
【AutoAugmentPolicy一覧】
● IMAGENET:-
●CIFAR10:-
●SVHN:-
例としてCIFAR10で適用すると下記の通りです。
[IN]
t = Trans.Compose([
    Trans.AutoAugment(Trans.AutoAugmentPolicy.CIFAR10)
    ])

img1,img2, img3, img4, img5, img6,img7,img8=t(img_PIL),t(img_PIL),t(img_PIL),t(img_PIL),t(img_PIL),t(img_PIL),t(img_PIL),t(img_PIL)
imgs=[img1,img2, img3, img4, img5, img6,img7,img8]
image_grid(imgs, 2,4)

[OUT]
結果はランダムで出現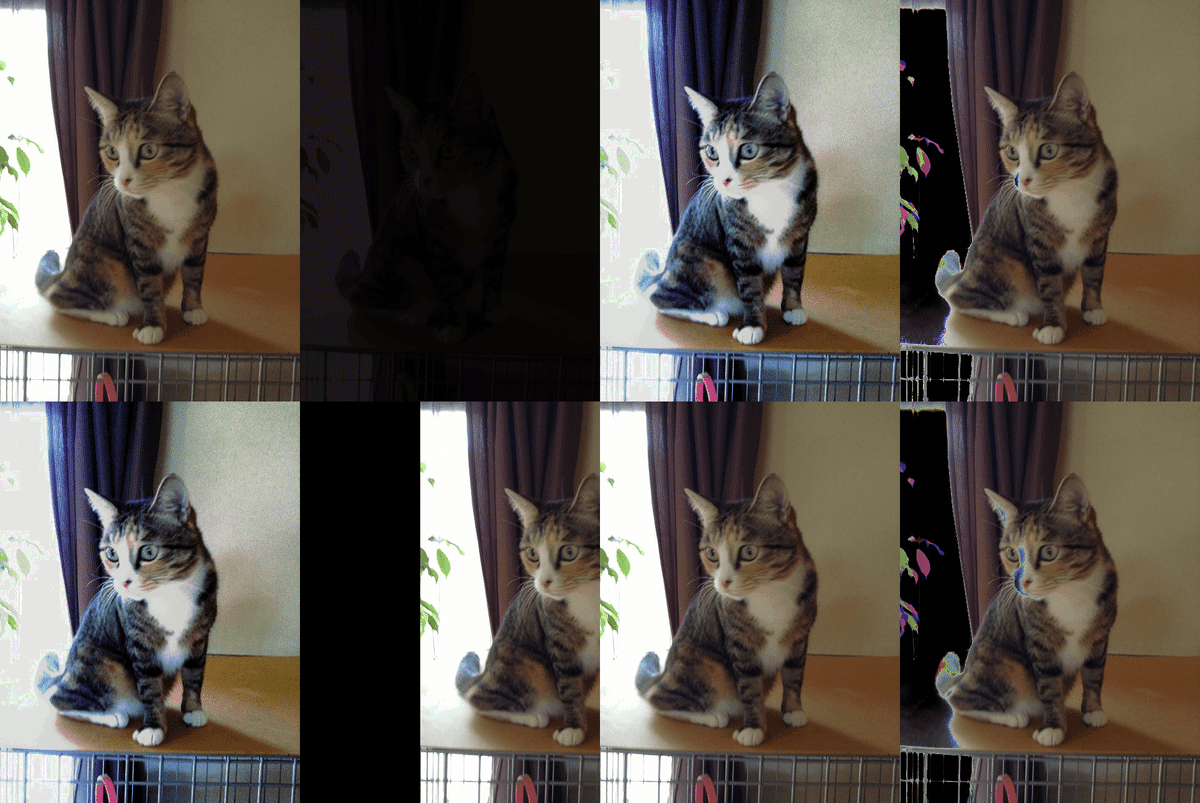
各Policyに対する参考例は下記の通りです。
[IN]
policies = [Trans.AutoAugmentPolicy.CIFAR10, Trans.AutoAugmentPolicy.IMAGENET, Trans.AutoAugmentPolicy.SVHN]
augmenters = [Trans.AutoAugment(policy) for policy in policies]
imgs = [
    [augmenter(img_PIL) for _ in range(4)]
    for augmenter in augmenters
]
row_title = [str(policy).split('.')[-1] for policy in policies]
plot(imgs, row_title=row_title)

[OUT]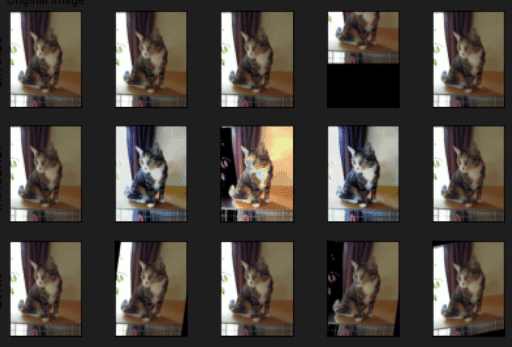
参考資料
参考1:Pytorch
参考2:画像処理
あとがき
前に使ったクロップ(切り抜き)、反転、回転、ぼかしは全部書いたけど、後は適宜かな。
