
フリーソフトで画像のスタックをする

はじめに
画像のスタックを検索するとPhotoshopとかLightroomの記事ばかり出てきてしまう。「フリーソフト 画像 スタック」などで検索してもDeepSkyStackerがヒットする。フリーソフトによる星ではない写真に対するスタックの記事が少ないので書いてみました。
手順
位置合わせにはPython、スタック(以下:平均化)にはGIMP2にインストールしたG'MICを使います。(位置合わせにもG'MIC使えばいいじゃん……)
まずサイト(下記)からプログラムを頂戴して画像の位置を合わせます。
import numpy as np
import cv2
import pathlib
import time
import sys

def main(float_img_path, ref_img_path, out_path):
    float_img = cv2.imread(float_img_path, cv2.COLOR_BGR2GRAY)
    ref_img = cv2.imread(ref_img_path, cv2.COLOR_BGR2GRAY)

    akaze = cv2.AKAZE_create()
    float_kp, float_des = akaze.detectAndCompute(float_img, None)
    ref_kp, ref_des = akaze.detectAndCompute(ref_img, None)

    bf = cv2.BFMatcher()
    matches = bf.knnMatch(float_des, ref_des, k=2)

    good_matches = []
    for m, n in matches:
        if m.distance < 0.75 * n.distance:
            good_matches.append([m])
        sys.stdout.write("\rm={} n={} matches={}".format(m, n, len(matches)))

    # 適切なキーポイントを選択
    ref_matched_kpts = np.float32(
        [float_kp[m[0].queryIdx].pt for m in good_matches]).reshape(-1, 1, 2)
    sensed_matched_kpts = np.float32(
        [ref_kp[m[0].trainIdx].pt for m in good_matches]).reshape(-1, 1, 2)

    # ホモグラフィを計算
    H, status = cv2.findHomography(
        ref_matched_kpts, sensed_matched_kpts, cv2.RANSAC, 5.0)

    # 画像を変換
    warped_image = cv2.warpPerspective(
        float_img, H, (float_img.shape[1], float_img.shape[0]))

    cv2.imwrite(out_path, warped_image)


start_time = time.time()
ref = "in\0042.png" #位置の基準の画像
input_dir = "in" #処理したいフォルダのパス
out_dir = "out" #出力パス
input_list = list(pathlib.Path(input_dir).glob("*"))

for i in range(len(input_list)):
    img_file_name = str(input_list[i])
    print("\n現在{}を処理中".format(img_file_name))
    main(img_file_name, ref, out_dir + "\u005c" + "alignment_" + str(i)+ ".png")

print("\n処理時間は{}secでした" .format(round((time.time() - start_time), 2)))
終わったらG'MICでLayers > Blend[Median]を使い中央値でブレンドします。


pythonで書いても良いです
import os
import sys
import numpy as np
import cv2
import pathlib
from scipy import stats
import time


start_time = time.time()
input_dir = "in" #処理したいフォルダのパス
output_dir = "out" #出力フォルダのパス
input_list = list(pathlib.Path(input_dir).glob("*"))


imgs = []
for i in range(len(input_list)):
    img_file_name = str(input_list[i])

    img = cv2.imread(img_file_name)
    imgs.append(img)

    sys.stdout.write("\r{0} / {1}    現在{2}を処理中".format(i+1, len(input_list), img_file_name))

imgs = np.array(imgs)
assert imgs.ndim == 4


print("\n{}枚を平均化中".format(len(input_list)))
#mean_img = np.mean(imgs, axis=0) #平均化
mean_img = np.median(imgs, axis=0) #平均化(中央値)
#mean_img = stats.mode(imgs, axis=0)[0] #平均化(最頻値)返値がmodeとcountの2つあるのでmodeだけ拾う

#mean_img = np.max(imgs, axis=0) #最大値
#mean_img = np.min(imgs, axis=0) #最小値


cv2.imwrite(output_dir + "\u005c" + os.path.splitext(os.path.basename(img_file_name))[0] + "stack" + ".png", mean_img)
print("処理時間は{}secでした\nファイルは{}として保存されました".format(round((time.time() - start_time), 2), output_path))
比較
使用した機材は7D2 + 24-105L + ND400。焦点距離は105mm。露光時間は4~5秒です。


もっとノイズを減らしたい場合は低いisoの画像も混ぜて平均化するといいと書こうと思ったんですが2つだとあんまり変わんないです。
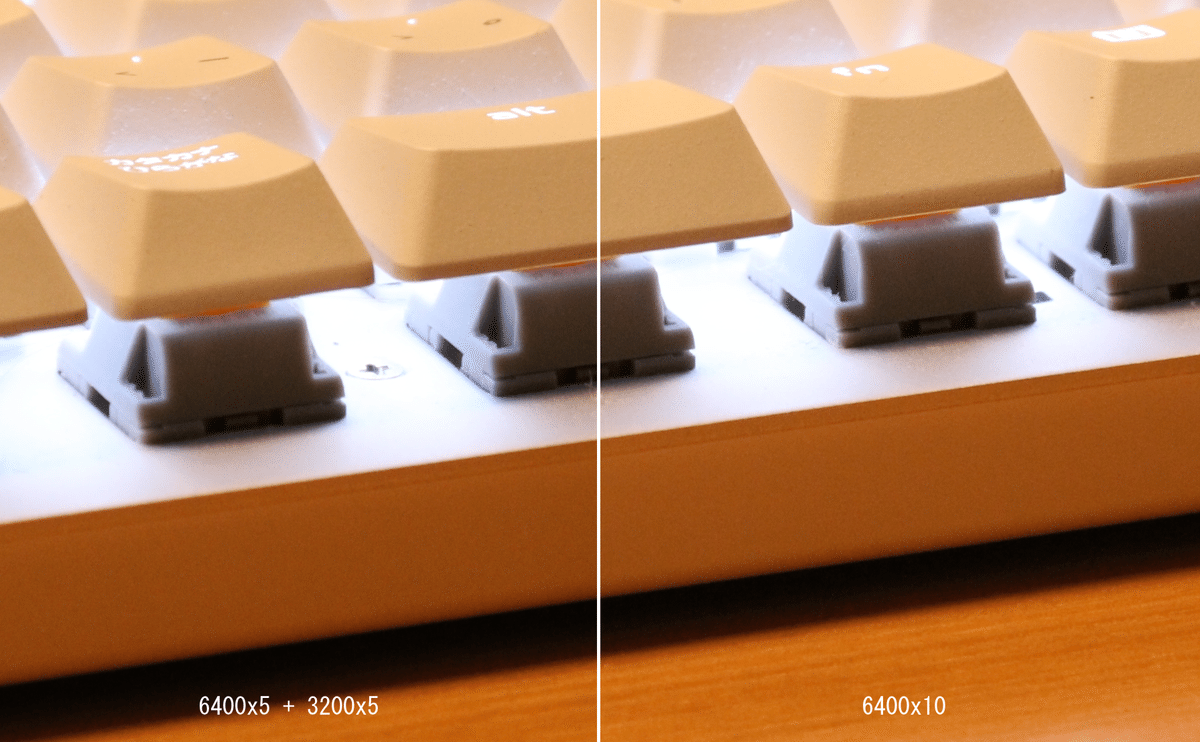


iso12800を5枚平均化すればiso3200と同じくらいのノイズ量になります。

枚数の比較

300%で見て少し違いがあるかなという感じ。
おまけ
スマホ(6sで撮った)写真5枚を平均化してみた。


スマホによるノイズ処理が入っていないRAWが欲しい…
センセーショナルなおまけ


プログラムのコピペ元
opencv+python フォルダ内の全てのjpg画像をforループで処理する
https://zenn.dev/k_neko3/articles/8b89b0ab1c29f8
画像位置合わせ:SIFTから深層学習まで
https://qiita.com/suuungwoo/items/9598cbac5adf5d5f858e