responderで理解するWebサーバー #8 APIドキュメント
こんにちは、Webエンジニアのjuri-tです。
今回はAPIドキュメントについて書きたいと思います。
APIドキュメントとは?
普段私達が使っているWebサービスの中には、APIとして、外部から操作可能なエンドポイントを公開していることがあります。例えば、Google Calender。普段はWebブラウザなどで使っていると思いますが、他のWebサービスやアプリから連携できるように、APIがあります。(ちなみに私は使ったことないです)
さて、Google Calendarのように自分のWebサービスもAPIを公開しよう!となったときに一つ考えることがあります。そうです。APIのドキュメントです。ドキュメントがないと、APIを公開しても使い方や利用規約などがよくわからず、使いたくても使えない状態になります。
これらを自分でカスタマイズして作るのも手ではありますが、開発者全員が好き勝手作ると、フォーマットがバラバラで読みにくいし、作るのにも時間がかかるなどデメリットも多いのでOpenAPI SpecificationというRESTful APIに関する仕様があります。
仮に一般公開はしない社内サーバーだとしても、他部署のエンジニアと共同で仕事をする際はドキュメントがないよりはあったほうがお互い認識の齟齬が起こりづらく円滑に進みやすいと思います。
前置きが長くなりましたが、responderではこれが簡単に出来るようになっているようです。
ドキュメントに沿って実行してみる
何はともあれ、responderで紹介している通りにやってみます。変数への代入などは不要だったのでそこは変えてます。また、簡単に実行できるように処理を足してます。
import responder

from marshmallow import Schema, fields

api = responder.API(
   title='Web Service',
   version='1.0',
   openapi='3.0.2',
   description='This is a sample server for a pet store.',
   terms_of_service='http://example.com/terms/',
   contact={
       'name': "API Support",
       'url': 'http://www.example.com/support',
       'email': 'support@example.com',
   },
   license={
       'name': 'Apache 2.0',
       'url': 'https://www.apache.org/licenses/LICENSE-2.0.html',
   },
   docs_route='/docs',
)

@api.schema('Pet')
class PetSchema(Schema):
   name = fields.Str()

@api.route("/")
async def index(req, resp):
   """A cute furry animal endpoint.
   ---
   get:
       description: Get a random pet
       responses:
           200:
               description: A pet to be returned
               content:
                   application/json:
                       schema:
                           $ref: '#/components/schemas/Pet'
   """
   resp.media = PetSchema().dump({'name': 'little orange'})


if __name__ == '__main__':
   r = api.session().get("http://;/schema.yml")
   print(r.text)
この状態で以下を実行してみます(ファイル名は任意です)。
$ python server.py
components:
 schemas:
   Pet:
     properties:
       name:
         type: string
     type: object
info:
 contact:
   email: support@example.com
   name: API Support
   url: http://www.example.com/support
 description: This is a sample server for a pet store.
 license:
   name: Apache 2.0
   url: https://www.apache.org/licenses/LICENSE-2.0.html
 termsOfService: http://example.com/terms/
 title: Web Service
 version: '1.0'
openapi: 3.0.2
paths:
 /:
   get:
     description: Get a random pet
     responses:
       '200':
         content:
           application/json:
             schema:
               $ref: '#/components/schemas/Pet'
         description: A pet to be returned
※ api.session()については以前書いているのでそちらもどうぞ!
apiのインスタンス作成時に指定したものはほとんどがinfoに、各ルートでのヒアドキュメントはpathsのドキュメントにされるみたいですね。OpenAPIの説明についてはこちらで丁寧に説明されていたので、引用させていただきます。
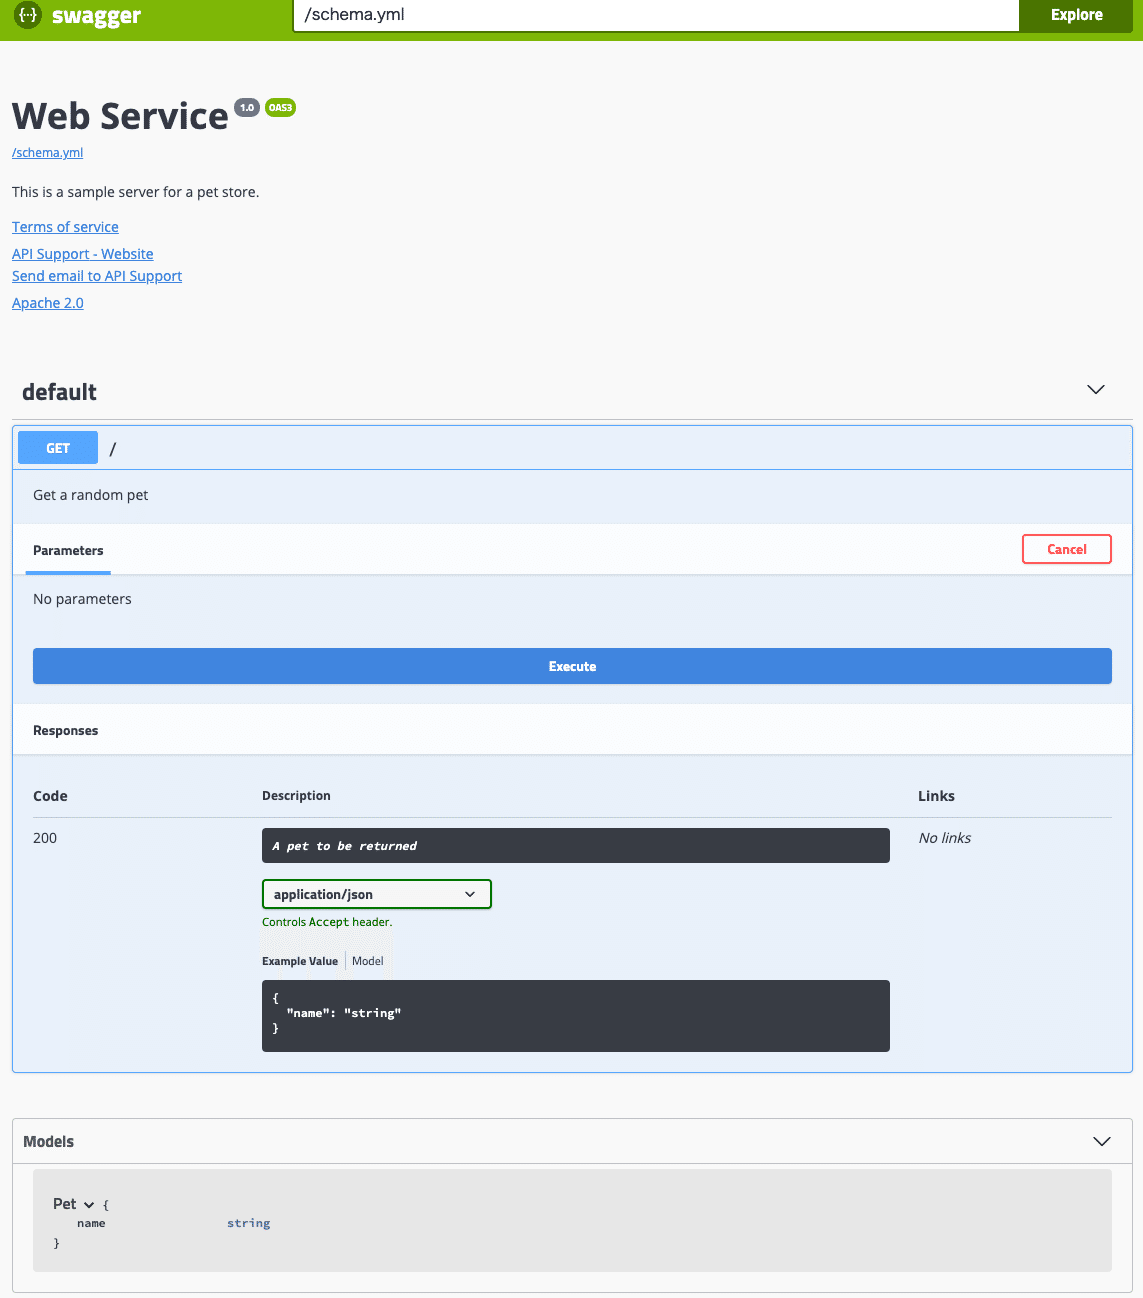
また、docs_routeとして/docsを設定したので、http://localhost:8000/docsにアクセスすることで、インタラクティブなドキュメントも使えます。良いですね!

responderのAPIドキュメントはmarshmallowというライブラリを使っているんですが、実はドキュメント生成以外にも出来ることがあります。
・ データのシリアライズ、デシリアライズ
・ データのバリデーション
その効果を体感したいので、まずは普通に頑張って実装してみます。
marshmallowがないとき
src/models/note.pyです。noteという記事をアップロードするサービスの想定です。
from dataclasses import dataclass
from datetime import datetime


@dataclass
class Note:
   note_id: int
   author: str
   body: str
   is_deleted: bool
   created_at: datetime
   updated_at: datetime

   def to_dict(self):
       return {
           'note_id': self.note_id,
           'author': self.author,
           'body': self.body
       }


class NoteRepository:
   _total = 1
   notes = {}

   @classmethod
   def all(cls):
       return [note.to_dict() for note in cls.notes.values()]

   @classmethod
   def create(cls, author, body):
       now = datetime.now()
       note = Note(cls._total, author, body, False, now, now)
       cls.notes[cls._total] = note
       cls._total += 1
return note.to_dict()こっちはserver.pyです。
import responder

from src.models.note import NoteRepository

api = responder.API()


@api.route('/note')
class NoteListController:
   async def on_get(self, req, resp):
       resp.media = {'data': NoteRepository.all()}

   async def on_post(self, req, resp):
       data = await req.media()
       resp.media = {'data': NoteRepository.create(data['author'], data['body'])}
/noteにGETすると、保存されているノート一覧が取得でき、/noteにPOSTすると新しい記事が追加されます。試しに3つPOSTしたあとにGETするとこんなレスポンスが得られます。
{
   "data": [
       {
           "note_id": 1,
           "author": "juri-t",
           "body": "responderの記事を書いてるよ!"
       },
       {
           "note_id": 2,
           "author": "juri-t",
           "body": "responderの記事を書いてるよ!"
       },
       {
           "note_id": 3,
           "author": "juri-t",
           "body": "responderの記事を書いてるよ!"
       }
   ]
}
POSTされたデータから頑張ってNoteインスタンスを作ったり、JSONシリアライズできないので自前でto_dictメソッドを使ったりしてます。クラスが1つでカラムも少ないので大したことないですが、ちょっと辛い未来が見えますね。また、Pythonの型ヒントは実行時には何もしないのでauthorやbodyにstr以外も入ります。
さぁ、次はmarshmallowを使ってみましょう
marshmallowがあるとき
src/models/note.pyです。
from dataclasses import dataclass
from datetime import datetime

from marshmallow import Schema, fields, post_load, pre_load


@dataclass
class Note:
   note_id: int
   author: str
   body: str
   is_deleted: bool = False
   created_at: datetime = datetime.now
   updated_at: datetime = datetime.now


class NoteSchema(Schema):
   note_id = fields.Int()
   author = fields.Str(required=True)
   body = fields.Str(required=True, validate=lambda attr: len(attr) > 20,
                     error_messages={"validator_failed": "Body require over 20."})
   is_deleted = fields.Bool()
   created_at = fields.DateTime()
   updated_at = fields.DateTime()

   @post_load
   def make_note(self, data):
       return Note(**data)

   @pre_load
   def issue_note_id(self, data):
       data['note_id'] = NoteRepository.total
       return data


class NoteRepository:
   total = 1
   notes = {}
   schema = NoteSchema(only=('note_id', 'author', 'body'))

   @classmethod
   def all(cls):
       return cls.schema.dump(NoteRepository.notes.values(), many=True)

   @classmethod
   def create(cls, data):
       note, errors = cls.schema.load(data)
       if errors:
           return None, errors
       cls.notes[cls.total] = note
       cls.total += 1
       return cls.schema.dump(note), None
こっちはserver.pyです。
import responder

from src.models.note import NoteRepository, NoteSchema

api = responder.API(
   title='Web Service',
   version='1.0',
   openapi='3.0.2',
   description='This is a sample.',
   docs_route='/docs',
)

api.add_schema('Note', NoteSchema)


@api.route('/note')
class NoteListController:
   """
   ---
   get:
       tags:
           - Note
       description: ノート一覧を取得するAPI
       responses:
           200:
               description: すべてのノートが返る
               content:
                   application/json:
                       schema:
                           $ref: '#/components/schemas/Note'
   post:
       tags:
           - Note
       description: ノートを登録します
       requestBody:
         content:
           application/json:
             schema:
               type: object
               properties:
                 author:
                   type: string
                   example: "juri-t"
                 body:
                   type: string
                   example: "This is a example note."
       responses:
           200:
               description: A note to be returned
               content:
                   application/json:
                       schema:
                           $ref: '#/components/schemas/Note'
   """

   async def on_get(self, req, resp):
       resp.media, _ = NoteRepository.all()

   async def on_post(self, req, resp):
       data = await req.media()
       note, errors = NoteRepository.create(data)
       if errors:
           resp.status_code = 400
           resp.media = {'message': errors}
       else:
           resp.media = note
schema.loadでデシリアライズ、schema.dumpでシリアライズできます。
デシリアライズの処理の前後でpre_load、post_loadという処理を、シリアライズの処理の前後でpre_dump、post_dumpという処理を差し込めます。schema.loadのみだとUnmarshalResultというオブジェクトが返ってくるため、ピュアなクラスオブジェクトに変換したければpost_loadでやると良いそうです。
デシリアライズするは、定義したスキーマに沿ってバリデーションされます。自分でバリデートのルールを作りたいときは、関数やlambda、callableなクラスなどを渡すと適用されます。また、そのときのエラーメッセージもカスタマイズできます。
バリデーションでエラーが起こったらValidationErrorをraiseする風なドキュメントに読めたんですが、実際は多値返却で [result, errors] を返しているため、errors があれば400エラーにするなどの条件分岐が必要です。Golangの影響をもろに受けたのかなぁ〜と思ってしまいますね。(別に悪いことではないですよ)
バリデートの型としてもIntegerやString、Datetimeの他にもEmailやURL、UUIDといった型もあり、便利そうです。ちなみに、loadsやdumpsのようにするとjson用にエンコード、デコードしてくれます。(URL-Encodingやダブルクォートのエスケープなどが入る)
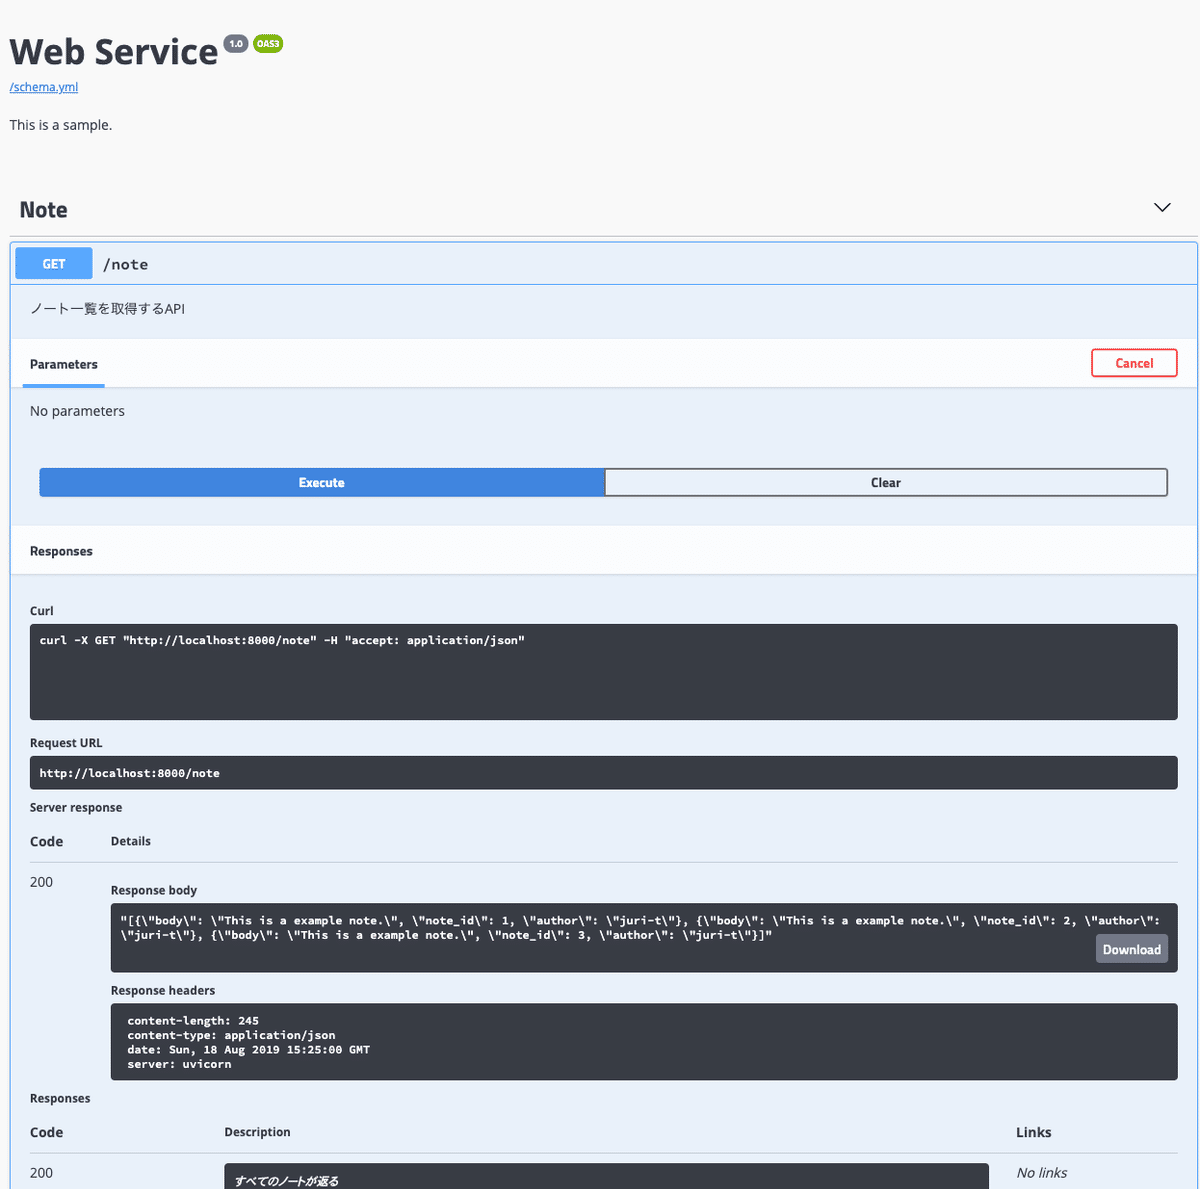
また、ヒアドキュメントで書かれたドキュメントを書いたので、そこから実際にリクエストを送ってみることもできます。

こっちのAPIドキュメントの方も、いろいろなパラメータが細かく設定できるようです。奥が深い・・!深すぎる!
まとめ
というわけで、奥が深すぎてあんまりうまくまとめられなかった気がしますし、もうresponderというよりmarshmallowの記事って感じになりましたが、marshmallowなかなか良さそうです。型がない動的言語でも型をもってValidationできるってのはなかなか良いですね。API作るときの選択肢として全然ありな気がしました。
ではでは今回はこのへんで〜
いいなと思ったら応援しよう!

