
Cusor×Flutterでメモ帳アプリをつくろう 第1回「Cusor導入」

1. Cursorの概要
Cursorとは何か
Cursorは、AIを活用したコードエディタです。Visual Studio Code (VSCode)をベースに開発されており、ChatGPTのような強力なAI機能が組み込まれています。
主な特徴と利点
AIによるコード生成・編集
自然言語での指示でコードを自動生成します。
既存コードの編集や修正をAIがサポートします。
例:「Pythonで簡単なWebサーバーを作成して」と入力するだけでコードが生成されます。
インタラクティブな質問応答
コードに関する質問をAIに直接尋ねられます。
エラーの原因や修正方法をAIが提案します。
例:「このコードはどういう機能を持っていますか?」と質問可能です。
自動デバッグ・エラー修正
エラーを自動検出し、修正案を提示します。
リアルタイムでのエラーチェックとリファクタリング提案を行います。
Curorの料金体系
Cursorは、3つの主要な料金プランを提供しています(2024年11月時点)。
Basic(無料プラン)
Pro(月額20ドル)
Business(月額40ドル)
2. Cursorのインストールと設定
システム要件
Cursorを利用するために、以下のシステム環境が必要です。
OS: Windows、macOS、Linux(一部のディストリビューション)
ブラウザ: Google Chrome、Mozilla Firefox、Microsoft Edge(最新版推奨)
インターネット接続: 安定した高速なインターネット環境
インストール手順(Windows編)
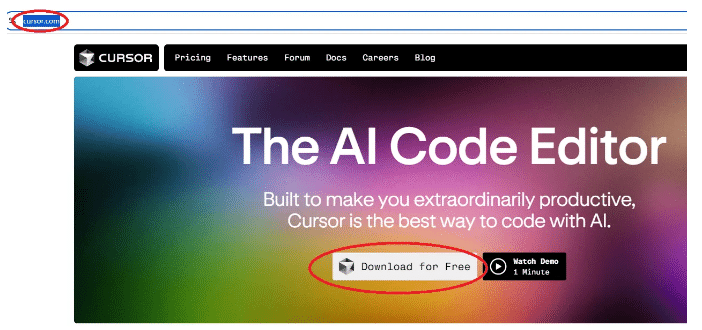
手順 1: ウェブサイトからインストーラーをダウンロード
Cursorの公式サイトにアクセスしてください。( https://cursor.com/download)
「Download for Free」をクリックしてインストーラーをダウンロードします。
手順 2: インストーラーを実行
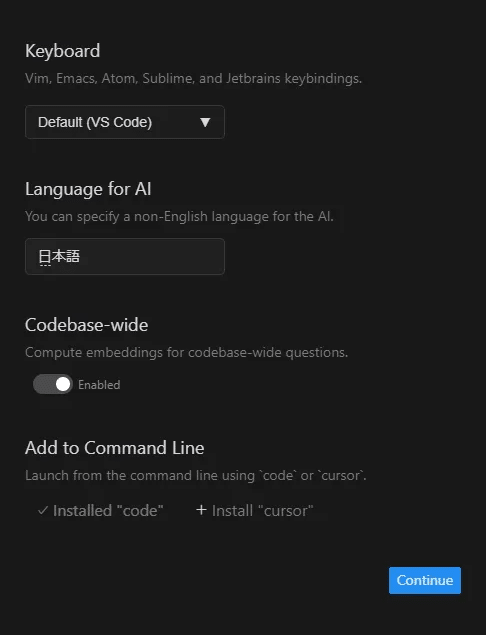
ダウンロードが完了したら、インストーラーをダブルクリックで開きます。

「Keyboard Default(VS Code)」、「Language for AI」に「日本語」を入力して「Continue」ボタンを押します。
VS Code Extensionsが表示されたら「Use Extensions」を押します。
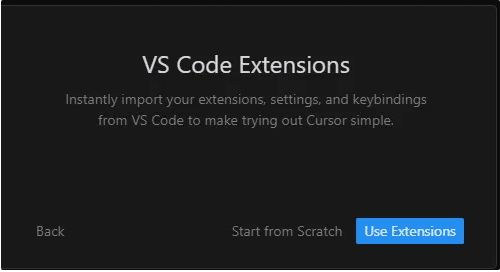
VS Codeに導入済みの拡張機能を移行できます。この画面は、VS Codeがインストールされていなければ表示されません。拡張機能を移行しない場合は「Start from Scratch」を押します。
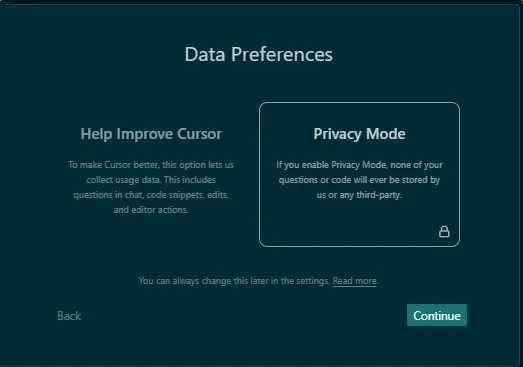
「Data Preferences」が表示されたら「Privacy Mode」を押します。
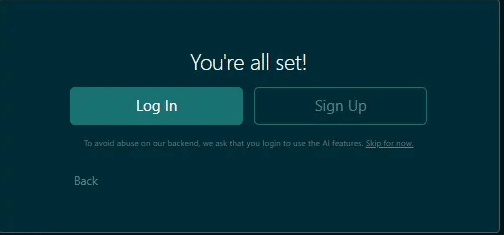
「You’re all set!」が表示されます。GoogleやGitHubのアカウントがあれば連携できます。そちらを使う場合は「Log In」を押します。新規にアカウントを作成したい場合は「Sign Up」を押します。
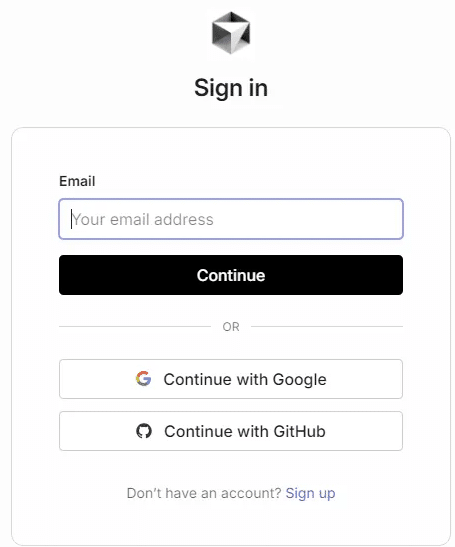
ブラウザで「Sign in」が表示されたら、使いたいアカウントでサインインします。今回は「Continue with Google」を押します。
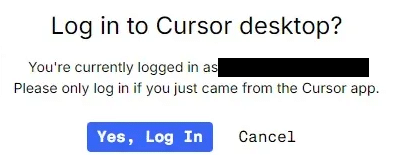
「Yes, Log In」を押します。
認証に成功すると「You may now proceed back to Cursor」が表示されます。これでCursorの初期設定は完了です。

初期設定とカスタマイズ
日本語化
Cursorは初期設定ではメニューが英語表示のため、日本語表示に変更します。
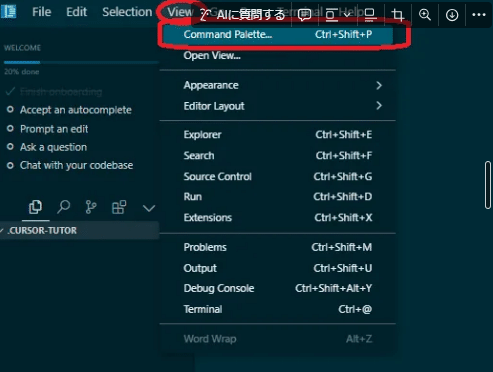
メニューバーから設定を開く
「View」メニューを選択し、「Command Palette」をクリックします。
言語設定の変更
コマンドパレットが開いたら、「Configure Display Language」と入力して選択します。

日本語を選択:
表示される言語の選択肢から「日本語」または「Japanese」を選びます。

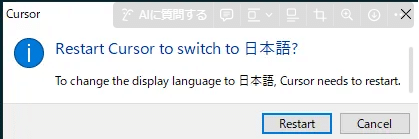
Cursorの再起動
言語設定を変更するために、Cursorの再起動が必要です。
「日本語に切り替えるためにCursorを再起動するか?」という確認ウィンドウが表示されるので、「Restart」をクリックして再起動します。
設定の確認
再起動後、インターフェースが日本語になっていることを確認します。

以上で終了です。次回はFlutterの開発環境を整えます。