Photo by
tochi_miyako
【Swift】ローカル通知(プッシュ通知)を実装する方法【Xcode12】
前回の記事はこちらです。
ローカル通知とはなにか、など触れております。
便利な通知機能を実装してみてください。
アプリ起動中もアプリ待機中もプッシュ通知が行えるようなコードです。
プッシュ通知を開いた場合の処理などはまた込み入って考えたいと思います(最適な設計なども紹介したいので)
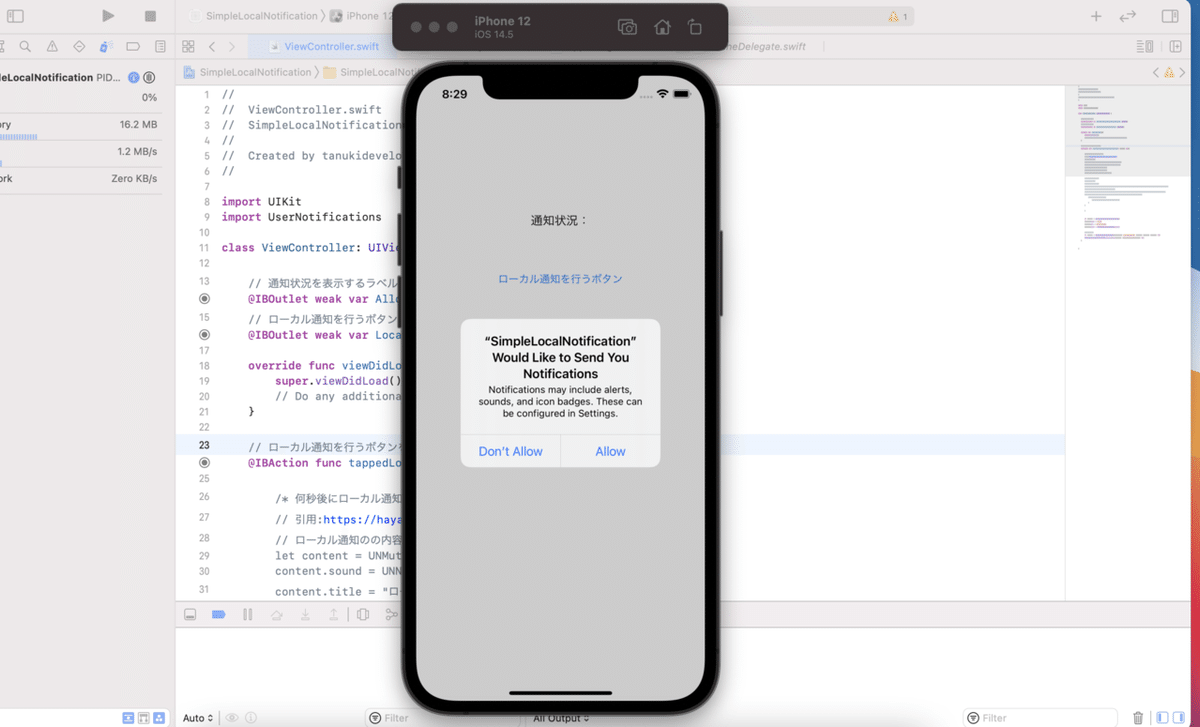
アプリイメージ

機能としてはシンプルです。
ローカル通知を行うボタンを押下することで、プッシュ通知を表示する処理になります。
アプリ構成もシンプルです。初期で用意されているViewController,AppDelegateにコードを記載し、Main.StoryboardにButtonを配置しております。
注意
ちなみにプッシュ通知まわりは実機でないと検証できません。
XcodeのiOSシミュレーターではプッシュ通知の許可を許可することはできますが、プッシュ通知が出ません。
これではプッシュ通知機能を検証できないので、
実機を繋いで検証しましょう。
ViewController.Swift
import UIKit
import UserNotifications

class ViewController: UIViewController {

   // 通知状況を表示するラベル
   @IBOutlet weak var AllowNotificationStatuslabel: UILabel!
   // ローカル通知を行うボタン
   @IBOutlet weak var LocalNotificationButton: UIButton!

   override func viewDidLoad() {
       super.viewDidLoad()
       // Do any additional setup after loading the view.
   }

   // ローカル通知を行うボタンを押下した時の処理
   @IBAction func tappedLocalNotificationButton(_ sender: Any) {

       /* 何秒後にローカル通知を行いたい場合の処理
       // 引用:https://hayashi-rin.net/post-7060
       // ローカル通知のの内容
       let content = UNMutableNotificationContent()
       content.sound = UNNotificationSound.default
       content.title = "ローカル通知テスト"
       content.subtitle = "タイマー通知"
       content.body = "タイマーによるローカル通知です"

       // タイマーの時間(秒)をセット
       let timer = 3
       // ローカル通知リクエストを作成
       let trigger = UNTimeIntervalNotificationTrigger(timeInterval: TimeInterval(timer), repeats: false)
       let identifier = NSUUID().uuidString
       let request = UNNotificationRequest(identifier: identifier, content: content, trigger: trigger)
       UNUserNotificationCenter.current().add(request){ (error : Error?) in
           if let error = error {
               print(error.localizedDescription)
           }
       }

       */


       let content = UNMutableNotificationContent()
       content.title = "お知らせ"
       content.body = "ボタンを押しました。"
       content.sound = UNNotificationSound.default

       // 直ぐに通知を表示
       let request = UNNotificationRequest(identifier: "immediately", content: content, trigger: nil)
       UNUserNotificationCenter.current().add(request, withCompletionHandler: nil)
   }


}
AppDelegate.Swift
import UIKit

@main
class AppDelegate: UIResponder, UIApplicationDelegate {

   func application(_ application: UIApplication, didFinishLaunchingWithOptions launchOptions: [UIApplication.LaunchOptionsKey: Any]?) -> Bool {
       // Override point for customization after application launch.
       // 通知許可の取得
       UNUserNotificationCenter.current().requestAuthorization(
       options: [.alert, .sound, .badge]){
           (granted, _) in
           if granted{
               UNUserNotificationCenter.current().delegate = self
           } else {
               print("通知が許可されていない")
           }
       }

       return true
   }

   // MARK: UISceneSession Lifecycle

   func application(_ application: UIApplication, configurationForConnecting connectingSceneSession: UISceneSession, options: UIScene.ConnectionOptions) -> UISceneConfiguration {
       // Called when a new scene session is being created.
       // Use this method to select a configuration to create the new scene with.
       return UISceneConfiguration(name: "Default Configuration", sessionRole: connectingSceneSession.role)
   }

   func application(_ application: UIApplication, didDiscardSceneSessions sceneSessions: Set<UISceneSession>) {
       // Called when the user discards a scene session.
       // If any sessions were discarded while the application was not running, this will be called shortly after application:didFinishLaunchingWithOptions.
       // Use this method to release any resources that were specific to the discarded scenes, as they will not return.
   }


}

extension AppDelegate: UNUserNotificationCenterDelegate{

   func userNotificationCenter(_ center: UNUserNotificationCenter, willPresent notification: UNNotification, withCompletionHandler completionHandler: @escaping (UNNotificationPresentationOptions) -> Void) {
       // アプリ起動中でもアラートと音で通知
       completionHandler([.alert, .sound])

   }

   func userNotificationCenter(_ center: UNUserNotificationCenter, didReceive response: UNNotificationResponse, withCompletionHandler completionHandler: @escaping () -> Void) {
       completionHandler()

   }
}