
【Objective-C】UICollectionViewでカスタムセル(UICollectionViewCell)を採用する方法【Xcode10.1対応】

※こういう人に向けて発信しています。
・通常の標準セルだと物足りない人
・カスタマイズされたセルを使いたい人
・Objective-C初心者
前回、UICollectionView生成について取り扱った
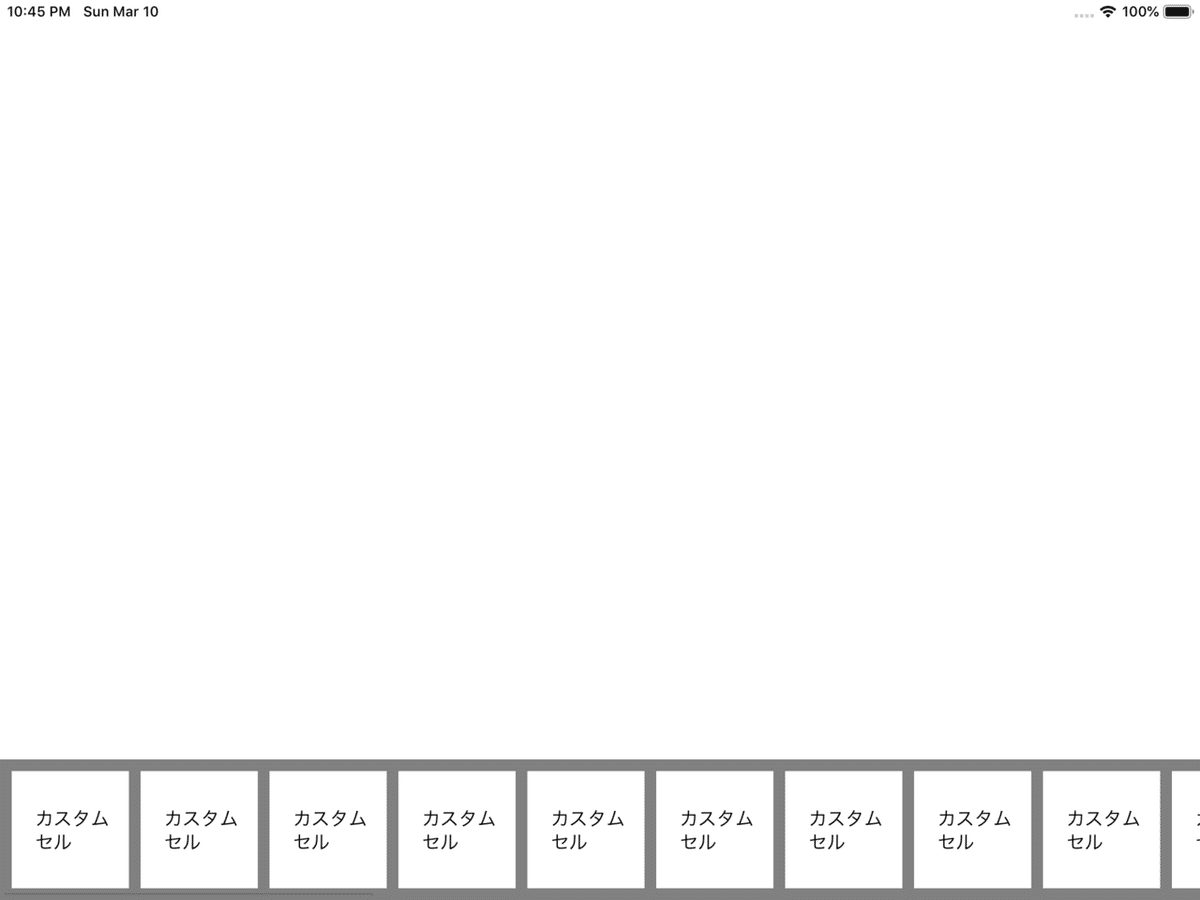
今回はUICollectionViewCellを継承したクラスを使って、
好きなセルを利用しちゃいましょう。
ViewController.h
#import <UIKit/UIKit.h>
@interface ViewController : UIViewController

@end
ViewController.m
通常セル使用とカスタムセル使用が対比になっているので、
ワカラナイ人は比較して勉強しましょう。
#import "ViewController.h"
#import "CustomCell.h"

@interface ViewController ()<UICollectionViewDelegate,UICollectionViewDataSource>{
    UIButton *btn;
}
@property (weak, nonatomic) IBOutlet UICollectionView *collectionView;

@end

@implementation ViewController

- (void)viewDidLoad {
    [super viewDidLoad];
    _collectionView.delegate = self;
    _collectionView.dataSource = self;
    _collectionView.bounces =NO;
    _collectionView.backgroundColor = [UIColor grayColor];
    [self collectionBrank];

    //標準セルを使用
    //     [_collectionView registerClass:[UICollectionViewCell class] forCellWithReuseIdentifier:NSStringFromClass([UICollectionViewCell class])];

    //カスタムセル使用
    UINib *nib = [UINib nibWithNibName:@"CustomCell" bundle:nil];
    [_collectionView registerNib:nib forCellWithReuseIdentifier:@"CustomCell"];
}

- (void)collectionBrank{
    UICollectionViewFlowLayout *layout = [[UICollectionViewFlowLayout alloc]init];
    layout.sectionInset = UIEdgeInsetsMake(10, 10, 10, 10);
    layout.scrollDirection = UICollectionViewScrollDirectionHorizontal;
    _collectionView.collectionViewLayout = layout;
}

- (NSInteger)collectionView:(UICollectionView *)collectionView numberOfItemsInSection:(NSInteger)section
{
    return 30;
}

- (UICollectionViewCell *)collectionView:(UICollectionView *)collectionView cellForItemAtIndexPath:(NSIndexPath *)indexPath
{

    //標準セルの場合
    //    NSString *cellName = NSStringFromClass([UICollectionViewCell class]);
    //    UICollectionViewCell *cell = [collectionView dequeueReusableCellWithReuseIdentifier:cellName forIndexPath:indexPath];
    //    cell.backgroundColor = [UIColor redColor];
    //    return cell;

    //カスタムセルの場合
    CustomCell *cell = [collectionView dequeueReusableCellWithReuseIdentifier:@"CustomCell" forIndexPath:indexPath];
    return cell;
}

- (NSInteger)numberOfSectionsInCollectionView:(UICollectionView *)collectionView
{
    return 1;
}

- (CGSize)collectionView:(UICollectionView *)collectionView
                  layout:(UICollectionViewLayout*)collectionViewLayout
  sizeForItemAtIndexPath:(NSIndexPath *)indexPath
{
    return CGSizeMake(100, 100);
}

@end
CustomCell.h
#import <UIKit/UIKit.h>
@interface CustomCell : UICollectionViewCell
@end
CustomCell.m
#import "CustomCell.h"
@implementation CustomCell

- (void)awakeFromNib {
    [super awakeFromNib];
    // Initialization code
}

@end
CustomCell.xib

※今回はノータッチでしたが、アウトレット接続するなら
hファイルに紐づけたほうが良さそうです。
注意点:アウトレット接続できないハマりの時
実は私もありました。
なぜかアウトレット接続ができないっていう。
調べてみるとゴミ箱内でファイル名が重複だ何だらしいですね。
素直に一度クラスを消して違うクラス名でやれば問題なく行きました。