9/5 blender 3D物件材質設定

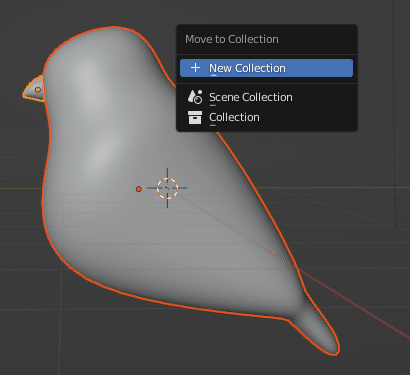
▲把物件集中在同個資料夾裡
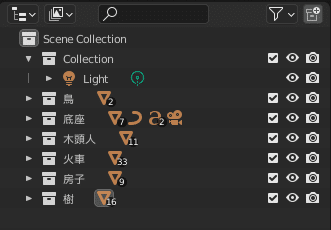
●物件全選後>M
▲叫出做好的材質
File>Append>Material>選擇材質檔案

▲材質套用
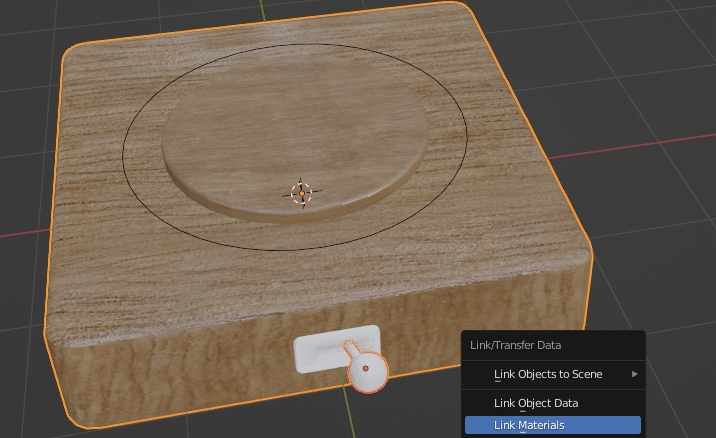
●B物件直接套用A物件的材質
選擇B後複選A>Ctrl+L>Materil
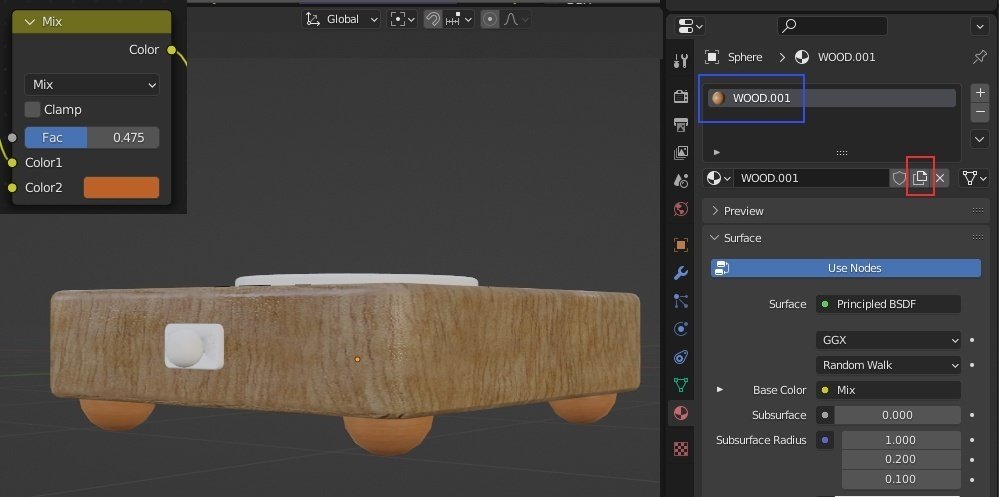
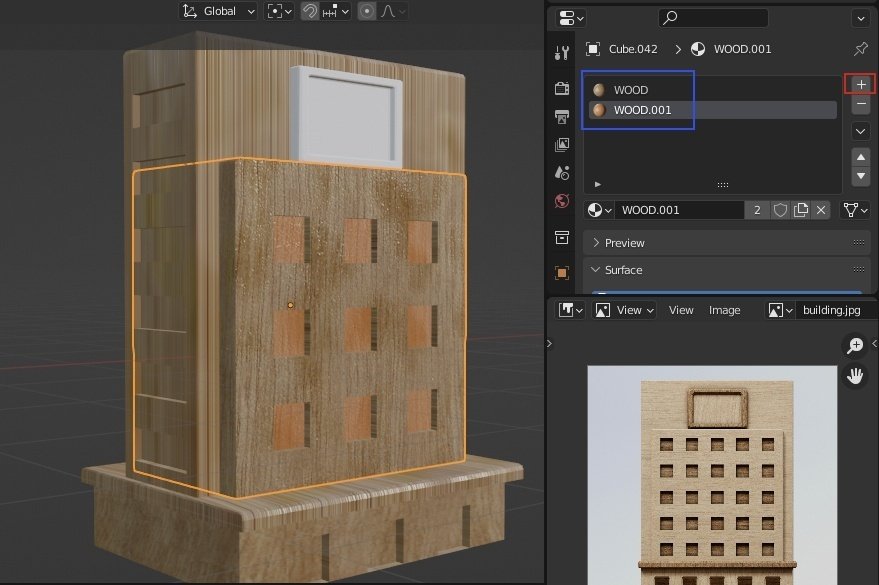
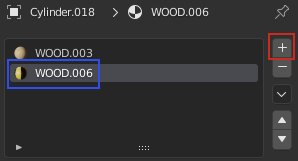
●複製原本的材質球後,用複製的材質球去做修改
以這個為例
角先套用底座的材質後>複製(紅框)>就會新增一個新的材質球(藍)
就可以單獨修改設定,而不會動到原本的材質球
●在同一個物件上套上第二種材質
進入編輯模式>選擇要修改的地方>按+>選擇材質球>同一個物件就會有兩顆材質球(藍框)>按Assign套用
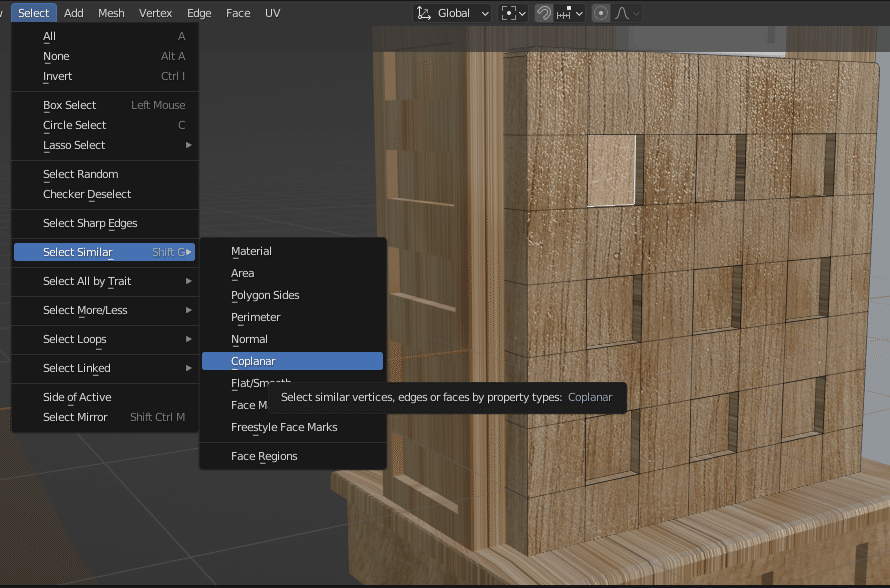
●快速選擇類似的物件
譬如我要選窗戶
Selsct>Seclect Similar>Coplanar
●ctrl+L / 反轉選取
(到線框選取模式後選擇物件>ctrl+L)
●可以開個參考圖放在右下做參考
新增一個視窗>把模式改成image editor
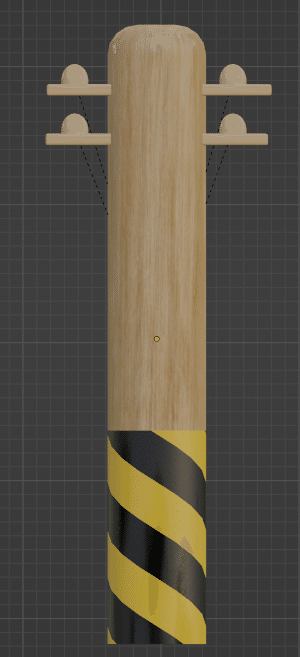
▲電線杆製作說明
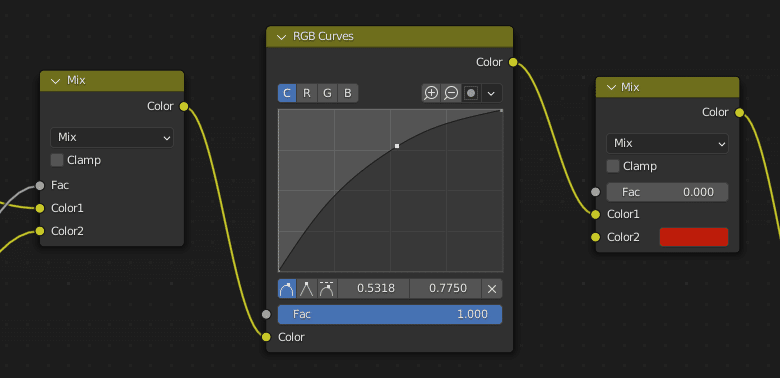
●調整顏色濃淡
一樣複製新的材質球出來後,
在mix跟mix中間新增RGB Curves,就可調整濃淡
(Shift+A>Colro>RGB Curves)
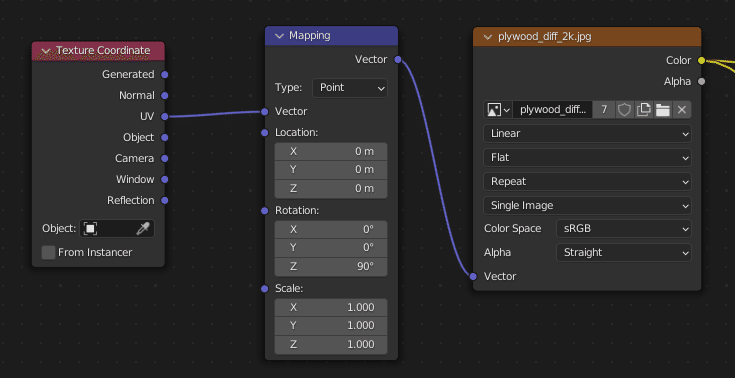
●調整素材的方向
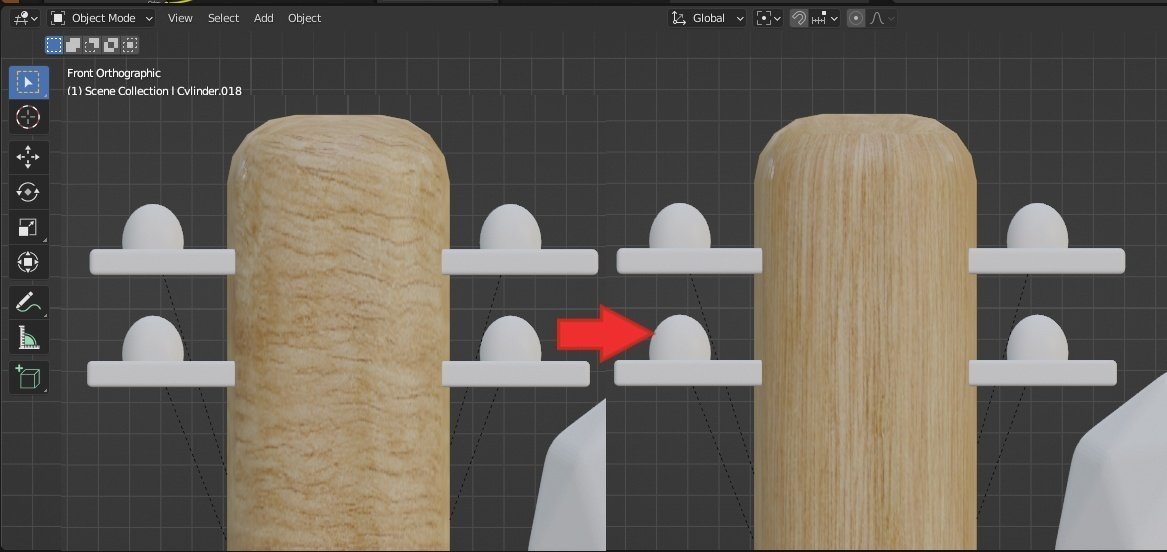
兩種方式
一、用貼圖的節點
二、用UV editor
●用貼圖的節點
要加入兩個節點:
1、Texture Coordinate(貼圖座標)
(Shift+A>Input>exture Coordinate)
2、Mapping
(Shift+A>Vector>Mapping)
然後把節點連到木頭素材的節點上
●用UV editor
開啟UV editor>選擇物件進入編輯模式>在UV editor選轉90度
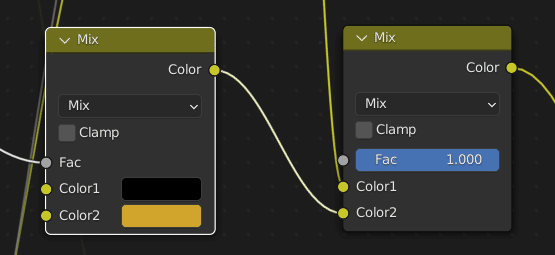
●黃黑條紋的製作
一樣按+新增一個材質球>新增MixRGB把顏色改掉
記得要把節點連到顏色輸出的MixRGB上
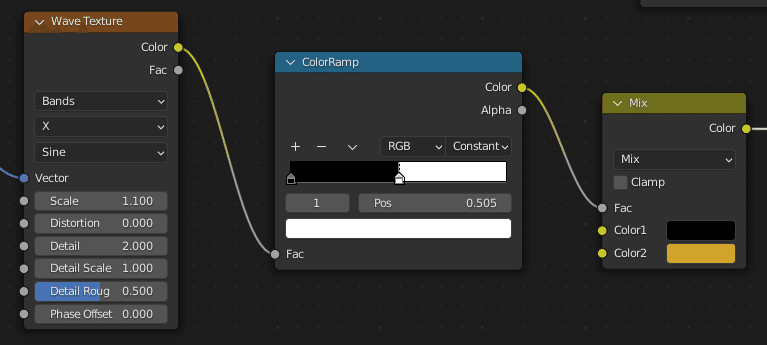
新增兩個節點
1、Wave Texture(可以產稱條狀物)
(Shift+A>Texture>Wave Texture)
2、ColeorRmap(可以調整數值讓顏色之間不要有過渡色)
(Shift+A>Converter>ColeorRmap)
然後把ColeorRmap放在Wave Texture跟剛剛新增的MixRGB中間
把ColeorRmap的Linear改成Constan,告訴系統我不要過渡色
用UV editor改線條的方向
首先讓系統自動拆UV,
進入線編輯模式>U>Cylinder Projection(專門拆UV圓柱的)
然後在UV editor旋轉就完成了
(*我不知道為什麼這裡我需要再加貼圖節點的方式,才會有作用)
*反正就是,如果你有要更改材質的設定,就必須複製新增一個新的材質球
+的意思是在同一個物件裡,在既有的材質上再新增一個材質