【AWS】Rocky LinuxをEC2で構築する

はじめに
CentOSの代替ディストリビューション候補としてよくあがるRocky Linux。
今回は、EC2でそのRocky Linuxを作成したいと思います。
合わせて簡単なOSの初期設定も実施していきます。
EC2インスタンス作成
1.AWS マネジメントコンソールにログインし、EC2 コンソールを開きます。2.EC2画面から「インスタンスを起動」をクリックします。
3.インスタンス設定項目が開きます。名前を適宜入力します。
4.OSイメージ選択欄から「その他のAMIを閲覧する」をクリックします。
(Rocky Linuxを探しにいきます)

「rocky linux」と入力し検索します。
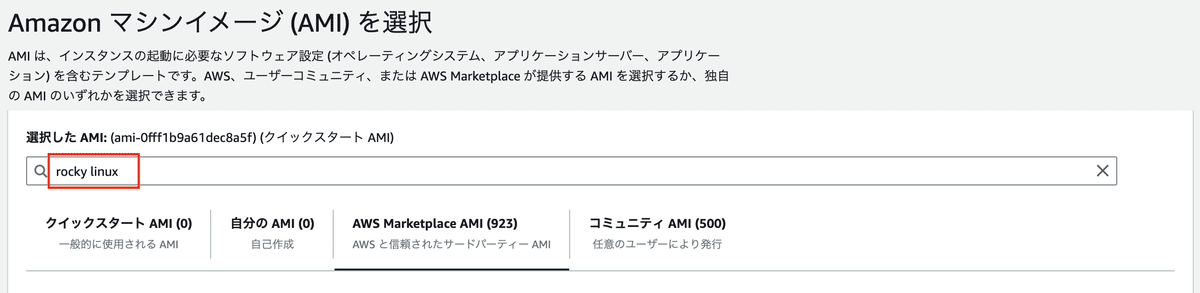
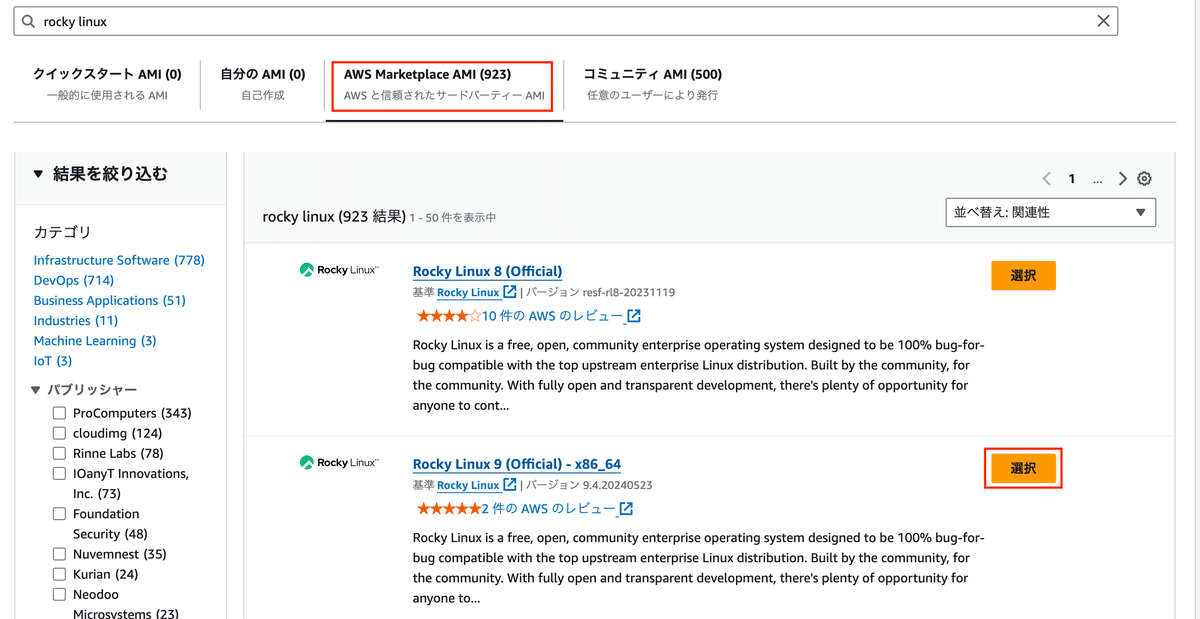
検索結果が表示されたら、AWS Marketplace AMIタブを開きます。
タブの中にある最新のRocky Linuxイメージを選びます。
サブスクリプション画面が開きます。
詳細をよく確認し、右下の「今すぐ購読」をクリックします。
※最新OSは、9.4.2のようです。(執筆時点)

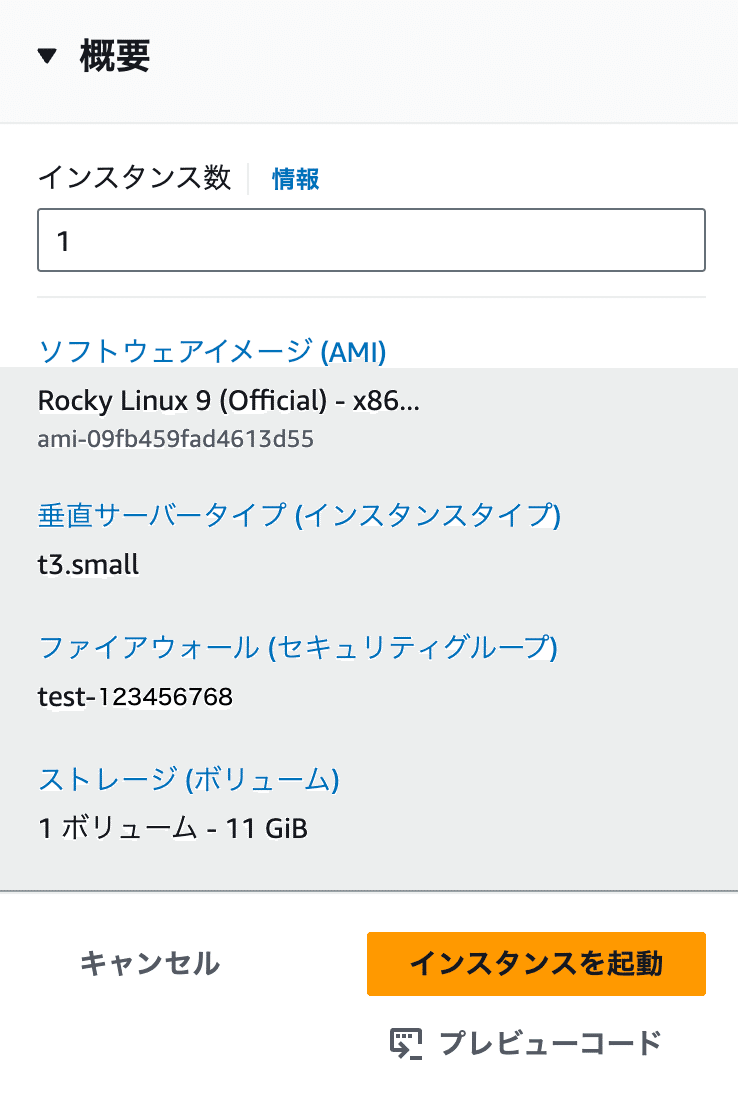
Rocky Linuxがセットされました。設定を継続しましょう。

5.インスタンスタイプを選びます。
用途に合わせて適切なタイプを選んでください。
※デフォルトで、t3.smallがセットされます。
6.キーペアは状況に応じて適宜作成してください。

7.ストレージ設定
デフォルトの設定は11GiBでgp2がセットされています。。。
サイズに不安な方は、適宜変更しましょう。

8.残りの設定はデフォルトのままでいきます。
詳細な設定を行う方は適宜設定を行ってください。
最後に「インスタンスを起動」をクリックします。
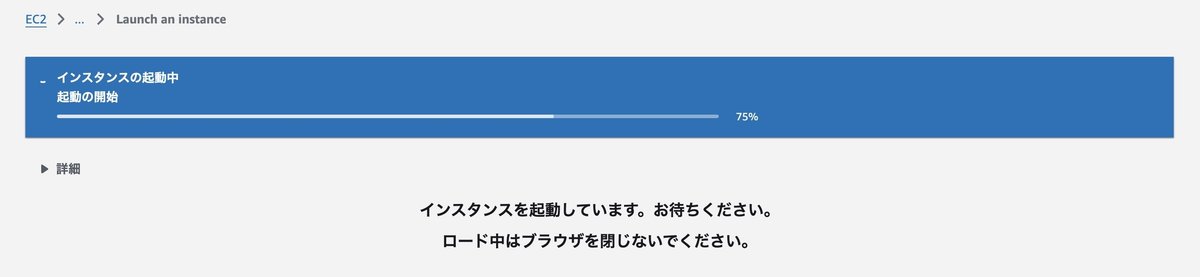
インスタンスが作成されるまで数分かかります。
ログイン確認
インスタンスが起動したら、ログイン確認してみましょう。
rootユーザでSSH接続を試みますが失敗します。
メッセージの中になにやら「rocky」を使用するようにと出ます。
$ ssh root@***.***.***.*** -i rocky-key.pem

Please login as the user "rocky" rather than the user "root".
改めて、「rocky」ユーザでSSHを試みると、接続に成功します。
なんとも・・・
確かにrockyユーザが存在しますね。
$ ssh rocky@***.***.***.*** -i rocky-key.pem

$ ls -la /home
total 4
drwxr-xr-x.  3 root  root    19 Oct 14 07:39 .
drwxr-xr-x. 19 root  root  4096 May 23 17:21 ..
drwx------.  3 rocky rocky   74 Oct 14 07:39 rocky
せっかくなので、OSバージョンなど環境をざっと確認します。
$ cat /etc/redhat-release
Rocky Linux release 9.4 (Blue Onyx)


$ uname -a
Linux ip-10-0-1-1.ec2.internal 5.14.0-427.16.1.el9_4.x86_64 #1 SMP PREEMPT_DYNAMIC Wed May 8 17:48:14 UTC 2024 x86_64 x86_64 x86_64 GNU/Linux
$ df -h
Filesystem Size Used Avail Use% Mounted on
devtmpfs 4.0M 0 4.0M 0% /dev
tmpfs 955M 0 955M 0% /dev/shm
tmpfs 382M 508K 382M 1% /run
/dev/nvme0n1p4 9.9G 1.1G 8.9G 11% /
/dev/nvme0n1p3 936M 220M 717M 24% /boot
/dev/nvme0n1p2 100M 7.0M 93M 8% /boot/efi
tmpfs 191M 0 191M 0% /run/user/1000
$ sudo lsblk
NAME MAJ:MIN RM SIZE RO TYPE MOUNTPOINTS
nvme0n1 259:0 0 11G 0 disk
├─nvme0n1p1 259:1 0 2M 0 part
├─nvme0n1p2 259:2 0 100M 0 part /boot/efi
├─nvme0n1p3 259:3 0 1000M 0 part /boot
└─nvme0n1p4 259:4 0 9.9G 0 part /
$ cat /proc/cpuinfo
processor : 0
vendor_id : GenuineIntel
cpu family : 6
model : 85
model name : Intel(R) Xeon(R) Platinum 8259CL CPU @ 2.50GHz
stepping : 7
microcode : 0x5003707
cpu MHz : 2500.004
cache size : 36608 KB
physical id : 0
siblings : 2
・
・
$ cat /proc/meminfo
MemTotal: 1955644 kB
MemFree: 1613680 kB
MemAvailable: 1633316 kB
Buffers: 5136 kB
Cached: 132708 kB
SwapCached: 0 kB
・
・
・OS初期設定
せっかくなので、OSの一般的な初期設定を行っていきます。
ホスト名変更
ホスト名をtest-serverとします。
$ hostname
ip-10-0-1-1.ec2.internal

$ sudo hostnamectl set-hostname test-server

$ hostname
test-server
ユーザ作成
今回は、testuserを作成していきます。
$ sudo adduser testuser

$ sudo passwd testuser
Changing password for user testuser.
New password:
Retype new password:
passwd: all authentication tokens updated successfully.


$ ls -la /home
total 4
drwxr-xr-x.  4 root     root       35 Oct 14 08:00 .
drwxr-xr-x. 19 root     root     4096 May 23 17:21 ..
drwx------.  3 rocky    rocky      74 Oct 14 07:39 rocky
drwx------.  2 testuser testuser   62 Oct 14 08:00 testuser
パッケージアップデート
$ sudo dnf update
タイムゾーンをAsia/Tokyoにする
$ date
Mon Oct 14 08:03:33 AM UTC 2024

$ sudo timedatectl set-timezone Asia/Tokyo

$ date
Mon Oct 14 05:04:18 PM JST 2024
ロケールの設定
$ echo $LANG
en_US.UTF-8

$ export LANG=ja_JP.UTF-8

$ echo $LANG
ja_JP.UTF-8
SELinuxの設定変更
※この作業は影響をよくよく検討してから行ってください。
まずは現在のモードをgetenforceで確認します。
Rocky Linuxのデフォルト設定は「Enforcing」です。
$ getenforce
Enforcingsestatusコマンドで現在の設定を確認します。ステータスはenabledになっていますね。
$ sestatus
SELinux status:                 enabled
SELinuxfs mount:                /sys/fs/selinux
SELinux root directory:         /etc/selinux
Loaded policy name:             targeted
Current mode:                   enforcing
Mode from config file:          enforcing
Policy MLS status:              enabled
Policy deny_unknown status:     allowed
Memory protection checking:     actual (secure)
Max kernel policy version: 33もし、SELinuxを無効化したい場合は、grubbyコマンドを使って以下の手順となります。
$ rpm -q grubby
grubby-8.40-64.el9.x86_64

$ sudo grubby --update-kernel ALL --args selinux=0

$ sudo reboot

$ getenforce
Disabled
MySQLクライアントのインストール
$ sudo dnf localinstall https://dev.mysql.com/get/mysql80-community-release-el9-4.noarch.rpm

$ sudo dnf info mysql-community-server
MySQL 8.0 Community Server                                                                                                                             39 MB/s | 1.9 MB     00:00
MySQL Connectors Community                                                                                                                            2.4 MB/s |  61 kB     00:00
MySQL Tools Community                                                                                                                                  11 MB/s | 721 kB     00:00
Available Packages
Name         : mysql-community-server
Version      : 8.0.39
Release      : 1.el9
Architecture : x86_64
Size         : 50 M
Source       : mysql-community-8.0.39-1.el9.src.rpm
Repository   : mysql80-community
Summary      : A very fast and reliable SQL database server
URL          : http://www.mysql.com/
License      : Copyright (c) 2000, 2024, Oracle and/or its affiliates. Under GPLv2 license as shown in the Description field.
Description  : The MySQL(TM) software delivers a very fast, multi-threaded, multi-user,
             : and robust SQL (Structured Query Language) database server. MySQL Server
             : is intended for mission-critical, heavy-load production systems as well
             : as for embedding into mass-deployed software. MySQL is a trademark of
             : Oracle and/or its affiliates
             :
             : The MySQL software has Dual Licensing, which means you can use the MySQL
             : software free of charge under the GNU General Public License
             : (http://www.gnu.org/licenses/). You can also purchase commercial MySQL
             : licenses from Oracle and/or its affiliates if you do not wish to be bound by the terms of
             : the GPL. See the chapter "Licensing and Support" in the manual for
             : further info.
             :
             : The MySQL web site (http://www.mysql.com/) provides the latest news and
             : information about the MySQL software.  Also please see the documentation
             : and the manual for more information.
             :
             : This package includes the MySQL server binary as well as related utilities
             : to run and administer a MySQL server.


$ sudo dnf -y install mysql mysql-community-client

$ mysql --version
mysql  Ver 8.0.39 for Linux on x86_64 (MySQL Community Server - GPL)
PostgreSQLクライアントインストール
$ sudo dnf install postgresql

$ psql --version
psql (PostgreSQL) 13.16
CloudWatchエージェントインストール
まず、Collectdをインストールします。
$ sudo dnf install epel-release

$ sudo  dnf repolist epel*
repo id                                                        repo name                                                                                                      status
epel                                                           Extra Packages for Enterprise Linux 9 - x86_64                                                                 enabled
epel-cisco-openh264                                            Extra Packages for Enterprise Linux 9 openh264 (From Cisco) - x86_64                                           enabled
epel-cisco-openh264-debuginfo                                  Extra Packages for Enterprise Linux 9 openh264 (From Cisco) - x86_64 - Debug                                   disabled
epel-cisco-openh264-source                                     Extra Packages for Enterprise Linux 9 openh264 (From Cisco) - x86_64 - Source                                  disabled
epel-debuginfo                                                 Extra Packages for Enterprise Linux 9 - x86_64 - Debug                                                         disabled
epel-source                                                    Extra Packages for Enterprise Linux 9 - x86_64 - Source                                                        disabled
epel-testing                                                   Extra Packages for Enterprise Linux 9 - Testing - x86_64                                                       disabled
epel-testing-debuginfo                                         Extra Packages for Enterprise Linux 9 - Testing - x86_64 - Debug                                               disabled
epel-testing-source                                            Extra Packages for Enterprise Linux 9 - Testing - x86_64 - Source                                              disabled

$ sudo dnf --enablerepo=epel install collectd

$ sudo systemctl enable --now collectd.service
$ sudo systemctl status collectd.service
次にCloudWatchエージェントをインストールします。
$ sudo dnf install https://s3.ap-northeast-1.amazonaws.com/amazoncloudwatch-agent-ap-northeast-1/redhat/amd64/latest/amazon-cloudwatch-agent.rpm

$ sudo dnf info amazon-cloudwatch-agent
Last metadata expiration check: 0:02:00 ago on Mon 14 Oct 2024 05:21:43 PM JST.
Installed Packages
Name         : amazon-cloudwatch-agent
Version      : 1.300044.0b793
Release      : 1
Architecture : x86_64
Size         : 402 M
Source       : amazon-cloudwatch-agent-1.300044.0b793-1.src.rpm
Repository   : @System
From repo    : @commandline
Summary      : Amazon CloudWatch Agent
License      : MIT License. Copyright Amazon.com, Inc. or its affiliates. All Rights Reserved.
Description  : This package provides daemon of Amazon CloudWatch Agent
CloudWatchエージェントの設定
インストールができましたので、ウィザードを利用しCloudWatchエージェントの設定をすすめていきます。
$ sudo /opt/aws/amazon-cloudwatch-agent/bin/amazon-cloudwatch-agent-config-wizard
================================================================
= Welcome to the Amazon CloudWatch Agent Configuration Manager =
=                                                              =
= CloudWatch Agent allows you to collect metrics and logs from =
= your host and send them to CloudWatch. Additional CloudWatch =
= charges may apply.                                           =
================================================================
On which OS are you planning to use the agent?
1. linux
2. windows
3. darwin
default choice: [1]:


Trying to fetch the default region based on ec2 metadata...
I! imds retry client will retry 1 timesAre you using EC2 or On-Premises hosts?
1. EC2
2. On-Premises
default choice: [1]:


Which user are you planning to run the agent?
1. cwagent
2. root
3. others
default choice: [1]:


Do you want to turn on StatsD daemon?
1. yes
2. no
default choice: [1]:


Do you want to turn on StatsD daemon?
1. yes
2. no
default choice: [1]:


Which port do you want StatsD daemon to listen to?
default choice: [8125]


What is the collect interval for StatsD daemon?
1. 10s
2. 30s
3. 60s
default choice: [1]:


What is the aggregation interval for metrics collected by StatsD daemon?
1. Do not aggregate
2. 10s
3. 30s
4. 60s
default choice: [4]:


Do you want to monitor metrics from CollectD? WARNING: CollectD must be installed or the Agent will fail to start
1. yes
2. no
default choice: [1]:


Do you want to monitor any host metrics? e.g. CPU, memory, etc.
1. yes
2. no
default choice: [1]:


Do you want to monitor cpu metrics per core?
1. yes
2. no
default choice: [1]:


Do you want to add ec2 dimensions (ImageId, InstanceId, InstanceType, AutoScalingGroupName) into all of your metrics if the info is available?
1. yes
2. no
default choice: [1]:


Do you want to aggregate ec2 dimensions (InstanceId)?
1. yes
2. no
default choice: [1]:


Would you like to collect your metrics at high resolution (sub-minute resolution)? This enables sub-minute resolution for all metrics, but you can customize for specific metrics in the output json file.
1. 1s
2. 10s
3. 30s
4. 60s
default choice: [4]:


Which default metrics config do you want?
1. Basic
2. Standard
3. Advanced
4. None
default choice: [1]:
ここまで来たら一旦、JSONが表示されます。
Current config as follows:
{
        "agent": {
                "metrics_collection_interval": 60,
                "run_as_user": "cwagent"
        },
        "metrics": {
                "aggregation_dimensions": [
                        [
                                "InstanceId"
                        ]
                ],
                "append_dimensions": {
                        "AutoScalingGroupName": "${aws:AutoScalingGroupName}",
                        "ImageId": "${aws:ImageId}",
                        "InstanceId": "${aws:InstanceId}",
                        "InstanceType": "${aws:InstanceType}"
                },
                "metrics_collected": {
                        "collectd": {
                                "metrics_aggregation_interval": 60
                        },
                        "disk": {
                                "measurement": [
                                        "used_percent"
                                ],
                                "metrics_collection_interval": 60,
                                "resources": [
                                        "*"
                                ]
                        },
                        "mem": {
                                "measurement": [
                                        "mem_used_percent"
                                ],
                                "metrics_collection_interval": 60
                        },
                        "statsd": {
                                "metrics_aggregation_interval": 60,
                                "metrics_collection_interval": 10,
                                "service_address": ":8125"
                        }
                }
        }
}
引き続き設定ウィザードが再開します。
Are you satisfied with the above config? Note: it can be manually customized after the wizard completes to add additional items.
1. yes
2. no
default choice: [1]:


Do you have any existing CloudWatch Log Agent (http://docs.aws.amazon.com/AmazonCloudWatch/latest/logs/AgentReference.html) configuration file to import for migration?
1. yes
2. no
default choice: [2]:


Do you want to monitor any log files?
1. yes
2. no
default choice: [1]:

Log file path:
/var/log/messages
Log group name:
default choice: [messages]

Log group class:
1. STANDARD
2. INFREQUENT_ACCESS
default choice: [1]:

Log stream name:
default choice: [{instance_id}]

Log Group Retention in days
1. -1
2. 1
3. 3
4. 5
5. 7
6. 14
7. 30
8. 60
9. 90
10. 120
11. 150
12. 180
13. 365
14. 400
15. 545
16. 731
17. 1096
18. 1827
19. 2192
20. 2557
21. 2922
22. 3288
23. 3653
default choice: [1]:


Do you want to specify any additional log files to monitor?
1. yes
2. no
default choice: [1]:
2


Do you want the CloudWatch agent to also retrieve X-ray traces?
1. yes
2. no
default choice: [1]:
2
またJSONが出力されます。
Existing config JSON identified and copied to:  /opt/aws/amazon-cloudwatch-agent/etc/backup-configs
Saved config file to /opt/aws/amazon-cloudwatch-agent/bin/config.json successfully.
Current config as follows:
{
        "agent": {
                "metrics_collection_interval": 60,
                "run_as_user": "cwagent"
        },
        "logs": {
                "logs_collected": {
                        "files": {
                                "collect_list": [
                                        {
                                                "file_path": "/var/log/messages",
                                                "log_group_class": "STANDARD",
                                                "log_group_name": "messages",
                                                "log_stream_name": "{instance_id}",
                                                "retention_in_days": -1
                                        }
                                ]
                        }
                }
        },
        "metrics": {
                "aggregation_dimensions": [
                        [
                                "InstanceId"
                        ]
                ],
                "append_dimensions": {
                        "AutoScalingGroupName": "${aws:AutoScalingGroupName}",
                        "ImageId": "${aws:ImageId}",
                        "InstanceId": "${aws:InstanceId}",
                        "InstanceType": "${aws:InstanceType}"
                },
                "metrics_collected": {
                        "collectd": {
                                "metrics_aggregation_interval": 60
                        },
                        "disk": {
                                "measurement": [
                                        "used_percent"
                                ],
                                "metrics_collection_interval": 60,
                                "resources": [
                                        "*"
                                ]
                        },
                        "mem": {
                                "measurement": [
                                        "mem_used_percent"
                                ],
                                "metrics_collection_interval": 60
                        },
                        "statsd": {
                                "metrics_aggregation_interval": 60,
                                "metrics_collection_interval": 10,
                                "service_address": ":8125"
                        }
                }
        }
}
Please check the above content of the config.
The config file is also located at /opt/aws/amazon-cloudwatch-agent/bin/config.json.
Edit it manually if needed.
設定ウィザードに戻ります。これが最後の質問です。
SSMパラメータストアに設定項目を保存するか?と。
Do you want to store the config in the SSM parameter store?
1. yes
2. no
default choice: [1]:
2
Program exits now.
以上でウィザードでの設定は終了です。
/opt/aws/amazon-cloudwatch-agent/bin 配下に「config.json」が出来上がります。
$ ls -la /opt/aws/amazon-cloudwatch-agent/bin
total 411276
drwxr-xr-x 2 root root       283 Oct 14 17:25 .
drwxr-xr-x 7 root root       140 Oct 14 17:23 ..
-rwxr-xr-x 1 root root 122140136 Aug 15 09:08 amazon-cloudwatch-agent
-rwxr-xr-x 1 root root  13696200 Aug 15 09:08 amazon-cloudwatch-agent-config-wizard
-rwxr-xr-x 1 root root     14113 Aug 15 09:08 amazon-cloudwatch-agent-ctl
-rwxr-xr-x 1 root root  38154104 Aug 15 09:08 config-downloader
-rw-r--r-- 1 root root      1117 Oct 14 17:34 config.json
-rwxr-xr-x 1 root root 117285640 Aug 15 09:08 config-translator
-rw-r--r-- 1 root root        15 Aug 15 09:08 CWAGENT_VERSION
-rw-r--r-- 1 root root  29755484 Aug 15 09:08 opentelemetry-jmx-metrics.jar
-rwxr-xr-x 1 root root 100081352 Aug 15 09:08 start-amazon-cloudwatch-agent
しかし、このままでは読み込んでくれないため、起動に失敗します。
/opt/aws/amazon-cloudwatch-agent/etc/ 配下に「config.json」をコピーします。
JSONファイルのコピーとリネーム
$ cd /opt/aws/amazon-cloudwatch-agent/bin

$ sudo cp -p config.json ../etc/

$ ls -la ../etc/
total 8
drwxr-xr-x 3 root root   84 Oct 14 17:39 .
drwxr-xr-x 7 root root  140 Oct 14 17:23 ..
drwxr-xr-x 2 root root    6 Aug 15 09:08 amazon-cloudwatch-agent.d
-rw-r--r-- 1 root root  959 Aug 15 09:08 common-config.toml
-rw-r--r-- 1 root root 1117 Oct 14 17:34 config.json

$ cd ../etc/
$ sudo mv config.json ./amazon-cloudwatch-agent.json


$ ls -la
total 8
drwxr-xr-x 3 root root  101 Oct 14 17:40 .
drwxr-xr-x 7 root root  140 Oct 14 17:23 ..
drwxr-xr-x 2 root root    6 Aug 15 09:08 amazon-cloudwatch-agent.d
-rw-r--r-- 1 root root 1117 Oct 14 17:34 amazon-cloudwatch-agent.json
-rw-r--r-- 1 root root  959 Aug 15 09:08 common-config.toml
「config.json」を/etc/ 配下にコピーし、かつ、リネーム(amazon-cloudwatch-agent.json)を行いました。
※ファイル名が、「config.json」のままでは読み込みに失敗し、cloudwatch-agentは起動しません。
CloudWatchエージェントの起動
$ sudo systemctl restart amazon-cloudwatch-agent

$ sudo systemctl status amazon-cloudwatch-agent
● amazon-cloudwatch-agent.service - Amazon CloudWatch Agent
     Loaded: loaded (/etc/systemd/system/amazon-cloudwatch-agent.service; disabled; preset: disabled)
     Active: active (running) since Mon 2024-10-14 17:42:20 JST; 9s ago
   Main PID: 12277 (amazon-cloudwat)
      Tasks: 7 (limit: 11766)
     Memory: 22.4M
        CPU: 237ms
     CGroup: /system.slice/amazon-cloudwatch-agent.service
             └─12277 /opt/aws/amazon-cloudwatch-agent/bin/amazon-cloudwatch-agent -config /opt/aws/amazon-cloudwatch-agent/etc/amazon-cloudwatch-agent.toml -envconfig /opt/aws/amazo>

Oct 14 17:42:20 test-server systemd[1]: Started Amazon CloudWatch Agent.
Oct 14 17:42:20 test-server start-amazon-cloudwatch-agent[12282]: D! [EC2] Found active network interface
Oct 14 17:42:20 test-server start-amazon-cloudwatch-agent[12282]: I! imds retry client will retry 1 timesI! Detected the instance is EC2
Oct 14 17:42:20 test-server start-amazon-cloudwatch-agent[12282]: 2024/10/14 17:42:20 Reading json config file path: /opt/aws/amazon-cloudwatch-agent/etc/amazon-cloudwatch-agent.jso>
Oct 14 17:42:20 test-server start-amazon-cloudwatch-agent[12282]: 2024/10/14 17:42:20 I! Valid Json input schema.
無事起動しましたね。
CloudWatchエージェント起動が上手くいかない場合
万が一、エージェントが起動しないなどのトラブル時は、ログの確認をするとよいでしょう。ログは以下の場所にあります。
/opt/aws/amazon-cloudwatch-agent/logs/amazon-cloudwatch-agent.log
まとめ
Rocky Linuxは、CentOSユーザーにとって理想的な移行候補のひとつとなるでしょう。
Rocky Linuxの活用で、よりシンプルで手軽なクラウド体験を手に入れましょう。この記事が誰かの役にたてば幸いです。