Amazon Linux 2023 にCloudWatch Logsの設定をしてみる

はじめに
Amazon Linux 2023(以下 AL2023)にCloudWatch Agentをインストールし、CloudWatch Logsのログ設定をしてみたいと思います。
作業は概ね以下の4点。
1.CloudWatchAgentのインストール
2.監視の設定(ウィザードを利用)
3.CloudWatchAgentの起動
4.確認作業
前提
EC2(AL2023)が起動済み。
適切なIAMロールがEC2に付与されている。(今回は、CloudWatchLogsFullAccessを付与している前提で進めます)
ここから実際に作業していきます。SSMセッションマネージャーを使用して作業を行っています。
Agentインストール
$ sudo dnf install amazon-cloudwatch-agent

メタデータの期限切れの最終確認: 0:01:48 時間前の 2023年09月24日 13時23分25秒 に実施しました。
依存関係が解決しました。
=============================================================================================================================================================
 パッケージ                                   アーキテクチャー            バージョン                                  リポジトリー                     サイズ
=============================================================================================================================================================
インストール:
 amazon-cloudwatch-agent                      x86_64                      1.300026.3-2.amzn2023                       amazonlinux                       68 M

トランザクションの概要
=============================================================================================================================================================
インストール  1 パッケージ

ダウンロードサイズの合計: 68 M
インストール後のサイズ: 334 M
これでよろしいですか? [y/N]: y
パッケージのダウンロード:
amazon-cloudwatch-agent-1.300026.3-2.amzn2023.x86_64.rpm                                                                      50 MB/s |  68 MB     00:01
-------------------------------------------------------------------------------------------------------------------------------------------------------------
合計                                                                                                                          48 MB/s |  68 MB     00:01
トランザクションの確認を実行中
トランザクションの確認に成功しました。
トランザクションのテストを実行中
トランザクションのテストに成功しました。
トランザクションを実行中
  準備             :                                                                                                                                     1/1
  scriptletの実行中: amazon-cloudwatch-agent-1.300026.3-2.amzn2023.x86_64                                                                                1/1
create group cwagent, result: 0
create user cwagent, result: 0

  インストール中   : amazon-cloudwatch-agent-1.300026.3-2.amzn2023.x86_64                                                                                1/1
  scriptletの実行中: amazon-cloudwatch-agent-1.300026.3-2.amzn2023.x86_64                                                                                1/1
  検証             : amazon-cloudwatch-agent-1.300026.3-2.amzn2023.x86_64                                                                                1/1

インストール済み:
  amazon-cloudwatch-agent-1.300026.3-2.amzn2023.x86_64
ウィザードを利用した監視設定
$ cd /opt/aws/amazon-cloudwatch-agent/bin
$ sudo ./amazon-cloudwatch-agent-config-wizard

================================================================
= Welcome to the Amazon CloudWatch Agent Configuration Manager =
=                                                              =
= CloudWatch Agent allows you to collect metrics and logs from =
= your host and send them to CloudWatch. Additional CloudWatch =
= charges may apply.                                           =
================================================================
On which OS are you planning to use the agent?
1. linux
2. windows
3. darwin
default choice: [1]:
1
Trying to fetch the default region based on ec2 metadata...
Are you using EC2 or On-Premises hosts?
1. EC2
2. On-Premises
default choice: [1]:
1
Which user are you planning to run the agent?
1. root
2. cwagent
3. others
default choice: [1]:
1
Do you want to turn on StatsD daemon?
1. yes
2. no
default choice: [1]:
2
Do you want to monitor metrics from CollectD? WARNING: CollectD must be installed or the Agent will fail to start
1. yes
2. no
default choice: [1]:
2
Do you want to monitor any host metrics? e.g. CPU, memory, etc.
1. yes
2. no
default choice: [1]:
1
Do you want to monitor cpu metrics per core?
1. yes
2. no
default choice: [1]:
2
Do you want to add ec2 dimensions (ImageId, InstanceId, InstanceType, AutoScalingGroupName) into all of your metrics if the info is available?
1. yes
2. no
default choice: [1]:
1
Do you want to aggregate ec2 dimensions (InstanceId)?
1. yes
2. no
default choice: [1]:
1
Would you like to collect your metrics at high resolution (sub-minute resolution)? This enables sub-minute resolution for all metrics, but you can customizefor specific metrics in the output json file.
1. 1s
2. 10s
3. 30s
4. 60s
default choice: [4]:
4
Which default metrics config do you want?
1. Basic
2. Standard
3. Advanced
4. None
default choice: [1]:
2
Current config as follows:
{
        "agent": {
                "metrics_collection_interval": 60,
                "run_as_user": "root"
        },
        "metrics": {
                "aggregation_dimensions": [
                        [
                                "InstanceId"
                        ]
                ],
                "append_dimensions": {
                        "AutoScalingGroupName": "${aws:AutoScalingGroupName}",
                        "ImageId": "${aws:ImageId}",
                        "InstanceId": "${aws:InstanceId}",
                        "InstanceType": "${aws:InstanceType}"
                },
                "metrics_collected": {
                        "cpu": {
                                "measurement": [
                                        "cpu_usage_idle",
                                        "cpu_usage_iowait",
                                        "cpu_usage_user",
                                        "cpu_usage_system"
                                ],
                                "metrics_collection_interval": 60,
                                "totalcpu": false
                        },
                        "disk": {
                                "measurement": [
                                        "used_percent",
                                        "inodes_free"
                                ],
                                "metrics_collection_interval": 60,
                                "resources": [
                                        "*"
                                ]
                        },
                        "diskio": {
                                "measurement": [
                                        "io_time"
                                ],
                                "metrics_collection_interval": 60,
                                "resources": [
                                        "*"
                                ]
                        },
                        "mem": {
                                "measurement": [
                                        "mem_used_percent"
                                ],
                                "metrics_collection_interval": 60
                        },
                        "swap": {
                                "measurement": [
                                        "swap_used_percent"
                                ],
                                "metrics_collection_interval": 60
                        }
                }
        }
}
Are you satisfied with the above config? Note: it can be manually customized after the wizard completes to add additional items.
1. yes
2. no
default choice: [1]:
1
Do you have any existing CloudWatch Log Agent (http://docs.aws.amazon.com/AmazonCloudWatch/latest/logs/AgentReference.html) configuration file to import formigration?
1. yes
2. no
default choice: [2]:
2
Do you want to monitor any log files?
1. yes
2. no
default choice: [1]:
1
Log file path:
/var/log/dnf.log
Log group name:
default choice: [dnf.log]
TestServer-Logs
Log stream name:
default choice: [{instance_id}]
/var/log/dnf.log
Log Group Retention in days
1. -1
2. 1
3. 3
4. 5
5. 7
6. 14
7. 30
8. 60
9. 90
10. 120
11. 150
12. 180
13. 365
14. 400
15. 545
16. 731
17. 1096
18. 1827
19. 2192
20. 2557
21. 2922
22. 3288
23. 3653
default choice: [1]:
1
Do you want to specify any additional log files to monitor?
1. yes
2. no
default choice: [1]:
2
Saved config file to /opt/aws/amazon-cloudwatch-agent/bin/config.json successfully.
Current config as follows:
{
        "agent": {
                "metrics_collection_interval": 60,
                "run_as_user": "root"
        },
        "logs": {
                "logs_collected": {
                        "files": {
                                "collect_list": [
                                        {
                                                "file_path": "/var/log/dnf.log",
                                                "log_group_name": "TestServer-Logs",
                                                "log_stream_name": "/var/log/dnf.log",
                                                "retention_in_days": -1
                                        }
                                ]
                        }
                }
        },
        "metrics": {
                "aggregation_dimensions": [
                        [
                                "InstanceId"
                        ]
                ],
                "append_dimensions": {
                        "AutoScalingGroupName": "${aws:AutoScalingGroupName}",
                        "ImageId": "${aws:ImageId}",
                        "InstanceId": "${aws:InstanceId}",
                        "InstanceType": "${aws:InstanceType}"
                },
                "metrics_collected": {
                        "cpu": {
                                "measurement": [
                                        "cpu_usage_idle",
                                        "cpu_usage_iowait",
                                        "cpu_usage_user",
                                        "cpu_usage_system"
                                ],
                                "metrics_collection_interval": 60,
                                "totalcpu": false
                        },
                        "disk": {
                                "measurement": [
                                        "used_percent",
                                        "inodes_free"
                                ],
                                "metrics_collection_interval": 60,
                                "resources": [
                                        "*"
                                ]
                        },
                        "diskio": {
                                "measurement": [
                                        "io_time"
                                ],
                                "metrics_collection_interval": 60,
                                "resources": [
                                        "*"
                                ]
                        },
                        "mem": {
                                "measurement": [
                                        "mem_used_percent"
                                ],
                                "metrics_collection_interval": 60
                        },
                        "swap": {
                                "measurement": [
                                        "swap_used_percent"
                                ],
                                "metrics_collection_interval": 60
                        }
                }
        }
}
Please check the above content of the config.
The config file is also located at /opt/aws/amazon-cloudwatch-agent/bin/config.json.
Edit it manually if needed.
Do you want to store the config in the SSM parameter store?
1. yes
2. no
default choice: [1]:
2
Program exits now.
上記のウィザードからログ監視に必要な一部分を抜粋し解説いたします。
Do you want to monitor any log files?
(ログファイルを監視しますか?)
1. yes
2. no
default choice: [1]:
1
(Yesを選択してます)

Log file path:
(ログファイルのパスは?)
/var/log/dnf.log
(今回は、「dnf.log」を指定)

Log group name:
(ロググループの名前は?)
default choice: [dnf.log]
TestServer-Logs
(今回は、「TestServer-Logs」と指定)

Log stream name:
(ログストリーム名は?)
default choice: [{instance_id}]
/var/log/dnf.log
(今回は、「/var/log/dnf.log」と指定)

Log Group Retention in days
(ロググループの保存期間は?)
1. -1
2. 1
3. 3
4. 5
5. 7
6. 14
7. 30
8. 60
9. 90
10. 120
11. 150
12. 180
13. 365
14. 400
15. 545
16. 731
17. 1096
18. 1827
19. 2192
20. 2557
21. 2922
22. 3288
23. 3653
default choice: [1]:
1
(「-1」を指定。-1は無期限の意味。)

Do you want to specify any additional log files to monitor?
(追加で監視するログファイルを指定しますか?)
1. yes
2. no
default choice: [1]:
2
(Noを指定。)
今回は、例として、「/var/log/dnf.log」をログ監視するよう設定しました。
この部分は、実際に監視したいログに適宜変更して設定してください。
設定ファイル(JSON)の確認
$ ls -la
合計 341844
drwxr-xr-x. 2 root root     16384  9月 24 13:26 .
drwxr-xr-x. 7 root root       140  9月 24 13:25 ..
-rw-r--r--. 1 root root        11  8月 31 07:22 CWAGENT_VERSION
-rwxr-xr-x. 1 root root 120683752  8月 31 07:22 amazon-cloudwatch-agent
-rwxr-xr-x. 1 root root  11559592  8月 31 07:22 amazon-cloudwatch-agent-config-wizard
-rwxr-xr-x. 1 root root     14107  8月 31 07:22 amazon-cloudwatch-agent-ctl
-rwxr-xr-x. 1 root root  11003032  8月 31 07:22 config-downloader
-rwxr-xr-x. 1 root root 108009448  8月 31 07:22 config-translator
-rw-r--r--. 1 root root      1362  9月 24 13:35 config.json
-rwxr-xr-x. 1 root root  98738408  8月 31 07:22 start-amazon-cloudwatch-agent
/opt/aws/amazon-cloudwatch-agent/bin 配下に「config.json」が出来上がります。
しかし、このままでは読み込んでくれないため、起動に失敗します。
/opt/aws/amazon-cloudwatch-agent/etc/ 配下に「config.json」をコピーします。
JSONファイルのコピーとリネーム
$ sudo cp -p config.json ../etc/
$ ls -la ../etc/
合計 8
drwxr-xr-x. 3 root root   84  9月 24 13:38 .
drwxr-xr-x. 7 root root  140  9月 24 13:25 ..
drwxr-xr-x. 2 root root    6  8月 31 07:22 amazon-cloudwatch-agent.d
-rw-r--r--. 1 root root  925  8月 31 07:22 common-config.toml
-rw-r--r--. 1 root root 1362  9月 24 13:35 config.json

$ cd ../etc/
$ sudo mv config.json ./amazon-cloudwatch-agent.json
$ ls -la

合計 8
drwxr-xr-x. 3 root root  101  9月 24 13:39 .
drwxr-xr-x. 7 root root  140  9月 24 13:25 ..
drwxr-xr-x. 2 root root    6  8月 31 07:22 amazon-cloudwatch-agent.d
-rw-r--r--. 1 root root 1362  9月 24 13:35 amazon-cloudwatch-agent.json
-rw-r--r--. 1 root root  925  8月 31 07:22 common-config.toml
「config.json」を/etc/ 配下にコピーし、かつ、リネーム(amazon-cloudwatch-agent.json)を行いました。
config.jsonのままでは読み込みに失敗し、cloudwatch-agentは起動しません。
Cloudwatch-agentの起動
$ sudo systemctl restart amazon-cloudwatch-agent
$ sudo systemctl status amazon-cloudwatch-agent

● amazon-cloudwatch-agent.service - Amazon CloudWatch Agent
     Loaded: loaded (/etc/systemd/system/amazon-cloudwatch-agent.service; disabled; preset: disabled)
     Active: active (running) since Sun 2023-09-24 13:41:16 JST; 12s ago
   Main PID: 2676 (amazon-cloudwat)
      Tasks: 8 (limit: 464)
     Memory: 135.2M
        CPU: 506ms
     CGroup: /system.slice/amazon-cloudwatch-agent.service
             └─2676 /opt/aws/amazon-cloudwatch-agent/bin/amazon-cloudwatch-agent -config /opt/aws/amazon-cloudwatch-agent/etc/amazon-cloudwatch-agent.toml ->

 9月 24 13:41:16 ip-10-0-10-96.ap-northeast-1.compute.internal systemd[1]: Started amazon-cloudwatch-agent.service - Amazon CloudWatch Agent.
 9月 24 13:41:18 ip-10-0-10-96.ap-northeast-1.compute.internal start-amazon-cloudwatch-agent[2676]: I! Detecting run_as_user...
無事起動しましたね。
CloudWatchの確認
CloudWatchのコンソールから「ロググループ」を確認します。
新しくロググループができてます。
上記ウィザードで設定した通り、「TestServer-Logs」という名前で出来上がっています。クリックします。

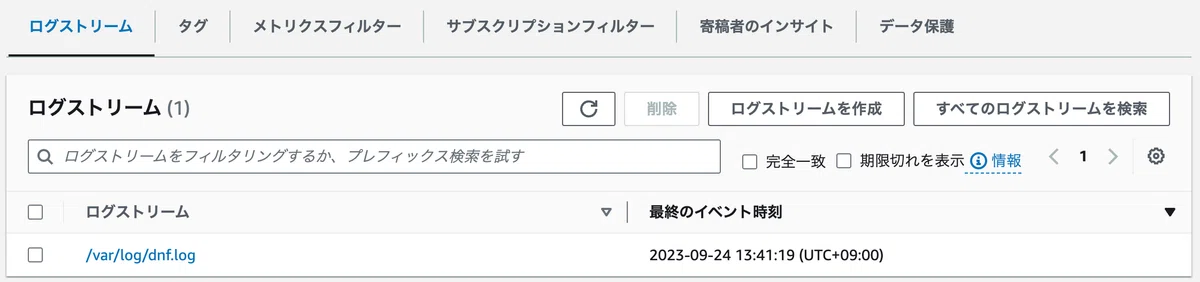
ログストリームも出来てますね。
「/var/log/dnf.log」の名前で指定しました。クリックすると実際のログが確認できます。クリックしましょう。
ログが収集できていることが確認できます。

今回は、ここまでとなります。
この後の工程としてはフィルターを設定してアラーム検知したらSNSで通知を飛ばすといった監視設定ができます。
フィルターとアラーム設定については後日記事にしたいと思います。
上手くいかない場合
万が一、agentが起動しないなどのトラブル時は、ログの確認をするとよいでしょう。ログは以下の場所にあります。
/opt/aws/amazon-cloudwatch-agent/logs/amazon-cloudwatch-agent.log
最後に
AL2023のログ監視設定を行いました。Amazon Linux 2と若干手順が違う箇所がありましたが、無事にログ取得することができました。
この記事が誰かのお役に立てれば幸いです。