はじめてのJSP~JSPでJacksonの利用(jspから外部jarの参照)~
こんにちは。青のひとりごとです。
この記事は「はじめてのJSPシリーズ」の3本目、「JSPでJacksonの利用(jspから外部jarの参照)」になります。
JSPでJacksonの利用(jspから外部jarの参照)
1. tomcat-api.jarをクラスパスに追加する。
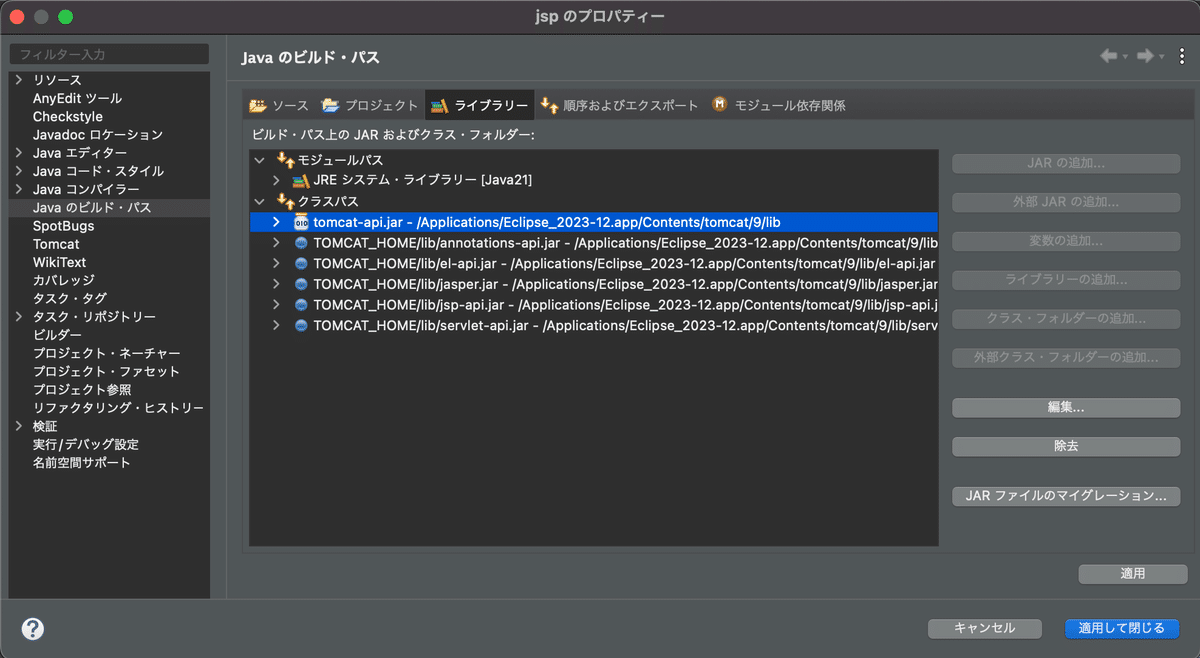
プロジェクトのプロパティ->Javaのビルドパス->ライブラリを開く。
クラスパス->外部JARの追加を選択して、使用しているバージョンのtomcatのホーム配下のlibファイルの中にある、tomcat-api.jarを選択して開く。

2. Jacksonのjarファイルをダウンロード
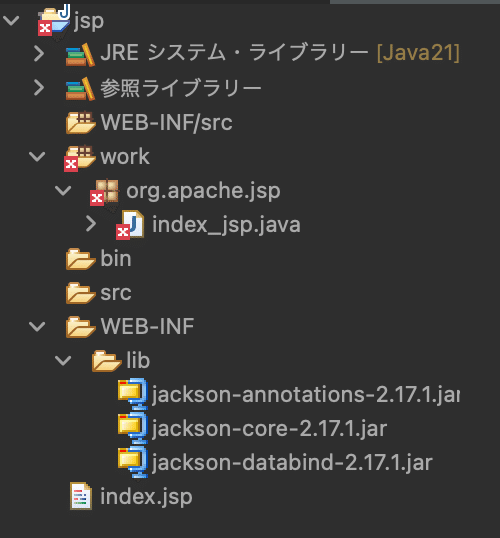
下記のurlから三つのjarファイルをダウンロードし、画像のようにWEB-INF/libの配下に入れる。
https://mvnrepository.com/artifact/com.fasterxml.jackson.core
※手順1のようにクラスパスに追加しても外部jarを使用できなかった。

3. index.jspにコードを書く。
<%@page contentType= "text/html; charset=UTF-8" pageEncoding="UTF-8"%>

<%@page import="java.util.*" %>
<%@page import="java.net.HttpURLConnection" %>
<%@page import="java.io.InputStreamReader" %>
<%@page import="java.io.BufferedReader" %>
<%@page import="java.net.URL" %>

<%@page import="com.fasterxml.jackson.databind.ObjectMapper" %>
<%@page import="java.io.IOException" %>
<%@page import="java.util.Map" %>
<%@page import="java.lang.Math" %>

<html>
	<head>
		<title>My First JSP</title>
	</head>
	<body>
		<%
		String location = "天気を取得したい街名";
		String apiKey = "自分で取得したAPIキー";

		String requestUrl = "https://api.openweathermap.org/data/2.5/weather?APPID=" + apiKey + "&q=" + location + ",jp";

        URL url = new URL(requestUrl);
		HttpURLConnection connection = (HttpURLConnection) url.openConnection();
		connection.setRequestMethod("GET");
		connection.connect();

		int responseCode = connection.getResponseCode();
		Map<String, Object> map = new HashMap<>();
		boolean getFlg = false;

		if(responseCode == HttpURLConnection.HTTP_OK){

			InputStreamReader isr = new InputStreamReader(connection.getInputStream());
			BufferedReader br = new BufferedReader(isr);
			String json = br.readLine();

			ObjectMapper mapper = new ObjectMapper();
	        try {
	            // JSON文字列をMapに変換
	            map = mapper.readValue(json, Map.class);
	            getFlg = true;
	            System.out.println("Converted Map: " + map);

	        } catch (IOException e) {
	            e.printStackTrace();
	            System.out.println("json->mapに失敗");
	        }

		}else{
			System.out.println("取得失敗");
		}
		%>

		<h4>
		<%
		if(getFlg){
			try{
				out.print("location: " + location + "<br>");
				out.print("weather: " + ((HashMap)((ArrayList)map.get("weather")).get(0)).get("description") + "<br>");
				out.print("temperature: " + Math.round(((double)((HashMap)map.get("main")).get("temp"))-273.15) + "<br>");
			}catch(Exception e){
				e.printStackTrace();
			}
		}
		%>
		</h4>

 	</body>
</html>
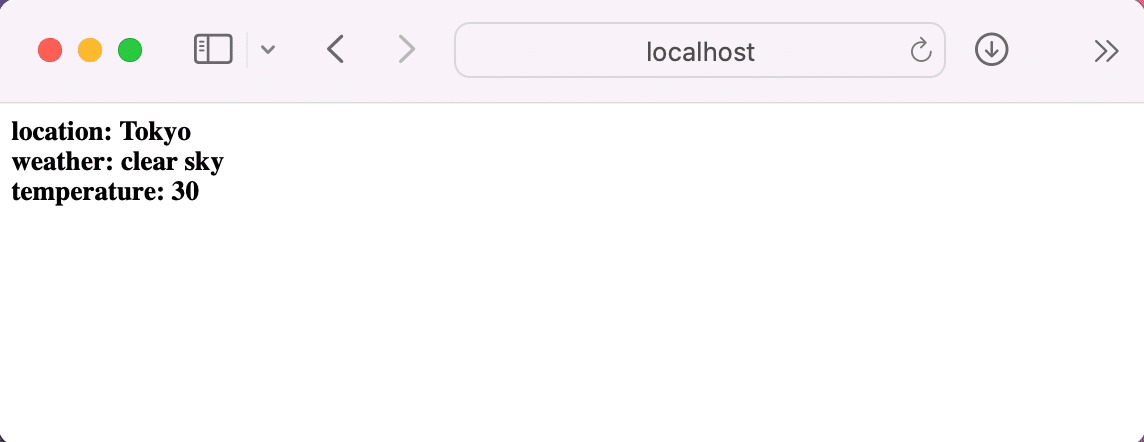
4. tomcatを実行し、ブラウザで確認。
画像のように、指定した場所の天気と気温が表示されたら成功。

