chatGPTでノーコード開発 ライフゲーム
chatGPT4でノーコードでライフゲームを作ってみます。
以下Qが質問でAがchatGTP4からの回答です。
A.ライフゲームのユースケースをplantUMLで記述してください
Q.PlantUMLを使用して、ライフゲームのシーケンス図を記述することができます。以下は、ライフゲームの基本的なユースケースを表現したPlantUMLコードの例です。
@startuml

actor User
participant "LifeGame" as LG
participant "Grid" as G
participant "Cell" as C

User -> LG: createGrid(width, height)
activate LG
LG -> G: new Grid(width, height)
activate G
G --> LG: grid
deactivate G
LG --> User: grid
deactivate LG

User -> LG: setInitialConfiguration(grid, configuration)
activate LG
LG -> G: applyConfiguration(configuration)
activate G
G -> C: setCellState(x, y, state)
activate C
C --> G:
deactivate C
G --> LG:
deactivate G
LG --> User:
deactivate LG

User -> LG: runSimulation(grid, iterations)
activate LG
loop iterations
    LG -> G: calculateNextGeneration()
    activate G
    G -> C: applyRules(x, y)
    activate C
    C --> G: nextState
    deactivate C
    G --> LG:
    deactivate G
    LG -> G: updateGrid()
    activate G
    G -> C: setCellState(x, y, nextState)
    activate C
    C --> G:
    deactivate C
    G --> LG:
    deactivate G
end
LG --> User: finalGrid
deactivate LG

@enduml
このコードは、UserがLifeGameクラスを通じてGridを作成し、初期設定を適用し、シミュレーションを実行する一連の手順を示しています。各イテレーションでは、GridはCellの状態を計算し、更新します。このシーケンス図は、PlantUMLで描画すると、ライフゲームの基本的なユースケースを視覚化できます。

(注記 ユースケースを飛ばしてシーケンス図を作ってくれました)
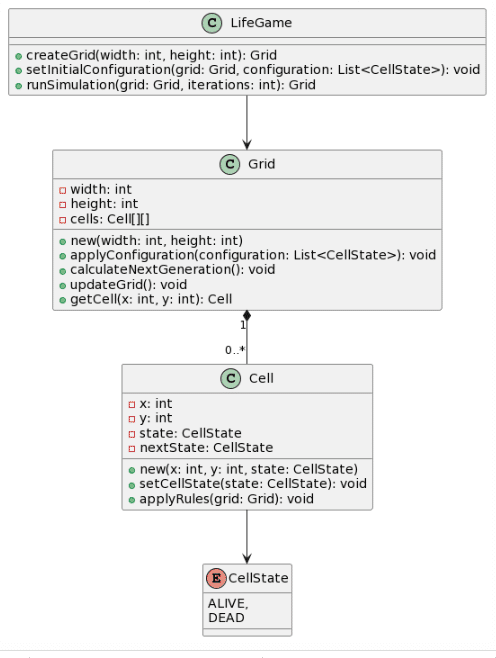
Q.このシーケンス図を基にクラス図をplantUMLで記述して頂けますか
A.以下は、先ほどのシーケンス図を基にしたライフゲームのクラス図を表現したPlantUMLコードの例です。
@startuml

class LifeGame {
    +createGrid(width: int, height: int): Grid
    +setInitialConfiguration(grid: Grid, configuration: List<CellState>): void
    +runSimulation(grid: Grid, iterations: int): Grid
}

class Grid {
    -width: int
    -height: int
    -cells: Cell[][]

    +new(width: int, height: int)
    +applyConfiguration(configuration: List<CellState>): void
    +calculateNextGeneration(): void
    +updateGrid(): void
    +getCell(x: int, y: int): Cell
}

class Cell {
    -x: int
    -y: int
    -state: CellState
    -nextState: CellState

    +new(x: int, y: int, state: CellState)
    +setCellState(state: CellState): void
    +applyRules(grid: Grid): void
}

enum CellState {
    ALIVE,
    DEAD
}

LifeGame --> Grid
Grid "1" *-- "0..*" Cell
Cell --> CellState

@enduml
このコードは、LifeGame、Grid、Cellの3つのクラスと、CellStateという列挙型を定義しています。それぞれのクラスには、シーケンス図で表現されたメソッドや属性が記述されています。このクラス図は、PlantUMLで描画すると、ライフゲームの基本的なクラス構造を視覚化できます。

Q.あなたはプログラマです。上記のクラス図を元にhtmlファイル1つでライフゲームを実装してください。サイズは100*100でランダムなセルに初期値を入れてください。
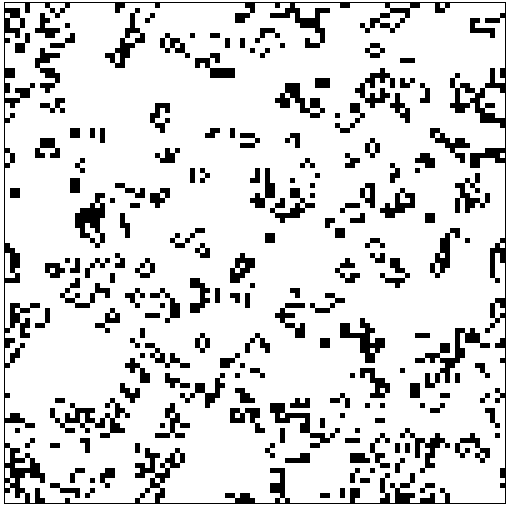
A.ライフゲームをHTMLファイル1つで実装するために、HTMLとJavaScriptを組み合わせて作成します。以下のコードは、上記のクラス図を元にした100x100サイズのライフゲームの実装例です。このコードを新しいHTMLファイルに貼り付けて、ウェブブラウザで開くことでライフゲームを実行できます。
<!DOCTYPE html>
<html lang="en">
<head>
    <meta charset="UTF-8">
    <meta name="viewport" content="width=device-width, initial-scale=1.0">
    <title>Life Game</title>
    <style>
        canvas {
            border: 1px solid black;
        }
    </style>
</head>
<body>
    <canvas id="game" width="500" height="500"></canvas>
    <script>
        class Cell {
            constructor(x, y, state) {
                this.x = x;
                this.y = y;
                this.state = state;
                this.nextState = state;
            }

            setCellState(state) {
                this.state = state;
            }

            applyRules(grid) {
                const neighbors = grid.getNeighbors(this.x, this.y);
                const aliveNeighbors = neighbors.filter(cell => cell.state === 1).length;

                if (this.state === 1 && (aliveNeighbors === 2 || aliveNeighbors === 3)) {
                    this.nextState = 1;
                } else if (this.state === 0 && aliveNeighbors === 3) {
                    this.nextState = 1;
                } else {
                    this.nextState = 0;
                }
            }
        }

        class Grid {
            constructor(width, height) {
                this.width = width;
                this.height = height;
                this.cells = this.createGrid();
            }

            createGrid() {
                const cells = [];
                for (let x = 0; x < this.width; x++) {
                    cells[x] = [];
                    for (let y = 0; y < this.height; y++) {
                        cells[x][y] = new Cell(x, y, Math.random() < 0.5 ? 1 : 0);
                    }
                }
                return cells;
            }

            getCell(x, y) {
                return this.cells[x][y];
            }

            getNeighbors(x, y) {
                const neighbors = [];
                for (let dx = -1; dx <= 1; dx++) {
                    for (let dy = -1; dy <= 1; dy++) {
                        if (dx === 0 && dy === 0) continue;
                        const newX = (x + dx + this.width) % this.width;
                        const newY = (y + dy + this.height) % this.height;
                        neighbors.push(this.getCell(newX, newY));
                    }
                }
                return neighbors;
            }

            updateGrid() {
                for (let x = 0; x < this.width; x++) {
                    for (let y = 0; y < this.height; y++) {
                        this.getCell(x, y).setCellState(this.getCell(x, y).nextState);
                    }
                }
            }

            calculateNextGeneration() {
                for (let x = 0; x < this.width; x++) {
                    for (let y = 0; y < this.height; y++) {
                        this.getCell(x, y).applyRules(this);
                    }
               }
            }
        }

        class LifeGame {
            constructor(canvas, grid) {
                this.canvas = canvas;
                this.ctx = canvas.getContext('2d');
                this.grid = grid;
                this.cellSize = 5;
            }

            drawGrid() {
                this.ctx.clearRect(0, 0, this.canvas.width, this.canvas.height);

                for (let x = 0; x < this.grid.width; x++) {
                    for (let y = 0; y < this.grid.height; y++) {
                        const cell = this.grid.getCell(x, y);
                        this.ctx.fillStyle = cell.state === 1 ? 'black' : 'white';
                        this.ctx.fillRect(x * this.cellSize, y * this.cellSize, this.cellSize, this.cellSize);
                    }
                }
            }

            runSimulation(iterations) {
                this.drawGrid();
                if (iterations > 0) {
                    setTimeout(() => {
                        this.grid.calculateNextGeneration();
                        this.grid.updateGrid();
                        this.runSimulation(iterations - 1);
                    }, 100);
                }
            }
        }

        const canvas = document.getElementById('game');
        const grid = new Grid(100, 100);
        const lifeGame = new LifeGame(canvas, grid);
        lifeGame.runSimulation(1000);
    </script>
</body>
</html>
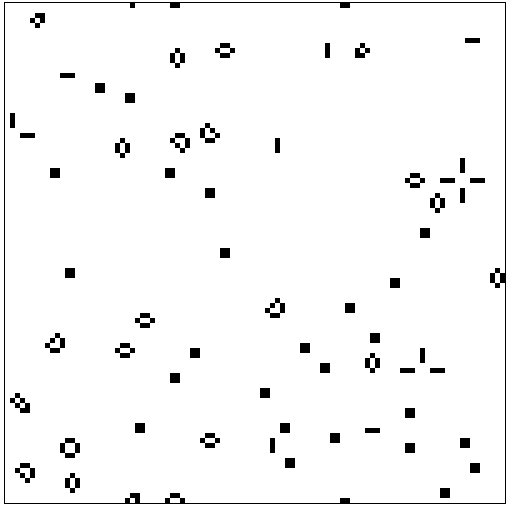
このコードは、LifeGameクラスを作成し、キャンバスにグリッドを描画してシミュレーションを実行する機能を追加しています。これにより、100x100サイズのライフゲームをウェブブラウザで視覚化し、実行することができます。


