
Stable Diffusionで生成した画像を、テキスタイル柄でおしゃれにぼかす


Stable Diffusionで生成した画像をアップロードするうえで、モザイクが必要なことがあります。WindowsならペイントやGimpでモザイクを入れることができますが、ペイントの拡大縮小は細かい調整が気になったり、Gimpはインストールと使い方を覚えるのが手間ではないでしょうか?
Stable Diffusionのimg2imgの機能であるInpaintを使ってぼかしを入れる方法を考案しました。さらに、マスキングテープのようにぼかす方法を考案しています。
手順
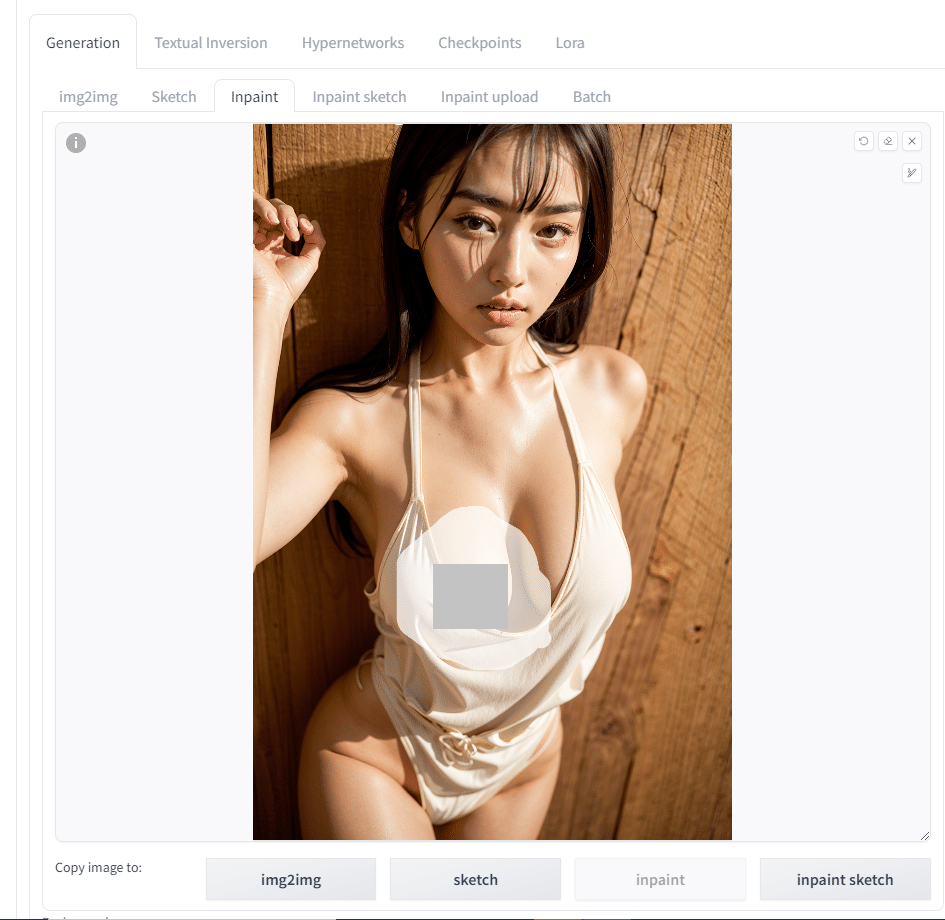
タブからimg2imgを選択し、Inpaintを開いてぼかしたい個所を塗りつぶします。
ポジティブプロンプト
painted flower seamless pattern design, simple white background, bright colors, ネガティブプロンプト
crowed, detailed, realistic, shade, shadow, パラメータ
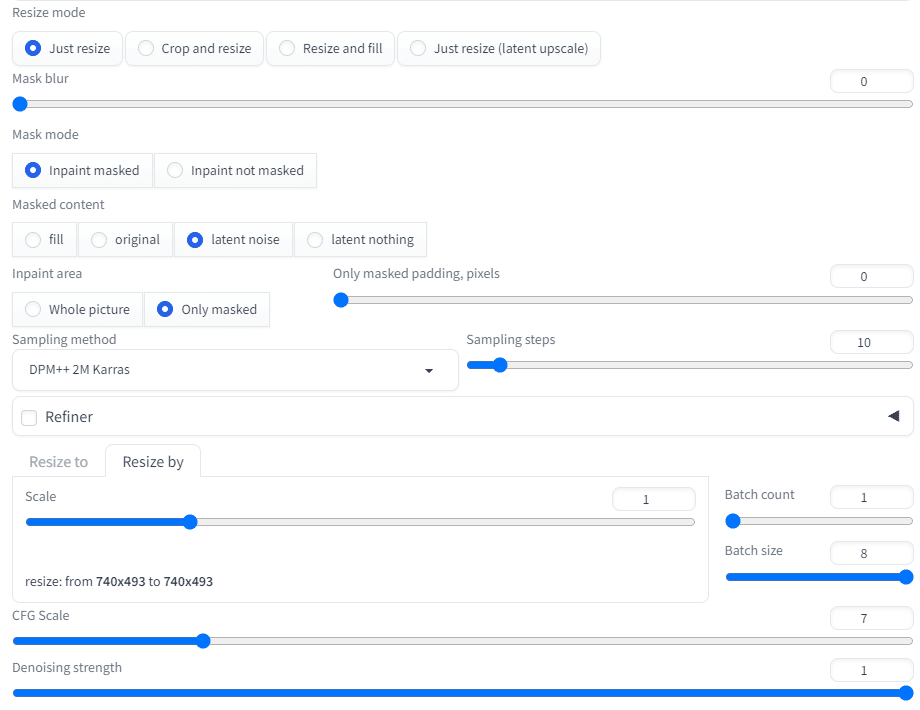
Resize mode: Just resize
Mask blur: 0(モザイク部分であることがはっきり分かるように)
Mask mode: Inpaint masked
Masked content: latent noise(任意だが、ゼロから生成しないと、一瞥してモザイクであるとわかりづらい)
Inpaint area: Only masked(処理速度のため)
Only masked padding, pixels: 0(指定すると境目が透過される)
Denoising strength: 1(元絵は一切反映させない)
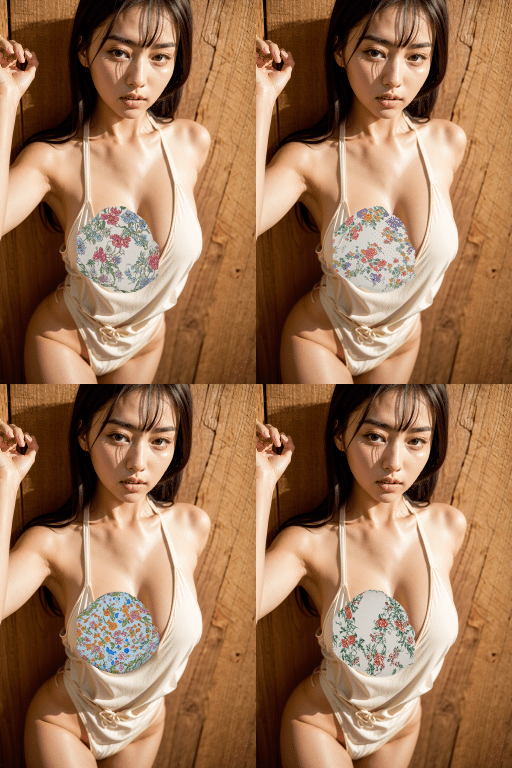
調整過程
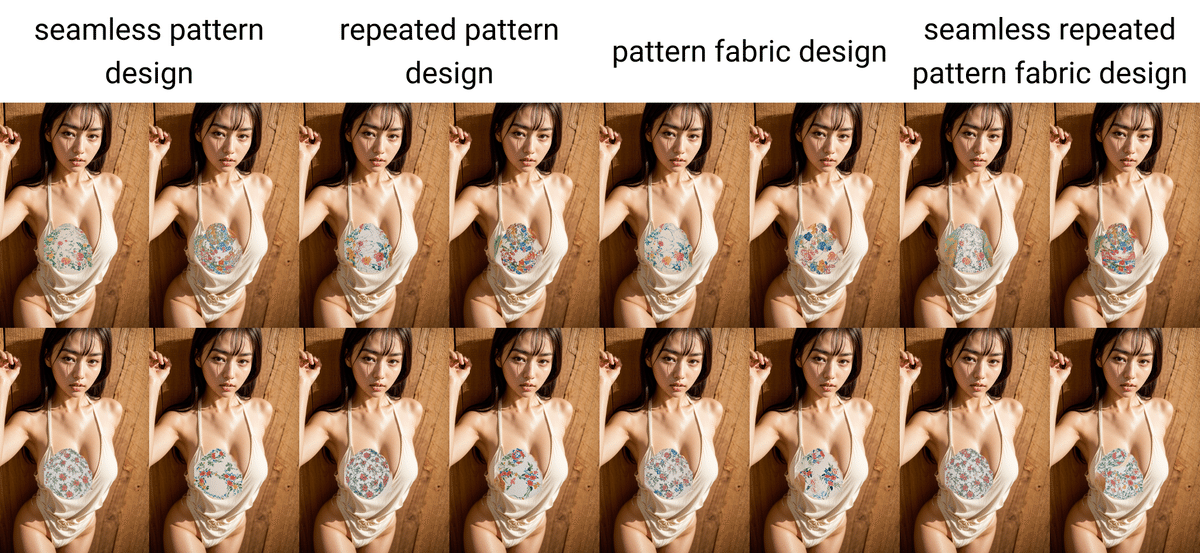
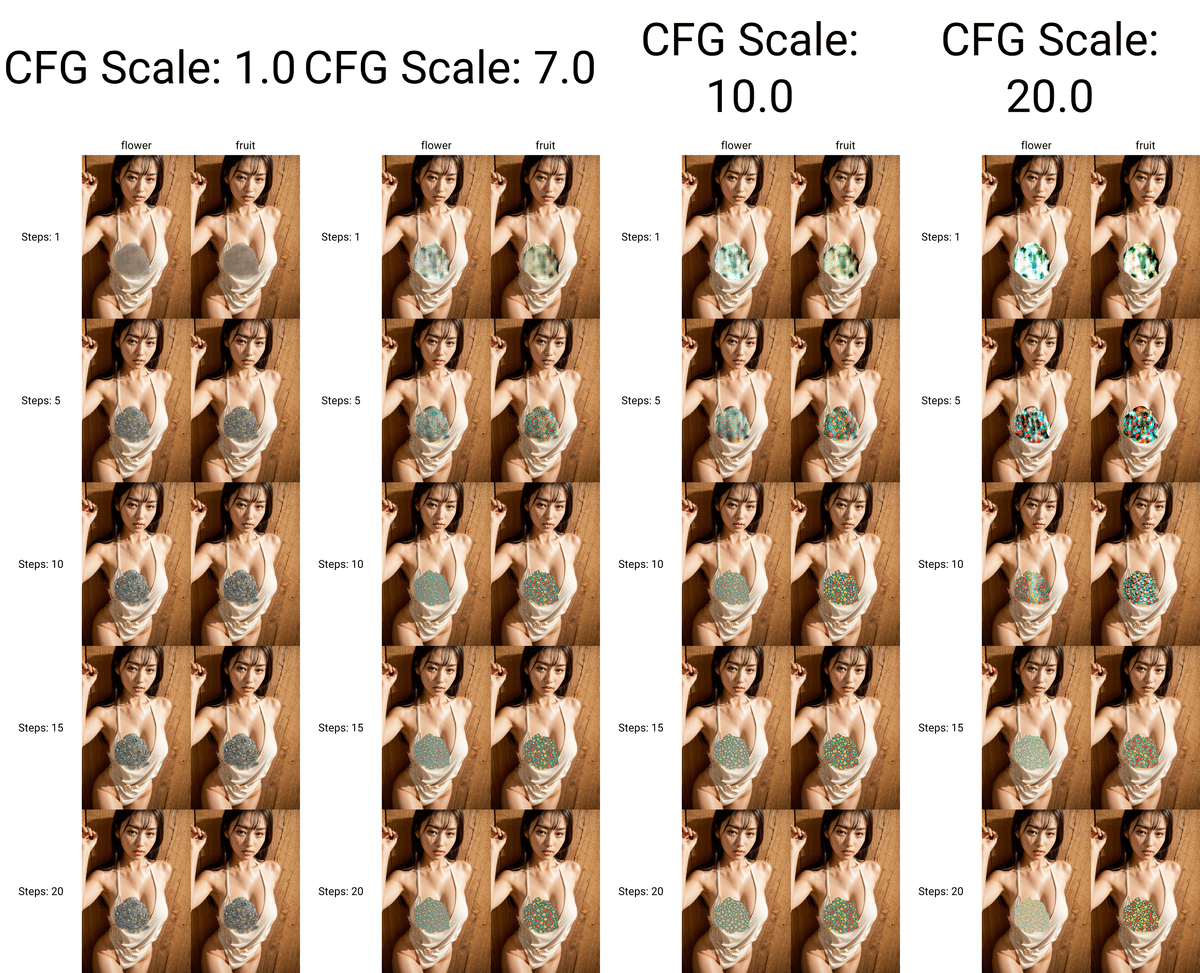
X/Y/Z plotを用いて、ちょうどよいプロンプト・パラメータを探りました。
まとめ
Stable DiffusionのInpaintを使うことで、ただのぼかしではないおしゃれなぼかしを入れることができます。
単色でぼかすこともできます。よければご覧ください!