
SwiftUIでいこう! - macOS App (2)

Macアプリの作成なのでiPhoneなどにはないメニューバーの作り方を参考サイトを見ながら実際に動かしてみます(Mac版Swift Playgrounds: Playgrounds:.appで実行します)。
デフォルトでできている以下コードにモディファイアをつけてメニューを操作します。
struct MyApp: App {
    var body: some Scene {
        WindowGroup {
            ContentView()
        }
基本になるモディファイアが
commands
この命令に以下の動作をつけていきます。
Button、Picker、Divider、Toggle、などのSwiftUIビューを使用して、メニューの階層を作ることができます。
新しいメニューを作る
CommandMenu
を使います。
struct MyApp: App {
    var body: some Scene {
        WindowGroup {
            ContentView()
        }
        .commands{
            CommandMenu("Menu") {
                Button("Print message") {
                    print("Hello World!")
                }.keyboardShortcut("p")
            }
        }
    }
}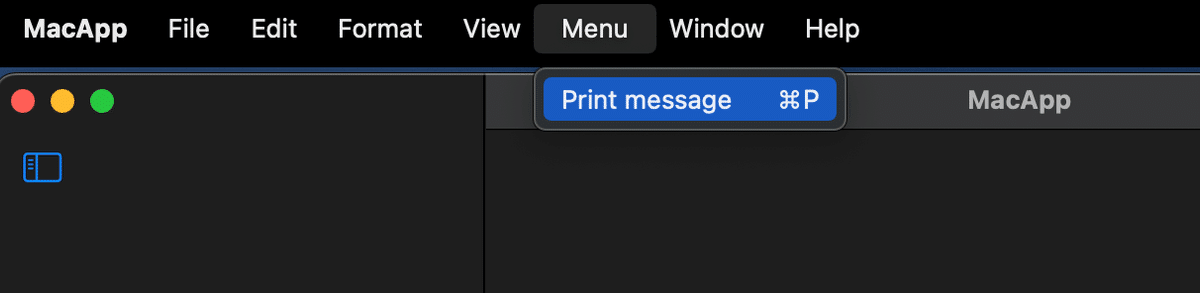
"Menu"という名前のメニューができて、"Print message"が選択できるようになっています。これを押すと、"print("Hello World!")"が実行されます。
ショートカットも"⌘P"となっていて"⌘P"キーボードで実際にショートカット"⌘P"すると"print("Hello World!")"が実行されます。
初めからあるメニューに追加、置き換える
CommandGroup
を使います。
.commands{
            CommandGroup(before: CommandGroupPlacement.newItem) {
                Button("before item") {
                    print("before item")
                }
            }
        }
とすると既存の"File(ファイル)"メニューを開くと一番上に新しい"before item"ができています。
メニューについては"CommandGroupPlacement"で指定します。
例えば、
.newItem ・・・ ファイルメニュー
とすれば既存の"File(ファイル)"メニューに機能が追加できます。