
SwiftUIをはじめてみよう! - レイアウト(2)

ざっくりとしたレイアウトはVStackなどを使ってできますが、もう少し細かい設定で好きな場所に配置したい場合があります。
frame(width:height:alignment:)
表示のサイズを指定することができます。
指定できるのは
width ・・・ 幅
height ・・・ 高さ
alignment ・・・ 並べ方
実際の表示ですが
struct ContentView: View {
    var body: some View {
        VStack {
            Ellipse()
                .fill(Color.purple)
                .frame(width: 200, height: 100)
            Ellipse()
                .fill(Color.blue)
                .frame(height: 100)
        }
    }
}
とすると

上が幅と高さを指定。下は高さだけ指定しているので幅は画面いっぱいに広がっています。
次に並べ方、alignmentを試してみます。以下の3種類の並べかたを表示してみます。
Text("Hello world!")
       .frame(width: 400, height: 50, alignment: .topLeading)
       .border(Color.gray)

Text("Hello world!")
       .frame(width: 400, height: 50, alignment: .center)
       .border(Color.gray)

Text("Hello world!")
       .frame(width: 400, height: 50, alignment: .bottomTrailing)
       .border(Color.gray)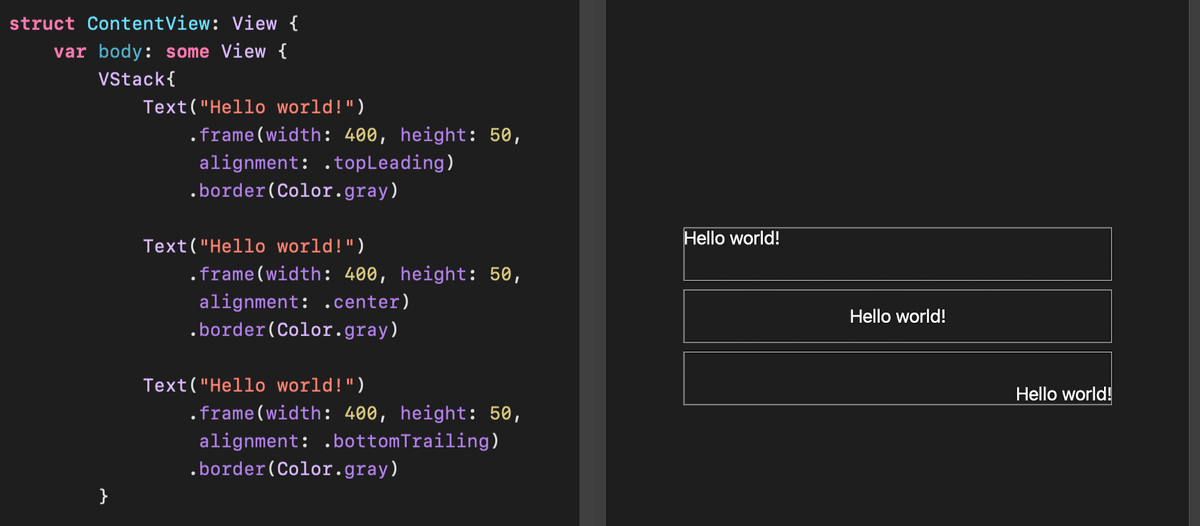
position(x:y:)
"Position"も表示位置を指定することができます。
Parameters

x

    The x-coordinate at which to place the center of this view.
y

    The y-coordinate at which to place the center of this view.
ということでx座標は表示物の横方向の中心座標、y座標は縦方向の中心座標。
例示のコードです。
Text("Position by passing the x and y coordinates")
    .position(x: 175, y: 100)
    .border(Color.gray)
このコードを利用して少し変化させて表示の仕方を試してみます。"border"の位置は記述する順番によって変わってくることもわかります。
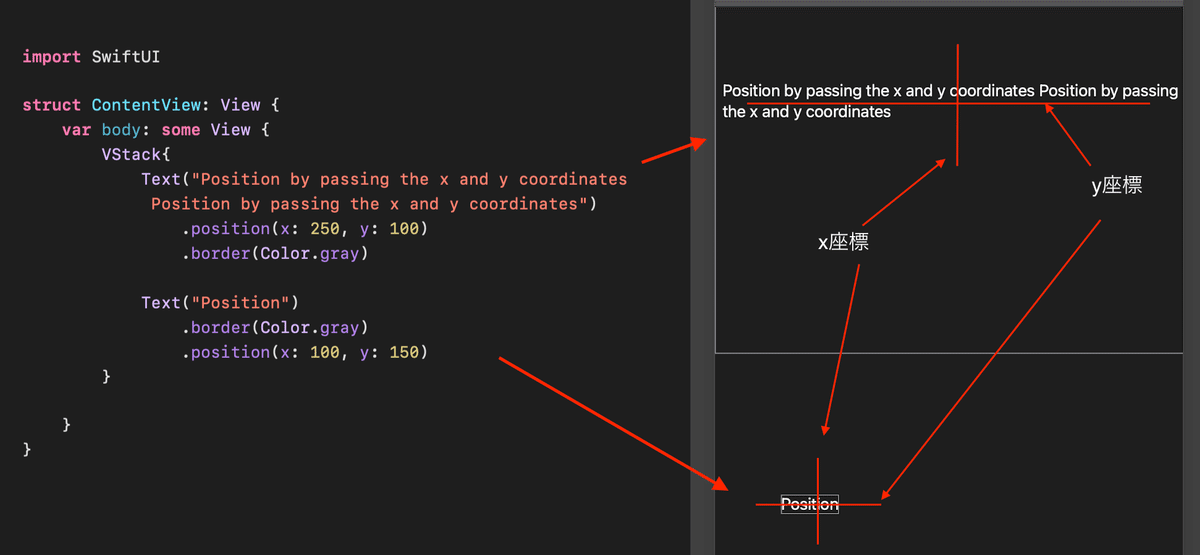
文字列であればx座標はその文章の真ん中の座標の指定をすることになります。縦方向も文字の真ん中の座標になります。
offset(_:)
"offset"も表示位置を指定することができます。
Parameters

offset

    The distance to offset this view.
表示位置を現在の位置から指定した分だけずらします。
Text("Offset by passing CGSize()")
                .border(Color.green)
                .offset(CGSize(width: 20, height: 10))
                .border(Color.gray)
緑のラインが"offset"でずらしたものです。